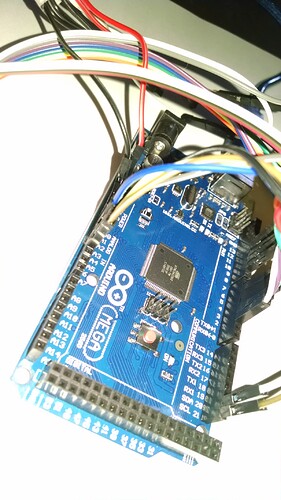
Merging examples question

Please forgive what I'm sure will be a stupid question. I'm an Arduino newbie working on my first project. I have some VB6 programming experience but no C+ experience at all so the syntax and formatting throws me off.

I'm trying to merge the BME280test and the NRFLITE Dynamic TX library examples to make a temp sensor I can put outside to radio the info inside.

I merged the code in what made the best sense to me but when I try to upload it to the Mega i get a message that reads " 'printValues' was not declared in this scope" and I don't know why.

(I also want to add Photoresistors for Sun Tracking - that is addressed after the problem code. That code works and I can merge it with the BME280 code so if I can merge the BME280 and MRFLITE codes I'll be able to merge that code without problem)

Someone please enlighten my to my ignorance. Code follows:

/*

Demonstrates sending data packets of different length.  The receiver will check to see what size of
packet was received and act accordingly.

Radio    Arduino
CE    -> 9
CSN   -> 10 (Hardware SPI SS)
MOSI  -> 11 (Hardware SPI MOSI)
MISO  -> 12 (Hardware SPI MISO)
SCK   -> 13 (Hardware SPI SCK)
IRQ   -> No connection
VCC   -> No more than 3.6 volts
GND   -> GND

*/

#include <SPI.h>
#include <NRFLite.h>
#include <Wire.h>
#include <SPI.h>
#include <Adafruit_Sensor.h>
#include <Adafruit_BME280.h>

#define BME_SCK 13
#define BME_MISO 12
#define BME_MOSI 11
#define BME_CS 10

#define SEALEVELPRESSURE_HPA (1013.25)
const static uint8_t RADIO_ID = 1;
const static uint8_t DESTINATION_RADIO_ID = 0;
const static uint8_t PIN_RADIO_CE = 9;
const static uint8_t PIN_RADIO_CSN = 10;

struct RadioPacket1
{
  uint8_t FromRadioId;
  uint8_t Counter;
};

struct RadioPacket2
{
  uint8_t FromRadioId;
  char Message[31];    // Note the max packet size is 32, so 31 is all we can use here.
};

NRFLite _radio;
RadioPacket1 _radioData1;
RadioPacket2 _radioData2;

Adafruit_BME280 bme; // I2C
//Adafruit_BME280 bme(BME_CS); // hardware SPI
//Adafruit_BME280 bme(BME_CS, BME_MOSI, BME_MISO, BME_SCK); // software SPI

unsigned long delayTime;

void setup()
{
  Serial.begin(115200);

  if (!_radio.init(RADIO_ID, PIN_RADIO_CE, PIN_RADIO_CSN))
  {
      Serial.println("Cannot communicate with radio");
      while (1); // Wait here forever.
  }

  _radioData1.FromRadioId = RADIO_ID;
  _radioData2.FromRadioId = RADIO_ID;

Serial.println(F("BME280 test"));

  bool status;
  
  // default settings
  // (you can also pass in a Wire library object like &Wire2)
  status = bme.begin();  
  if (!status) {
      Serial.println("Could not find a valid BME280 sensor, check wiring!");
      while (1);
  }
  
  Serial.println("-- Default Test --");
  delayTime = 1000;

  Serial.println();
}

void loop()
{
  printValues();
  delay(delayTime);


void printValues() {
  Serial.print("Temperature = ");
  Serial.print(bme.readTemperature());
  Serial.println(" *C");

  Serial.print("Pressure = ");

  Serial.print(bme.readPressure() / 100.0F);
  Serial.println(" hPa");

  Serial.print("Approx. Altitude = ");
  Serial.print(bme.readAltitude(SEALEVELPRESSURE_HPA));
  Serial.println(" m");

  Serial.print("Humidity = ");
  Serial.print(bme.readHumidity());
  Serial.println(" %");

  Serial.println();

  // Pick a number from 10,000 - 60,000.
  uint16_t randomNumber = random(10000, 60001);

  if (randomNumber > 30000)
  {
      // Send RadioPacket1.

      _radioData1.Counter++;

      Serial.print("Sending ");
      Serial.print(_radioData1.Counter);

      if (_radio.send(DESTINATION_RADIO_ID, &_radioData1, sizeof(_radioData1)))
      {
          Serial.println("...Success");
      }
      else
      {
          Serial.println("...Failed");
      }
  }
  else
  {
      // Send RadioPacket2.

      // Create a message and assign it to the packet.
      // Strings need to be converted to a char array and note they cannot be longer
      // than 31 characters since that is the size of _radioData2.Message.
      String msg = "Hello " + String(randomNumber);
      msg.toCharArray(_radioData2.Message, msg.length() + 1);

      Serial.print("Sending '");
      Serial.print(msg);
      Serial.print("'");

      if (_radio.send(DESTINATION_RADIO_ID, &_radioData2, sizeof(_radioData2)))
      {
          Serial.println("...Success");
      }
      else
      {
          Serial.println("...Failed");
      }
  }

  delay(1000);
}

this is the Photoresistor set code that I will want to merge with the code above. I can merge it with the BME280 code (below) and it works so if I can merge the BME280 and radio code (above) if I can get them to work

/***************************************************************************
This is a library for the BME280 humidity, temperature & pressure sensor

Designed specifically to work with the Adafruit BME280 Breakout
----> http://www.adafruit.com/products/2650

These sensors use I2C or SPI to communicate, 2 or 4 pins are required
to interface. The device's I2C address is either 0x76 or 0x77.

Adafruit invests time and resources providing this open source code,
please support Adafruit andopen-source hardware by purchasing products
from Adafruit!

Written by Limor Fried & Kevin Townsend for Adafruit Industries.
BSD license, all text above must be included in any redistribution
***************************************************************************/

#include <Wire.h>
#include <SPI.h>
#include <Adafruit_Sensor.h>
#include <Adafruit_BME280.h>

#define BME_SCK 13
#define BME_MISO 12
#define BME_MOSI 11
#define BME_CS 10

#define SEALEVELPRESSURE_HPA (1013.25)

Adafruit_BME280 bme; // I2C
//Adafruit_BME280 bme(BME_CS); // hardware SPI
//Adafruit_BME280 bme(BME_CS, BME_MOSI, BME_MISO, BME_SCK); // software SPI

unsigned long delayTime;

void setup() {
  Serial.begin(9600);
  Serial.println(F("BME280 test"));

  bool status;
  
  // default settings
  // (you can also pass in a Wire library object like &Wire2)
  status = bme.begin();  
  if (!status) {
      Serial.println("Could not find a valid BME280 sensor, check wiring!");
      while (1);
  }
  
  Serial.println("-- Default Test --");
  delayTime = 1000;

  Serial.println();
}


void loop() { 
  printValues();
  delay(delayTime);
}

unsigned int AnalogValue1;
unsigned int AnalogValue2;
unsigned int AnalogValue3;
unsigned int AnalogValue4;
unsigned int AnalogValue5;
unsigned int DigitalValue1;
unsigned int DigitalValue2;
unsigned int DigitalValue3;
unsigned int DigitalValue4;
unsigned int DigitalValue5;


void printValues() {

AnalogValue1 = analogRead(A0);
AnalogValue2 = analogRead(A1);
AnalogValue3 = analogRead(A2);
AnalogValue4 = analogRead(A3);
AnalogValue5 = analogRead(A4);
DigitalValue1 = analogRead(2);
DigitalValue2 = analogRead(3);
DigitalValue3 = analogRead(4);
DigitalValue4 = analogRead(5);
DigitalValue5 = analogRead(6);

  Serial.println(AnalogValue1);
  Serial.println(AnalogValue2);
  Serial.println(AnalogValue3);
  Serial.println(AnalogValue4);
  Serial.println(AnalogValue5);
  Serial.print("PRsA");
  
  Serial.println(DigitalValue1);
  Serial.println(DigitalValue2);
  Serial.println(DigitalValue3);
  Serial.println(DigitalValue4);
  Serial.println(DigitalValue5);
  Serial.print("PRsD");

  Serial.print("Temperature = ");
  Serial.print(bme.readTemperature());
  Serial.println(" *C");

  Serial.print("Pressure = ");

  Serial.print(bme.readPressure() / 100.0F);
  Serial.println(" hPa");

  Serial.print("Approx. Altitude = ");
  Serial.print(bme.readAltitude(SEALEVELPRESSURE_HPA));
  Serial.println(" m");

  Serial.print("Humidity = ");
  Serial.print(bme.readHumidity());
  Serial.println(" %");


  Serial.println();
}

To make it easy for people to help you please modify your post and use the code button </> so your code looks like this and is easy to copy to a text editor. See How to use the Forum

Your code is too long for me to study quickly without copying to a text editor.

Also use the AutoFormat tool to indent your code for easier reading.

And please display your image(s) in your post so we can see it(them) without downloading it(them). See this Simple Image Guide

I am not familiar with the NRFlite library (never heard of it before now). I use the the TMRh20 version of the RF24 library. This Simple nRF24L01+ Tutorial may be of interest.

...R

Sorry, Thanks for the posting tips

Rather than think about merging those two programs can you first identify the data variables in the BME program that you would like to transmit?

Also, there is no point writing a program to transmit wireless data without having a matching program to receive the data.

Have a look at the examples in my tutorial - they are all in matching pairs and I have designed them to be as simple and obvious as possible. If you just want one-way transmission then the first example should be a good starting point.

...R

Actually I found code that works better but I am still having trouble merging my code.

I have a second setup with an Arduino Uno and an rf24 and works ok sending the "hello worl" message from the code and I already have a VB6 program setup up to put the temp, humdity, and pressure values from the serial buffer and it works fine.

my problem is merging these codes and then changing the message transmitting the values recorded from the sensors

Working code for the rf24

/*

Demonstrates sending data packets of different length.  The receiver will check to see what size of
packet was received and act accordingly.

Radio    Arduino
CE    -> 9
CSN   -> 10 (Hardware SPI SS)
MOSI  -> 11 (Hardware SPI MOSI)
MISO  -> 12 (Hardware SPI MISO)
SCK   -> 13 (Hardware SPI SCK)
IRQ   -> No connection
VCC   -> No more than 3.6 volts
GND   -> GND

*/

#include <SPI.h>
#include <NRFLite.h>

const static uint8_t RADIO_ID = 1;
const static uint8_t DESTINATION_RADIO_ID = 0;
const static uint8_t PIN_RADIO_CE = 49;
const static uint8_t PIN_RADIO_CSN = 53;

struct RadioPacket1
{
    uint8_t FromRadioId;
    uint8_t Counter;
};

struct RadioPacket2
{
    uint8_t FromRadioId;
    char Message[31];    // Note the max packet size is 32, so 31 is all we can use here.
};

NRFLite _radio;
RadioPacket1 _radioData1;
RadioPacket2 _radioData2;

void setup()
{
    Serial.begin(115200);

    if (!_radio.init(RADIO_ID, PIN_RADIO_CE, PIN_RADIO_CSN))
    {
        Serial.println("Cannot communicate with radio");
        while (1); // Wait here forever.
    }

    _radioData1.FromRadioId = RADIO_ID;
    _radioData2.FromRadioId = RADIO_ID;
}

void loop()
{
    // Pick a number from 10,000 - 60,000.
    uint16_t randomNumber = random(10000, 60001);

    if (randomNumber > 30000)
    {
        // Send RadioPacket1.

        _radioData1.Counter++;

        Serial.print("Sending ");
        Serial.print(_radioData1.Counter);

        if (_radio.send(DESTINATION_RADIO_ID, &_radioData1, sizeof(_radioData1)))
        {
            Serial.println("...Success");
        }
        else
        {
            Serial.println("...Failed");
        }
    }
    else
    {
        // Send RadioPacket2.

        // Create a message and assign it to the packet.
        // Strings need to be converted to a char array and note they cannot be longer
        // than 31 characters since that is the size of _radioData2.Message.
        String msg = "Hello " + String(randomNumber);
        msg.toCharArray(_radioData2.Message, msg.length() + 1);

        Serial.print("Sending '");
        Serial.print(msg);
        Serial.print("'");

        if (_radio.send(DESTINATION_RADIO_ID, &_radioData2, sizeof(_radioData2)))
        {
            Serial.println("...Success");
        }
        else
        {
            Serial.println("...Failed");
        }
    }

    delay(1000);
}

And the working code for the BME280 sensor and the Photo Resistors

/*
BME280I2C Modes.ino

This code shows how to use predefined recommended settings from Bosch for
the BME280I2C environmental sensor.

GNU General Public License

Written: Dec 30 2015.
Last Updated: Sep 23 2017.

Connecting the BME280 Sensor:
Sensor              ->  Board
-----------------------------
Vin (Voltage In)    ->  3.3V
Gnd (Ground)        ->  Gnd
SDA (Serial Data)   ->  A4 on Uno/Pro-Mini, 20 on Mega2560/Due, 2 Leonardo/Pro-Micro
SCK (Serial Clock)  ->  A5 on Uno/Pro-Mini, 21 on Mega2560/Due, 3 Leonardo/Pro-Micro

 */

#include <BME280I2C.h>
#include <Wire.h>             // Needed for legacy versions of Arduino.

#define SERIAL_BAUD 115200

/* Recommended Modes -
   Based on Bosch BME280I2C environmental sensor data sheet.

Weather Monitoring :
   forced mode, 1 sample/minute
   pressure ×1, temperature ×1, humidity ×1, filter off
   Current Consumption =  0.16 μA
   RMS Noise = 3.3 Pa/30 cm, 0.07 %RH
   Data Output Rate 1/60 Hz

Humidity Sensing :
   forced mode, 1 sample/second
   pressure ×0, temperature ×1, humidity ×1, filter off
   Current Consumption = 2.9 μA
   RMS Noise = 0.07 %RH
   Data Output Rate =  1 Hz

Indoor Navigation :
   normal mode, standby time = 0.5ms
   pressure ×16, temperature ×2, humidity ×1, filter = x16
   Current Consumption = 633 μA
   RMS Noise = 0.2 Pa/1.7 cm
   Data Output Rate = 25Hz
   Filter Bandwidth = 0.53 Hz
   Response Time (75%) = 0.9 s


Gaming :
   normal mode, standby time = 0.5ms
   pressure ×4, temperature ×1, humidity ×0, filter = x16
   Current Consumption = 581 μA
   RMS Noise = 0.3 Pa/2.5 cm
   Data Output Rate = 83 Hz
   Filter Bandwidth = 1.75 Hz
   Response Time (75%) = 0.3 s

*/

BME280I2C::Settings settings(
   BME280::OSR_X1,
   BME280::OSR_X1,
   BME280::OSR_X1,
   BME280::Mode_Forced,
   BME280::StandbyTime_1000ms,
   BME280::Filter_Off,
   BME280::SpiEnable_False,
   0x76 // I2C address. I2C specific.
);

BME280I2C bme(settings);

//////////////////////////////////////////////////////////////////
void setup()
{
  Serial.begin(SERIAL_BAUD);

  while(!Serial) {} // Wait

  Wire.begin();
  while(!bme.begin())
  {
    Serial.println("Could not find BME280I2C sensor!");
    delay(1000);
  }

  // bme.chipID(); // Deprecated. See chipModel().
  switch(bme.chipModel())
  {
     case BME280::ChipModel_BME280:
       Serial.println("Found BME280 sensor! Success.");
       break;
     case BME280::ChipModel_BMP280:
       Serial.println("Found BMP280 sensor! No Humidity available.");
       break;
     default:
       Serial.println("Found UNKNOWN sensor! Error!");
  }

   // Change some settings before using.
   settings.tempOSR = BME280::OSR_X4;

   bme.setSettings(settings);
}

//////////////////////////////////////////////////////////////////
void loop()
{
   printBME280Data(&Serial);
   delay(500);
}

//////////////////////////////////////////////////////////////////
void printBME280Data
(
   Stream* client
)
{
  unsigned int AnalogValue1;
unsigned int AnalogValue2;
unsigned int AnalogValue3;
unsigned int AnalogValue4;
unsigned int AnalogValue5;

unsigned int DigitalValue1;
unsigned int DigitalValue2;
unsigned int DigitalValue3;
unsigned int DigitalValue4;
unsigned int DigitalValue5;

AnalogValue1 = analogRead(A0);
AnalogValue2 = analogRead(A1);
AnalogValue3 = analogRead(A2);
AnalogValue4 = analogRead(A3);
AnalogValue5 = analogRead(A4);

DigitalValue1 = analogRead(2);
DigitalValue2 = analogRead(3);
DigitalValue3 = analogRead(4);
DigitalValue4 = analogRead(5);
DigitalValue5 = analogRead(6);


   float temp(NAN), hum(NAN), pres(NAN);

   BME280::TempUnit tempUnit(BME280::TempUnit_Celsius);
   BME280::PresUnit presUnit(BME280::PresUnit_Pa);

   bme.read(pres, temp, hum, tempUnit, presUnit);

   client->print("Temp: ");
   client->print(temp);
   client->print("°"+ String(tempUnit == BME280::TempUnit_Celsius ? 'C' :'F'));
   client->print("\t\tHumidity: ");
   client->print(hum);
   client->print("% RH");
   client->print("\t\tPressure: ");
   client->print(pres);
   client->print(" Pa");
   client->print(" PR");
   client->print("\t\tPR1A: ");
   client->print(AnalogValue1);
   client->print("\t\tPR2A: ");
   client->print(AnalogValue2);
   client->print("\t\tPR3A: ");
   client->print(AnalogValue3);
   client->print("\t\tPR4A: ");
   client->print(AnalogValue4);
   client->print("\t\tPR5A: ");
   client->print(AnalogValue5);
   client->print("\t\tPR1D: ");
   client->print(DigitalValue1);
   client->print("\t\tPR2D: ");
   client->print(DigitalValue2);
   client->print("\t\tPR3D: ");
   client->print(DigitalValue3);
   client->print("\t\tPR4D: ");
   client->print(DigitalValue4);
   client->print("\t\tPR5D: ");
   client->print(DigitalValue5);
   client->println(" ");
   
   delay(1000);
}

Actually nevermind, I got it, just need to tweak the output to transmit it through the radio but at least everything works
working in progress code

/*

Demonstrates sending data packets of different length.  The receiver will check to see what size of
packet was received and act accordingly.

Radio    Arduino
CE    -> 9
CSN   -> 10 (Hardware SPI SS)
MOSI  -> 11 (Hardware SPI MOSI)
MISO  -> 12 (Hardware SPI MISO)
SCK   -> 13 (Hardware SPI SCK)
IRQ   -> No connection
VCC   -> No more than 3.6 volts
GND   -> GND

*/

#include <SPI.h>
#include <NRFLite.h>
#include <BME280I2C.h>
#include <Wire.h>             // Needed for legacy versions of Arduino.

#define SERIAL_BAUD 115200

BME280I2C::Settings settings(
   BME280::OSR_X1,
   BME280::OSR_X1,
   BME280::OSR_X1,
   BME280::Mode_Forced,
   BME280::StandbyTime_1000ms,
   BME280::Filter_Off,
   BME280::SpiEnable_False,
   0x76 // I2C address. I2C specific.
);

BME280I2C bme(settings);

const static uint8_t RADIO_ID = 1;
const static uint8_t DESTINATION_RADIO_ID = 0;
const static uint8_t PIN_RADIO_CE = 49;
const static uint8_t PIN_RADIO_CSN = 53;

struct RadioPacket1
{
    uint8_t FromRadioId;
    uint8_t Counter;
};

struct RadioPacket2
{
    uint8_t FromRadioId;
    char Message[31];    // Note the max packet size is 32, so 31 is all we can use here.
};

NRFLite _radio;
RadioPacket1 _radioData1;
RadioPacket2 _radioData2;

void setup()
{
    Serial.begin(115200);

    if (!_radio.init(RADIO_ID, PIN_RADIO_CE, PIN_RADIO_CSN))
    {
        Serial.println("Cannot communicate with radio");
        while (1); // Wait here forever.
    }

    _radioData1.FromRadioId = RADIO_ID;
    _radioData2.FromRadioId = RADIO_ID;
    
      Serial.begin(SERIAL_BAUD);

  while(!Serial) {} // Wait

  Wire.begin();
  while(!bme.begin())
  {
    Serial.println("Could not find BME280I2C sensor!");
    delay(1000);
  }

  // bme.chipID(); // Deprecated. See chipModel().
  switch(bme.chipModel())
  {
     case BME280::ChipModel_BME280:
       Serial.println("Found BME280 sensor! Success.");
       break;
     case BME280::ChipModel_BMP280:
       Serial.println("Found BMP280 sensor! No Humidity available.");
       break;
     default:
       Serial.println("Found UNKNOWN sensor! Error!");
  }

   // Change some settings before using.
   settings.tempOSR = BME280::OSR_X4;

   bme.setSettings(settings);
}

void loop()
{
     printBME280Data(&Serial);
   delay(500);
    // Pick a number from 10,000 - 60,000.
    uint16_t randomNumber = random(10000, 60001);

    if (randomNumber > 30000)
    {
        // Send RadioPacket1.

        _radioData1.Counter++;

        Serial.print("Sending ");
        Serial.print(_radioData1.Counter);

        if (_radio.send(DESTINATION_RADIO_ID, &_radioData1, sizeof(_radioData1)))
        {
            Serial.println("...Success");
        }
        else
        {
            Serial.println("...Failed");
        }
    }
    else
    {
        // Send RadioPacket2.

        // Create a message and assign it to the packet.
        // Strings need to be converted to a char array and note they cannot be longer
        // than 31 characters since that is the size of _radioData2.Message.
        String msg = "Hello " + String(randomNumber);
        msg.toCharArray(_radioData2.Message, msg.length() + 1);

        Serial.print("Sending '");
        Serial.print(msg);
        Serial.print("'");

        if (_radio.send(DESTINATION_RADIO_ID, &_radioData2, sizeof(_radioData2)))
        {
            Serial.println("...Success");
        }
        else
        {
            Serial.println("...Failed");
        }
    }

    delay(1000);
}
void printBME280Data
(
   Stream* client
)
{
  unsigned int AnalogValue1;
unsigned int AnalogValue2;
unsigned int AnalogValue3;
unsigned int AnalogValue4;
unsigned int AnalogValue5;

unsigned int DigitalValue1;
unsigned int DigitalValue2;
unsigned int DigitalValue3;
unsigned int DigitalValue4;
unsigned int DigitalValue5;

AnalogValue1 = analogRead(A0);
AnalogValue2 = analogRead(A1);
AnalogValue3 = analogRead(A2);
AnalogValue4 = analogRead(A3);
AnalogValue5 = analogRead(A4);

DigitalValue1 = analogRead(2);
DigitalValue2 = analogRead(3);
DigitalValue3 = analogRead(4);
DigitalValue4 = analogRead(5);
DigitalValue5 = analogRead(6);


   float temp(NAN), hum(NAN), pres(NAN);

   BME280::TempUnit tempUnit(BME280::TempUnit_Celsius);
   BME280::PresUnit presUnit(BME280::PresUnit_Pa);

   bme.read(pres, temp, hum, tempUnit, presUnit);

   client->print("Temp: ");
   client->print(temp);
   client->print("°"+ String(tempUnit == BME280::TempUnit_Celsius ? 'C' :'F'));
   client->print("\t\tHumidity: ");
   client->print(hum);
   client->print("% RH");
   client->print("\t\tPressure: ");
   client->print(pres);
   client->print(" Pa");
   client->print(" PR");
   client->print("\t\tPR1A: ");
   client->print(AnalogValue1);
   client->print("\t\tPR2A: ");
   client->print(AnalogValue2);
   client->print("\t\tPR3A: ");
   client->print(AnalogValue3);
   client->print("\t\tPR4A: ");
   client->print(AnalogValue4);
   client->print("\t\tPR5A: ");
   client->print(AnalogValue5);
   client->print("\t\tPR1D: ");
   client->print(DigitalValue1);
   client->print("\t\tPR2D: ");
   client->print(DigitalValue2);
   client->print("\t\tPR3D: ");
   client->print(DigitalValue3);
   client->print("\t\tPR4D: ");
   client->print(DigitalValue4);
   client->print("\t\tPR5D: ");
   client->print(DigitalValue5);
   client->println(" ");
   
   delay(1000);
}

Any assistance would be appreciated. All I want to do is transmit the serial buffer or the values therein through the radio. no matter what I do I get some kind of error, usually about conversion between float and string or string and int or something isn't defined in the scope or whatever. It's been driving me pretty nuts for a few days.

This code works. It prints everything I want to the serial, but nothing I try works to transmit it through the radio. Any hints would be appreciated.

/*

Demonstrates sending data packets of different length.  The receiver will check to see what size of
packet was received and act accordingly.

Radio    Arduino
CE    -> 9
CSN   -> 10 (Hardware SPI SS)
MOSI  -> 11 (Hardware SPI MOSI)
MISO  -> 12 (Hardware SPI MISO)
SCK   -> 13 (Hardware SPI SCK)
IRQ   -> No connection
VCC   -> No more than 3.6 volts
GND   -> GND

*/

#include <SPI.h>
#include <NRFLite.h>
#include <BME280I2C.h>
#include <Wire.h>             // Needed for legacy versions of Arduino.

#define SERIAL_BAUD 115200

BME280I2C::Settings settings(
   BME280::OSR_X1,
   BME280::OSR_X1,
   BME280::OSR_X1,
   BME280::Mode_Forced,
   BME280::StandbyTime_1000ms,
   BME280::Filter_Off,
   BME280::SpiEnable_False,
   0x76 // I2C address. I2C specific.
);

BME280I2C bme(settings);

const static uint8_t RADIO_ID = 1;
const static uint8_t DESTINATION_RADIO_ID = 0;
const static uint8_t PIN_RADIO_CE = 49;
const static uint8_t PIN_RADIO_CSN = 53;

struct RadioPacket1
{
    uint8_t FromRadioId;
    uint8_t Counter;
};

struct RadioPacket2
{
    uint8_t FromRadioId;
    char Message[31];    // Note the max packet size is 32, so 31 is all we can use here.
};

NRFLite _radio;
RadioPacket1 _radioData1;
RadioPacket2 _radioData2;

void setup()
{
    Serial.begin(115200);

    if (!_radio.init(RADIO_ID, PIN_RADIO_CE, PIN_RADIO_CSN))
    {
        Serial.println("Cannot communicate with radio");
        while (1); // Wait here forever.
    }

    _radioData1.FromRadioId = RADIO_ID;
    _radioData2.FromRadioId = RADIO_ID;
    
      Serial.begin(SERIAL_BAUD);

  while(!Serial) {} // Wait

  Wire.begin();
  while(!bme.begin())
  {
    Serial.println("Could not find BME280I2C sensor!");
    delay(1000);
  }

  // bme.chipID(); // Deprecated. See chipModel().
  switch(bme.chipModel())
  {
     case BME280::ChipModel_BME280:
       Serial.println("Found BME280 sensor! Success.");
       break;
     case BME280::ChipModel_BMP280:
       Serial.println("Found BMP280 sensor! No Humidity available.");
       break;
     default:
       Serial.println("Found UNKNOWN sensor! Error!");
  }

   // Change some settings before using.
   settings.tempOSR = BME280::OSR_X4;

   bme.setSettings(settings);
}

void printBME280Data
(
   Stream* client
)
{
  unsigned int AnalogValue1;
unsigned int AnalogValue2;
unsigned int AnalogValue3;
unsigned int AnalogValue4;
unsigned int AnalogValue5;

unsigned int DigitalValue1;
unsigned int DigitalValue2;
unsigned int DigitalValue3;
unsigned int DigitalValue4;
unsigned int DigitalValue5;

AnalogValue1 = analogRead(A0);
AnalogValue2 = analogRead(A1);
AnalogValue3 = analogRead(A2);
AnalogValue4 = analogRead(A3);
AnalogValue5 = analogRead(A4);

DigitalValue1 = digitalRead(2);
DigitalValue2 = digitalRead(3);
DigitalValue3 = digitalRead(4);
DigitalValue4 = digitalRead(5);
DigitalValue5 = digitalRead(6);


   float temp(NAN), hum(NAN), pres(NAN);

   BME280::TempUnit tempUnit(BME280::TempUnit_Celsius);
   BME280::PresUnit presUnit(BME280::PresUnit_Pa);

   bme.read(pres, temp, hum, tempUnit, presUnit);

   client->print("Temp: ");
   client->print(temp);
   client->print("°"+ String(tempUnit == BME280::TempUnit_Celsius ? 'C' :'F'));
   client->print("\t\tHumidity: ");
   client->print(hum);
   client->print("% RH");
   client->print("\t\tPressure: ");
   client->print(pres);
   client->print(" Pa");
   client->print(" PR");
   client->print("\t\tPR1A: ");
   client->print(AnalogValue1);
   client->print("\t\tPR2A: ");
   client->print(AnalogValue2);
   client->print("\t\tPR3A: ");
   client->print(AnalogValue3);
   client->print("\t\tPR4A: ");
   client->print(AnalogValue4);
   client->print("\t\tPR5A: ");
   client->print(AnalogValue5);
   client->print("\t\tPR1D: ");
   client->print(DigitalValue1);
   client->print("\t\tPR2D: ");
   client->print(DigitalValue2);
   client->print("\t\tPR3D: ");
   client->print(DigitalValue3);
   client->print("\t\tPR4D: ");
   client->print(DigitalValue4);
   client->print("\t\tPR5D: ");
   client->print(DigitalValue5);
   client->println(" ");
   
   delay(1000);
}
void loop()
{
     printBME280Data(&Serial);
   delay(500);
    // Pick a number from 10,000 - 60,000.
    uint16_t randomNumber = random(10000, 60001);

    if (randomNumber > 30000)
    {
        // Send RadioPacket1.

        _radioData1.Counter++;

        Serial.print("Sending ");
        Serial.print(_radioData1.Counter);

        if (_radio.send(DESTINATION_RADIO_ID, &_radioData1, sizeof(_radioData1)))
        {
            Serial.println("...Success");
        }
        else
        {
            Serial.println("...Failed");
        }
    }
    else
    {
        // Send RadioPacket2.

        // Create a message and assign it to the packet.
        // Strings need to be converted to a char array and note they cannot be longer
        // than 31 characters since that is the size of _radioData2.Message.
        String msg = "Hello " + String(randomNumber);
        msg.toCharArray(_radioData2.Message, msg.length() + 1);

        Serial.print("Sending '");
        Serial.print(msg);
        Serial.print("'");

        if (_radio.send(DESTINATION_RADIO_ID, &_radioData2, sizeof(_radioData2)))
        {
            Serial.println("...Success");
        }
        else
        {
            Serial.println("...Failed");
        }
    }

    delay(1000);
}

So far this is the best I've got but it only sends the temp and not the rest

/*

Demonstrates sending data packets of different length.  The receiver will check to see what size of
packet was received and act accordingly.

Radio    Arduino
CE    -> 9
CSN   -> 10 (Hardware SPI SS)
MOSI  -> 11 (Hardware SPI MOSI)
MISO  -> 12 (Hardware SPI MISO)
SCK   -> 13 (Hardware SPI SCK)
IRQ   -> No connection
VCC   -> No more than 3.6 volts
GND   -> GND

*/

#include <SPI.h>
#include <NRFLite.h>
#include <BME280I2C.h>
#include <Wire.h>             // Needed for legacy versions of Arduino.

#define SERIAL_BAUD 115200

BME280I2C::Settings settings(
   BME280::OSR_X1,
   BME280::OSR_X1,
   BME280::OSR_X1,
   BME280::Mode_Forced,
   BME280::StandbyTime_1000ms,
   BME280::Filter_Off,
   BME280::SpiEnable_False,
   0x76 // I2C address. I2C specific.
);

BME280I2C bme(settings);

String Readings;

const static uint8_t RADIO_ID = 1;
const static uint8_t DESTINATION_RADIO_ID = 0;
const static uint8_t PIN_RADIO_CE = 49;
const static uint8_t PIN_RADIO_CSN = 53;

struct RadioPacket1
{
    uint8_t FromRadioId;
    uint8_t Counter;
};

struct RadioPacket2
{
    uint8_t FromRadioId;
    char Message[31];    // Note the max packet size is 32, so 31 is all we can use here.
};

NRFLite _radio;
RadioPacket1 _radioData1;
RadioPacket2 _radioData2;

void setup()
{
    Serial.begin(115200);

    if (!_radio.init(RADIO_ID, PIN_RADIO_CE, PIN_RADIO_CSN))
    {
        Serial.println("Cannot communicate with radio");
        while (1); // Wait here forever.
    }

    _radioData1.FromRadioId = RADIO_ID;
    _radioData2.FromRadioId = RADIO_ID;
    
      Serial.begin(SERIAL_BAUD);

  while(!Serial) {} // Wait

  Wire.begin();
  while(!bme.begin())
  {
    Serial.println("Could not find BME280I2C sensor!");
    delay(1000);
  }

  // bme.chipID(); // Deprecated. See chipModel().
  switch(bme.chipModel())
  {
     case BME280::ChipModel_BME280:
       Serial.println("Found BME280 sensor! Success.");
       break;
     case BME280::ChipModel_BMP280:
       Serial.println("Found BMP280 sensor! No Humidity available.");
       break;
     default:
       Serial.println("Found UNKNOWN sensor! Error!");
  }

   // Change some settings before using.
   settings.tempOSR = BME280::OSR_X4;

   bme.setSettings(settings);
}

void printBME280Data
(
   Stream* client
)
{
  unsigned int AnalogValue1;
unsigned int AnalogValue2;
unsigned int AnalogValue3;
unsigned int AnalogValue4;
unsigned int AnalogValue5;

unsigned int DigitalValue1;
unsigned int DigitalValue2;
unsigned int DigitalValue3;
unsigned int DigitalValue4;
unsigned int DigitalValue5;

AnalogValue1 = analogRead(A0);
AnalogValue2 = analogRead(A1);
AnalogValue3 = analogRead(A2);
AnalogValue4 = analogRead(A3);
AnalogValue5 = analogRead(A4);

DigitalValue1 = digitalRead(2);
DigitalValue2 = digitalRead(3);
DigitalValue3 = digitalRead(4);
DigitalValue4 = digitalRead(5);
DigitalValue5 = digitalRead(6);


   float temp(NAN), hum(NAN), pres(NAN);

   BME280::TempUnit tempUnit(BME280::TempUnit_Celsius);
   BME280::PresUnit presUnit(BME280::PresUnit_Pa);

   bme.read(pres, temp, hum, tempUnit, presUnit);

   client->print("Temp: ");
   client->print(temp);
   client->print("°"+ String(tempUnit == BME280::TempUnit_Celsius ? 'C' :'F'));
   client->print("\t\tHumidity: ");
   client->print(hum);
   client->print("% RH");
   client->print("\t\tPressure: ");
   client->print(pres);
   client->print(" Pa");
   client->print(" PR");
   client->print("\t\tPR1A: ");
   client->print(AnalogValue1);
   client->print("\t\tPR2A: ");
   client->print(AnalogValue2);
   client->print("\t\tPR3A: ");
   client->print(AnalogValue3);
   client->print("\t\tPR4A: ");
   client->print(AnalogValue4);
   client->print("\t\tPR5A: ");
   client->print(AnalogValue5);
   client->print("\t\tPR1D: ");
   client->print(DigitalValue1);
   client->print("\t\tPR2D: ");
   client->print(DigitalValue2);
   client->print("\t\tPR3D: ");
   client->print(DigitalValue3);
   client->print("\t\tPR4D: ");
   client->print(DigitalValue4);
   client->print("\t\tPR5D: ");
   client->print(DigitalValue5);
   client->println(" ");
   
   Readings = temp, hum, pres, AnalogValue1, AnalogValue2, AnalogValue3, AnalogValue4, AnalogValue5, DigitalValue1, DigitalValue2, DigitalValue3, DigitalValue4, DigitalValue5;
   
   delay(1000);
}
void loop()
{
     printBME280Data(&Serial);
   delay(500);
    // Pick a number from 10,000 - 60,000.
    uint16_t randomNumber = random(10000, 60001);

    if (randomNumber < 1)
    {
        // Send RadioPacket1.

        _radioData1.Counter++;

        Serial.print("Sending ");
        Serial.print(_radioData1.Counter);

        if (_radio.send(DESTINATION_RADIO_ID, &_radioData1, sizeof(_radioData1)))
        {
            Serial.println("...Success");
        }
        else
        {
            Serial.println("...Failed");
        }
    }
    else
    {
        // Send RadioPacket2.

        // Create a message and assign it to the packet.
        // Strings need to be converted to a char array and note they cannot be longer
        // than 31 characters since that is the size of _radioData2.Message.
        String msg = String(Readings);
        msg.toCharArray(_radioData2.Message, msg.length() + 1);

        Serial.print("Sending '");
        Serial.print(msg);
        Serial.print("'");

        if (_radio.send(DESTINATION_RADIO_ID, &_radioData2, sizeof(_radioData2)))
        {
            Serial.println("...Success");
        }
        else
        {
            Serial.println("...Failed");
        }
    }

    delay(1000);
}

tried replacing this line

   Readings = temp, hum, pres, AnalogValue1, AnalogValue2, AnalogValue3, AnalogValue4, AnalogValue5, DigitalValue1, DigitalValue2, DigitalValue3, DigitalValue4, DigitalValue5;

with this line

String Readings = String(temp + hum + pres + AnalogValue1 + AnalogValue2 + AnalogValue3 + AnalogValue4 + AnalogValue5 + DigitalValue1 + DigitalValue2 + DigitalValue3 + DigitalValue4 + DigitalValue5);

but that gets me no where

This can't work (from Reply #7) for 2 reasons

   Readings = temp, hum, pres, AnalogValue1, AnalogValue2, AnalogValue3, AnalogValue4, AnalogValue5, DigitalValue1, DigitalValue2, DigitalValue3, DigitalValue4, DigitalValue5;

You build a String from components using +. Readings = temp + hum + press etc

And the components must themselves be Strings. In your case temp is a float

Anyway, all this String manipulation is just going to end in a crash. It is not a good idea to use the String (capital S) class on an Arduino as it can cause memory corruption in the small memory on an Arduino. Just use cstrings - char arrays terminated with 0.

By far the easiest way to send the data using the nRF24 is to create a struct to hold all the datatypes - making sure the total size does not exceed 32 bytes. You already have an example of creating and using a struct.

...R

i came to the same conclusion about the structs but yeah still troubleshooting because of float. at the moment I have bigger problems, the radio won't detect, even after swapping the radio, the wires, and using the default sample code alone which always worked. but yeah this is my current progress Basically creating a new packet for each reading and using char [31].

current code exceeds the 9000 character limit for posts

When your program is too long just post the .ino file as an attachment.

I can't help with your NRFlite library but the examples in this Simple nRF24L01+ Tutorial do work. They use the TMRh20 RF24 library.

Wireless problems can be very difficult to debug so get the wireless part working on its own before you start adding any other features.

...R

This project just went on hold for about 2 weeks. I have 2 radios, 1 Uno and 1 Mega. The uno and radio attached work fine. The Mega radio doesn't work on the Uno and the Uno radio doesn't work on the Mega. I suspect somehow I ESD'd them. It will be a couple weeks before I can spare money for replacement parts. However, this has made me rethink the radio idea. It was ideal for outdoor use, but now I think if I have to buy a new radio anyway, maybe try Wifi or just suck it up and sting 50' of Cat5/6 and use an Ethernet board.

Any suggestions?

To recap, Temp/Humidity/Pressure with 5 Photo resistors in a 180 degree arc for Solar Position monitoring and will be placed outdoors and monitored remotely. Additional components like soil moisture sensors and solenoid activated water valves will be added later. Rather not have to run Cat5 from the house to a post in the yard with a bird feeder and this unit when completed because it would look like sh*t so I'd have to dig a trench and bury it in PVC.

Btw, in case you're curious to see if I was on the right track the ino is attached.

Thanks.

4R7vDhsy.ino (7.59 KB)

BobCatEndeavors:
This project just went on hold for about 2 weeks. I have 2 radios, 1 Uno and 1 Mega. The uno and radio attached work fine. The Mega radio doesn't work on the Uno and the Uno radio doesn't work on the Mega.

I presume you are aware that the MOSI MISO and SCLK pins are in a completely different place on a Mega? They are pins 51, 50 and 52. And SS is 53. The SS pin must be set as OUTPUT for the Arduino to act as SPI master.

On what evidence are you saying that the Uno and radio work fine if you don't have a working radio on the Mega to prove that? Maybe I am misunderstanding what you are saying.

Have you tried the connection test (I think it's in Reply #29) in my Tutorial. It will verify whether the Arduino can communicate with its own nRF24. Of course it does not prove that the wireless part of the nRF24 works.

Debugging wireless problems can be very tedious. You must be very methodical.

By the way a couple of nRF24s is probably cheaper than 50 feet of CAT 5 cable.

And if you are buying more nRF24s buy an extra one for a spare against which you can test the other 2.

...R

Yes I know the pins are different. I am basing it on the fact that it used to work until a cat pulled it off the desk by the cord which caused me to grab the cat, move him and pick up the mega and radio, after which it stopped working (previously working code with previously working wiring now said unable to communicate with radio) either from the fall or ESD or a short caused by the landing I'm not sure, but the temp/pressure/humidity sensor and photo resisters still work, just the radio no longer works. Then after switching radios with the Uno, the results were as I said, leading me to believe both that radio and possibly those pins on the Mega are bad. Using the dynamic tx and dynamic rx code from the library the unit transmitted "hello" and a random number just as the code told it to and the radio received it fine. My problem was then getting it to transmit my data variables instead.

Radio would be convenient since this is intended to be the first piece of a larger system for automated garden watering, so sticking radio controlled arduinos around the yard and such would be easier. On the other hand recently lousy weather around here reminded my how bad radio interference gets whenever we get a storm, which is often. Normally I'm not fond of wireless, a hard line is always more reliable, but maybe that's just the old tech in me and I probably have a spool of cat 5 somewhere and rj45's with the crimper in my toolbox. If I stick an Ethernet shield on the Mega I could still use it as I would no longer need the possibly bad pin area, and could write the code to write the values to an ini file on the Ethernet shield's SD card which would be easy to work with.

So it boils down to which is more of a pain, burying cable or fighting stubborn radio code. I want to get another Uno anyway for a gardening watering unit anyway so I could get a shield for the Mega and another set of radios to have on for a spare. That's the direction I'm leaning

BobCatEndeavors:
Yes I know the pins are different. I am basing it on the fact that it used to work until a cat pulled it off the desk by the cord which caused me to grab the cat, move him and pick up the mega and radio, after which it stopped working

It would have saved a lot of time if you had said that in your first post.

Just get a new wireless module.

...R

It didn't happen until post #10 (at one point I did say prior to that post that things were working and all I needed to do was figure out how to get the radio to transmit the readings.)

Also, if the working radio that is connected to the Uno doesn't work on the Mega why do you think a brand new one would? (I did say I had 2 and already tried swapping them.)

nevermind man, I'm just going to mark this resolved and do what I was going to do and If I run into problems I'll try posting again.

Thank for your time.

BobCatEndeavors:
Also, if the working radio that is connected to the Uno doesn't work on the Mega why do you think a brand new one would? (I did say I had 2 and already tried swapping them.)

I'm confused.

You seem to be leaving out important pieces of the picture, or else you are scattering them across different Replies. Or the circumstances change and you don't give details of the change.

I already asked how do you know that the radio works with the Uno but you have not answered. Give us a very full description of the test that you used to prove that the radio works with the Uno.

...R

Post #4

Actually I found code that works better but I am still having trouble merging my code.

I have a second setup with an Arduino Uno and an rf24 and works ok sending the "hello worl" message from the code and I already have a VB6 program setup up to put the temp, humdity, and pressure values from the serial buffer and it works fine.

my problem is merging these codes and then changing the message transmitting the values recorded from the sensors

Working code for the rf24

Right there I said that everything works, that I had 2 and it worked sending the "Hello World" message. all I needed to do was change the message from "Hello word" to the bme readings

Post #12

I have 2 radios, 1 Uno and 1 Mega. The uno and radio attached work fine. The Mega radio doesn't work on the Uno and the Uno radio doesn't work on the Mega. I suspect somehow I ESD'd them.

I restated the setup and said I possibly ESD'd (Electro Static Discharge) them. No I didn't go into the details of how the damage occured but I did indicate possible damage, i.e. change in circumstances.

Here's the test I used.
At Post 4
I had both the Uno and It's radio and the Mega and it's radio both hooked up and viewed them using the Arduino Create Monitor. The Monitor on the Uno stated it successfully received message "Hello world" from Radio 1.(Radio 1 being the radio on the Mega)
At Post 12
no coding or wiring had changed however damage had occurred
The monitor for the Mega now said Cannot communicate with radio
The Uno gave no errors.
then I swapped the 2 radios
The Mega still said cannot communicate with the radio
but now the Uno also said cannot communicate with radio
when the radio's were switched back the Uno gave no errors but the Mage still did.
I then removed the BME and Photo Resistors (both of which worked fine, I removed them to eliminate them as a possible cause) from the Mega and tried again with the same results