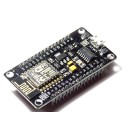
When we need to use Arduino's full potential in connectivity mode, we have two options. Make a webserver from Arduino, or send data to the Internet, which will make Arduino much easier. This tutorial contains sketches that are used to send data to the Internet via HTTP, HTTPS protocol, sending mode can be called Webclient mode, or simply a client when we connect to a remote server. All sample sketches will be designed for sending and processing of 2x temperature from DS18B20 sensors, DHT12 humidity, atmospheric pressure for BMP280. To process the result on the webserver side, we use the PHP language in the procedural version.
Tutorial for Arduino (Wiznet W5100 Ethernet shield - HTTP only):
#include <OneWire.h>
#include <DallasTemperature.h>
#define ONE_WIRE_BUS 6
OneWire oneWire(ONE_WIRE_BUS);
DallasTemperature sensors(&oneWire);
#include <SPI.h>
#include <DHT12.h>
#include <Ethernet.h>
Adafruit_BMP280 bmp;
#include <Adafruit_Sensor.h>
#include "Adafruit_BMP280.h"
byte mac[] = { 0xAA, 0xBB, 0xCC, 0xDD, 0xEE, 0xFF };
char server[] = "www.example.com";
IPAddress ip(192, 168, 1, 100);
EthernetClient client;
DHT12 dht12;
void setup() {
  sensors.begin();
  bmp.begin();
  delay(2000);
  Serial.begin(9600);
}
void loop() {
  if (Ethernet.begin(mac) == 0) {
    Serial.println("Chyba konfiguracie cez DHCP");
    Ethernet.begin(mac, ip);
  }

  if (client.connect(server, 80)) {
    sensors.requestTemperatures();
    Serial.println("Pripojenie uspesne na webserver");
    client.print("GET /add.php?temp1=");
    client.print(sensors.getTempCByIndex(0));
    client.print(sensors.getTempCByIndex(1));
    client.print("&humidity=");
    client.print(dht12.readHumidity());
    client.print("&pressure=");
    client.print((bmp.readPressure() / 100) + 30. 120481927710843373493975903614);
    client.println(" HTTP/1.1");
    client.println("Host: www.example.com");
    client.println("Connection: close");
    client.println();
    client.stop();
  } else {
    Serial.println("Connection unsuccessful");
  }
delay(15000);
}
When using wifi, we can use the Arduino shield, or the board with an ESP8266 integrated chip (NodeMCU), or a separate ESP chip.

Sketch for NodeMCU HTTPS variant:
#include <ESP8266WiFi.h>
#include <WiFiClientSecure.h>
#include <OneWire.h>
Adafruit_BMP280 bmp;
#include <Adafruit_Sensor.h>
#include "Adafruit_BMP280.h"
#include <DallasTemperature.h>
#define ONE_WIRE_BUS 14
OneWire oneWire(ONE_WIRE_BUS);
DallasTemperature sensors(&oneWire);
#include <DHT12.h>
#include <Wire.h>
DHT12 dht12;
#include <SPI.h>
const char* ssid = "wifiname";
const char* password = "wifipassword";
const char* host = "example.com"; //bez https a www
const int httpsPort = 443;
const char* fingerprint = "13 9f 87 1d b1 85 be e6 bd 73 c1 8d 04 63 58 99 f0 32 43 92"; //sha1 certificate fingerprint
void setup() {
  Wire.begin();
  sensors.begin();
  bmp.begin();
  Serial.begin(115200);
  Serial.println();
  Serial.println("Connecting to wifi: ");
  Serial.println(ssid);
 WiFi.begin(ssid, password); //pripoj sa na wifi siet s heslom

  }

void loop(){

 sensors.requestTemperatures();
  WiFiClientSecure client;
  if (!client.connect(host, httpsPort)) {
    return;
  }
  if (client.verify(fingerprint, host)) {
  }
  else {
  }
  String temp1 = String (sensors.getTempCByIndex(0));
 String tempinside = String (sensors.getTempCByIndex(1));
  String humidity = String (dht12.readHumidity());
 String pressure = String ((bmp.readPressure() / 100) + 30.12);
 String url = "/add.php?temp1=" + temp1+"&tempinside="+ tempinside+"&humidity="+ humidity+"&pressure="+ pressure; //
  client.print(String("GET ") + url + " HTTP/1.1\r\n" + "Host: " + host + "\r\n" + "User-Agent: NodeMCU\r\n" + "Connection: close\r\n\r\n");
  Serial.println("Successfuly sent");
  delay(15000);
  }
Processing results online:
Once the data arrives on the web, it is necessary to process and save it to the database. The database is a great tool for archiving data for several thousand records. Data can then be easily used, can be used for charts, interactive reports, and various other actions and visualizations by programming.
First, you need to create 4 spreadsheets to which data will be sent:
TempOutside - id (Auto_increment, Primary Key) temperature (float), time (timestamp, on CURRENT_TIMESTAMP update)
TempLivingRoom - id (Auto_increment, Primary Key) temperature (float), time (timestamp, on CURRENT_TIMESTAMP update)
Humidity - id (Auto_increment, Primary Key) Humidity (float), time (timestamp, on CURRENT_TIMESTAMP update)
PressureOutside- id (Auto_increment, Primary Key) pressure (float), time (timestamp, on CURRENT_TIMESTAMP update)

PHP data processing code:
 <?php
     $con = mysqli_connect("localhost","root","password","database");
     mysqli_set_charset($con,"utf8");

if (mysqli_connect_errno())
  {
  echo "Error connecting to MySQL db: " . mysqli_connect_error();
  }

     $temp1 = $_GET["temp1"];
     $t2 = $_GET["tempinside"];
     $p = $_GET["pressure"];
     $h = $_GET["humidity"];
     if($temp1== "" || $t2=="" || $p=="" || $h=="" || $temp1== 0 || $t2==0 || $p==0 || $h==0 || $temp1< -40 || $t2< -40 || $temp1>50 || $t2>50 || $p>1050 || $p<950 || $h==0.01 || $h==0.02 || $h==0.03 || $h==95){
      echo 'We cannot save bad values to DB!';
     }
     else{
    $ins = mysqli_query($con,"INSERT INTO `TempOutside` (`temperature`) VALUES ('".$temp1."')") or die (mysqli_error($con));
    $ins2 = mysqli_query($con,"INSERT INTO `TempLivingRoom` (`temperature`) VALUES ('".$t2."')") or die (mysqli_error($con));
    $ins3 = mysqli_query($con,"INSERT INTO `PressureOutside` (`pressure`) VALUES ('".$p."')") or die (mysqli_error($con));
    $ins4 = mysqli_query($con,"INSERT INTO `Humidity` (`humidity`) VALUES ('".$h."')") or die (mysqli_error($con));
  echo 'Datas saved succesfully!';
       }
    ?>
In this tutorial we have shown how two different Ethernet and Wifi technologies can upload data to the database via both HTTP and HTTPS protocol using PHP code to which the GET method will sell recorded data.
More projects with demo you can find on my website: https://arduino.php5.sk