Uno + Dht + Oled IC SSD1306 + aprendiendo = problema

Hola a tod@s!!

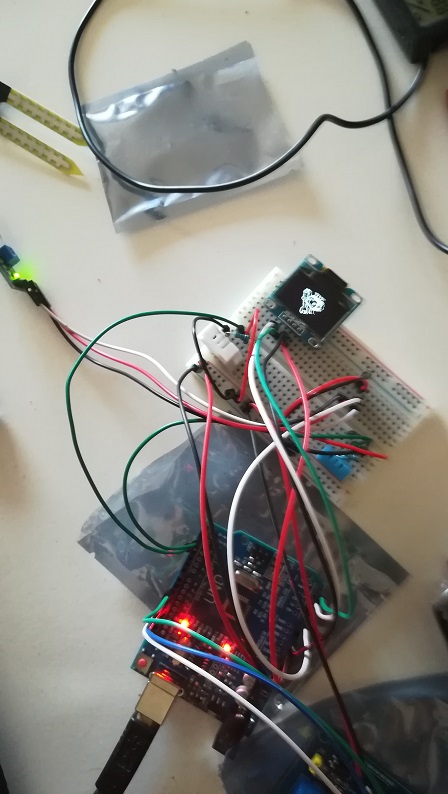
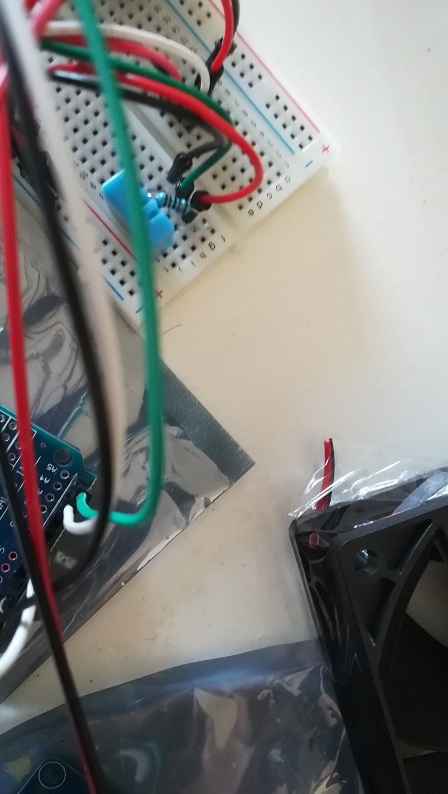
Llevo semanas trabajando duro con arduino para hacer un proyecto doméstico que consiste en controlar una atmosfera controlada, básicamente Temp y Hum con relés y un DHT11. Uso un arduino Uno.

Hasta ahora he ido superando todos los obstáculos estudiando, viendo proyectos, tutoriales, enlaces web, en este foro...ya tengo un código que funciona ok para el sistema controlando con DHT y varios relés con sus periféricos.

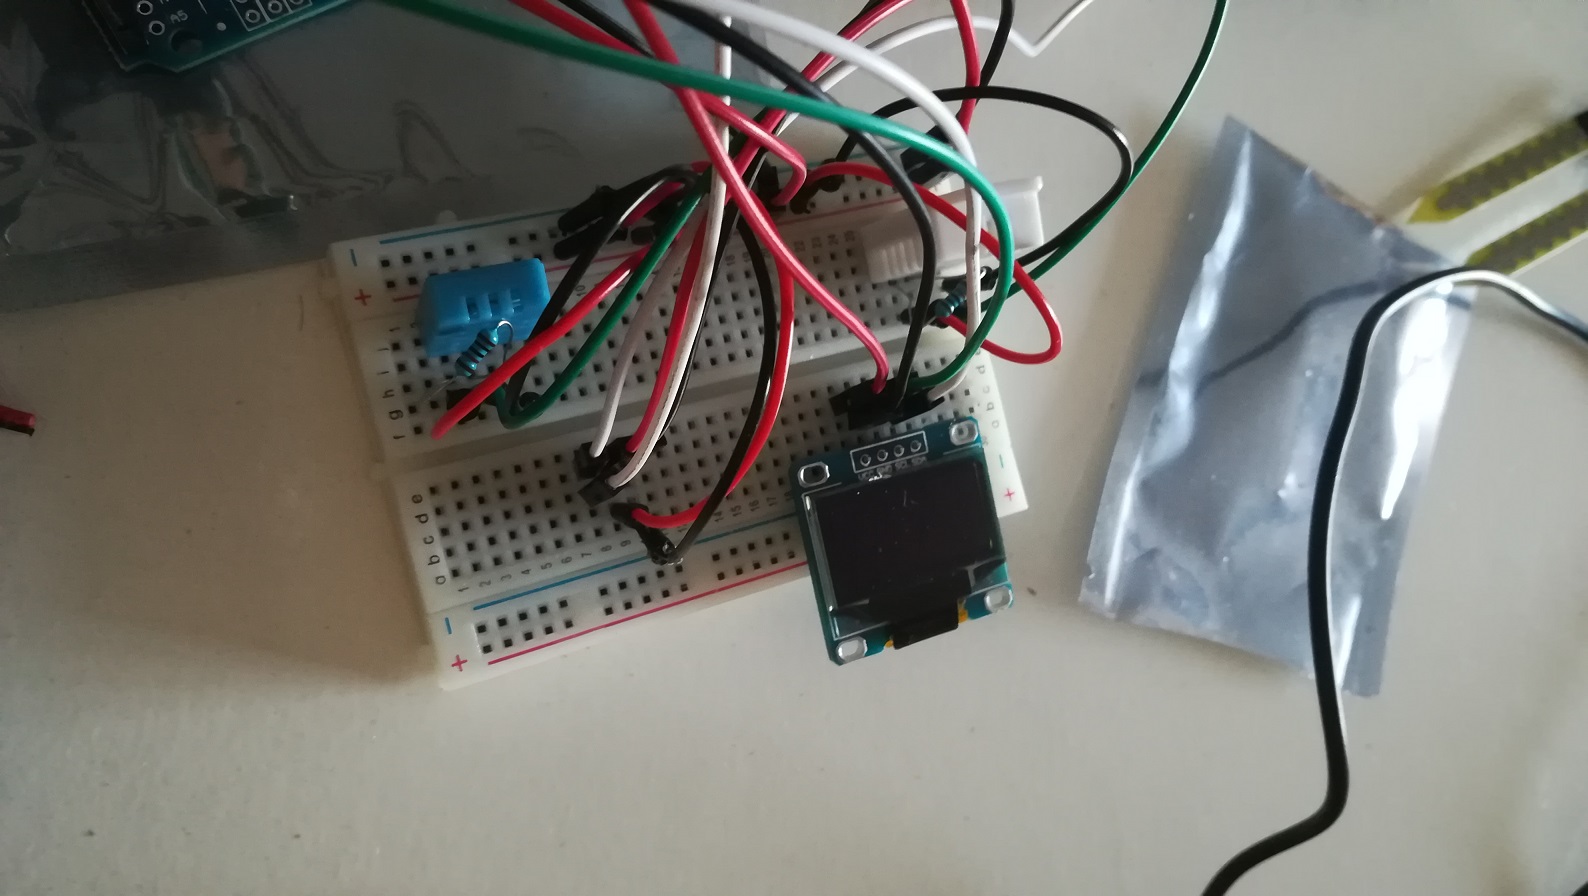
Pero me he estancado con la OLED IC SSD1306. No me quedo corto si habré echado ya unas 20 horas consultando temas OLED...y por cierto hay pocos temas en foros, ni googleando...Estoy por comprarme un LCD :slight_smile:

He llegado a poder comunicarme con la pantalla y enviarle un dibujo que representa bien. No pongo el link del código porque viene del blog de un proveedor.

Os pego el código con el que estoy trabajando, copiado linea por linea de youtube:

A él le funciona, a mi me compila, pero no carga datos en OLED.

código:

#include <SPI.h>

#include <Wire.h>

#include <Adafruit_Sensor.h>

#include <DHT.h>
#include <DHT_U.h>


#include <Adafruit_GFX.h>      //Nucleo de la librería gráfica.
#include <Adafruit_SSD1306.h>  //Librería para pantallas OLED monocromas de 128x64 y 128x32


#define DHTPIN 2

#define OLED_RESET 0 
Adafruit_SSD1306 display(OLED_RESET);

#define NUMFLAKES 10
#define XPOS 0
#define YPOS 1
#define DELTAY 2


#define LOGO16_GLCD_HEIGHT 16 
#define LOGO16_GLCD_WIDTH  16 
static unsigned char PROGMEM const logo16_glcd_bmp[] =
{ B00000000, B11000000,
 B00000001, B11000000,
 B00000001, B11000000,
 B00000011, B11100000,
 B11110011, B11100000,
 B11111110, B11111000,
 B01111110, B11111111,
 B00110011, B10011111,
 B00011111, B11111100,
 B00001101, B01110000,
 B00011011, B10100000,
 B00111111, B11100000,
 B00111111, B11110000,
 B01111100, B11110000,
 B01110000, B01110000,
 B00000000, B00110000 };


#define DHTTYPE DHT11
DHT_Unified dht(DHTPIN, DHTTYPE, 30);

void setup()   {                
                                            
dht.begin();
 
 display.begin(SSD1306_SWITCHCAPVCC, 0x3C); 
 display.display();
 delay(2000);

 display.clearDisplay();

}

void loop() {

 // Wait a few seconds between measurements.
 delay(1000);

 sensors_event_t event;
 dht.temperature().getEvent(&event); 
 if (isnan(event.temperature)){
   display.println("error reading temperature!");
 } else {

int inF = (event.temperature);

 display.setTextSize(3);        
 display.setTextColor(WHITE);
 display.setCursor(10,0);
 display.clearDisplay();
 display.print(inF);
 display.print("");
 display.println("C");
 display.display();
  
}

 dht.humidity().getEvent(&event); 
 if (isnan(event.relative_humidity)){
   display.println("error reading humidity!");
 } else {

     int humid = event.relative_humidity;
 
     display.setTextSize(3);  
    
 display.setTextColor(WHITE);
 display.setCursor(10,40);
 display.clearDisplay();
 display.print(humid);
 display.print("");
 display.println(" %H");
 display.display();
 delay(1000);
  
}

}

Por favor, si alguién puede echarme un cable...Muchas gracias a tod@s!!

I hope that someone also helps me. Thanks for your reply.

This is an English forum. Please edit your orginal post. Google Translate will create an English translation for you. Add a note to explain you have edited the message.

You will get a better response from your readers.

David.

wisely david_prentice has recommended me to repeat a message in English:

Hello

I have been working hard with Arduino for weeks to do a domestic project that consists of controlling a atmosphere, basically Temp and Hum with relays and a DHT11. I use an Arduino Uno.

So far I have been overcoming all the obstacles studying, watching projects, tutorials, web links, in this forum ... I already have a code that works ok for the system controlling with DHT and several relays with their peripherals.

But I have stuck with the OLED IC SSD1306. I'm not short if I've already spent about 20 hours consulting OLED themes ... and by the way there are few topics in forums, or googling ... I'm about to buy an LCD :slight_smile:

I have become able to communicate with the screen and send you a drawing that represents well. I do not put the code link because it comes from a provider's blog.

I paste the code with which I am working, copied line by line of youtube:

It works for me, it compiles to me, but it does not load data in OLED.

#include <SPI.h>

#include <Wire.h>

#include <Adafruit_Sensor.h>

#include <DHT.h>
#include <DHT_U.h>


#include <Adafruit_GFX.h>      //Nucleo de la librería gráfica.
#include <Adafruit_SSD1306.h>  //Librería para pantallas OLED monocromas de 128x64 y 128x32


#define DHTPIN 2

#define OLED_RESET 0 
Adafruit_SSD1306 display(OLED_RESET);

#define NUMFLAKES 10
#define XPOS 0
#define YPOS 1
#define DELTAY 2


#define LOGO16_GLCD_HEIGHT 16 
#define LOGO16_GLCD_WIDTH  16 
static unsigned char PROGMEM const logo16_glcd_bmp[] =
{ B00000000, B11000000,
 B00000001, B11000000,
 B00000001, B11000000,
 B00000011, B11100000,
 B11110011, B11100000,
 B11111110, B11111000,
 B01111110, B11111111,
 B00110011, B10011111,
 B00011111, B11111100,
 B00001101, B01110000,
 B00011011, B10100000,
 B00111111, B11100000,
 B00111111, B11110000,
 B01111100, B11110000,
 B01110000, B01110000,
 B00000000, B00110000 };


#define DHTTYPE DHT11
DHT_Unified dht(DHTPIN, DHTTYPE, 30);

void setup()   {                
                                            
dht.begin();
 
 display.begin(SSD1306_SWITCHCAPVCC, 0x3C); 
 display.display();
 delay(2000);

 display.clearDisplay();

}

void loop() {

 // Wait a few seconds between measurements.
 delay(1000);

 sensors_event_t event;
 dht.temperature().getEvent(&event); 
 if (isnan(event.temperature)){
   display.println("error reading temperature!");
 } else {

int inF = (event.temperature);

 display.setTextSize(3);        
 display.setTextColor(WHITE);
 display.setCursor(10,0);
 display.clearDisplay();
 display.print(inF);
 display.print("");
 display.println("C");
 display.display();
  
}

 dht.humidity().getEvent(&event); 
 if (isnan(event.relative_humidity)){
   display.println("error reading humidity!");
 } else {

     int humid = event.relative_humidity;
 
     display.setTextSize(3);  
    
 display.setTextColor(WHITE);
 display.setCursor(10,40);
 display.clearDisplay();
 display.print(humid);
 display.print("");
 display.println(" %H");
 display.display();
 delay(1000);
  
}

}

Please, if someone can help me ... Thank you very much to everyone!

Hello again, I give you more info:

From the provider's website where I bought the OLED, I even tested its code, and it does not work. In contrast to that same web, the code of an image works. I attached both codes and info:

Code that interests me (with DHT) and that does not go:

#include <Adafruit_GFX.h>
#include <Adafruit_SPITFT.h>
#include <Adafruit_SPITFT_Macros.h>
#include <gfxfont.h>

#include <Adafruit_SSD1306.h>
#include <splash.h>

#include <Wire.h>

#include <Fonts/FreeMonoBoldOblique12pt7b.h>
#include "DHT.h"
 
#define OLED_RESET 0 
Adafruit_SSD1306 display(OLED_RESET);
 
#define NUMFLAKES 10
#define XPOS 0
#define YPOS 1
#define DELTAY 2

#define DHTPIN 2     // what digital pin we're connected to
#define DHTTYPE DHT11   // DHT 22  (AM2302), AM2321
DHT dht(DHTPIN, DHTTYPE);

void setup()   {                
 
  display.begin(SSD1306_SWITCHCAPVCC, 0x3C); //Inicializa pantalla con en la dirección 0x3C 
                                             // para la conexión I2C.
  dht.begin();
 
}

void loop() {

  // Wait a few seconds between measurements.
  delay(2000);

  // Reading temperature or humidity takes about 250 milliseconds!
  // Sensor readings may also be up to 2 seconds 'old' (its a very slow sensor)
  float h = dht.readHumidity();
  // Read temperature as Celsius (the default)
  float t = dht.readTemperature();
  // Read temperature as Fahrenheit (isFahrenheit = true)
  float f = dht.readTemperature(true);

  // Compute heat index in Fahrenheit (the default)
  float hif = dht.computeHeatIndex(f, h);
  // Compute heat index in Celsius (isFahreheit = false)
  float hic = dht.computeHeatIndex(t, h, false);

  //TEXTO CON FUENTE PREDETERMINADA
 
  display.fillScreen(0);         //Limpiamos la pantalla
 
  display.setFont();             //Fuente por defecto -si no la hemos cambiado no es necesario seleccionarla
 
  display.setTextSize(1);        
  display.setTextColor(1,0);
  display.setCursor(0,0);
  display.println("Temperatura ambiente");
  display.setTextSize(1);
  display.println(t,DEC);
  display.setCursor(0,18);
  display.setTextSize(2);
  display.print("Grado C");
  
  display.setTextSize(3);
  display.setTextColor(0,1);     //Color invertido
  display.setCursor(0,32);
  display.print("AaBbCcD");
  display.display();             //Refrescamos la pantalla para visualizarlo
  delay(4000);

  display.fillScreen(0);         //Limpiamos la pantalla
 
  display.setFont();             //Fuente por defecto -si no la hemos cambiado no es necesario seleccionarla
 
  display.setTextSize(1);        
  display.setTextColor(1,0);
  display.setCursor(0,0);
  display.println("Humedad actual");
  display.setTextSize(1);
  display.println(h,DEC);
  display.setCursor(0,18);
  display.setTextSize(2);
  display.print("%");
  
  display.setTextSize(3);
  display.setTextColor(0,1);     //Color invertido
  display.setCursor(0,32);
  display.print("AaBbCcD");
  display.display();             //Refrescamos la pantalla para visualizarlo
  delay(4000);
  
}

and they say:

In order for the program to compile successfully, you absolutely need to download the Arduino Wire.h, Adafruit_GFX.h, Adafruit_SSD1306.h, Fonts / FreeMonoBoldOblique12pt7b.h, DHT.h libraries, placing your folders to the following address on your system:
C:\Program Files (x86)\Arduino\libraries

and this "trimmed" code, that occupies a lot of, is the image that does work on OLed:

#include <Wire.h>
 
 
#define DIRECCION_PANTALLA  0x3C

const unsigned char imagen [] = {

.....ocupa mucho...
 
void setup()   {                
    // Inicializar el controlador de la pantalla OLED
    inicializar_pantalla();
}
 
void loop() {
   //Recorre la matriz de la imagen y dibuja cada byte en la pantalla
   char c;
   for(int i = 0; i < 1024; i++)
   {
        Wire.beginTransmission(DIRECCION_PANTALLA);
        Wire.write(0x40);
            Wire.write(imagen[i]); //Dibujar el byte correspondiente
            Wire.endTransmission();
   }
 
     
}
 
void inicializar_pantalla()
{
    Wire.begin(); //Iniciar la comunicacion I2C de Arduino
 
 
    //Aumentar la frecuencia de SCL a 400 kHz
    //Esto aumentara la velocidad de refresco
    TWBR = 12; 
 
 
    /* Inicializar la pantalla, siguiendo las instrucciones
       exactas de la pag. 64 de la documentacion:   */
 
    //Iniciar la comunicacion con la pantalla
    Wire.beginTransmission(DIRECCION_PANTALLA); 
     
    //Le decimos a la pantalla que viene una lista de comandos de configuracion
    Wire.write(0x00);
 
    //Apagar la pantalla
    Wire.write(0xAE);
 
    // Establecer el maximo de filas a 0x3F = 63
    // es decir, ira de 0 a 63, por tanto tenemos 64 filas de pixeles
    Wire.write(0xA8);
    Wire.write(0x3F);
 
    //Poner el offset a 0
    Wire.write(0xD3);
    Wire.write(0x00);
 
    //Poner el comienzo de linea a 0
    Wire.write(0x40);
 
    //Invertir el eje X de pantalla, por si esta girada.
    //Puedes cambiarlo por 0xA0 si necesitas cambiar la orientacion
    Wire.write(0xA1);
 
    //Invertir el eje Y de la patnalla
    //Puedes cambiarlo por 0xC0 si necesitas cambiar la orientacion
    Wire.write(0xC8);
 
    //Mapear los pines COM
    Wire.write(0xDA);
    Wire.write(0x12); 
    //Al parecer, la unica configuracion que funciona con mi modelo es 0x12, a pesar
    // de que en la documentacion dice que hay que poner 0x02
 
 
    //Configurar el contraste
    Wire.write(0x81);
    Wire.write(0x7F); //Este valor tiene que estar entre 0x00 (min) y 0xFF (max)
 
     
    //Este comando ordena al chip que active el output de la pantalla en funcion del contenido
    //almacenado en su GDDRAM
    Wire.write(0xA4);
 
    //Poner la pantalla en modo Normal
    Wire.write(0xA6);
 
    //Establecer la velocidad del Oscilador
    Wire.write(0xD5);
    Wire.write(0x80);
 
    //Activar el 'charge pump'
    Wire.write(0x8D);
    Wire.write(0x14);
 
    //Encender la pantalla
    Wire.write(0xAF);
 
 
    //Como extra, establecemos el rango de columnas y paginas
    Wire.write(0x21); //Columnas de 0 a 127
    Wire.write(0x00);
    Wire.write(0x7F);
    Wire.write(0x22); //Paginas de 0 a 7
    Wire.write(0x00); 
    Wire.write(0x07);
 
    //Modo de escritura horizontal
    //en mi modelo no haria falta enviar este comando (por defecto utiliza este modo)
    Wire.write(0x20);
    Wire.write(0x00);
 
    //Cerrar la comunicacion
    Wire.endTransmission();
     
    //Limpiamos la memoria, por si hubiera quedado memoria residual
    //de la ultima vez que se encendio la pantalla
    for(int i = 0; i < 1024; i++){
        Wire.beginTransmission(DIRECCION_PANTALLA);
        Wire.write(0x40);
        Wire.write(0x00);
        Wire.endTransmission();
        }
     
 
}

In addition I execute the example of the library "ssd_1306_128x64_i2c" and it does not work either.

The provider's advice is a bit complicated.

Just use the IDE Library Manager.
Install / Upgrade Adafruit_GFX
Install / Upgrade Adafruit_SSD1306

This will install Fonts, Adafruit_SPITFT etc

Then run the examples that come with Adafruit_SSD1306

It is always wise to use libraries supported by the Library Manager.
Then test with the examples.

David.

I've tried it, it does not work. Thank you

I don't believe you.

It is not difficult to connect 4-wires from OLED to the Uno. SDA, SCL, 5V, GND
Post a photo.

File->Preferences->Verbose Compile

Paste the build report to your message.
It shows which library versions were used.

David.

if I've tried it, now again and not work the SSD1306 example.

info you ask:

attached pictures.

Your photo 153919_1 shows that the OLED is displaying a logo ok. So the OLED wiring is correct.
I can not follow your DHT wiring from the photo.

I will try your code in #4 later with a real OLED and real DHT sensor.

It is not very useful showing GitHub library links. You need to show the libraries are installed on your PC.
What I would really like to see is this from the verbose build report:

Using library Adafruit_GFX_Library at version 1.3.6 in folder: C:\Users\David Prentice\Documents\Arduino\libraries\Adafruit_GFX_Library 
Using library SPI at version 1.0 in folder: C:\Program Files (x86)\Arduino-1.8.1\hardware\arduino\avr\libraries\SPI 
Using library Adafruit_SSD1306 at version 1.2.9 in folder: C:\Users\David Prentice\Documents\Arduino\libraries\Adafruit_SSD1306 
Using library Wire at version 1.0 in folder: C:\Program Files (x86)\Arduino-1.8.1\hardware\arduino\avr\libraries\Wire 
Using library DHT at version 1.1.0 in folder: C:\Users\David Prentice\Documents\Arduino\libraries\DHT 
Sketch uses 16014 bytes (49%) of program storage space. Maximum is 32256 bytes.
Global variables use 382 bytes (18%) of dynamic memory, leaving 1666 bytes for local variables. Maximum is 2048 bytes.

I can then check with the Library Manager to see whether the versions are up to date.
Yes. DHT from Adafruit is now version 1.3.2

David.

Edit. I ran your program on a DHT11 with OLED. It worked fine.
Then I upgraded the DHT library and this worked fine too:

Using library Adafruit_GFX_Library at version 1.3.6 in folder: C:\Users\David Prentice\Documents\Arduino\libraries\Adafruit_GFX_Library 
Using library SPI at version 1.0 in folder: C:\Program Files (x86)\Arduino-1.8.1\hardware\arduino\avr\libraries\SPI 
Using library Adafruit_SSD1306 at version 1.2.9 in folder: C:\Users\David Prentice\Documents\Arduino\libraries\Adafruit_SSD1306 
Using library Wire at version 1.0 in folder: C:\Program Files (x86)\Arduino-1.8.1\hardware\arduino\avr\libraries\Wire 
Using library DHT_sensor_library at version 1.3.2 in folder: C:\Users\David Prentice\Documents\Arduino\libraries\DHT_sensor_library 
Using library Adafruit_Unified_Sensor at version 1.0.2 in folder: C:\Users\David Prentice\Documents\Arduino\libraries\Adafruit_Unified_Sensor 
Sketch uses 17312 bytes (53%) of program storage space. Maximum is 32256 bytes.
Global variables use 386 bytes (18%) of dynamic memory, leaving 1662 bytes for local variables. Maximum is 2048 bytes.

attached image of dht's in protoboard and the complite info that you ask me in text file.

I have an arduino program with relays that seems to work well. I only doubt with the humidity value, because I have another non-arduino sensor, but the reading of dht11 and dht22 is very similar.

thanks

compilacion.txt (46.1 KB)

I built the ssd1306_128x64_i2c example from the library. I edited the example because it expected 0x3D:

  // SSD1306_SWITCHCAPVCC = generate display voltage from 3.3V internally
  if(!display.begin(SSD1306_SWITCHCAPVCC, 0x3C)) { // Address 0x3D for 128x64

It works fine. Even with the DHT on digital#2.

Using library SPI at version 1.0 in folder: C:\Program Files (x86)\Arduino-1.8.1\hardware\arduino\avr\libraries\SPI 
Using library Wire at version 1.0 in folder: C:\Program Files (x86)\Arduino-1.8.1\hardware\arduino\avr\libraries\Wire 
Using library Adafruit_GFX_Library at version 1.3.6 in folder: C:\Users\David Prentice\Documents\Arduino\libraries\Adafruit_GFX_Library 
Using library Adafruit_SSD1306 at version 1.2.9 in folder: C:\Users\David Prentice\Documents\Arduino\libraries\Adafruit_SSD1306 
Sketch uses 20804 bytes (64%) of program storage space. Maximum is 32256 bytes.
Global variables use 479 bytes (23%) of dynamic memory, leaving 1569 bytes for local variables. Maximum is 2048 bytes.

I would NEVER put libraries in OneDrive. It is better to store them on your PC with the Library Manager.

You have a "badly named directory". Please use the Library Manager and NOT "install from ZIP"

Utilitzant biblioteca Adafruit-GFX-Library-master a la seva versió 1.3.6 en la carpeta: C:\Users\jovid\OneDrive\Documentos\Arduino\libraries\Adafruit-GFX-Library-master

David.

I'm going to keep trying. I have already deleted the existing folder and I have copied the folder in the directory of my documents, and continues to take it onedrive ...

God day!!

I write to close this post, I finally bought an LCD for 3.5 €, and everything solved in a while.

When I have more time I will fight with this OLED or not.

Greetings and thanks to all for trying to help me.