Hi all,
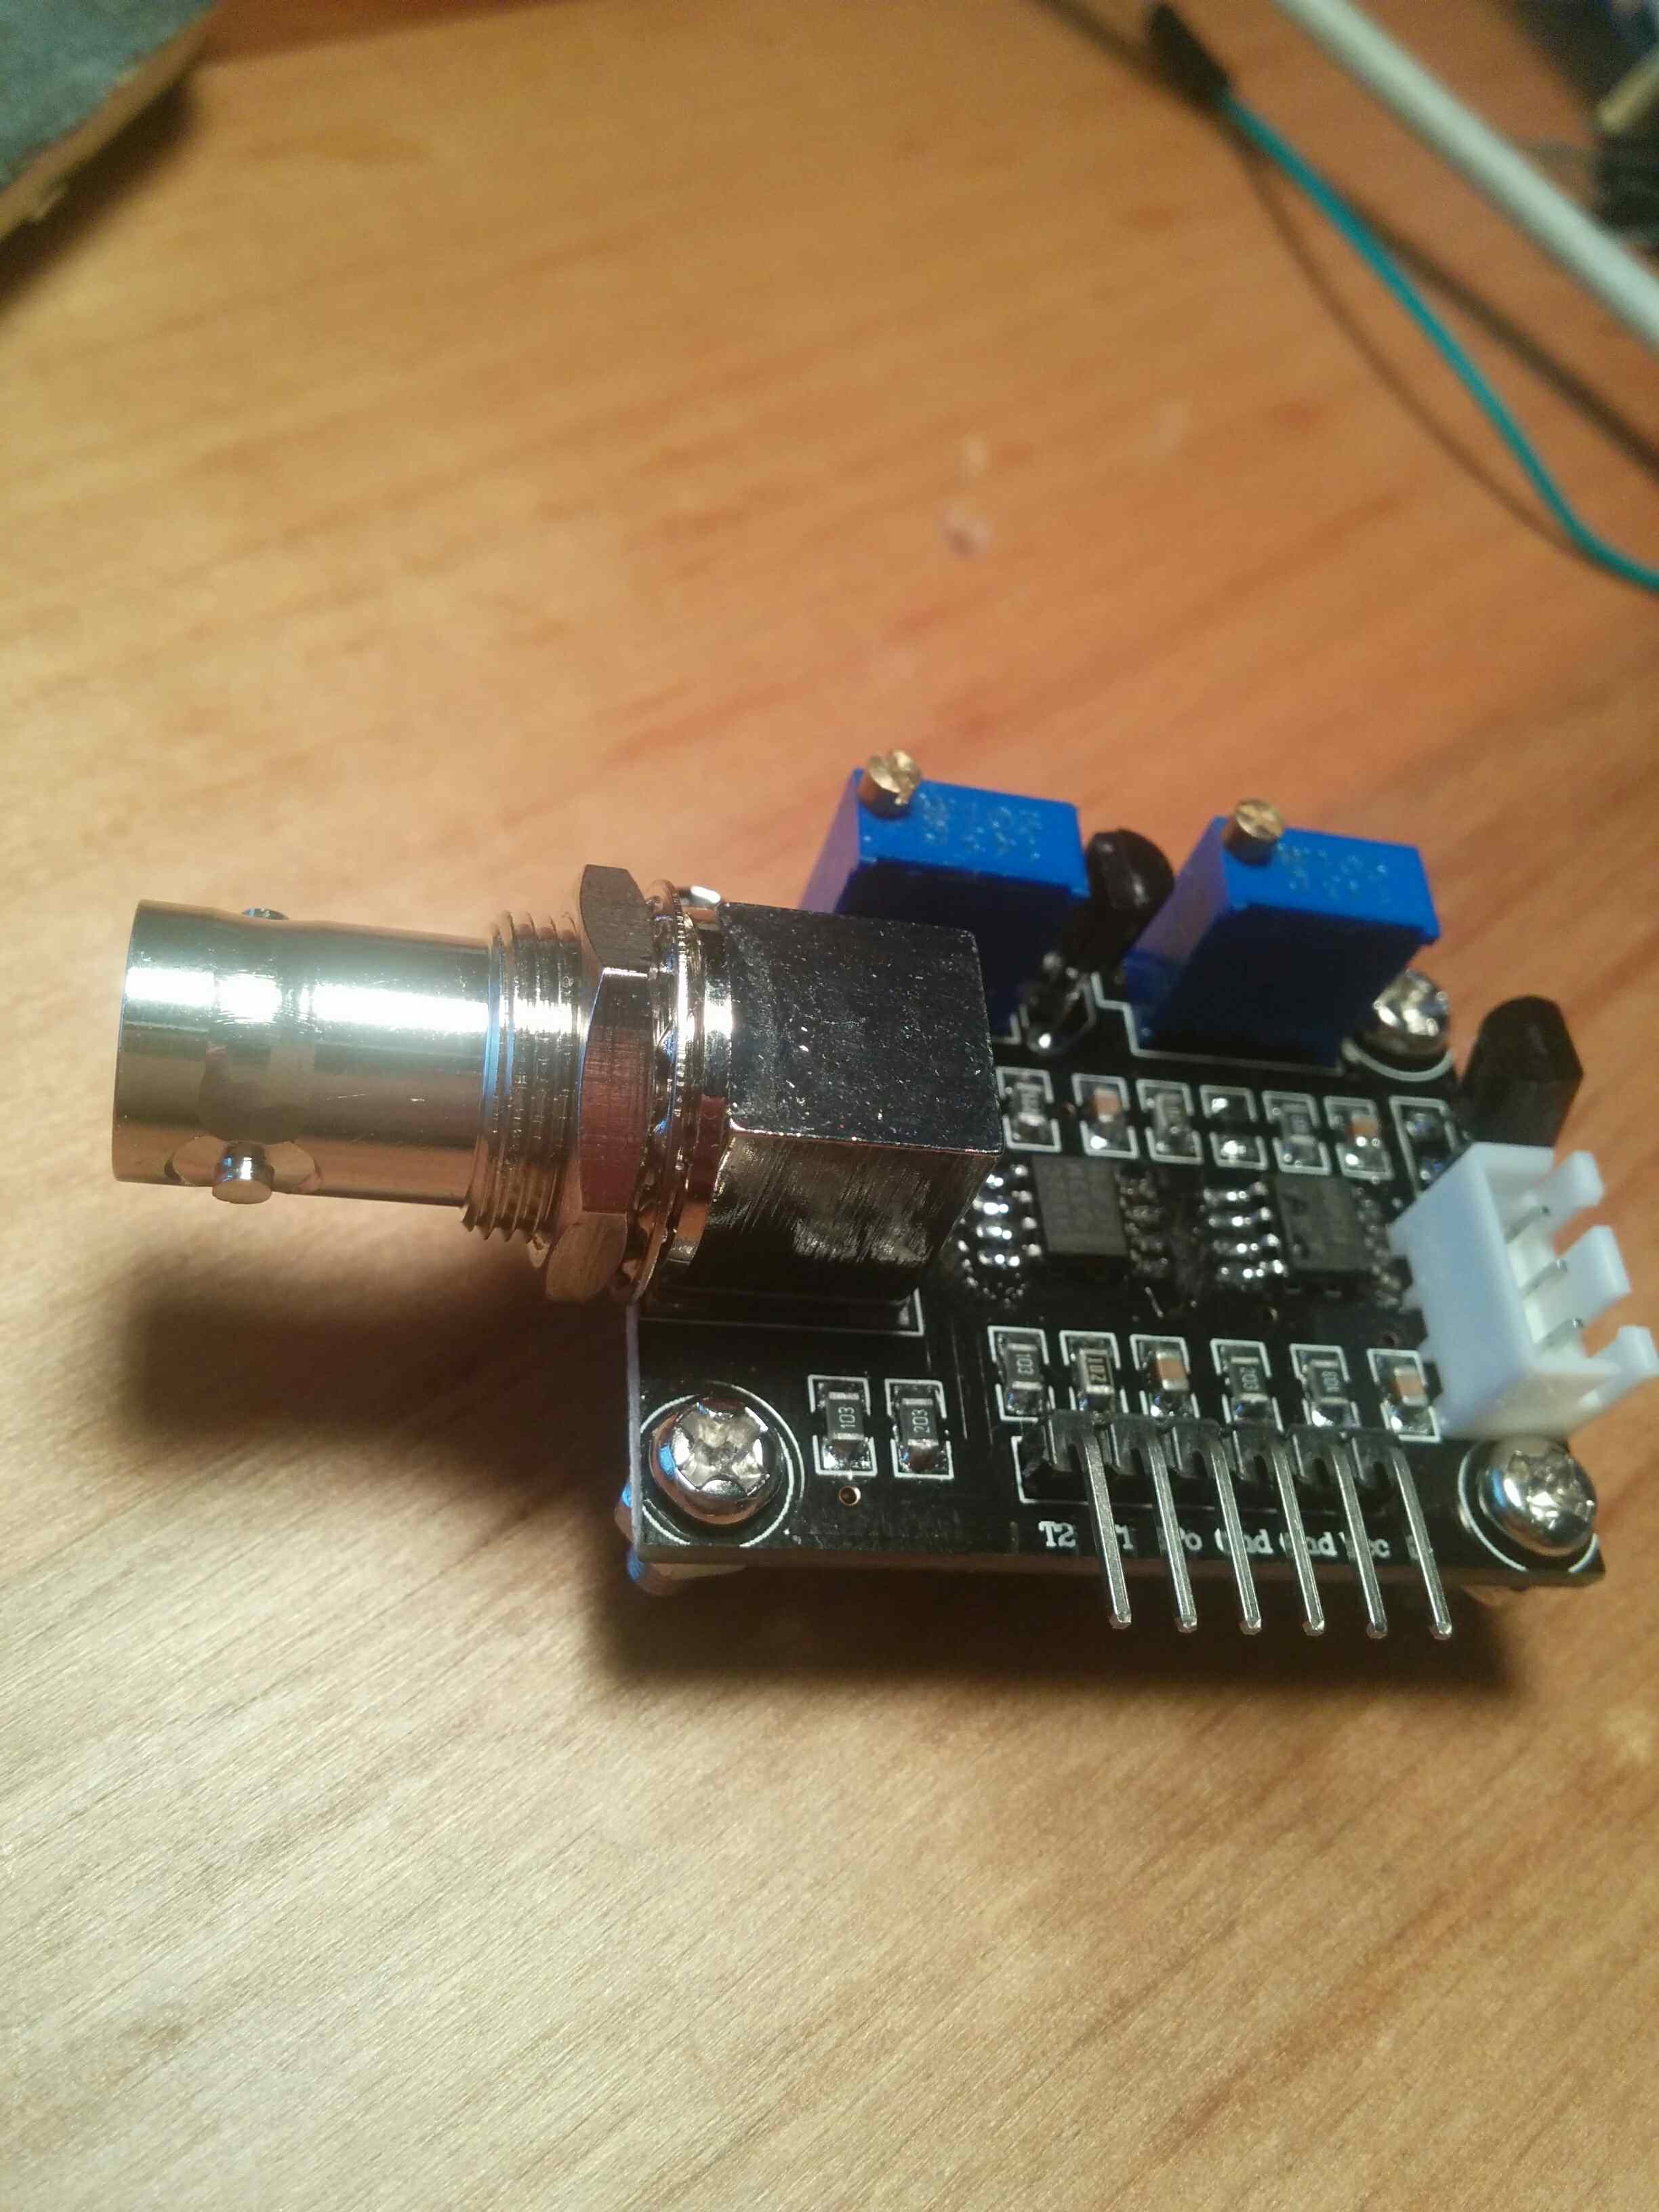
First of all, I'm only speaking about the board labelled "www.auto-crtl.com" and "Logo_PHsensor v1.1". The one with only 6 pins in front of the BNC plug (not on the side) as you can see in image Pinout1.jpg.
I also bought this little board from China and it is difficult to make it working. Most topics are related to other boards (Atlas, Sparkfun, Sparky's Widgets, etc.) and nothing is working. And when the subject is speaking about the correct card, the information is incorrect or computation are made with random numbers coming from the sky.
Some words are in italic to avoid "experts" saying it's incorrect (because it is incorrect) but for our small projects and for understanding I intentionaly use those "simple" terms.
General info about pH to know
The pH is a value between 0 (acid) and 14 (basic) with a neutral value of 7.
The curve (log10) of the pH is a mix between linear and exponential as you can see in pH_curve.png. It means that you can almost measure a linear value between 4 and 9 pH. Less than 2 and more than 12 is almost impossible to determine something (too acid or too basic).
The probe is like a (tiny) battery when placed in a liquid. Depending the pH it output a positive or negative voltage of a couple of millivolts. This value is too small and other tech stuff like impedance make it unusable directly with an Arduino that's why you need an "op amp". The op amp board just convert the millivolts of the probe into to something acceptable for Arduino (positive between 0 and 5v).
There are 3 common buffer solutions used for pH measurement: pH 4.01, pH 6.86 and pH 9.18 (7.0 and 10.0 exists). I suggest the powder instead the liquid because it's cheaper, expire after longer and the powder can't be contamined (vs bottle). You should read the product instructions but usually you have to put the content of the bag into 250ml of water and stir. You can use any water with an average pH (6-8) because the powder will saturate the water at the correct pH level. I personnaly use tap water (pH 7.4) and didn't see any difference between distilled, osmosed and demineralized water. Buffers are not stable in the time, this means that you cannot keep the solution for weeks or months.
Board description
- BNC plug: Where you put the probe. It seems to work with any probe with a calibration difference. I tested 3 models (cheap blue, cheap black and a short black from a EC+pH kit).
- Pin To: Should be the temperature but I can't make it works.
- Pin Do: High/Low 3.3v adjustable limit.
- Pin G/GND: Probe ground. It is useful when the ground is not the same as your Arduino. In some circumstances the ground voltage of the liquid to measure can be different.
- Pin G/GND: Power ground (direct from Arduino).
- Pin V+/VCC: Input power 5V DC (direct from Arduino).
- Blue potentiometer close to BNC: pH offset.
- Blue potentiometer close to pins: limit adjustment.
- Black component with 103 printed (not the one between potentiometers): thermistor for temperature compensation.
"Calibration"
A single word for many things because in our case there are 2 different calibrations. The "offset" value and the "step" value.
- The offset.
The offset is the shifting of all pH values to a specific voltage range. If a pH 7 output a voltage of 2.2v and pH 8 a voltage of 2.1v, then a shift of +0.3v move the pH 7 to 2.5v and the pH 8 to 2.4v. This can be done on the board or via software but it's probably easyer on the board because it's probe independant and there are less programming to do.
Connect GND (both) and Vcc to Arduino GND and 5v. Remove the probe and do a short circuit between the the small BNC hole and the external part of BNC. Put a voltmeter (or Arduino) to measure the voltage between GND and Po. Adjust the pot (close BNC) until the output is 2.5v. Now the pH 7 have an exact value of 2.5v (511 with analogRead function) because the probe will output 0 millivolt.
- The steps.
Now you need one or more buffer solutions depending the range and precision you want. Ideally you should know the range of the measure you want to do with your system. I use water between pH 5 and pH 7, then I choose the buffer 4.01 (and 6.86 to verify my stuff). If you usually measure pH between 8 and 10 choose buffer 9.18 (eventually 6.86 also).
Connect the (clean) probe and put it in the buffer then let it stabilize for a minute. You know it's stable when it goes up and down (3.04 then 3.05 then 3.03 then 3.04) .Take note of the voltmeter (or Arduino) value, in my example it's 3.05v.
That's all, now you can use it with the code below.
The code
The PH_step calculation is quite simple. You take the difference between the two known voltage, in my example 2.5v@pH7 and 3.05v@pH4.01 which is -0.55v. It's the voltage range equivalent of the pH range from 7 to 4.01, which is 2.99 pH units. A small division of the voltage by pH units gives you a volts per pH number (0,1839... in my case).
The PH_probe is calculated by taking the known pH 7 voltage (2.5v) where we add some PH_step to match the probe voltage. This means that a pH of 8 have a voltage value of 2.5v (pH 7) + 0.1839 (1 unit/step); pH 9 then is 2.5v + 0.1839 + 0.1839 = 2.87v.
No magic number, no ridiculous stuff, just maths :).
If you need under and over pH 7, I suggest you have two PH_step variables. One for the lower part (use buffer 4.01) and another for the upper part (use buffer 9.16). The probe is almost linear but far from perfect and you can have a side more linear than the other.
int ph_pin = A7; //This is the pin number connected to Po

void setup() {
  Serial.begin(9600);
}

void loop() {
  int measure = analogRead(ph_pin);
  Serial.print("Measure: ");
  Serial.print(measure);

  double voltage = 5 / 1024.0 * measure; //classic digital to voltage conversion
  Serial.print("\tVoltage: ");
  Serial.print(voltage, 3);

  // PH_step = (voltage@PH7 - voltage@PH4) / (PH7 - PH4)
  // PH_probe = PH7 - ((voltage@PH7 - voltage@probe) / PH_step)
  float Po = 7 + ((2.5 - voltage) / 0.18);
  Serial.print("\tPH: ");
  Serial.print(Po, 3);

  Serial.println("");
  delay(2000);
}
pH limit (Do pin)
You can adjust the pot close to the pins to adapt a pH limit. If the limit is reached, a red led on the board (near the green one) switch on/off and the Do pin pass from 3.65v to 0.77v. This can be used as HIGH or LOW values with the digitalRead() function or any other interrupt.
Temperature
The To pin should do something about temperature but I'm not mastering LM358 op amp stuff. The thermistor should adjust the pH value but didn't notice any remarkable change (liquid = 20°C, thermistor = 50°C). Anyway, at normal (18-25°C) temperature there is no pH difference with temperature compensation for a hobby purpose. For a simple aquarium you need pH between 6.5 and 7.5, then a measure variation of 0.1 or 0.2 is fine.