Hello everyone, I am back again with another weird project.
I am working on a rave mask for my birthday coming up. I have the layout and everything all measured out, I also have various animations made but am having a little trouble with the mechanics of one.
Here are some pictures below to give some background on what I am trying to do. I may make this into an instructable if people are interested.
I am essentially trying to make a heartbeat animation but instead of deleting it like in the video, below, I am trying to keep how it is on a real HB sensor.
What I mean by this is; instead of turning on the array, then deleting the array one by one. How do I turn on the first array, the actual heart beat and instead, just start over and redraw it in a different position, making it seem it is a continuous line and NOT on then off, on then off.
Hopefully I am wording it right. I will upload some pictures and videos of it to give clarity, and also, my code.
Also, if any of you have any cool animations you can think of, would be greatly appreciated ![]() <3
<3
I made this in photoshop but use the template and paint bucket to make the designs before animating them. See below/attached
/* Arduino 256 RGB LEDs Matrix Animation Frame
* Using WS2812 LED Strips
Created by Yvan / https://Brainy-Bits.com
This code is in the public domain...
You can: copy it, use it, modify it, share it or just plain ignore it!
Thx!
*/
//
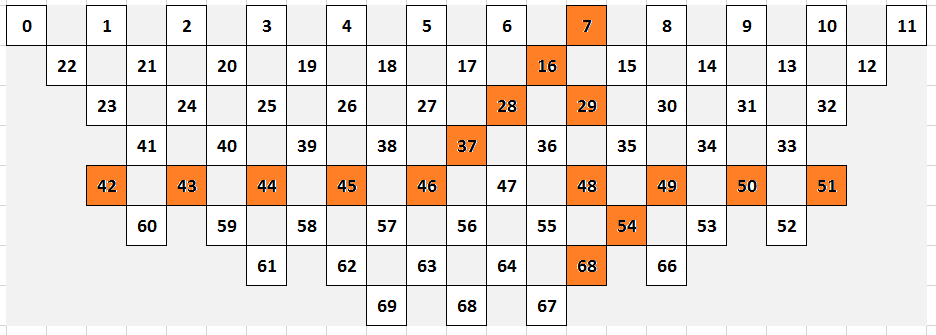
/* LED Matrix diagram for mask
000---001---002---003---004---005---006---007---008---009---010---011------------------ // 12
---022---021---020---019---018---017---016---015---014---013---012--------------------- // 11
------023---024---025---026---027---028---029---030---031---032------------------------ // 10
---------041---040---039---038---037---036---035---034---033--------------------------- // 9
------042---043---044---045---046---047---048---049---050---051------------------------ // 10
---------060---059---058---057---056---055---054---053---052--------------------------- // 9
------------------061---062---063---064---065---066------------------------------------ // 6
---------------------------067---068---069--------------------------------------------- // 3
*/
#include <avr/pgmspace.h> // Needed to store stuff in Flash using PROGMEM
#include "FastLED.h" // Fastled library to control the LEDs
// How many leds are connected?
#define NUM_LEDS 70
// Define the Data Pin
#define DATA_PIN 3 // Connected to the data pin of the first LED strip
// Define the array of leds
CRGB leds[NUM_LEDS];
int heartbeat [] = {42, 43, 44, 39, 26, 18, 5, 27, 46, 63, 56, 47, 36, 35, 34, 33}; //array with the LED adresses to light up
int beat_line [] = {42, 43, 44, 45, 46, 47, 48, 49, 50, 51}; //10 in row line that i was going to ue as static line before beats
void setup() {
//FastLED.addLeds<NEOPIXEL,DATA_PIN>(leds, NUM_LEDS); // Init of the Fastled library
FastLED.addLeds<WS2812B, DATA_PIN, GRB>(leds, NUM_LEDS);
FastLED.setBrightness(25);
}
void loop() {
//FastLED.clear();
for(int i = 0; i < 16; i++) {
leds[heartbeat[i]] = CRGB::Red;
FastLED.show();
delay(28);
}
for(int i = 0; i < 16; i++) {
leds[heartbeat[i]] = CRGB::Black; //turn them off
FastLED.show();
delay(28);
}
//FastLED.show();
delay(500);
}
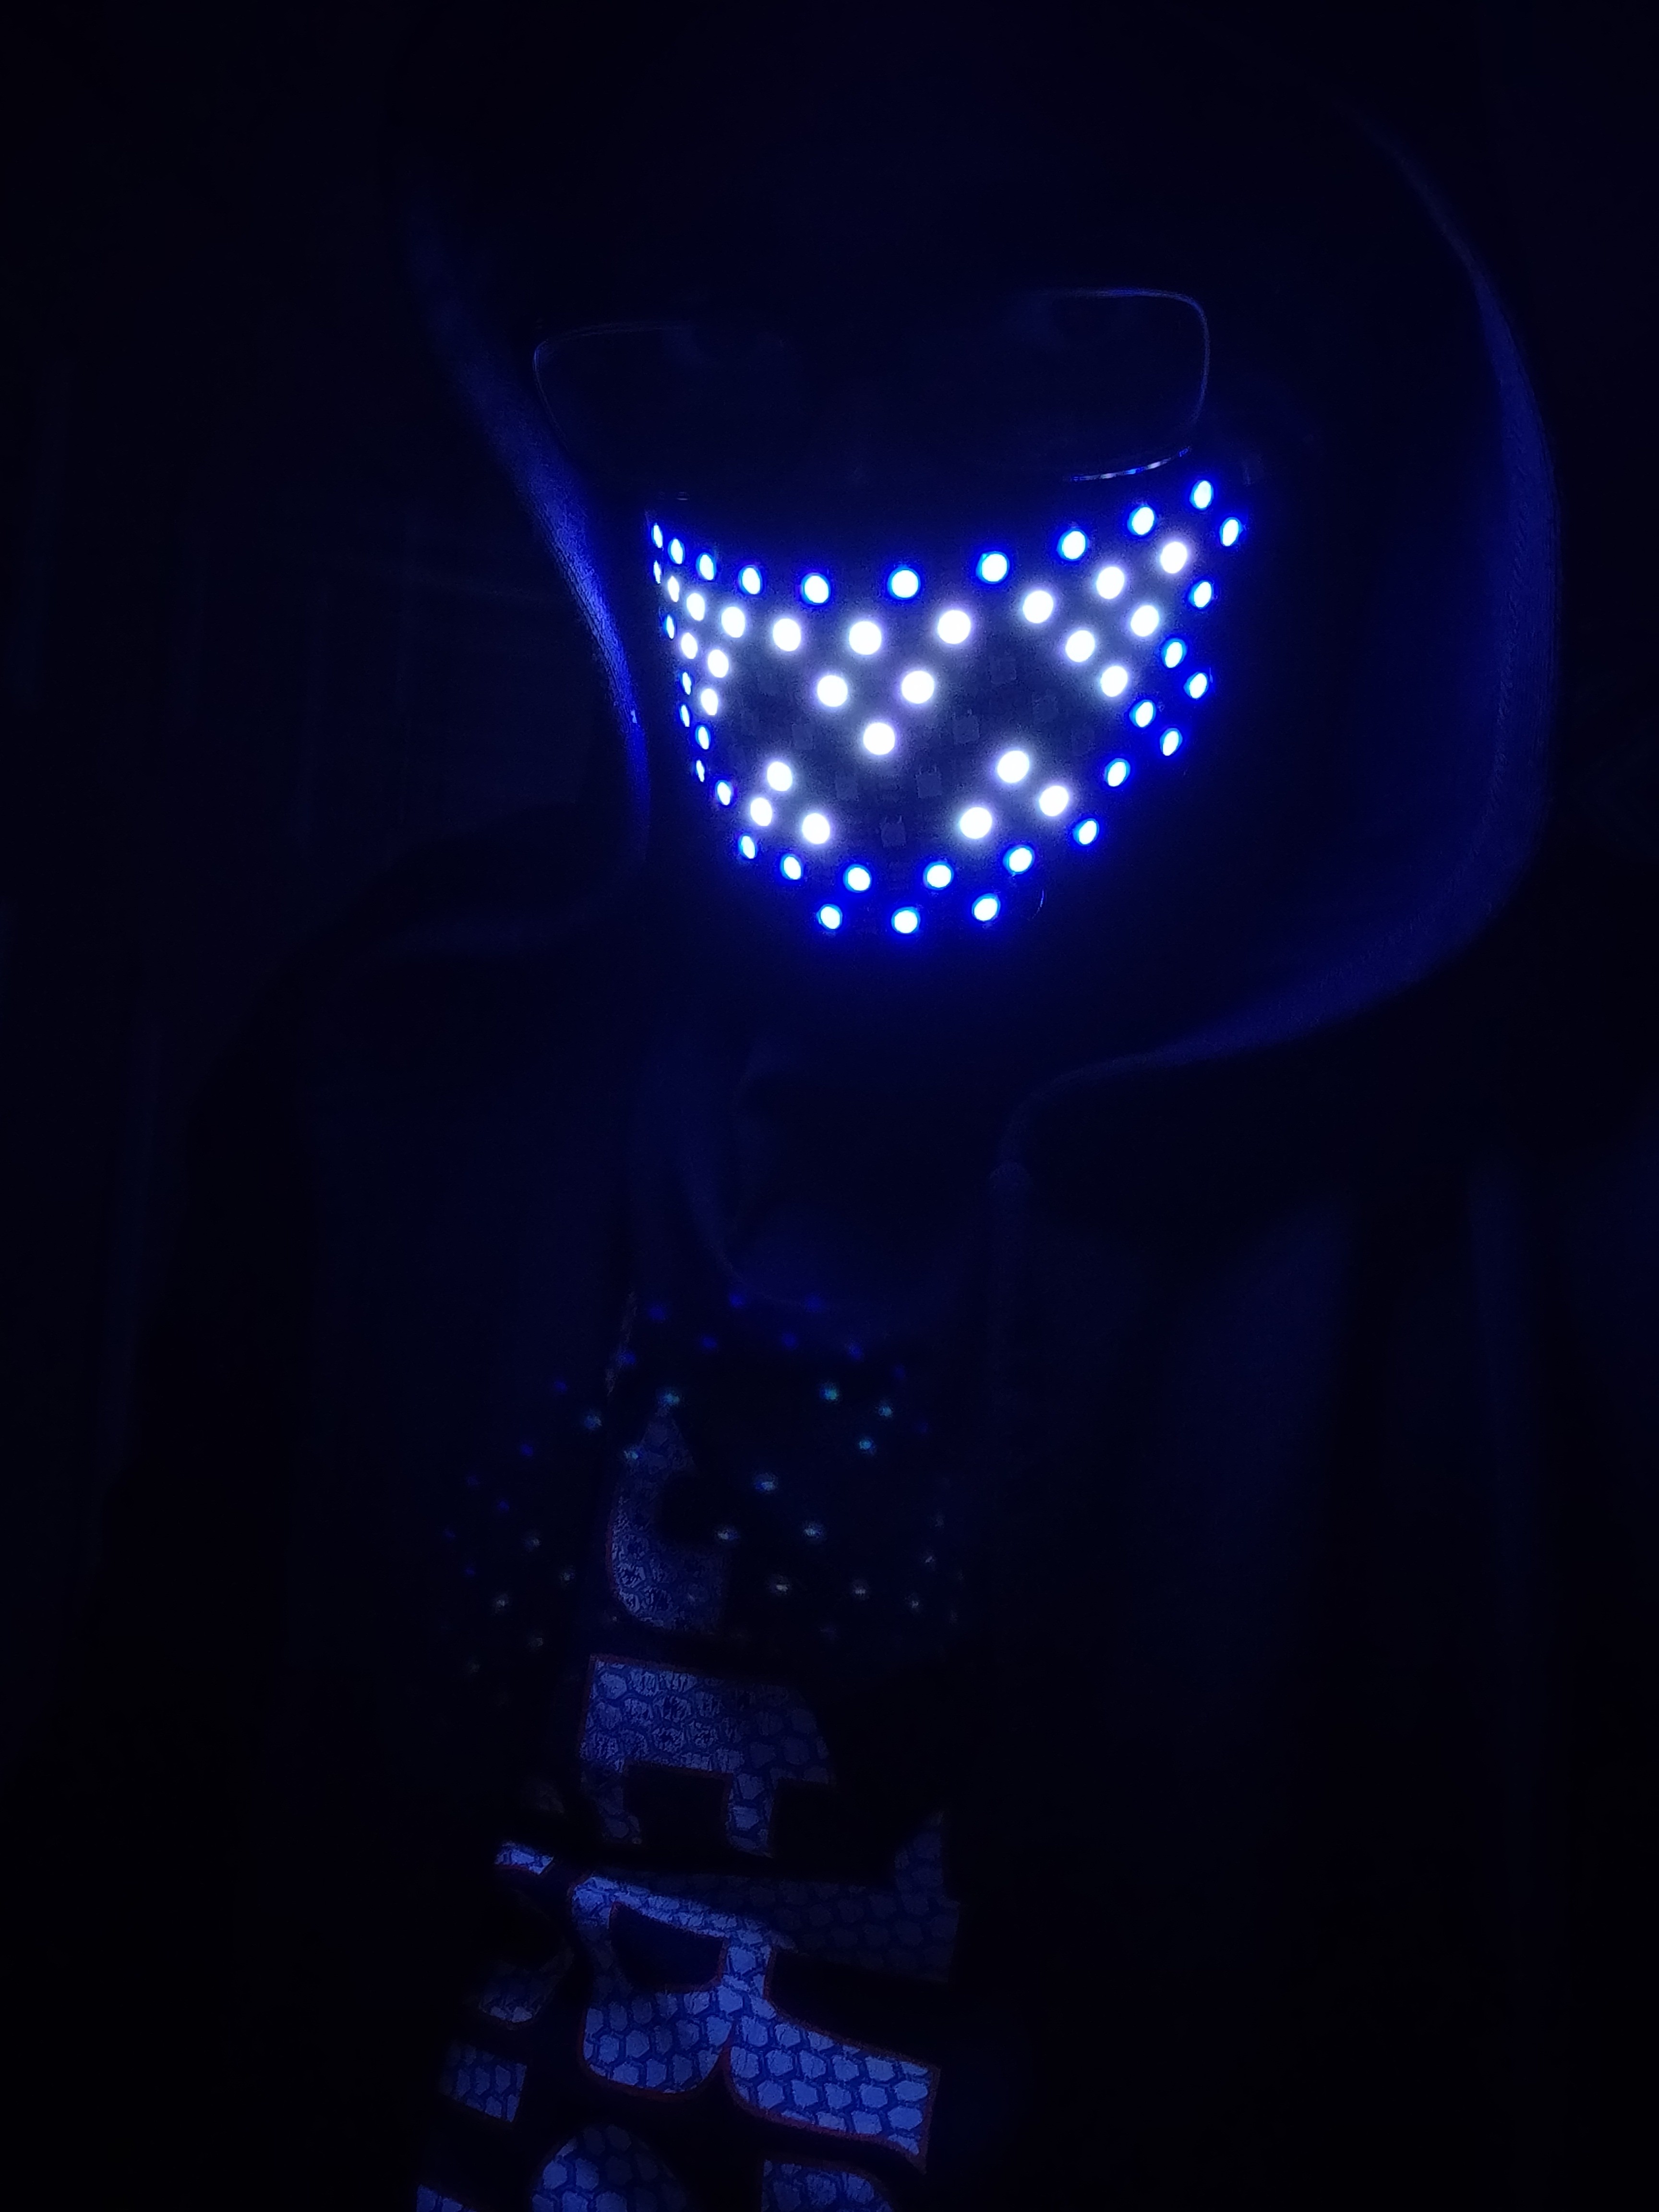
What it should look like

Layout of leds
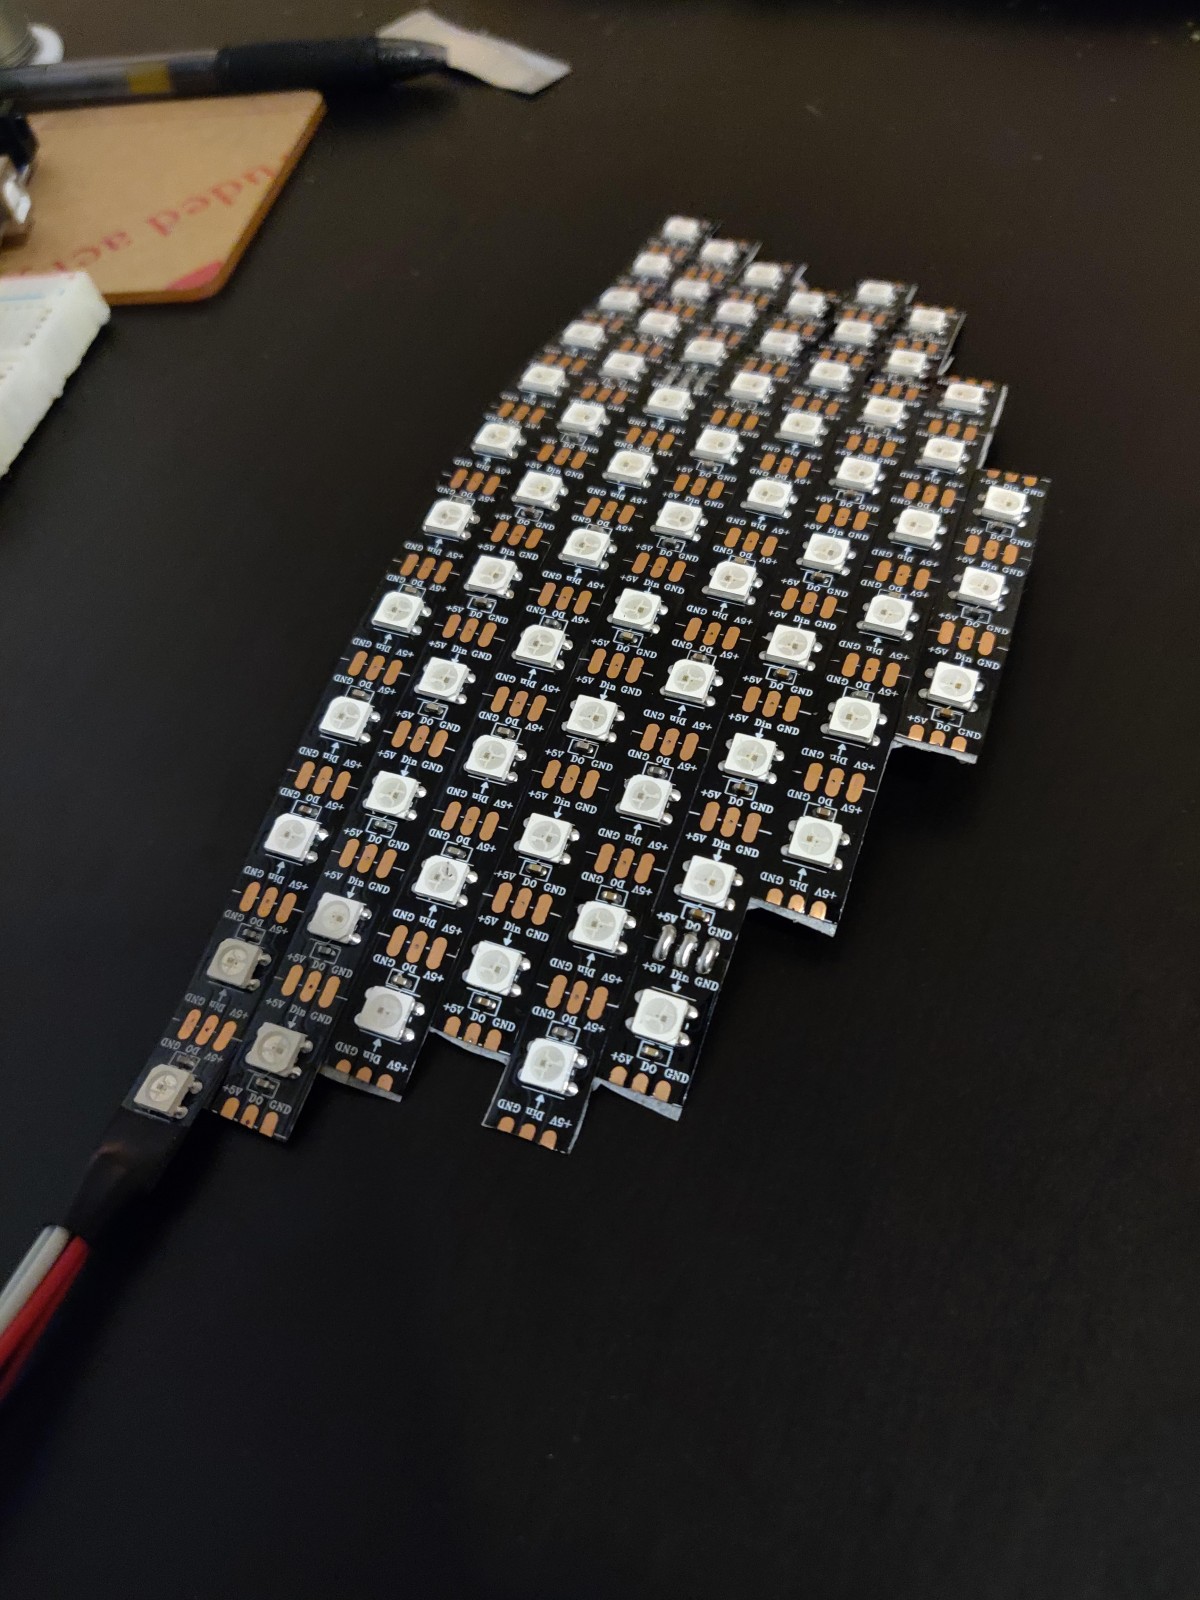
Layout of mask

Video of what I have so far
Click for video