Two steppers, eight transistors, eight diodes, sixteen resistors, and an Arduino.
Full project docs are in progress...
Two steppers, eight transistors, eight diodes, sixteen resistors, and an Arduino.
Full project docs are in progress...
")
Arduino wall plotter, now mounted to a 6' (two meter) chunk of scrapwood and using dry erase while I work out movement routines and pen hardware.
This is one everyone should do... when it's done, it should be able to plot HUGE areas if set up with powerful enough stepper motors. Go rip apart a printer and get down to it!
I like it!
I have thought for years about coming up with some sort of large dot matrix printer gantry that could paint murals on walls. You have identified a wonderfully simple and inexpensive approach. I wonder how the dry erase markers would work on painted drywall?
Well, unless the "mural" is going to be a single color, single continuous line affair, you need a little more:
While there are lots of ways to do this with more complexity and varying degrees of performance, I applaud the elegant simplicity you describe.
My original approach was the gantry arrangment, lowering a horizontal bar on which a "print head" travels back and forth.. was going to set it up by using steppers and threaded rod.. which would take substantially more powerful motors than I'm using at the moment, and is a much more complex design. While I was researching how I might make this work, I came across a link on Hackaday of a similar project, using the suspended line method. It's simple, elegant, and easily made.. doesn't require a machine shop or even tools beyond a screwdriver and soldering iron.. and the motor requirements are so low that pretty much any old stepper motor will do.
The Stepper library, the linked site by Tom Igoe, and a couple others served very well in teaching me what I needed to know about stepper motors. Another site as well as Arduino guided me on the design of the controller, which is just switching transistors.
Actually, I've got a small servo (9g hobby servo) that I am going to use to manipulate the pen in the next step.. but last night I figured out I can no longer reach the line spools, so I made a joystick "pendant" to manually move the pen around the drawing area. I'll need that later on as part of the calibration sequence of the finished device.. and my daughter is happily drawing away using the pendant as we speak, a kind of dry-erase etch-a-sketch....
The goal is move away from a pen to either an airbrush or color-blendable pen arrangment, but dry erase is cheap and easy to work out code with. The "carriage" could carry almost any type of marking system... in a REALLY disturbed moment, I considered that one could guide the barrel of a paintball gun and feed the gun with a solenoid.. a super-duper inkjet printer with a range of 200 yards, anyone? I guess the effective printing range would depend on the dot size generated by a paintball.. they must be able to overlap to draw continuous lines, of course.. I actually envision two versions of this device in time.. one as a "toy" with the dry erase (most likely still monochrome) that I could hang on almost any wall and then does it's thing pretty much as it stands now, with just a pen up/down addition. The other is much more.. esoteric. I'm going to servo-mount a BRUSH, and use Oils and Acrylics. I think I can come up with a blending method that will work, but even if I must manually mix colors to start, I want to actually paint with brushstrokes. The challenges are not THAT big, just going to take a bit of twiddling...
As for source images, there's plenty to do there. Plotters work best with vector drawings, pulling a line from point A to point B, then on to the next line to be drawn, while a printer is dot-matrixed usually. I'll be looking at code for both methods and seeing how it works out.
I really do recommend you build one. I made my first version in less than a day.. and sourced the steppers from trashed printers.. it's recycling to boot!
If you're looking for code to "vectorize" images, you might explore software developed for the RepRap project. (See reprap.org.)
RepRap is a home-buildable 3D printer that uses a plastic extruder head (rather analogous to a plotter pen) to build up parts layer by layer. Here's an overview of how I think it works:
I understand gcodes have their origins in specifying geometries for PC board layout.
Yeah.. Seen the RepRap.. Out of my price range for now. Of course there's nothing stopping anyone using this fishing-line design with a an extruder I suppose... Who knows what nonsense this will lead to!
An intermediate stage video from the other day, just showing a bit of geometric drawing. I think the point that I was try to get across- somewhat reasonable x/y pair plotting- is kind of lost anyway. Other than seeing the very clear "pixelation" of the line (I'm using a slightly modified version of Bresenham's line algorithm.. I'm hoping Bresenham will be as helpful at arcs..), you wouldn't know it wasn't just some kind of rhythmic periodic pendulum or something. Not the effect I was looking for. A better exhibit is in progress.

I'd recommend muting the music, I had youtube assign something Ambient at random, and honestly it's pretty irritating. Looking into how to re-replace the audio. However, it will be superceded in a short time by something much better.. Text Plotting derived from G-code.
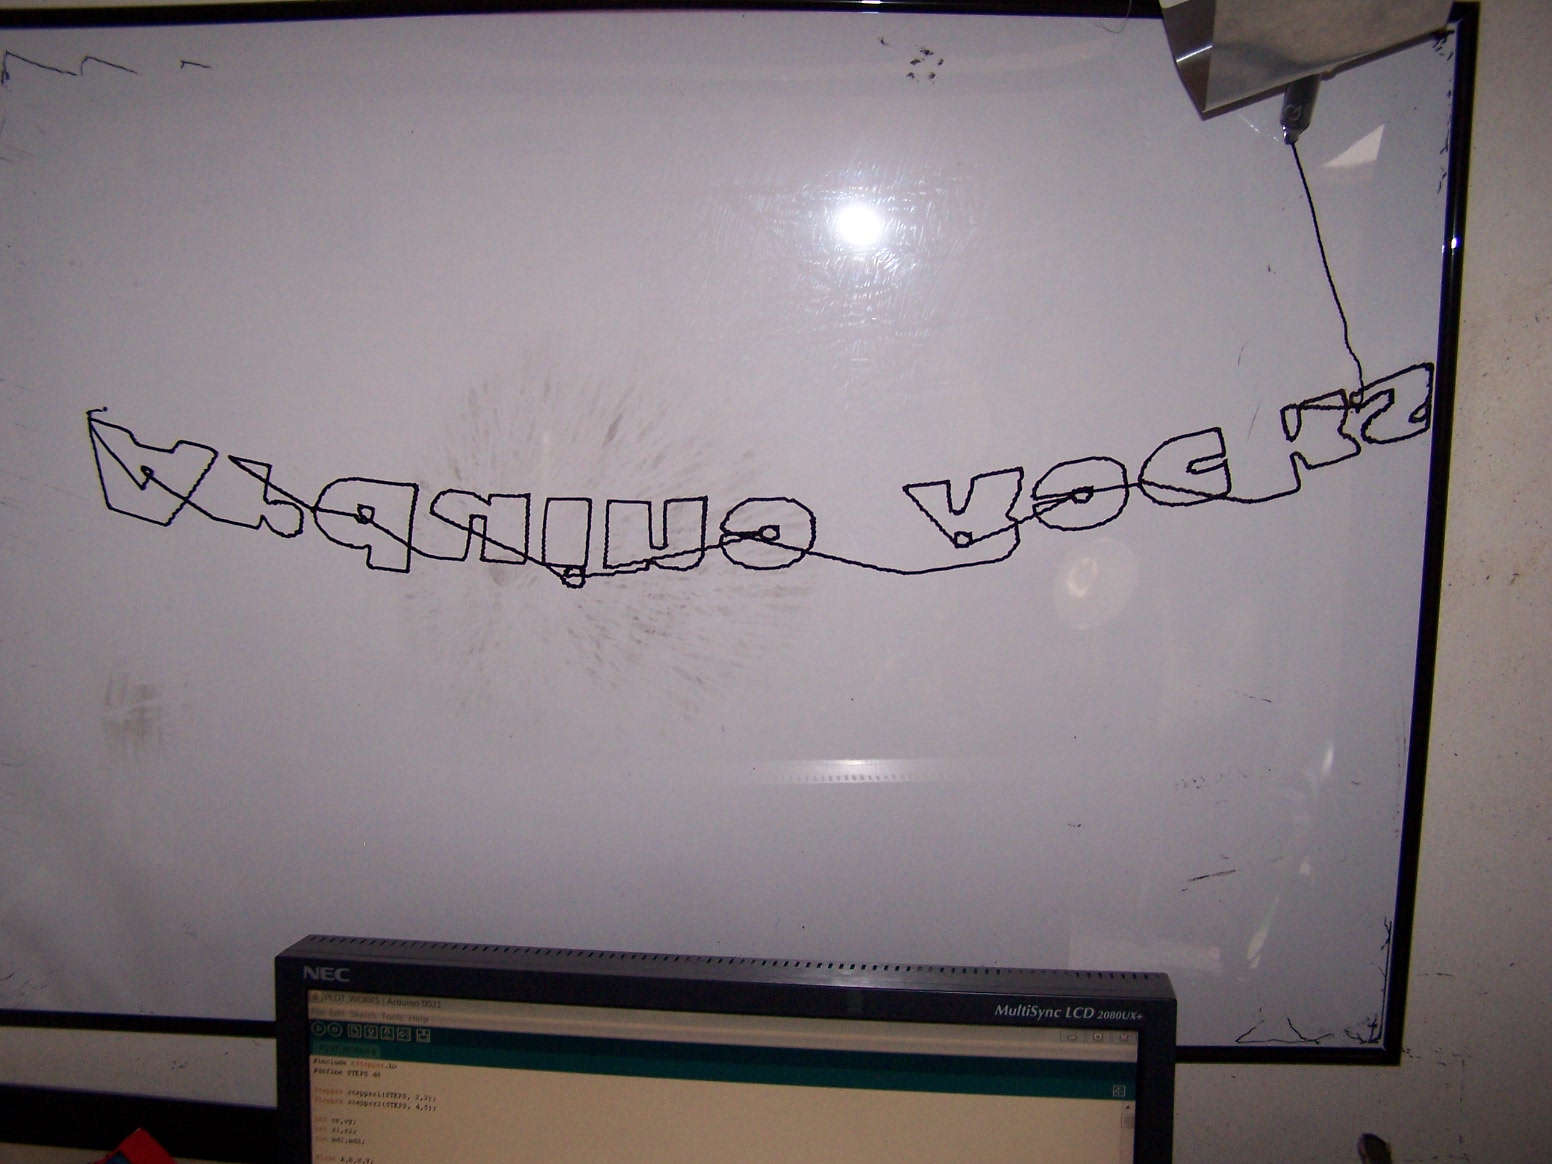
I'm in the process of implementing a very basic g-code interpreter (pen up/down, x,y absolute... that's it at first). The text print ("Arduino Rocks") is actually running as a series of 1200 lines of Arduino code similar to:
line(232,10,235,12);
derived by stripping down a Gcode set produced by DeskEngrave. I cheated and stripped out everything but the x,y pairs, and used an Excel macro to make it into the line statements. All I really need to do is perform that parsing on the Arduino itself.. sscanf will do it. It seemed a reasonable enough idea to test what the output would look like..
As you can see, the first attempt didn't work out as well as I had hoped, but it clearly heading in the right direction and shows proof of concept. I still haven't implemented Pen Up yet, but there's a reason for that. Dry Erase is just testing. A little math will fix up the problem encountered below, at least the being upside down part (LOL):
I do have to address the arc problem.. going to have to come up with a reasonable formula to calculate in to compensate for the geometry. Anyone got a good solution already on hand? As I see it, I just need to compensate for the arc at any given radius, so a formula should be workable.. and probably something I ought to know.. or knew once, long ago, when I needed to, for a grade. Something about the two motors being chords on the arc, which then you can use to get the radius, which you then apply an adjustment for a circle offset by the radius at twice the distance? Wikipedia, and a headache I'm sure, are coming..
Will this be it for the Thinganator? No. We're just getting started ![]()