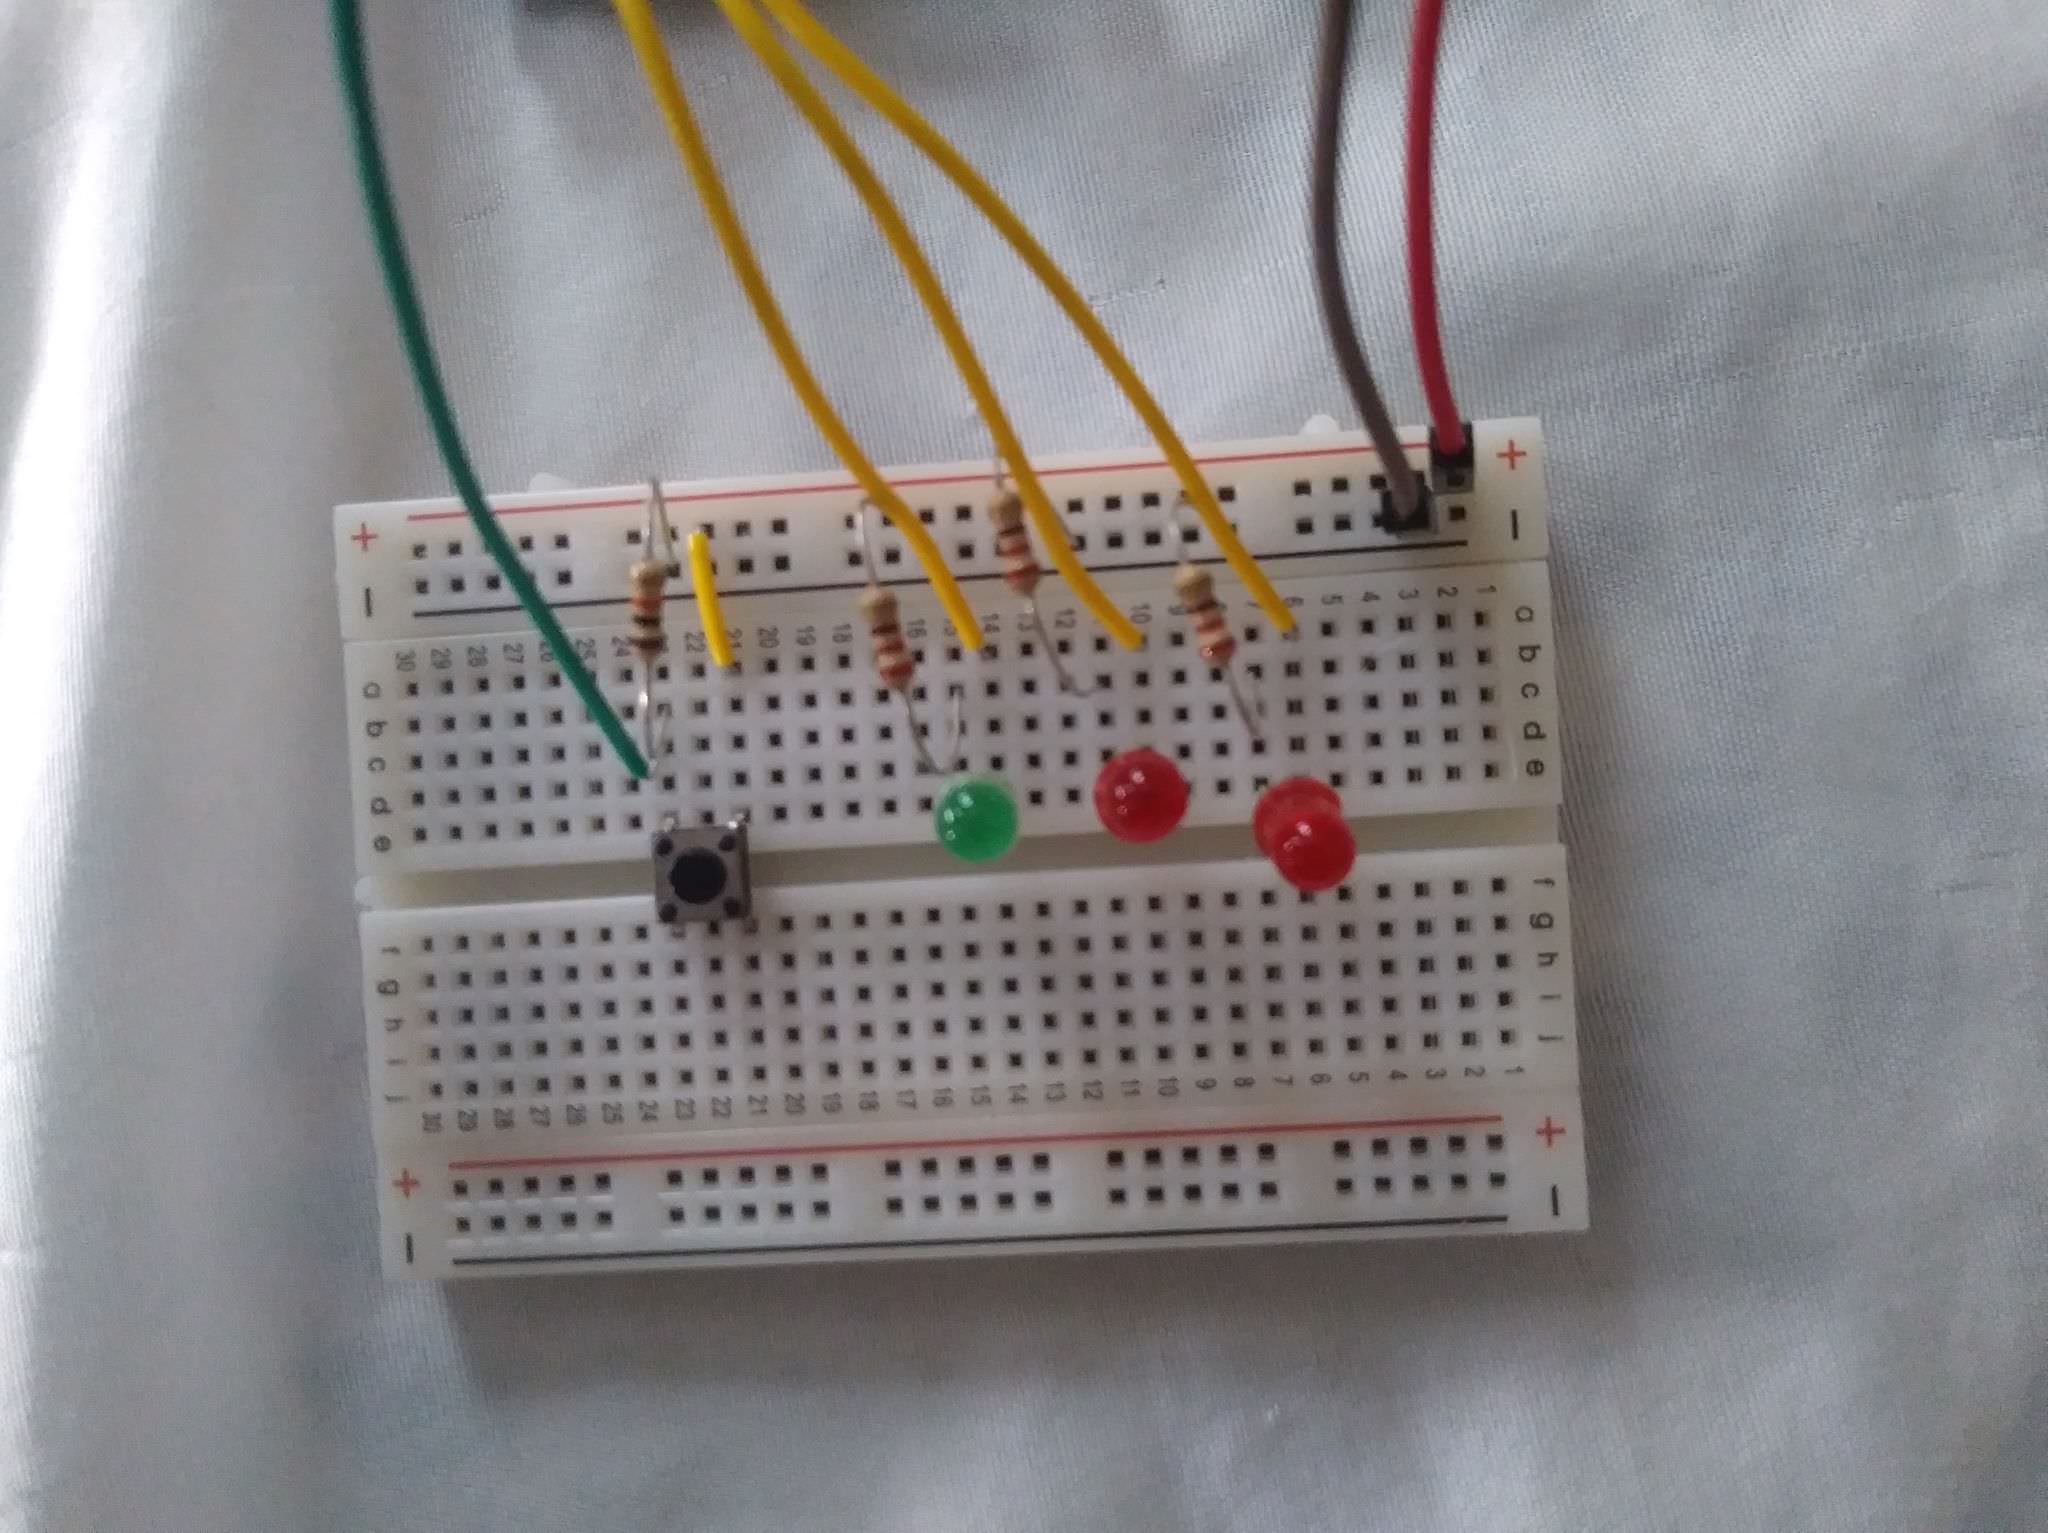
Hey guys, how's it going? Still pretty new to this whole Arduino stuff, but am beginning to understand more. So I started to work on Project 2 from the book and followed every step, but for some reason the LEDS are not turning on at all. I checked the code and everything seems to be fine, check my setup and everything seemed to be fine as well unless I missed something. Any idea of what it could be? Am I missing something pretty obvious? I'll leave pictures below, let me know if need to upload better ones.
You're much more likely to get help if you post the pictures right here on the forum so we don't have to go to another site. Here's a guide on how to do it: http://forum.arduino.cc/index.php?topic=364156
What happens if you power the LED directly on the breadboard, instead of using the Arduino's digital pins to switch it (still use the current limiting resistor)?
pert:
You're much more likely to get help if you post the pictures right here on the forum so we don't have to go to another site. Here's a guide on how to do it: http://forum.arduino.cc/index.php?topic=364156
What happens if you power the LED directly on the breadboard, instead of using the Arduino's digital pins to switch it (still use the current limiting resistor)?
Thanks! Now the post looks much better! And well i'm just using a usb and my laptop as my power source not a battery pack or anything, so I don't think that would work right?
You'll still be using the Arduino board to power the breadboard but you won't be using the microcontroller on the Arduino board to control the LED.
Pull one of the yellow wires out of the Uno.
Plug the yellow wire into one of the holes on the breadboard next to the red line (the 5 V power rail).
Plug the USB cable of the Uno into your computer to power the breadboard.
If your circuit is wired correctly the LED should now be on.
When you're having a problem it's best to remove as much of the unnecessary complexity as possible for a sanity check. With the microcontroller in the mix you don't know whether the problem is with the LED circuit, the button circuit, or the Arduino sketch. You could spend a bunch of time troubleshooting all that only to discover the problem was something simple like a bad jumper wire or an LED plugged in backwards.
pert:
You'll still be using the Arduino board to power the breadboard but you won't be using the microcontroller on the Arduino board to control the LED.
Pull one of the yellow wires out of the Uno.
Plug the yellow wire into one of the holes on the breadboard next to the red line (the 5 V power rail).
Plug the USB cable of the Uno into your computer to power the breadboard.
If your circuit is wired correctly the LED should now be on.
When you're having a problem it's best to remove as much of the unnecessary complexity as possible for a sanity check. With the microcontroller in the mix you don't know whether the problem is with the LED circuit, the button circuit, or the Arduino sketch. You could spend a bunch of time troubleshooting all that only to discover the problem was something simple like a bad jumper wire or an LED plugged in backwards.
So it ended up being something really simple that i'm embarrassed to admit, turns out that the Anode of the LEDS weren't in the write place and that's why they weren't turning on. I only figured this out after trying what you told me and that not working. I retraced my steps and looked at the book again. Still I wouldn't had stopped to really analyze the problem if it wasn't for your advice, so thanks man!