I have recently developed an open source device based on arduino, with an ATMEGA1284P chip. I need to build a number of them and program/test them as well. I did some research and found this article from sparkfun to be quite useful:
https://www.sparkfun.com/tutorials/138
For me, my device is rather large, not a small breakout board. So I need something for its size. The device has LCD, rotary encoder, RTC, SD card, etc. All need some tests before I flash a standard firmware. So I need some software that can flash at least two different firmware to a target with some human interactions. Luckly Nick Gammon has done all the great work with hex loader code. You can turn an arduino into a hex loader that programs fuse values on a target, and load hex files from an SD card to a target. Here is his repo:
I used his Atmega_hex_uploader code. It is interactive. You open the serial port and type in commands and see printouts. Very nicely done. Thanks Nick!
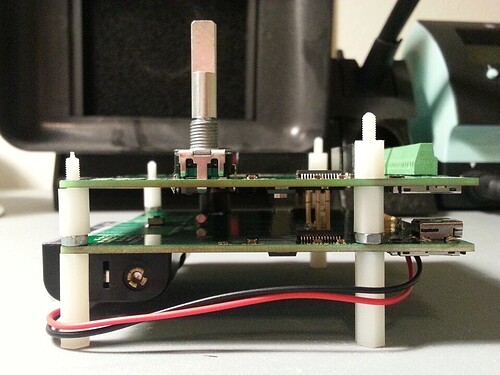
For my programmer, I thought about just using an arduino and a jumper wire. Then I have to solder male pins to my device's ICSP pins. It's a bit unnecessary and time-consuming, say if I need to program 100 devices (at least a couple extra hours to solder the pins). So I based on my original device design, moved the ICSP header to a different location, and placed a target ICSP header where the original device has ICSP header. I then kept the SD card, RTC, power supply, FTDI chip, and the MCU from the original design. The result is a device that can program other devices. I put it on standoffs. Since this device has the same screw hole locations, I can slide a newly-assembled device down the standoffs to make contact with the programmer. Then use nuts to hold the new device. I can then program it using serial port (fuses, hex code etc.) The programmer also has 2 push buttons. In the future, I will get rid of serial port and have the programmer standalone. If I press button 1, it will flash the target with one hex file that runs a series of tests. Then if all tests pass, I press the second button to flash the target with standard firmware and move on to the next board. I also have 4 LEDs (not yet soldered on) and a buzzer to show audio and visual indications of success and failure firmware flash. I also have a 8-dip switch row to further customize what I do with the target, such as program different standard firmware versions to the target for different variations of the device etc.
Here are some pictures:
Front side (left side has programmer's own ICSP header, right side is 6 pogo sticks)
Back side (SD card, MCU, two buttons, RTC, power supply):
Programmer with a target board on top:
Programmer with target board on the side (you can see the gold pogo sticks to the left of the right standoffs):
In the future, I will also write a more capable hex programmer with Nick's code to do:
-
At the push of button 1, program target fuses and flash FLASH/EEPROM with the current time and date saved to target EEPROM. This way the target can program its own RTC based on the time of the programmer's RTC, with at most a few seconds off. The rest of the program will self test target.
-
At the push of button 2, program target fuses and flash FLASH with a standard firmware.
-
Audio indicator of success/failure. With audio, you don't have to watch the programmer. You can do other stuff and be reminded by success/failure tunes.
-
Programming mode (which standard firmware, what fuse setting etc.) based on the 8-dip switches.
I'll post some videos when I get a chance.


