analogRead() very noisy ADC values on Nano 33 BLE

I faced very noisy data when reading the analog value from a poti with the Arduino nano 33 BLE. But with the Arduino Micro it is working fine (only quantization error).

For further investigations I connected the analog input pin on the internal 3,3v source and had the same bud issues. I tried 10Bit and 12Bit ADC resolution. The ADC value drifts from 981 to 1008 (10Bit) and 3927 to 4052 (12Bit)!

I powered the Nano per USB and external 5V power supply. On the one hand I tested with the internal 3,3v source and on the other hand I used an external 3,3v source. With no difference.
I also tested with a capacitor to ground, with no difference. All different analog input pins (beside the IC² pins with Pullup) show more or less the same bad results.

It seems like to be a contact problem, but I’ve re soldered the connection pins on the nano. With no difference. And on the Micro it works fine (same test setup). This seems to be so simple, but it doesn’t work, it makes me crazy!

I’m hoping someone can help.

Could you post your test code and let me know what value potentiometer you used? I can run some test on my board to compare.

I remember there were some noise issues with the MPM3610 step down converter on the Nano 33 IoT. The Arduino board does not seem to follow the layout guidelines from the manufacturer datasheet. I suspect this could be similar on the BLE board.

Here is the post for additional information.

https://forum.arduino.cc/index.php?topic=650488.0

Thanks a lot for the fast reply!

Please find enclosed the test code and my serial output data. You do not need a potentiometer. Just connect the analog input to the internal 3,3V source.

I will have a closer look on the issue with the IoT board. May this helps…

Thanks!

ADCTestNano33BLE.ino (565 Bytes)

serial.txt (2 KB)

OK, here are my test results.

I get values from 993 to 1023. Attached you can find a screenshot from my oscilloscope. You can see the following.
There is a voltage ripple from 3.18V to 3.3V with a frequency of 2MHz (this is the switching frequency of the MPM3610).

When you compute the values seen by the A/D.

3.3V / 1024 * 993 is 3.20V.

The A/D converter is seeing exactly what the oscilloscope is seeing.

Thanks Klaus_K! Your feedback makes sense. But the ripple voltage measured with the oscilloscope is crazy. I’m wondering how to solve this problem.

May I’m wrong but I think the ARef Pin has no connection to the microcontroller, correct? I can’t find in the schematics the connection.

In the documentation “Nano_BLE_MCU-nRF52840_PS_v1.1” (page 379) I found the microcontrollers description of the ADC reference voltage settings. Which are internal reverence of 0,6V or external source VDD. I think the external voltage VDD is used. Do you know which option is used on the Arduino board?
I’m not this deep into the Arduino world, may do you know where this register is set?

My other option is to try some filters, but I want to avoid this as I have to measure time critical values.

Or I will use an external ADC with IC² connection.

The nRF52840 does not have a separate ADC reference pin. The ARef pin does not have a connection in the schematic and therefore the pin is likely NC.

I looked a bit at the source code. The mbed source are so many files it’s hard to find any useful information. It’s probably easiest to figure out how to read the peripheral registers and then read the values from there and compare to the datasheet.
This is where a debugger is really useful. You can just poke in the registers. Especially with an ARM Cortex-M processor. You can just write into memory while the processor is running. Not necessarily safe when you have a motor connected, but useful for almost everything else.

The ADC does allow differential measurement. This should allow you to remove the noise from the power. You connect one pin to the potentiometer and one to the 3.3V pin. Because they now both fluctuate the ratio between them should be stable. The ADC has a lot of registers and the library files have many functions. I am not sure which is the fastest way to get the right configuration for this.

I agree, the differential measurement will be a nice solution without any hardware changes.

I did some reading and tried to understand the necessary steps to start and configure the ADC and read the values. But I’m not this deep into ADCs. Furthermore, I have to use IC² which is also connected to the analog pins and may is interfered by my manual register changes. And I control two 5kW motors. I don’t want to have an unstable system.

If someone can assist on setting the ADC registers, I would appreciate it. Because I’m not capable of doing it.

So due to safety I will go for a hardware fix of this problem. May I will power the microcontroller at 3,3V pin via an external source (which I need anyhow), and cut the jumper SJ4 or I will use an external ADC with IC² connection.

Thanks a lot for your help!!!

In order to get a better 3.3V line, you should desolder R9 (39K resistor from AAM pin of the mpm3610 to ground). That will make the mpm3610 works in ccm mode always, which is the low noise mode.

Sorry to open this old topic. Is there any update on this?
I'm wondering if this also explains the noisy readings of the other sensors on the board, like the LSM9DS1?

In the BLE sense scheme the Aref appears to be connected, but the lead disappears in the big blue line. I did not find where it comes out.

I'm not so fond of modifying the board itself.
Is there anything else possible? A big Elco on the 3.3v did not work.

I don't understand how you could do a differential measurement. Between the pin and what?

What I do now is simply average a lot of measurements, but it needs to be in the thousands for a stable result.

femmeverbeek:
Sorry to open this old topic. Is there any update on this?

Unless somebody reviews the board layout, I do not think there will be one.

femmeverbeek:
I'm wondering if this also explains the noisy readings of the other sensors on the board, like the LSM9DS1?

You could cut the 3V3 jumper/bridge on the underside of the board and power it with a battery or through a 3.3V linear regulator on the +3V3 pin to find out. I did not feel like modifying my board yet. Maybe I should try.

femmeverbeek:
In the BLE sense scheme the Aref appears to be connected, but the lead disappears in the big blue line. I did not find where it comes out.

The nRF52840 ADC does not have a separate Vref input.

femmeverbeek:
I'm not so fond of modifying the board itself. Is there anything else possible? A big Elco on the 3.3v did not work.

Use a separate power source and disable the MPM3610 (see above).

femmeverbeek:
I don't understand how you could do a differential measurement. Between the pin and what?

I did some tests, and this did not work. The fluctuations are too fast. They occur during the conversion time, which makes them almost impossible to filter out.

femmeverbeek:
What I do now is simply average a lot of measurements, but it needs to be in the thousands for a stable result.

Yes, it’s a real bummer. Arduino should have made this a 5V maximum input voltage product. The MPM3610 works over a large input voltage range and provides quite a lot of power, but the noise in this implementation is bad. It would be interesting to see whether a better layout could solve this issue.

I had issues with the Nano 33 IoT, which I'm guessing has a very similar architecture. I managed to get it to work okay in my application. In case it helps, the details are here: Extremely inconsistent analogRead() on Nano 33 IoT - Nano 33 IoT - Arduino Forum

Good luck!

Hello

I have looked at both topics and yes it seems that there is some kind of problem with the internal 3v3 regulator, anyway according to the nordic datasheet what the nrf52840 shield has is not exactly an adc but a saadc (successive approximation adc).

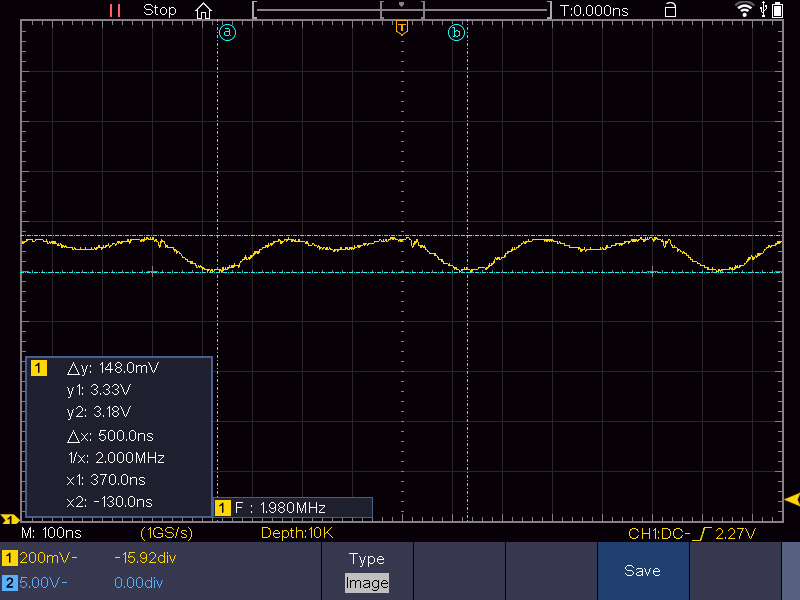
The saadc driver from nordic is very complex but I think that avoiding the oversampling and the burst mode in a nutshell it stores values in a buffer to sample them. So I show every second the average of a set of values read in the adc port with a simple code, apparently in the arduino core mbed library dont do this. I am testing an O2 KE-25 sensor that is quite sensitive and accurate with a range of 0 to just under 80mV for the full range 0 - 100%

It's true that comparing to the no sampled results is much more stable but still the results they gave were still a bit unstable so as they said about the problem with the internal regulator I put an external one and connect via lipo, althought in the arduino's pinout says that 3v3 is an output pin connecting the lipo to this pin through a 3v3 regulator turns it on, so it looks like it can be power like this, after that I connected it with the usb to see the data in the serial, the values came out much better, I had made tests with a 3uF capacitor that offered a little more stable results but with the sampling and the external regulator they come out much better without the need of a capacitor.

Here are the code and the results

simple sampling

/*
  Analog Input
*/

#define SAMPLES 500

int sensorPin = A7;   // select the input pin for the o2 sensor
int saadcBuffer[SAMPLES];  // variable to store the value coming from the sensor
float voltage = 0;
float average = 0;
int i = 0;
unsigned long int timer = millis();

void setup() {
  // Set the analog reference to 3.3V (default)
  // analogReference(AR_VDD);
  // Set the resolution to 12-bit (0..4095)
  analogReadResolution(12); // Can be 8, 10, 12 or 14
  Serial.println("Reading O2");
}

void loop() {
  // store the read value from the sensor
  if (i<SAMPLES)
    saadcBuffer[i] = analogRead(sensorPin);
  i=i+1;

  if (millis() - timer > 1000) {
    for (i=0; i<SAMPLES; i++)
      average = average + saadcBuffer[i];
    average = average / SAMPLES;
    voltage = (average * 3300.0F ) / (4096.0F);
    Serial.println();
    Serial.println("O2 mV: ");
    Serial.print(voltage);
    Serial.println();
    i = 0;
    timer = millis();
  }
}

Power through usb no sampling and capacitator

O2 mV:
129.71

O2 mV:
125.68

O2 mV:
123.27

O2 mV:
110.38

O2 mV:
114.40

O2 mV:
117.63

O2 mV:
119.24

O2 mV:
93.46

O2 mV:
121.66

O2 mV:
108.76

O2 mV:
111.99

O2 mV:
124.07

O2 mV:
116.82

O2 mV:
121.66

O2 mV:
123.27

O2 mV:
116.02

O2 mV:
107.15

O2 mV:
123.27

O2 mV:
112.79

O2 mV:
93.46

O2 mV:
123.27

O2 mV:
125.68

O2 mV:
122.46

O2 mV:
120.04

Power through usb sampling

O2 mV: 
112.34

O2 mV: 
112.75

O2 mV: 
111.90

O2 mV: 
112.50

O2 mV: 
111.43

O2 mV: 
113.77

O2 mV: 
115.36

O2 mV: 
114.50

O2 mV: 
112.05

O2 mV: 
113.71

O2 mV: 
113.44

O2 mV: 
112.55

O2 mV: 
113.25

O2 mV: 
112.77

O2 mV: 
112.77

O2 mV: 
112.74

O2 mV: 
113.37

O2 mV: 
112.42

Power through lipo no sampling and capacitator

Reading O2

O2 mV: 
107.96

O2 mV: 
107.96

O2 mV: 
110.38

O2 mV: 
107.96

O2 mV: 
111.18

O2 mV: 
110.38

O2 mV: 
107.15

O2 mV: 
106.35

O2 mV: 
105.54

O2 mV: 
110.38

O2 mV: 
108.76

O2 mV: 
106.35

O2 mV: 
105.54

O2 mV: 
107.15

O2 mV: 
109.57

O2 mV: 
108.76

O2 mV: 
109.57

O2 mV: 
111.18

O2 mV: 
109.57

O2 mV: 
107.15

O2 mV: 
110.38

O2 mV: 
110.38

O2 mV: 
107.15

O2 mV: 
107.96

Power through lipo sampling

O2 mV: 
109.25

O2 mV: 
108.92

O2 mV: 
109.07

O2 mV: 
108.59

O2 mV: 
108.65

O2 mV: 
108.57

O2 mV: 
108.77

O2 mV: 
108.65

O2 mV: 
108.79

O2 mV: 
108.69

O2 mV: 
108.91

O2 mV: 
108.58

O2 mV: 
108.63

O2 mV: 
108.63

O2 mV: 
108.42

O2 mV: 
108.49

O2 mV: 
108.60

O2 mV: 
108.58

O2 mV: 
108.60

O2 mV: 
108.81

O2 mV: 
108.82

O2 mV: 
108.67

O2 mV: 
108.44

It looks like you're confirming what was already found.
With this fast rate of disturbance you can't correlate the measurement with it. The only way is to use the average of a large number of samples as you did yourself.

The 3.3V pin can serve as output and input.
Output for reference and powering low power devices such as leds or sensors on the condition that the USB or the Vin is connected.
To use as input for powering the processor bypassing the onboard voltage regulator. You should cut the SJ4 jumper the disconnect it.
Some of the other Arduino processors have a separate reference connector which you can use for analog measurements, but not this one. The 3.3 V powering the processor is also the reference.
A more stable supply like the LiPo will improve the measurement result.

The suggestion of desoldering R9 was shown to have little or no effect.

I've had a similar problem using a Nano 33 IOT when reading values from a pot. My pot is quite old so I've put this down to it being noisey so this is something to look at. I put a 1uF capactitor across it and not sure this did anything so I'm now averageing/de-bouncing and also ignoring any change less than 50, which is ok for my application.

If there is high frequency (eg. in the MHz range) noise, as I think has been suggested, then a uF value electrolytic capacitor probably won't have much effect, some like a 100nF ceramic capacitor should work much better.

After all the forum comments I'll put a scope across mine to see if it's the same.

I've also found this board VERY noisey w.r.t. RF noise. I'm doing some projects for use in microlights/gliders and this makes the airband radio virtually unusable. I've seen this before with some 12V to 5V (USB) convertors, eg. cigarette lighter types. It does seem that the circuit layout is quite critical in this respect.

I presume the Nano 33 IOT should conform to RFI regulations, although I don't know what these actually are.

I'm not sure at what point the "radios" for the Wifi/Bluetooth are switched on, if this could be a problem.

I have used a standard Nano without any major RF problems and also a Nano Every which also seems to be ok, but will check this one again.