Hi everyone!
i have an ATMEGA328P which I want to use as a weather station which gets data from sensors and send info to another Arduino via WiFi.
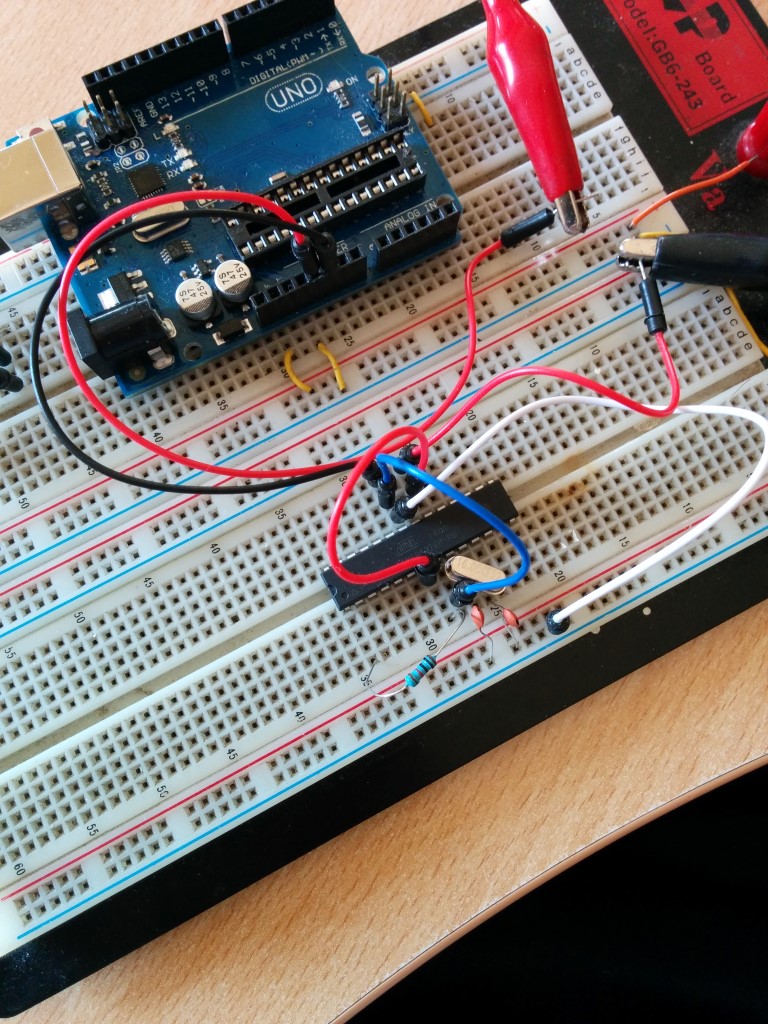
I started to study the power consumption of the ATMEGA328P itself, so I connected it on a breadboard with the minimal configuration as shown in the attached picture
then looking on the Internet i found the following test code using the JeeLib library which claims to reduce the power consumption down to 0,043mA so i decided to test it
#include <JeeLib.h> // Low power functions library
int led_pin = 13;
ISR(WDT_vect) { Sleepy::watchdogEvent(); } // Setup the watchdog

void setup() {
 pinMode(led_pin, OUTPUT);
}

void loop() {

 // Turn the LED on and sleep for 5 seconds
 digitalWrite(led_pin, HIGH);
 Sleepy::loseSomeTime(5000);

 // Turn the LED off and sleep for 5 seconds
 digitalWrite(led_pin, LOW);
 Sleepy::loseSomeTime(5000);
}
the problem is that even if I use that sketch, with LED off the minimum consumption I have is 13.47mA
at the moment i am taking Vcc (5v) from an arduino Uno board, but my tester is measuring only the current going into the external ATMEGA328P
i've just attached a picture of the full circuit
the resistor is a 10K resistor and it is connected to Vcc
all is connected is that 10K resistor, a 16MHz crystal and 2 10 uF capacitors
niddu:
i'm going to test your guide and let you know if something changes.
Thanks
Just tested step by step and reached the point where i should load Sketch B on a breadboard, but my ATMEGA is still taking 13.06 mA instead of 0.360 mA as you mentioned
However, speaking of 10 μF capacitors, you should have a capacitor directly across the 5V on the chip as well as a 0.1 μF capacitor. And the 10 pF or 22 pF capacitors - whatever they actually are - should go to the adjacent ground row for the chip, not the bus rail and that long looping wire.
Now, you have a sketch that will slowly flash the LED. Does it?
To test the current consumption, you need to set it up with the meter in series and the LED and its resistor in place. Once you determine that the LED is actually flashing at the specified rate, then you pull out the LED without disconnecting the power and see what the current is, This is the only way to make sure your circuit is doing what you think it is.
My fault, I don't know why I wrote 10uF, but the 2 capacitors were 22pF each, sorry.
I will try to connect them directly to pin #8, but I hope it will not make the difference.
My current sketch does not light any LED, I'm using Sketch B provided by Nick Gammon
Paul__B:
As I mention, the problem with that sketch, is that you have no idea - no indication - whether it is actually executing at all.
That's why I suggested you implement the flashing circuit, see it flashing, and then - while it is operating - remove the LED.
so, i fixed the 2 capacitors connections, added a LED and loaded the blink led sketch (my initial one)
#include <JeeLib.h> // Low power functions library
int led_pin = 13;
ISR(WDT_vect) { Sleepy::watchdogEvent(); } // Setup the watchdog

void setup() {
 pinMode(led_pin, OUTPUT);
}

void loop() {

 // Turn the LED on and sleep for 5 seconds
 digitalWrite(led_pin, HIGH);
 Sleepy::loseSomeTime(5000);

 // Turn the LED off and sleep for 5 seconds
 digitalWrite(led_pin, LOW);
 Sleepy::loseSomeTime(5000);
}
the result is still the same, about 13 mA when the led is OFF
I agree with Paul__B, we need to confirm you are actually running the posted code. How are you putting the sketches on the chip? I don't see any ICSP or FTDI interface on your board. Change the sketch to blink the LED 5 times in setup, with say a 1 second delay in between each one. Wire up a LED and resistor (say, 330 ohms or 1k even). Check that the LED blinks. If not, solve that first.
Can you measure that resistor on your meter? Maybe my eyes are going but it doesn't look like 10k to me.
After a lot of tests without the desired result I took out a brand new atmega328p, uploaded the boolloader and loaded the same test sketcj started working straight away...
Probably there was something wrong with the previous chip. Thanks for the support and for Nick's guide which is really well explained!