I am creating a retro fit kit for a baby car seat. Most of the components of the kit should fit inside the handle of the seat; the components include the Arduino ,wires, breadboard and a bunch of sensors. So, my question is how do i fit these components in such a tight space?
Use a compact microcontroller instead of a bulky Arduino-like board and avoid using a breadboard (as it is not suitable for a functional project; breadboards are primarily meant for quick testing purposes).
Additionally, solder the wires directly to the sensors.
The XIAO series from Seeed Studio is one of the smallest development board options available.

I would make a PCB (Printed Circuit Board) using the smallest SMD (Surface Mounted Devices) I could work with. When you have the layout finished you will know if it will fit before actually making the board.
Boards based on de Uno form factor are bulky. An alternative can be a MKR WiFi (if you require the WiFi).
Don't use a breadboard, wires can come loose too easily. Use protoboard (and solder wires) or even better, a dedicated PCB
MY question is: do you have the project working correctly right now? I have seen printed circuit boards 4-5 inches long, but 1/4 inch wide. You can create a similar project. Be sure to use double sided boards.
Fitting a project into a tight space can be a challenge, but with careful planning and creative problem-solving, it is often possible. Here are some steps to consider when trying to fit a project into a constrained space:
- Define project goals and requirements: Start by clearly defining the objectives and requirements of your project. What is the project's purpose, and what are the essential elements that must be accommodated in the limited space? Understanding these fundamental requirements is crucial.
- Evaluate the available space: Measure the available space accurately and take note of any constraints, such as walls, columns, or other obstructions that may impact the project. Understanding the limitations of the space is essential for planning.
- Prioritize project components: Identify the most critical elements of the project and prioritize them. Some components may be essential, while others may be nice to have but not critical. This will help you focus your efforts on what matters most.
- Consider modular or flexible designs: Modular or flexible designs can be helpful in tight spaces. These designs allow for adjustments and reconfigurations to make the most efficient use of the available area. For example, modular furniture can be rearranged to fit different spatial constraints.
- Use vertical space: In tight spaces, it's often a good idea to make use of vertical space. Install shelves, cabinets, or storage units that extend upward to maximize storage and workspace while minimizing the footprint on the floor.
- Optimize layout and flow: Carefully plan the layout to ensure efficient flow and functionality. Consider traffic patterns and how people will move within the space. Eliminate unnecessary clutter and create a clean and organized environment.
- Custom solutions: In some cases, you may need custom-made furniture, equipment, or fixtures that are specifically designed to fit the available space. Custom solutions can be tailored to the exact dimensions of the area.
- Multifunctional furniture and fixtures: Look for furniture and fixtures that serve multiple purposes. For example, a sofa that can also be used as a bed or a dining table with built-in storage can help maximize functionality in tight spaces.
- Lighting and color: Use lighting and color schemes to create the illusion of a larger space. Well-placed mirrors, light colors, and strategic lighting can make a small area feel more open and airy.
- Consult with experts: If the project is particularly challenging or requires structural modifications, it's a good idea to consult with architects, interior designers, or contractors who specialize in working with tight spaces. They can provide valuable insights and expertise.
- Regular maintenance and organization: Once the project is in place, it's essential to maintain a high level of organization. Regularly declutter and reorganize to ensure the space remains functional.
Fitting a project into a tight space requires creativity and careful planning. By defining your objectives, prioritizing, and making efficient use of the available space, you can successfully complete your project while optimizing the limited area.
Hi.
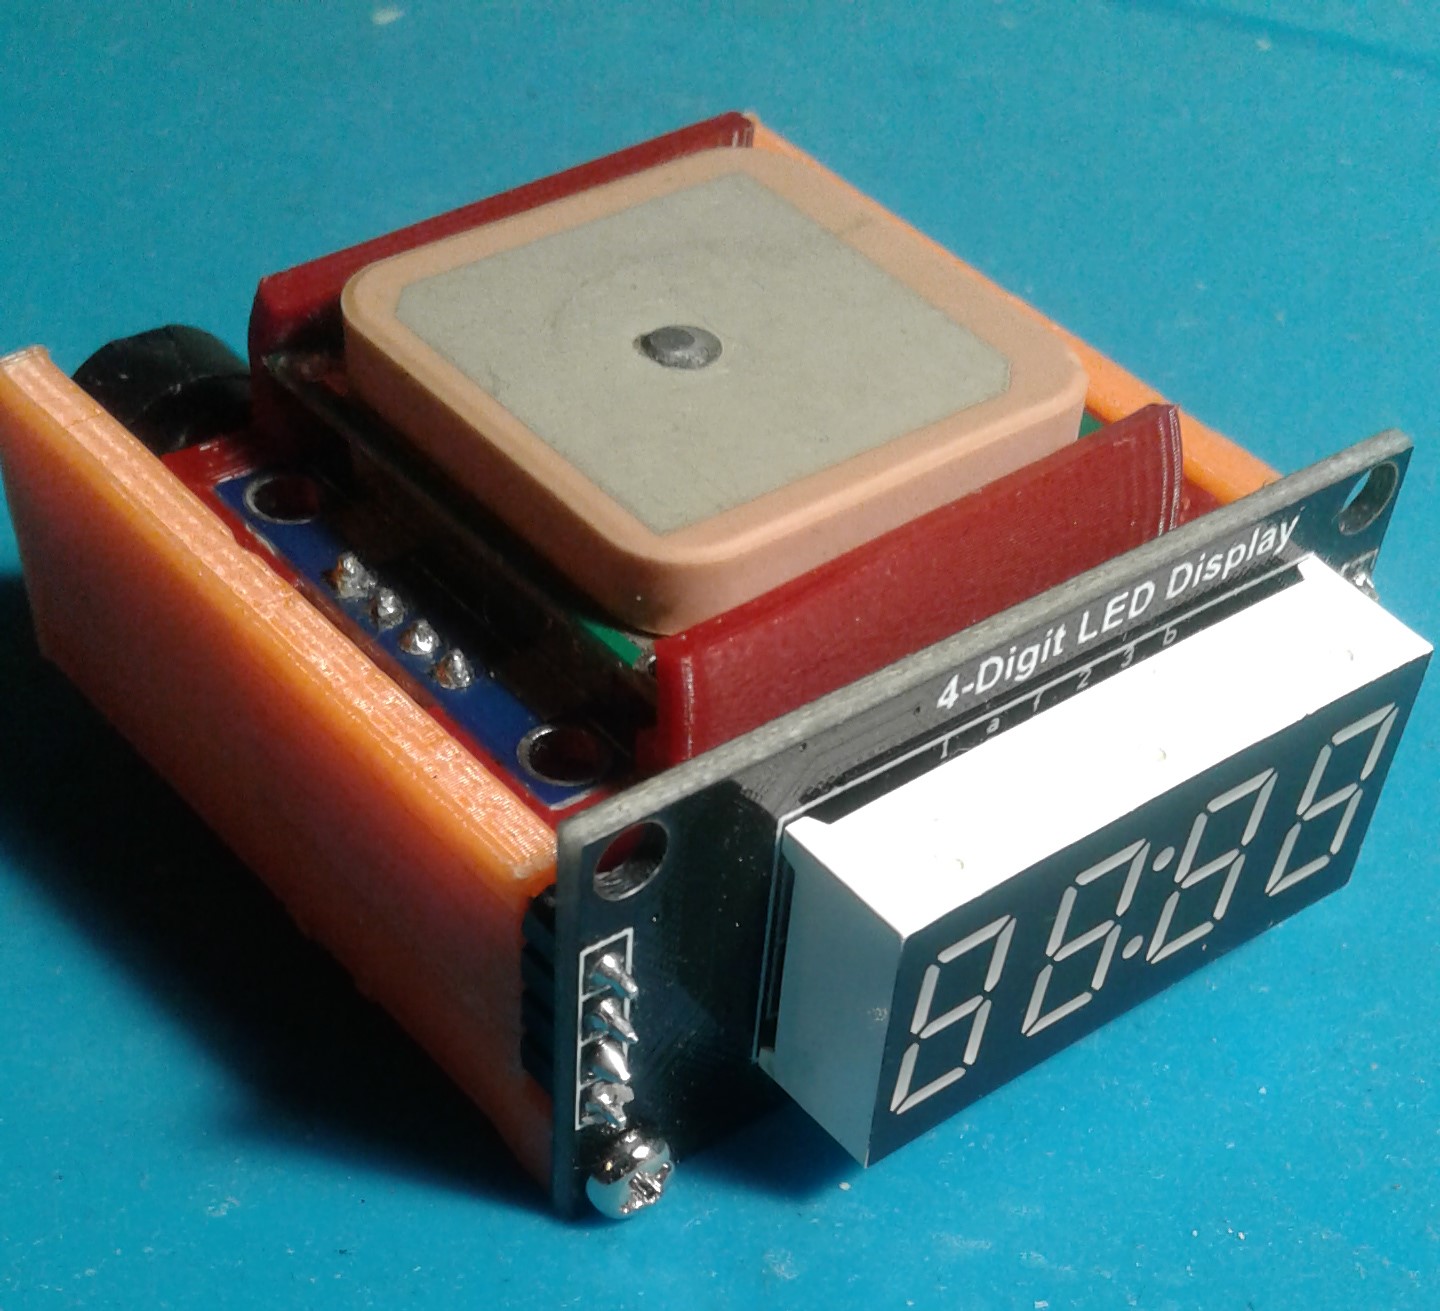
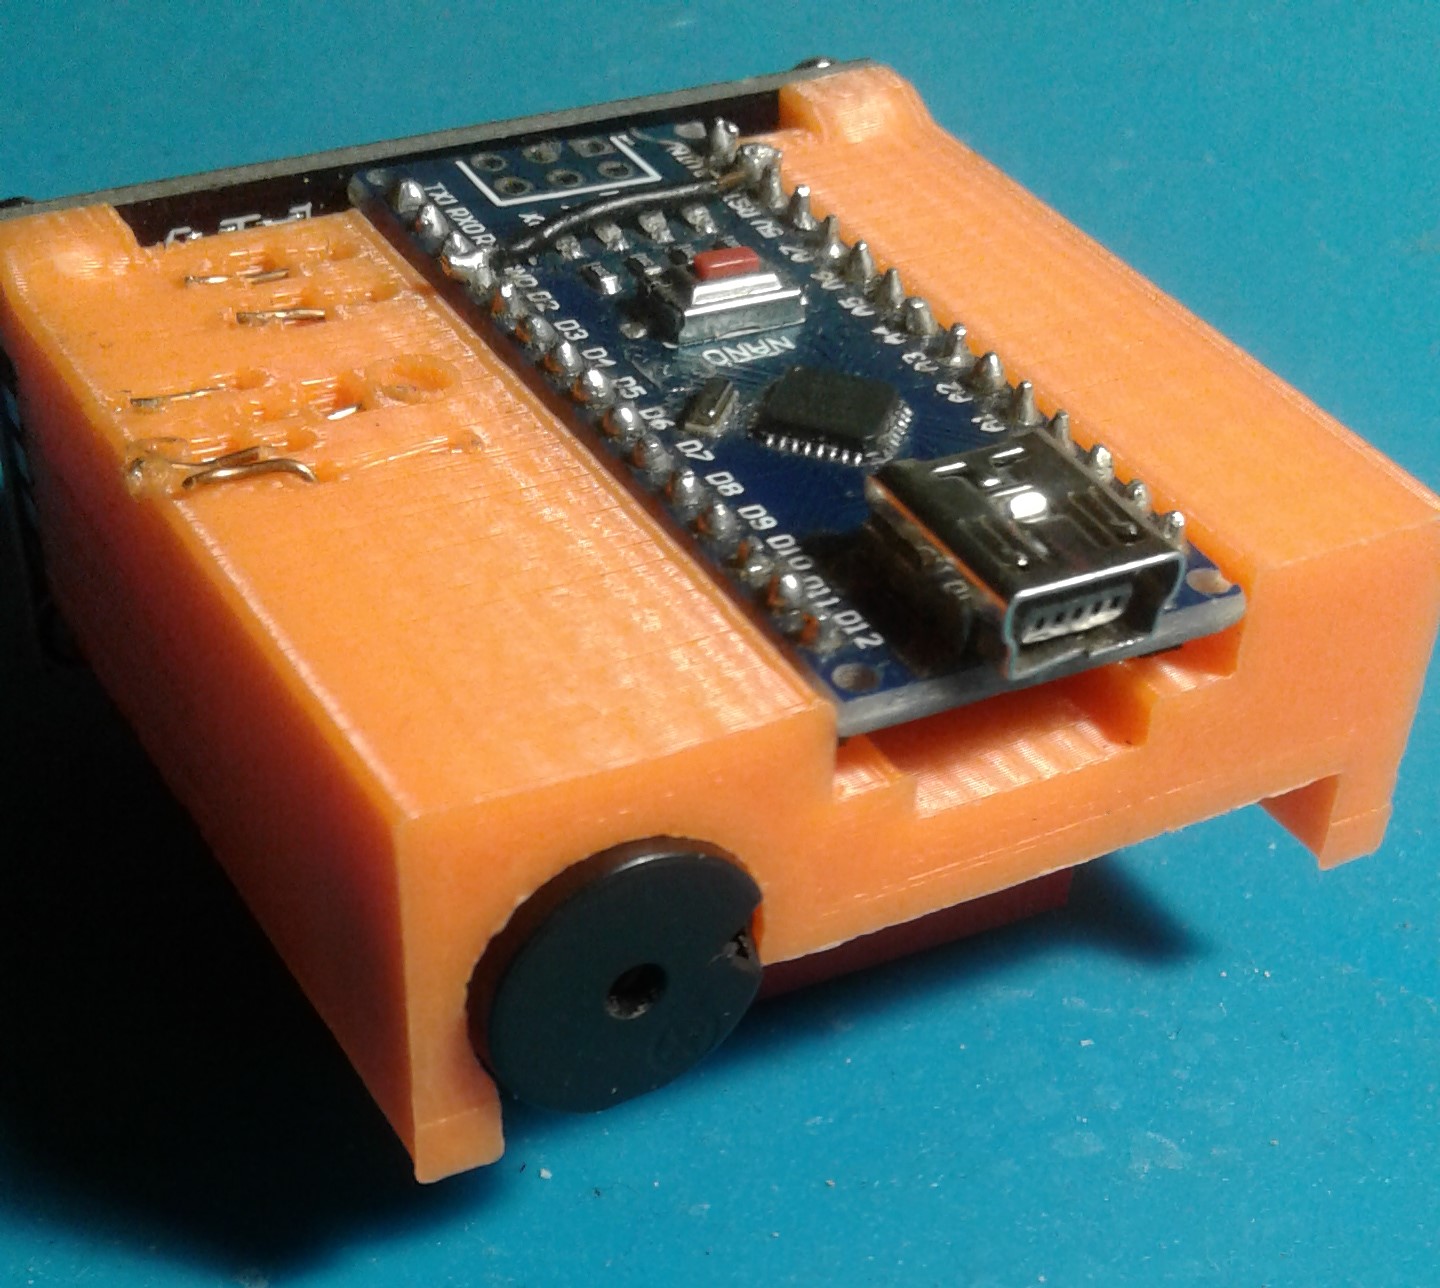
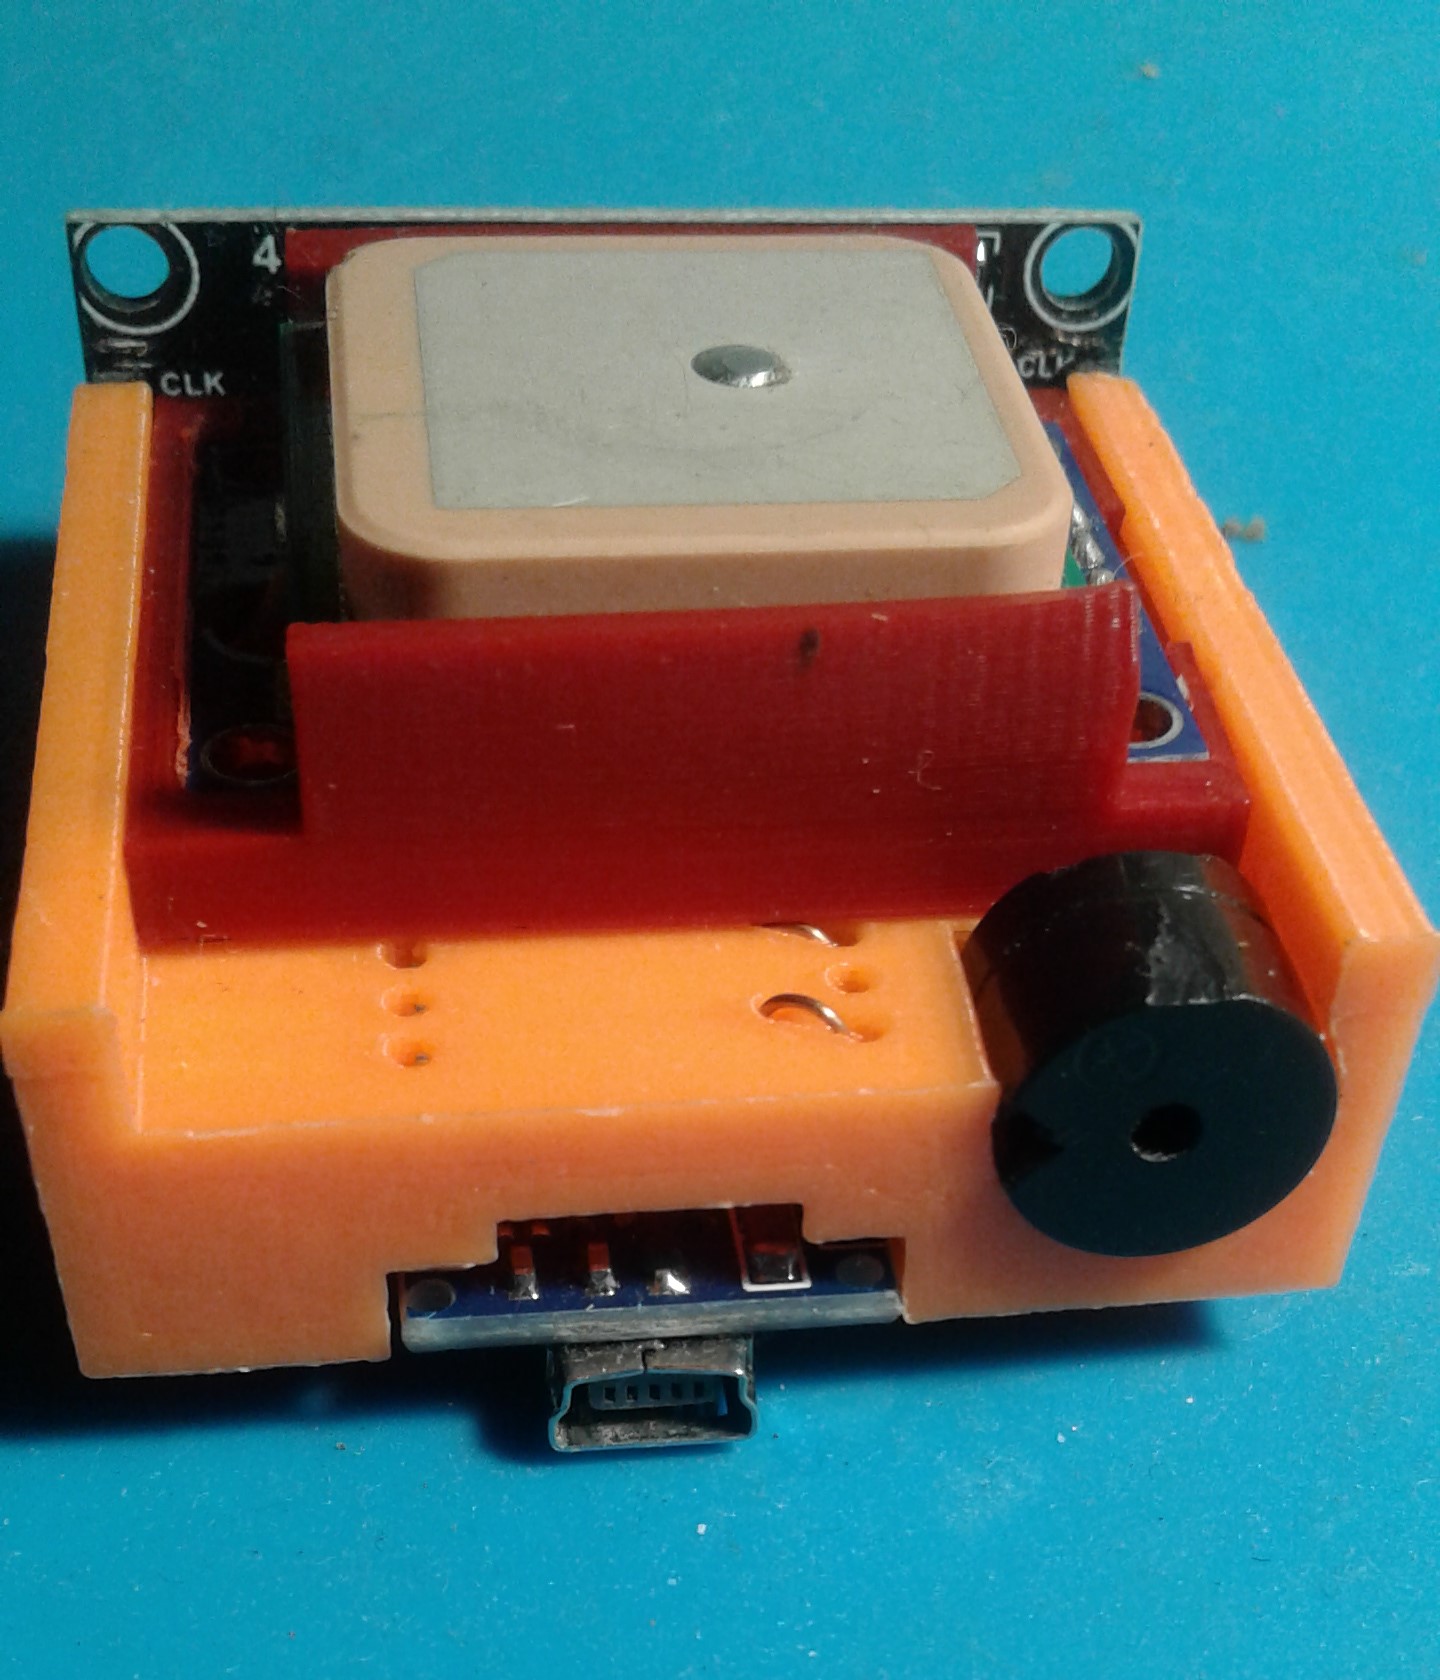
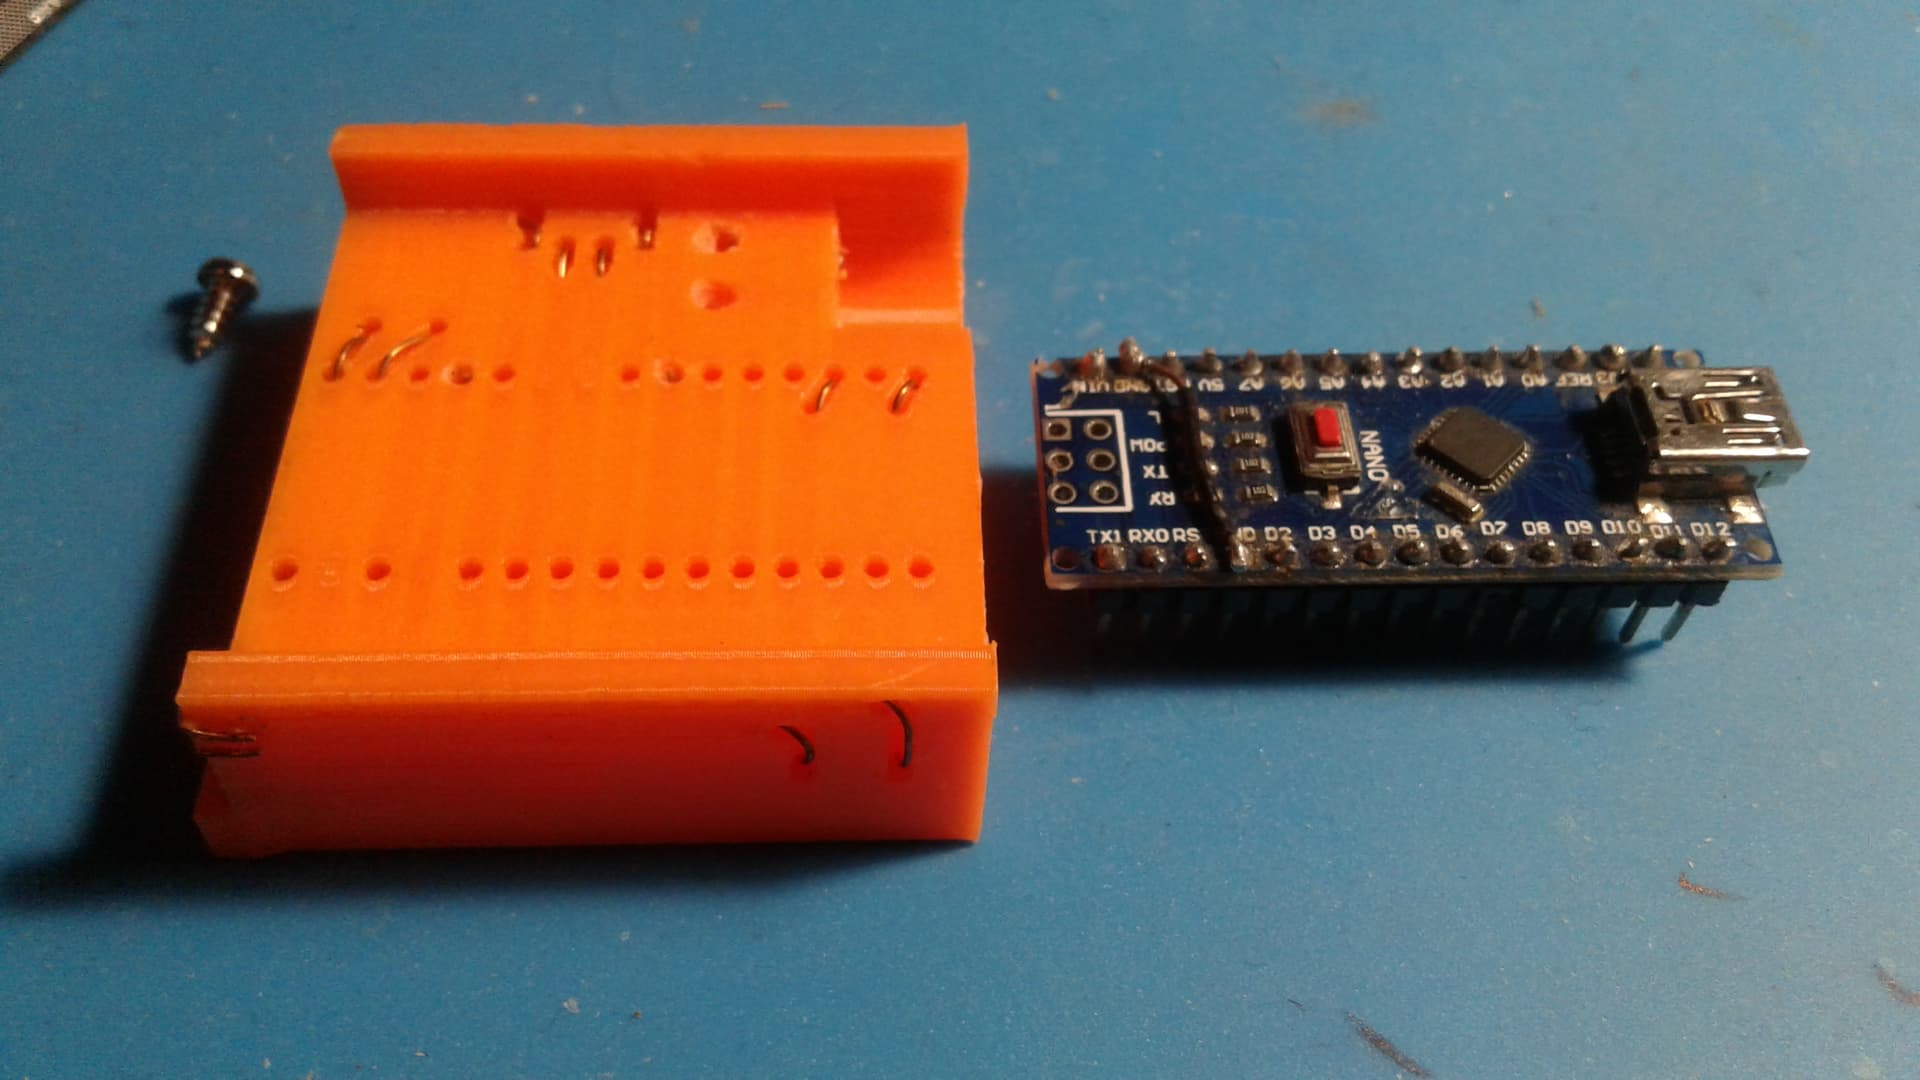
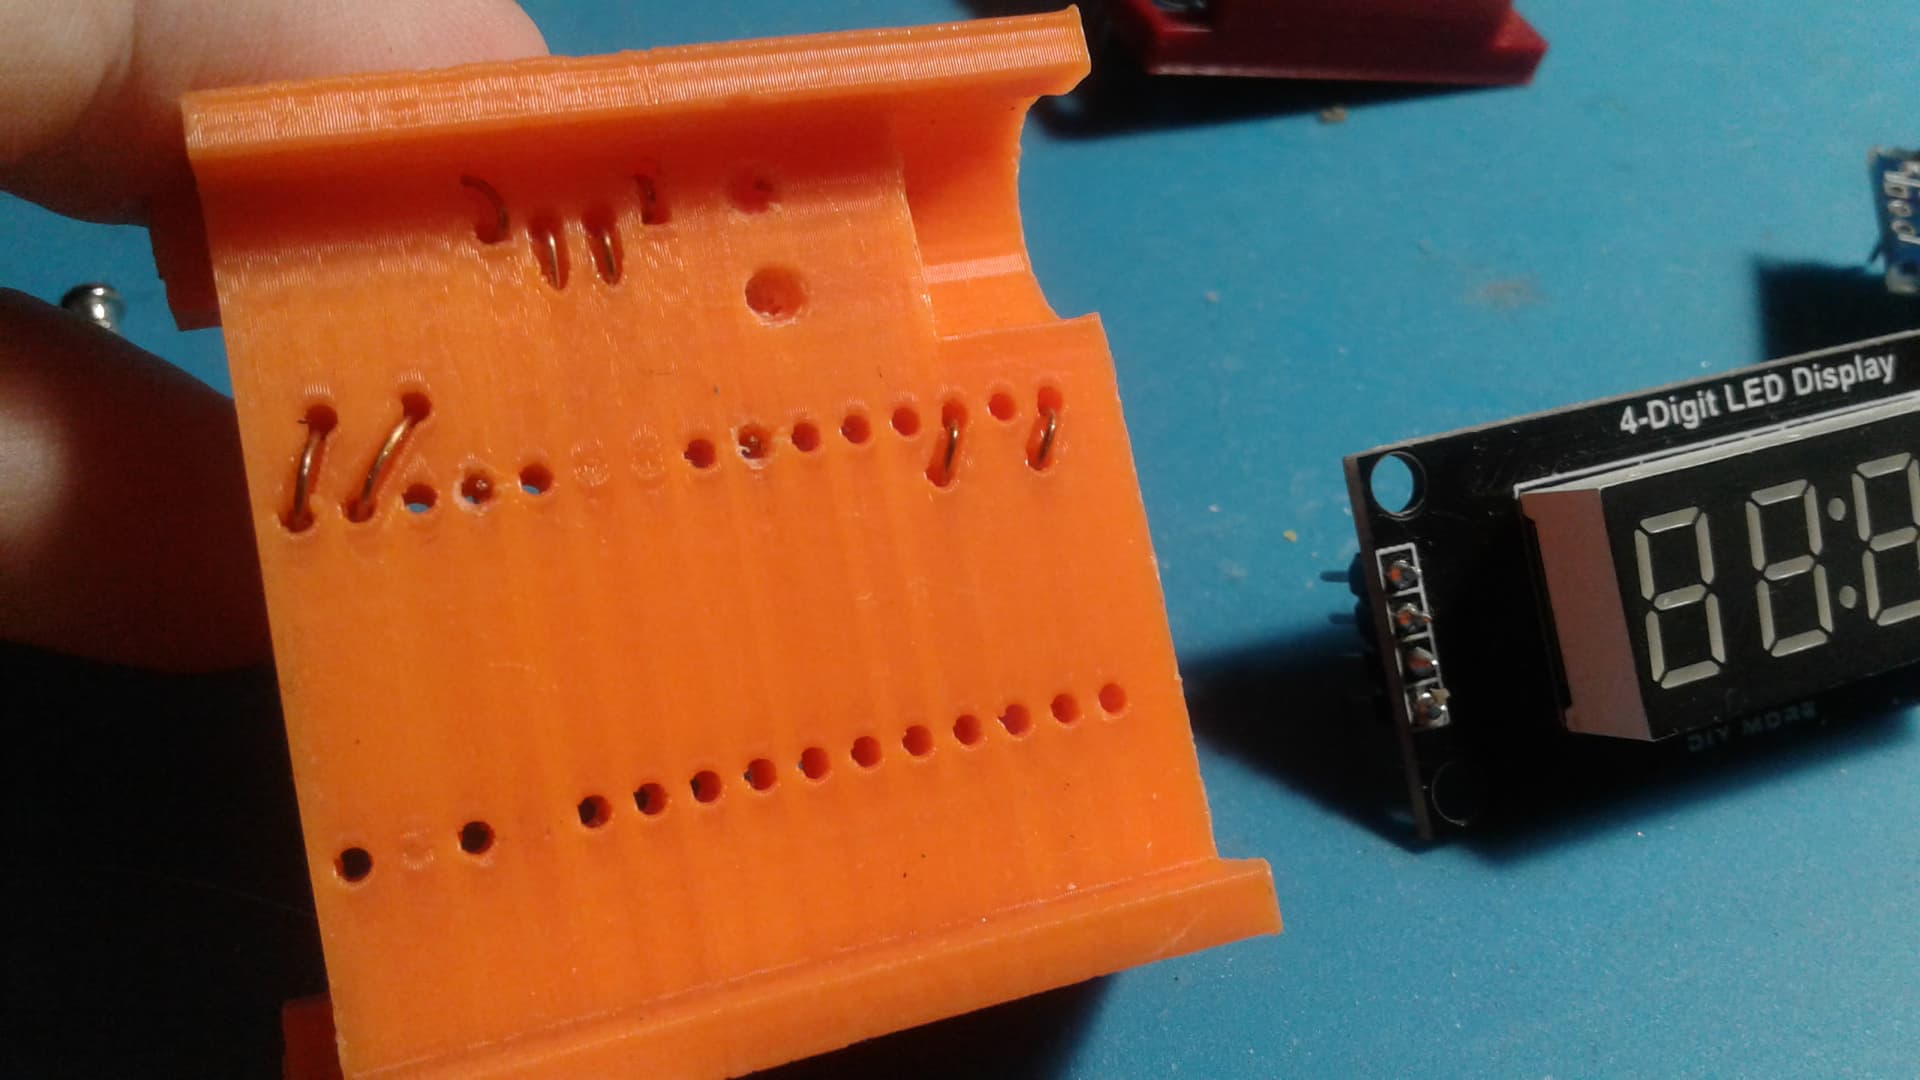
I've been making 3D printed "blocks" with holes and conduits for the microprocessor and sensors. It's kind of like a 3-d PCB. Allows for rapid assembly (and reliable connections) and very compact.
Sounds fascinating. Can you post a photo or two please?


Thanks, impressive. Have you published details anywhere; such as thingiverse.com? STL, SCAD files? Guess we’re straying OT here, so PM alternatively.
I’ve printed a variety of small cases but a Nano-based design would be attractive.
Curious about those eight variously located wires/connectors?
I've made the design public in Tinkercad:
I call this method monobloc. It's difficult to explain the concept in words. Imagine the bloc is solid. Then include holes to take the pins of the components. In the 5th pic you can see two rows of holes to take the Nano. So each component can be inserted into the bloc (pics 1 to 3). Now, to make electrical connections between pins of different components, I design into the bloc 1.5mm conduits running from pin to pin as required by the circuit diagram. I thread each conduit with solid copper wire (stripped), turn over each end and set it into the bloc by the heat of a soldering iron.
Now when the components are inserted some pins are pressed tightly against a wire. The components are physically secure and the connections are electrically robust. The components are removable, making development of the bloc easy.
You might like to print the bloc and explore. Thanks for the interest.
Many thanks for that clear and detailed description. Although not a TinkerCad user (my few 3D projects have been with OpenSCAD and Cura) I’ll follow up via that link.
No worries. You just need to sign up to a Tinkercad account. That's simple & free. The you can export the .STL file. Once you understand the conduit concept you might like to try out a design for your project using OpenSCAD. I used Cura for printing too. I hope you get something out of it.
This topic was automatically closed 180 days after the last reply. New replies are no longer allowed.