Hi, some time ago I bought the Arduino Starter Kit. Today I tryed to use the lcd display with the fritzing's project and the scripts of Arduino IDE but when I try to use the scripts Hello World I receive no output.
There are so many reasons why that might be that no-one here can begin to guess and will not therefore, waste time on it.
If however, you give us a photo of your layout (perfectly focused and sized appropriately for the web page), the code you are using (posted inside "code" tags generated by the little "scroll" icon in the submission area) and tell what the LCD actually does (lights up, shows any pattern at all), some suggestions may emerge.
This is the photo and this is the code:
// include the library code:
#include <LiquidCrystal.h>

// initialize the library with the numbers of the interface pins
LiquidCrystal lcd(12, 11, 5, 4, 3, 2);

void setup() {
  // set up the LCD's number of columns and rows:
  lcd.begin(16, 2);
  // Print a message to the LCD.
  lcd.print("hello, world!");
}

void loop() {
  // set the cursor to column 0, line 1
  // (note: line 1 is the second row, since counting begins with 0):
  lcd.setCursor(0, 1);
  // print the number of seconds since reset:
  lcd.print(millis() / 1000);
}

It's hard to follow your four data lines since the wires are all the same color, but it looks like they are exactly wrong.
Don

I'm sure you went back and checked after Don mentioned that you made an obvious error but your drawing and your photo show the four data lines are reversed.
Yes, I reassembled it in quickly and I did not noticed the mistake. Anyway today I reassembled it correctly (I think) and I still get no output. I also tryed with another script called setCursor and I received the output in the picture.
userpicture
Buy
Download
Products
Learning
Forum
Support
Blog
 userpicture

Learning   Examples | Foundations | Hacking | Links

Examples > Libraries > LiquidCrystal

LiquidCrystal - setCursor()

The Liquid Crystal Library allows you to control LCD displays that are compatible with the Hitachi HD44780 driver. There are many of them out there, and you can usually tell them by the 16-pin interface.

This example sketch shows how to use the setCursor() method to reposition the cursor. To move the cursor, just call setCursor() with a row and column position. For example, for a 2x16 display:

lcd.setCursor(0, 0); // top left
lcd.setCursor(15, 0); // top right
lcd.setCursor(0, 1); // bottom left
lcd.setCursor(15, 1); // bottom right

Hardware Required

Arduino Board
LCD Screen (compatible with Hitachi HD44780 driver)
pin headers to solder to the LCD display pins
10k Potentiometer
breadboard
hook-up wire
Circuit

Before wiring the LCD screen to your Arduino we suggest to solder a pin header strip to the 14 (or 16) pin count connector of the LCD screen, as you can see in the image above.
To wire your LCD screen to your Arduino, connect the following pins:

LCD RS pin to digital pin 12
LCD Enable pin to digital pin 11
LCD D4 pin to digital pin 5
LCD D5 pin to digital pin 4
LCD D6 pin to digital pin 3
LCD D7 pin to digital pin 2
Additionally, wire a 10K pot to +5V and GND, with it's wiper (output) to LCD screens VO pin (pin3).

click the images to enlarge


image developed using Fritzing. For more circuit examples, see the Fritzing project page


Code

/*
  LiquidCrystal Library - setCursor

 Demonstrates the use a 16x2 LCD display.  The LiquidCrystal
 library works with all LCD displays that are compatible with the
 Hitachi HD44780 driver. There are many of them out there, and you
 can usually tell them by the 16-pin interface.

 This sketch prints to all the positions of the LCD using the
 setCursor(0 method:

  The circuit:
 * LCD RS pin to digital pin 12
 * LCD Enable pin to digital pin 11
 * LCD D4 pin to digital pin 5
 * LCD D5 pin to digital pin 4
 * LCD D6 pin to digital pin 3
 * LCD D7 pin to digital pin 2
 * LCD R/W pin to ground
 * 10K resistor:
 * ends to +5V and ground
 * wiper to LCD VO pin (pin 3)

 Library originally added 18 Apr 2008
 by David A. Mellis
 library modified 5 Jul 2009
 by Limor Fried (http://www.ladyada.net)
 example added 9 Jul 2009
 by Tom Igoe
 modified 22 Nov 2010
 by Tom Igoe

 This example code is in the public domain.

 http://arduino.cc/en/Tutorial/LiquidCrystalSetCursor

 */

// include the library code:
#include <LiquidCrystal.h>

// these constants won't change.  But you can change the size of
// your LCD using them:
const int numRows = 2;
const int numCols = 16;

// initialize the library with the numbers of the interface pins
LiquidCrystal lcd(12, 11, 5, 4, 3, 2);

void setup() {
  // set up the LCD's number of columns and rows:
  lcd.begin(numCols,numRows);
}

void loop() {
  // loop from ASCII 'a' to ASCII 'z':
  for (int thisLetter = 'a'; thisLetter <= 'z'; thisLetter++) {
    // loop over the columns:
    for (int thisCol = 0; thisCol < numRows; thisCol++) {
      // loop over the rows:
      for (int thisRow = 0; thisRow < numCols; thisRow++) {
        // set the cursor position:
        lcd.setCursor(thisRow,thisCol);
        // print the letter:
        lcd.write(thisLetter);
        delay(200);
      }
    }
  }
}
Yes, I reassembled it in quickly and I did not noticed the mistake. Anyway today I reassembled it correctly (I think) and I still get no output. I also tryed with another script called setCursor and I received the output in the picture.
// include the library code:
#include <LiquidCrystal.h>

// these constants won't change.  But you can change the size of
// your LCD using them:
const int numRows = 2;
const int numCols = 16;

// initialize the library with the numbers of the interface pins
LiquidCrystal lcd(12, 11, 5, 4, 3, 2);

void setup() {
  // set up the LCD's number of columns and rows:
  lcd.begin(numCols,numRows);
}

void loop() {
  // loop from ASCII 'a' to ASCII 'z':
  for (int thisLetter = 'a'; thisLetter <= 'z'; thisLetter++) {
    // loop over the columns:
    for (int thisCol = 0; thisCol < numRows; thisCol++) {
      // loop over the rows:
      for (int thisRow = 0; thisRow < numCols; thisRow++) {
        // set the cursor position:
        lcd.setCursor(thisRow,thisCol);
        // print the letter:
        lcd.write(thisLetter);
        delay(200);
      }
    }
  }
}
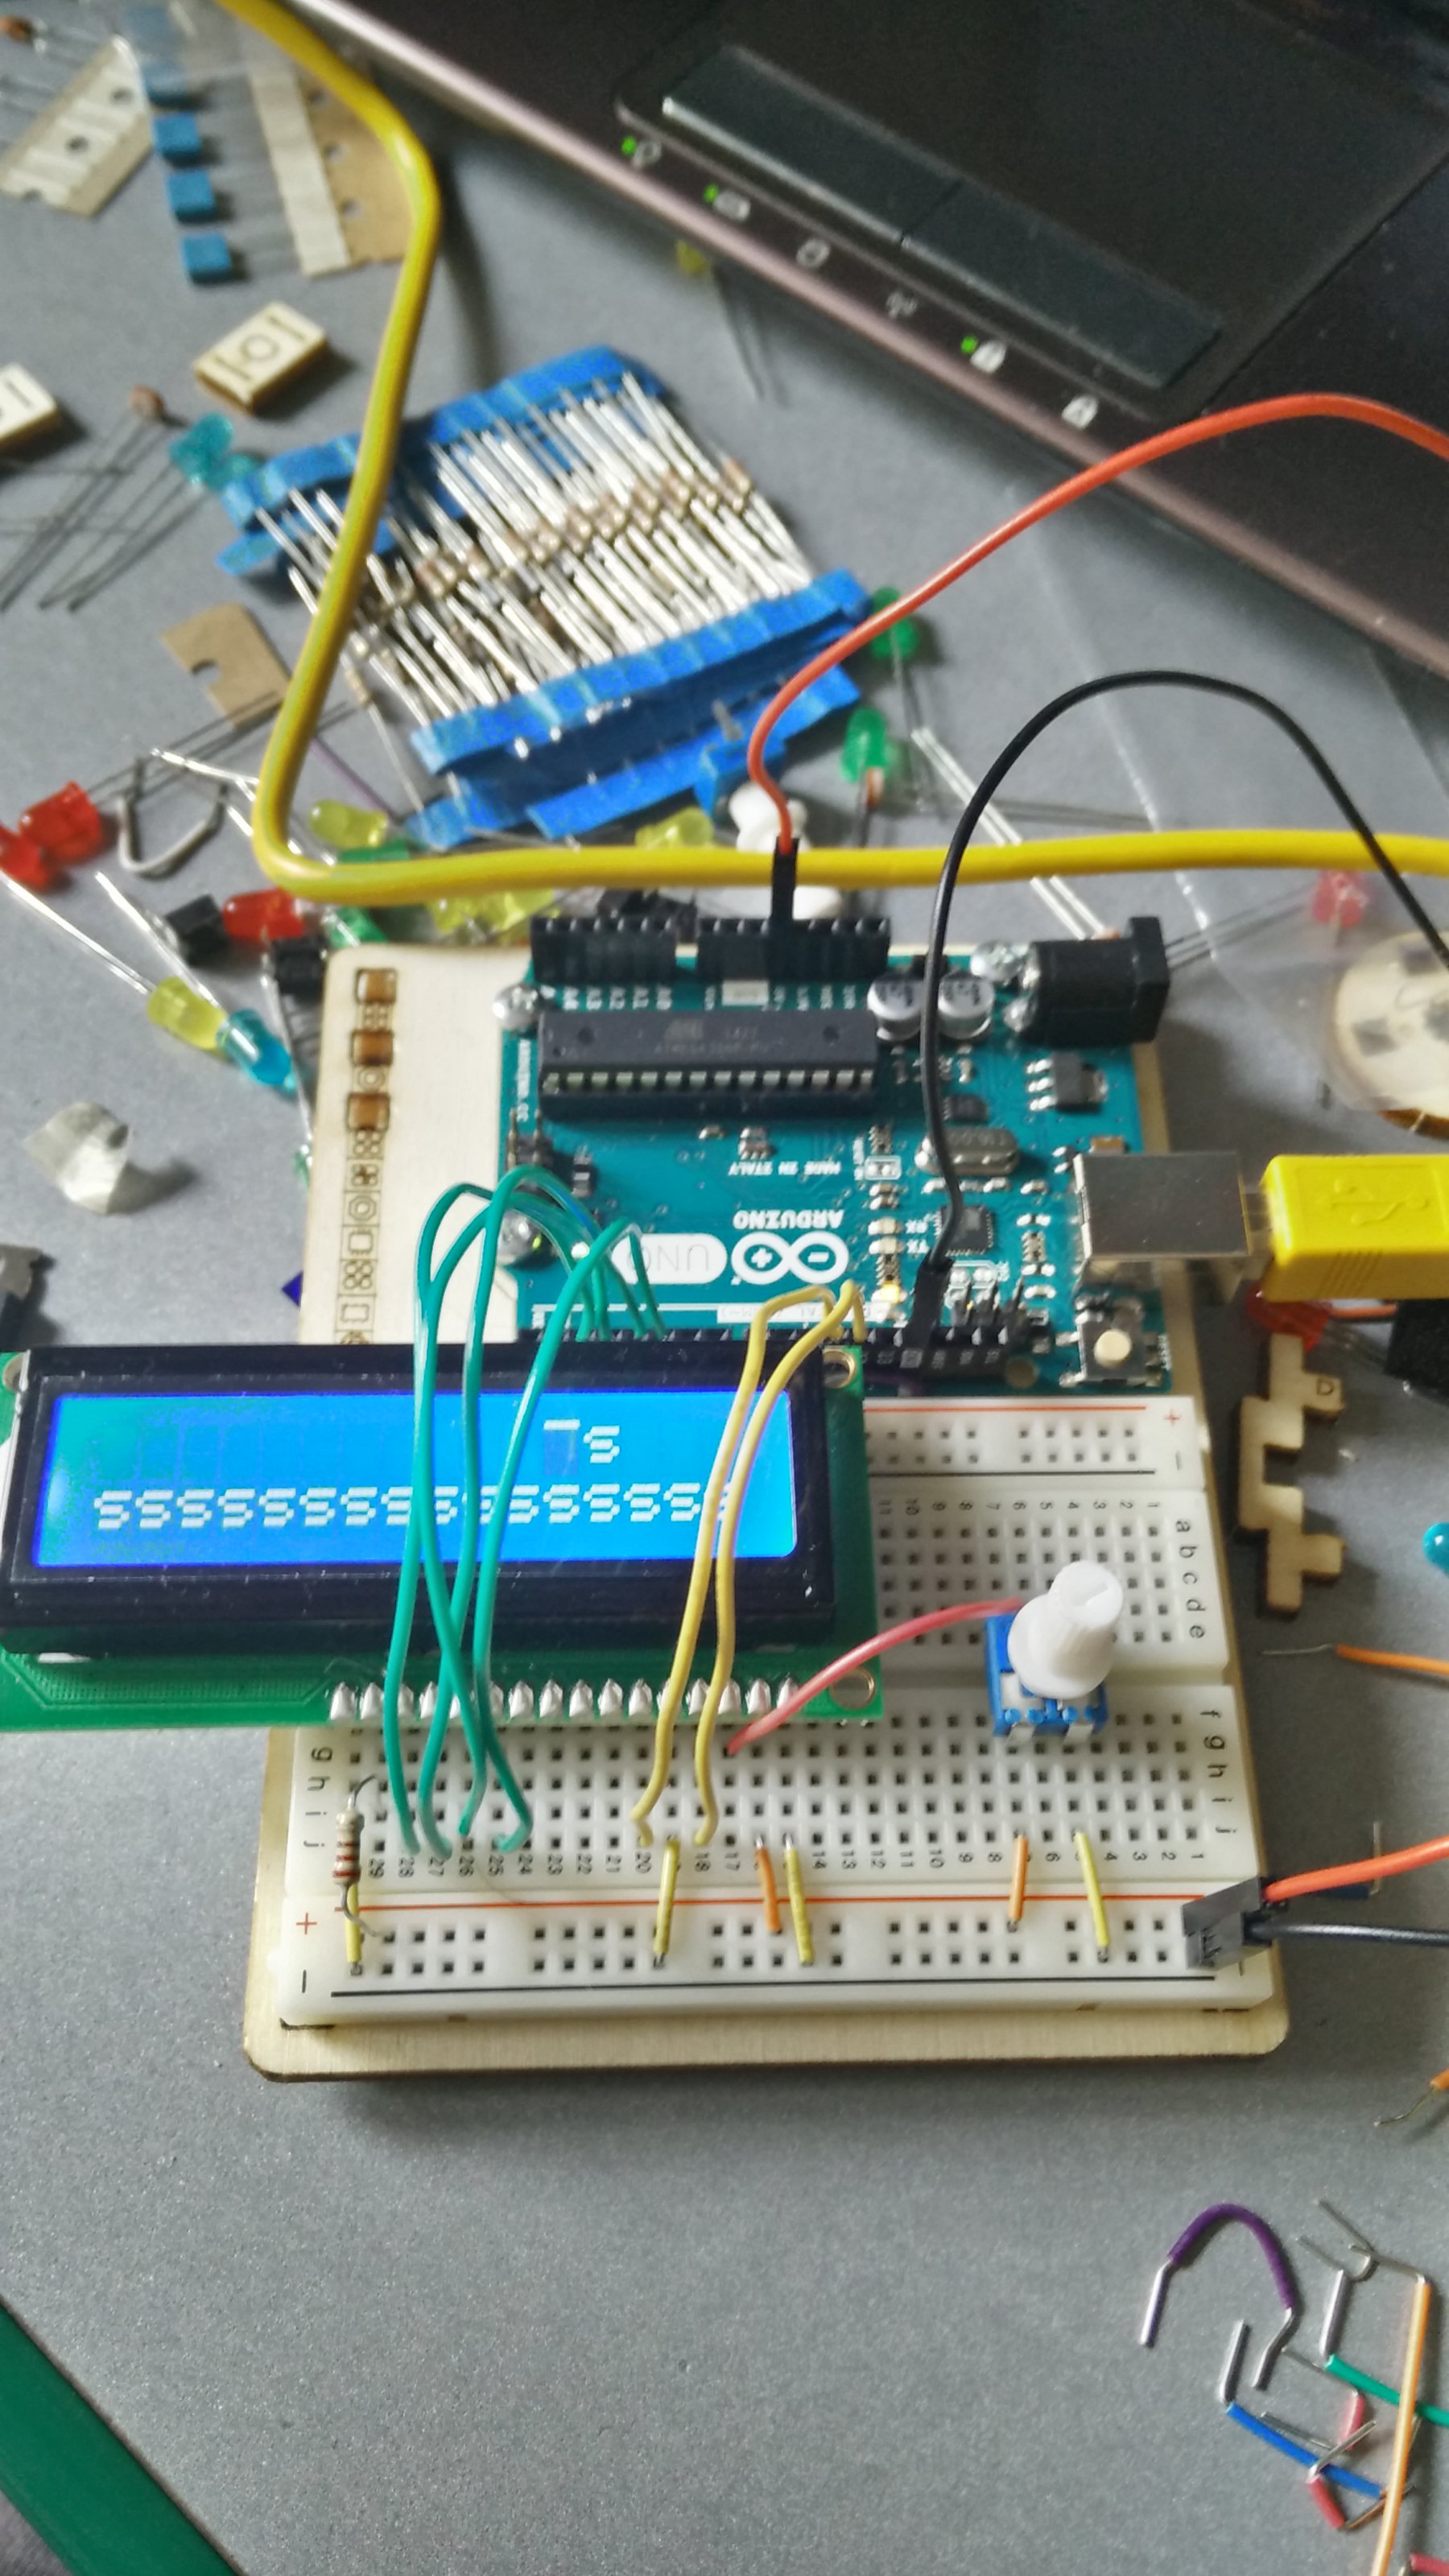
... and I still get no output
But you are getting output, it is just not what you expect.
While you are troubleshooting a problem like this you want to use as simple a program as you can and it is a good idea to have all of that code in setup() and have nothing in loop().
Even the sample sketch in the Liquid Crystal tutorial does not meet those criteria. I suggest this one:
#include <LiquidCrystal.h>

//LiquidCrystal lcd(RS, E, D4, D5, D6, D7);
LiquidCrystal lcd(12, 11, 5, 4, 3, 2);      // put your pin numbers here

void setup()
  {
  lcd.begin(16, 2);                          // put your LCD parameters here
  lcd.print("hello, world!");
  lcd.setCursor(0,1);
  lcd.print("it works!");
  }

void loop()
  {
  }
Please provide a photograph that is in focus and that lets us unambiguously follow each wire from the Arduino to the LCD module. I think you may have the D5 and D6 wires crossed but it is hard to tell. Can't you find two different color wires for D5 and D7.
Your LCD is upside down.
Don
Yeah, I' inverted the jumper and now it works. I'm sorry for the bother, but this is the first time I use it, and I'm also a little bit an asshole. ![]()
Congratulations on your success. I don't know why anybody here would think poorly of you - you just seemed a bit frustrated. There's nobody here that hasn't been there and been that.