Only an Arduino/microcontroller expert will know for certain when it is a good design to use 2+ microcontrollers in the same project. The expert will have carefully evaluated ways to avoid using 2+ microcontrollers and come to the conclusion that none of those solutions is better and simpler than using 2+ microcontrollers.
As a beginner, you should assume that it is always bad to use 2+ microcontrollers. If you cannot find a way to achieve your project with only 1 microcontroller, then you should ask for help from experts. They may recommend using 2+ microcontrollers, but probably they will know a better way that needs only 1.
When beginners try to use 2+ microcontrollers, the results are mostly the same. They cannot make it work and come to the forum asking for help to make communications work between the microcontrollers. The advice is almost always the same: use only 1 microcontroller, then there are no communication problems.
5. Press REST Buttons of both ESP8266 and NANO. 6. Open Serial Monitor of i2C master at Bd = 115200. 7. Check that the following message appers on SM at 1-sec interva.
Reading 1-byte from SLave-1: 23
Reading 1-byte from SLave-1: 23
Reading 1-byte from SLave-1: 23
Do you have the following gadgets to exchange data between ESP32-CAM Module and Arduino NANO using I2C Bus? If yes, then I can help you with connections and sketches. 1. Arduino NANO.
2. Level Shifter (ESP#@-CAM is strictly a 3.3V device; it's pins are not 5V tolerant).
3. USB/TTL adapter (Type: ESP32-CAM-MB) to uplaod sketch into ESp32-CAM Module.
Yes Sir I have all these gadgets except level shifter
Can you plz help to do I2C communication between them
I have Arduino nano, ESP32-CAM-MB and also ESP32-CAM module
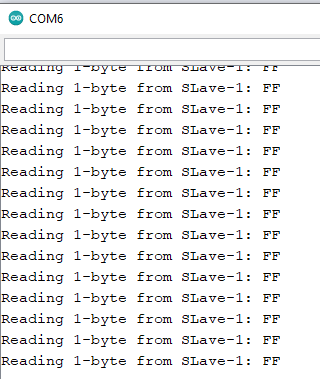
Dear Also the issue is when I want to write a String data and increase the number of bytes like 5 or 9 it shows me 255 like this
also when i print only x without Hex like
Serial.println(x);
it then shows me 255
can you plz tell me why it not displays the exact message as it is a number or as a string
Upload the following sketches and check that the Serial Monitor of ESP8266 shows the following message; If not, check the connections and the continuity of the jumper wires: I2C Device found at address: 0x8
Sketch for ESP8266:
#include<Wire.h>
byte busStatus;

void setup()
{
  Serial.begin(9600);
  Wire.begin(D2, D1);  //D2 = SDA, D1 = SCL
  for (int i2cAddress = 0x00; i2cAddress < 0x80; i2cAddress++)
  {
    Wire.beginTransmission(i2cAddress);
    busStatus = Wire.endTransmission();
    if (busStatus == 0x00)
    {
      Serial.print("I2C Device found at address: 0x");
      Serial.println(i2cAddress, HEX);
    }

    else
    {
      Serial.print("I2C Device not found at address: 0x");
      Serial.println(i2cAddress, HEX);
    }
  }
}

void loop()
{

}
Not the voltage check; I said for continuity check of the jumper wires after removing them from the circuit. if the wire is ok, you will hear tiny tone.
Repeat the tasks of post 28. If your NANO is not detected at address 8, then change the NANO and try againg. If the problem is still there, change ESP8266.
Okay Sir I'll check when I, have 2nd arduino nano
Thank you very much for your efforts and responses Thanks Alot
I really happy to see that the seniors here like you to help us beginners
Really Helpful and again thank you very much for your precious time
I'll tell you very soon.
Before you buy the second NANO, you may check that the present NANO is alright. Just uplaod a blink program from the IDE Examples and chcek that the onboard LED (L) is blinking at 1-sec interval.