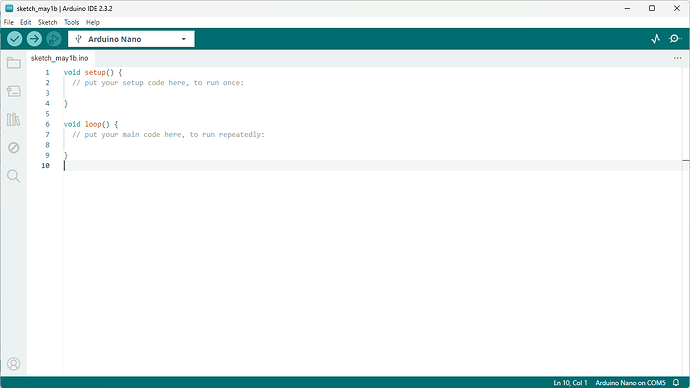
there is no other error code!
and I read the whole damn thing!!
it does say "in function 'main'" :
but what does that mean??
well for one thing, I had the window for 'Output' at the bottom much too small to really see anything...........
apparently I need something following 'void setup();'
but everything I try doesn't help.
I put in FastLED and got hit with an error that it wasn't correct, but that it what I have as #include at the top. (FastLED.h)
and I have FastLED.show() in the void loop line
don't have any idea how you would come to that conclusion as each time I try to find info through Google and on Arduino.IDE, but it confusing to me.
what I want is so very simple but all the stuff on line is way beyond what I want to do.
that being turning on 30 LED's one at a time till all are lit. that's it!
sorry to have been a pain.
In the IDE, use file / new. You will see something like this
void setup()
{
}

void loop()
{
}
Compile it; does it compile?
Next, at the top, create a few empty lines. Replace one of the empty lines with #include <FastLED.h> so it looks like
#include <FastLED.h>

void setup()
{
}

void loop()
{
}
Compile it; does it compile? If not, post the complete error message; in IDE 1.x you will see a button "copy error messages" in the orange bar, in IDE 2.x there will be a popup at the right button and you can click "copy error" (or something in that line, I don't have access to IDE 2.x at the moment). In both you can also select all text from the output window, copy it and paste it here.
Use code tags (the <CODE/> button on the forum) when posting error messages or when posting the code.
I put it together as you suggested and it did compile
also put in
#define NUM_PIXELS 30
and
#define PIN 2
and it compiled
however I am at a loss for what to put in following setup()
I actually have one now that has compiled!!
now I just need to upload and hook to my LED strip o see if it works!
may take me a bit (with other things going on) to get to that point.
thank you very much!!
char exampleArray[] = "Hello, World!";

void setup() {
  Serial.begin(115200); // start communications
  Serial.println(exampleArray);
}

void loop() { /* minimum requirement for loop() */ }
Post #12 shows a complete, compileable code with an LED strip (of one pixel). Just change the pixel count (to 30?) and you are done.
thanks
I actually ended up with
NeoPixel.begin();
and that worked
Sounds like you are using Adafruit_Neopixel.h library. You should post your complete code like the example I showed in Post #41.
this is my code
#include <Adafruit_NeoPixel.h>
    #ifdef __AVR__
    #include <avr/power.h> // Required for 16 MHz Adafruit Trinket
    #endif
    #define PIN_NEO_PIXEL  4   // Arduino pin that connects to NeoPixel
    #define NUM_PIXELS     30  // The number of LEDs (pixels) on NeoPixel
    #define DELAY_INTERVAL (500)
    Adafruit_NeoPixel NeoPixel(NUM_PIXELS, PIN_NEO_PIXEL, NEO_GRB + NEO_KHZ800);
    void setup() {
      NeoPixel.begin(); // INITIALIZE NeoPixel strip object (REQUIRED)
    }
    void loop() {
      NeoPixel.clear(); // set all pixel colors to 'off'. It only takes effect if pixels.show() is called
      // turn pixels to white one by one with delay between each pixel
      for (int pixel = 0; pixel < NUM_PIXELS; pixel++) { // for each pixel
        NeoPixel.setPixelColor(pixel, NeoPixel.Color(255, 255, 255)); // it only takes effect if pixels.show() is called
        NeoPixel.show();   // send the updated pixel colors to the NeoPixel hardware.
        delay(DELAY_INTERVAL); // pause between each pixel
      }}
just looking to turn on each pixel one at a time in white and all stay on when finished.
until the circuit is turned off (in this case by cutting power)
Works perfectly.
Files for WOKWI.COM
sketch.ino
#include <Adafruit_NeoPixel.h>

#define PIN_NEO_PIXEL  4   // Arduino pin that connects to NeoPixel
#define NUM_PIXELS     78  // The number of LEDs (pixels) on NeoPixel
#define DELAY_INTERVAL 500

Adafruit_NeoPixel NeoPixel(NUM_PIXELS, PIN_NEO_PIXEL, NEO_GRB + NEO_KHZ800);

void setup() {
  NeoPixel.begin(); // INITIALIZE NeoPixel strip object (REQUIRED)
  NeoPixel.clear(); // set all pixel colors to 'off'. It only takes effect if pixels.show() is called
  NeoPixel.show();
}

void loop() {
  // turn pixels to white one by one with delay between each pixel
  for (int pixel = 0; pixel < NUM_PIXELS; pixel++) { // for each pixel
    NeoPixel.setPixelColor(pixel, NeoPixel.Color(255, 255, 255)); // it only takes effect if pixels.show() is called
    NeoPixel.show();   // send the updated pixel colors to the NeoPixel hardware.
    delay(DELAY_INTERVAL); // pause between each pixel
  }
  while (1); // remain here forever
}
diagram.json
{
  "version": 1,
  "author": "Anonymous maker",
  "editor": "wokwi",
  "parts": [
    { "type": "wokwi-arduino-nano", "id": "nano", "top": 0, "left": 0, "attrs": {} },
    {
      "type": "wokwi-led-ring",
      "id": "ring2",
      "top": -554.75,
      "left": -166.1,
      "attrs": { "pixels": "78" }
    },
    { "type": "wokwi-vcc", "id": "vcc1", "top": -66.44, "left": 182.4, "attrs": {} },
    { "type": "wokwi-gnd", "id": "gnd1", "top": 9.6, "left": 181.8, "attrs": {} }
  ],
  "connections": [
    [ "gnd1:GND", "nano:GND.2", "black", [ "v-19.2", "h-67.2" ] ],
    [ "gnd1:GND", "ring2:GND", "black", [ "v-19.2", "h-105.6" ] ],
    [ "vcc1:VCC", "ring2:VCC", "red", [ "v19.2", "h-96" ] ],
    [ "nano:4", "ring2:DIN", "green", [ "v0" ] ]
  ],
  "dependencies": {}
}
Be aware that you can not power all 30 LEDs on full white at the same time from the Arduino 5V pin; around 5 at the same time is more than likely the maximum. After that, you will need an external power supply; below a wiring diagram (I think by LarryD)


