I have been building a self guided rocket like BPS and I am using the mpu6050 IMU with an arduino Micro. I was testing to make sure i had all my wiring right, (and I did) but all the board put into the serial moniter was this: "Adafruit MPU6050 test!" but no values.
Please post the code so we don't have to hunt on the web to find it (and possibly find the wrong one).
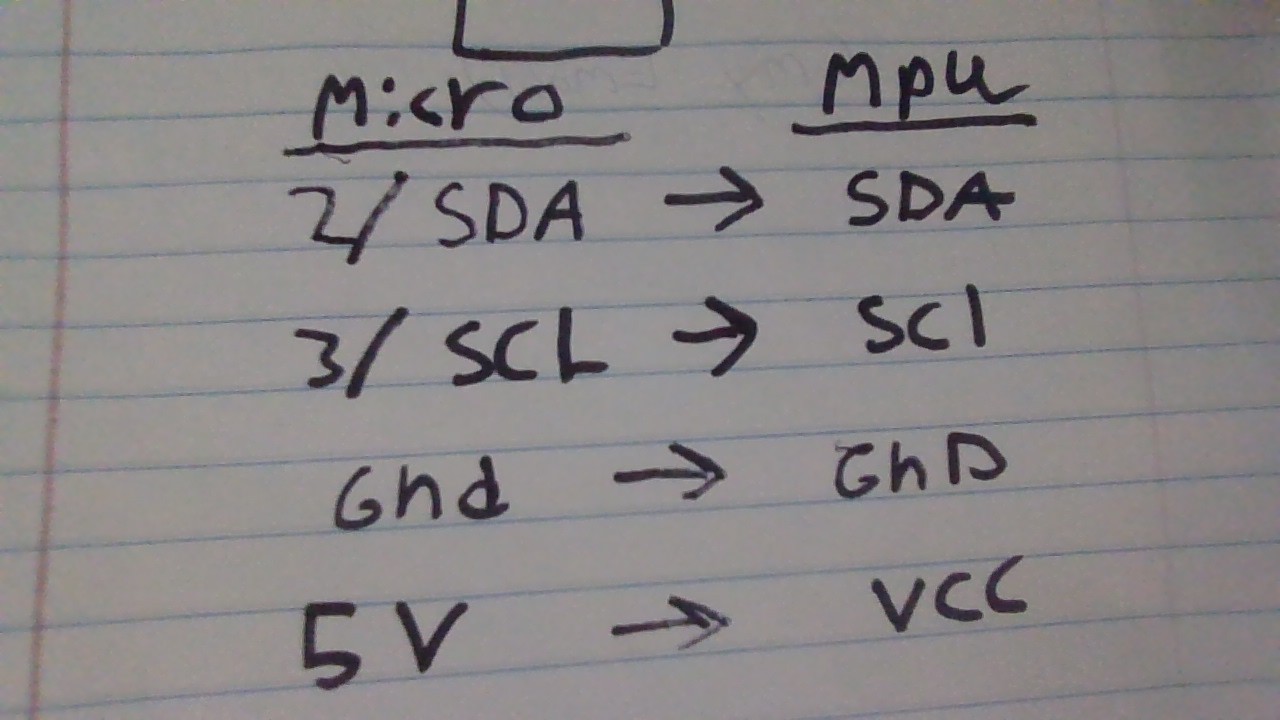
Please post a schematic / wiring diagram (photo of pencil/paper drawing is fine); I know that you say that your wiring is fine but we don't know how you wired it.
Please post a photo of your setup.
heres the real code
'> // Basic demo for accelerometer readings from Adafruit MPU6050
#include <Adafruit_MPU6050.h>
#include <Adafruit_Sensor.h>
#include <Wire.h>
Adafruit_MPU6050 mpu;
void setup(void) {
Serial.begin(115200);
while (!Serial)
delay(10); // will pause Zero, Leonardo, etc until serial console opens
Serial.println("Adafruit MPU6050 test!");
// Try to initialize!
if (!mpu.begin()) {
Serial.println("Failed to find MPU6050 chip");
while (1) {
delay(10);
}
}
Serial.println("MPU6050 Found!");
mpu.setAccelerometerRange(MPU6050_RANGE_8_G);
Serial.print("Accelerometer range set to: ");
switch (mpu.getAccelerometerRange()) {
case MPU6050_RANGE_2_G:
Serial.println("+-2G");
break;
case MPU6050_RANGE_4_G:
Serial.println("+-4G");
break;
case MPU6050_RANGE_8_G:
Serial.println("+-8G");
break;
case MPU6050_RANGE_16_G:
Serial.println("+-16G");
break;
}
mpu.setGyroRange(MPU6050_RANGE_500_DEG);
Serial.print("Gyro range set to: ");
switch (mpu.getGyroRange()) {
case MPU6050_RANGE_250_DEG:
Serial.println("+- 250 deg/s");
break;
case MPU6050_RANGE_500_DEG:
Serial.println("+- 500 deg/s");
break;
case MPU6050_RANGE_1000_DEG:
Serial.println("+- 1000 deg/s");
break;
case MPU6050_RANGE_2000_DEG:
Serial.println("+- 2000 deg/s");
break;
}
mpu.setFilterBandwidth(MPU6050_BAND_21_HZ);
Serial.print("Filter bandwidth set to: ");
switch (mpu.getFilterBandwidth()) {
case MPU6050_BAND_260_HZ:
Serial.println("260 Hz");
break;
case MPU6050_BAND_184_HZ:
Serial.println("184 Hz");
break;
case MPU6050_BAND_94_HZ:
Serial.println("94 Hz");
break;
case MPU6050_BAND_44_HZ:
Serial.println("44 Hz");
break;
case MPU6050_BAND_21_HZ:
Serial.println("21 Hz");
break;
case MPU6050_BAND_10_HZ:
Serial.println("10 Hz");
break;
case MPU6050_BAND_5_HZ:
Serial.println("5 Hz");
break;
}
Serial.println("");
delay(100);
}
void loop() {
/* Get new sensor events with the readings */
sensors_event_t a, g, temp;
mpu.getEvent(&a, &g, &temp);
/* Print out the values */
Serial.print("Acceleration X: ");
Serial.print(a.acceleration.x);
Serial.print(", Y: ");
Serial.print(a.acceleration.y);
Serial.print(", Z: ");
Serial.print(a.acceleration.z);
Serial.println(" m/s^2");
Serial.print("Rotation X: ");
Serial.print(g.gyro.x);
Serial.print(", Y: ");
Serial.print(g.gyro.y);
Serial.print(", Z: ");
Serial.print(g.gyro.z);
Serial.println(" rad/s");
Serial.print("Temperature: ");
Serial.print(temp.temperature);
Serial.println(" degC");
Serial.println("");
delay(500);
}'
The Arduino Micro is a 5V processor, and the MPU-6050 is a 3.3V sensor. To connect the two, logic level conversion is required, or you will damage one or both devices. I recommend something like this logic level converter: https://www.sparkfun.com/products/12009
thankyou i did not se that
It is much easier to use a 3.3V Arduino. 5V logic will soon be a thing of the past.
Im still getting the same result?
I switched pins and im still getting the same serial output?
cant i just use the 3.3v pin?
No, the logic pins are 5V on a 5V processor. You may have already damaged one or the other of the devices.
SOMETIMES the MPU-6050 will work with a 5V processor, if you have the required pullup resistors on SDA and SCL connected to 3.3V. Use 2.2K to 4.7K resistors. But operation is reliable only if you directly connect a 3.3V MCU with a 3.3V sensor.
okay thank you for the help.
This topic was automatically closed 180 days after the last reply. New replies are no longer allowed.