Some here use KiCAD and purchase from JLCPCB.
1 Like
Works for me.
1 Like


I used kicad originally but moved to EasyEDA for simplicity sake but I did order with Kicad generated BOM and placement files without problems. You can just keep a window open on your PC for the JLCPCB parts. An additional benefit of the EasyEDA was that the parts all had the pcb footprint and you had to import less but not a deal breaker. I think Kicad has more professional features although there is a professional version of EasyEDA for a fee. You also want to look at the manufacturers preferences re size and panelization if you want to order lots for cheap.
1 Like
I've used PCBWAY and JLCPCB and been happy with both. Postage will cost more than the boards themselves ![]()
OSHPARK for very small boards when I only need one or two; slightly faster, lower postage. But rapidly gets expensive as board size goes up.
1 Like
I too use JLCPCB with great success .
They will build from a parts list , but you need to pay storage for the parts and think there is min order number .
If you go on YouTube there are some videos on the factory - very impressive .
I’d assumed 1206 was the component size type not the number of parts !
JLCPCB still does 1206 parts (like 570000 of one capacitor in stock)
PCBWay is expensive, but you can get a sponsorship with them and they will make your boards for free. I've gotten two sponsorships so far (of three I applied for, they are still reviewing one).
They also offer three assembly coupons a month, two of which gives you free assembly. Then all you need to pay for are components and postage (use AliExpress postage option - $5)
We should probably be careful to distinguish “bare pcbs” from “assembled pcbs”…. I’ve only done the former, and it sounded to me like that was what OP had in mind.
Both. Eventually I’d like to have a product I would write library for, long shot
What do you mean?
I just did a comparison for this project:
For full assembly of five boards, PCBWay will cost $150, and JLCPCB will cost $120.
This includes shipping and the components.
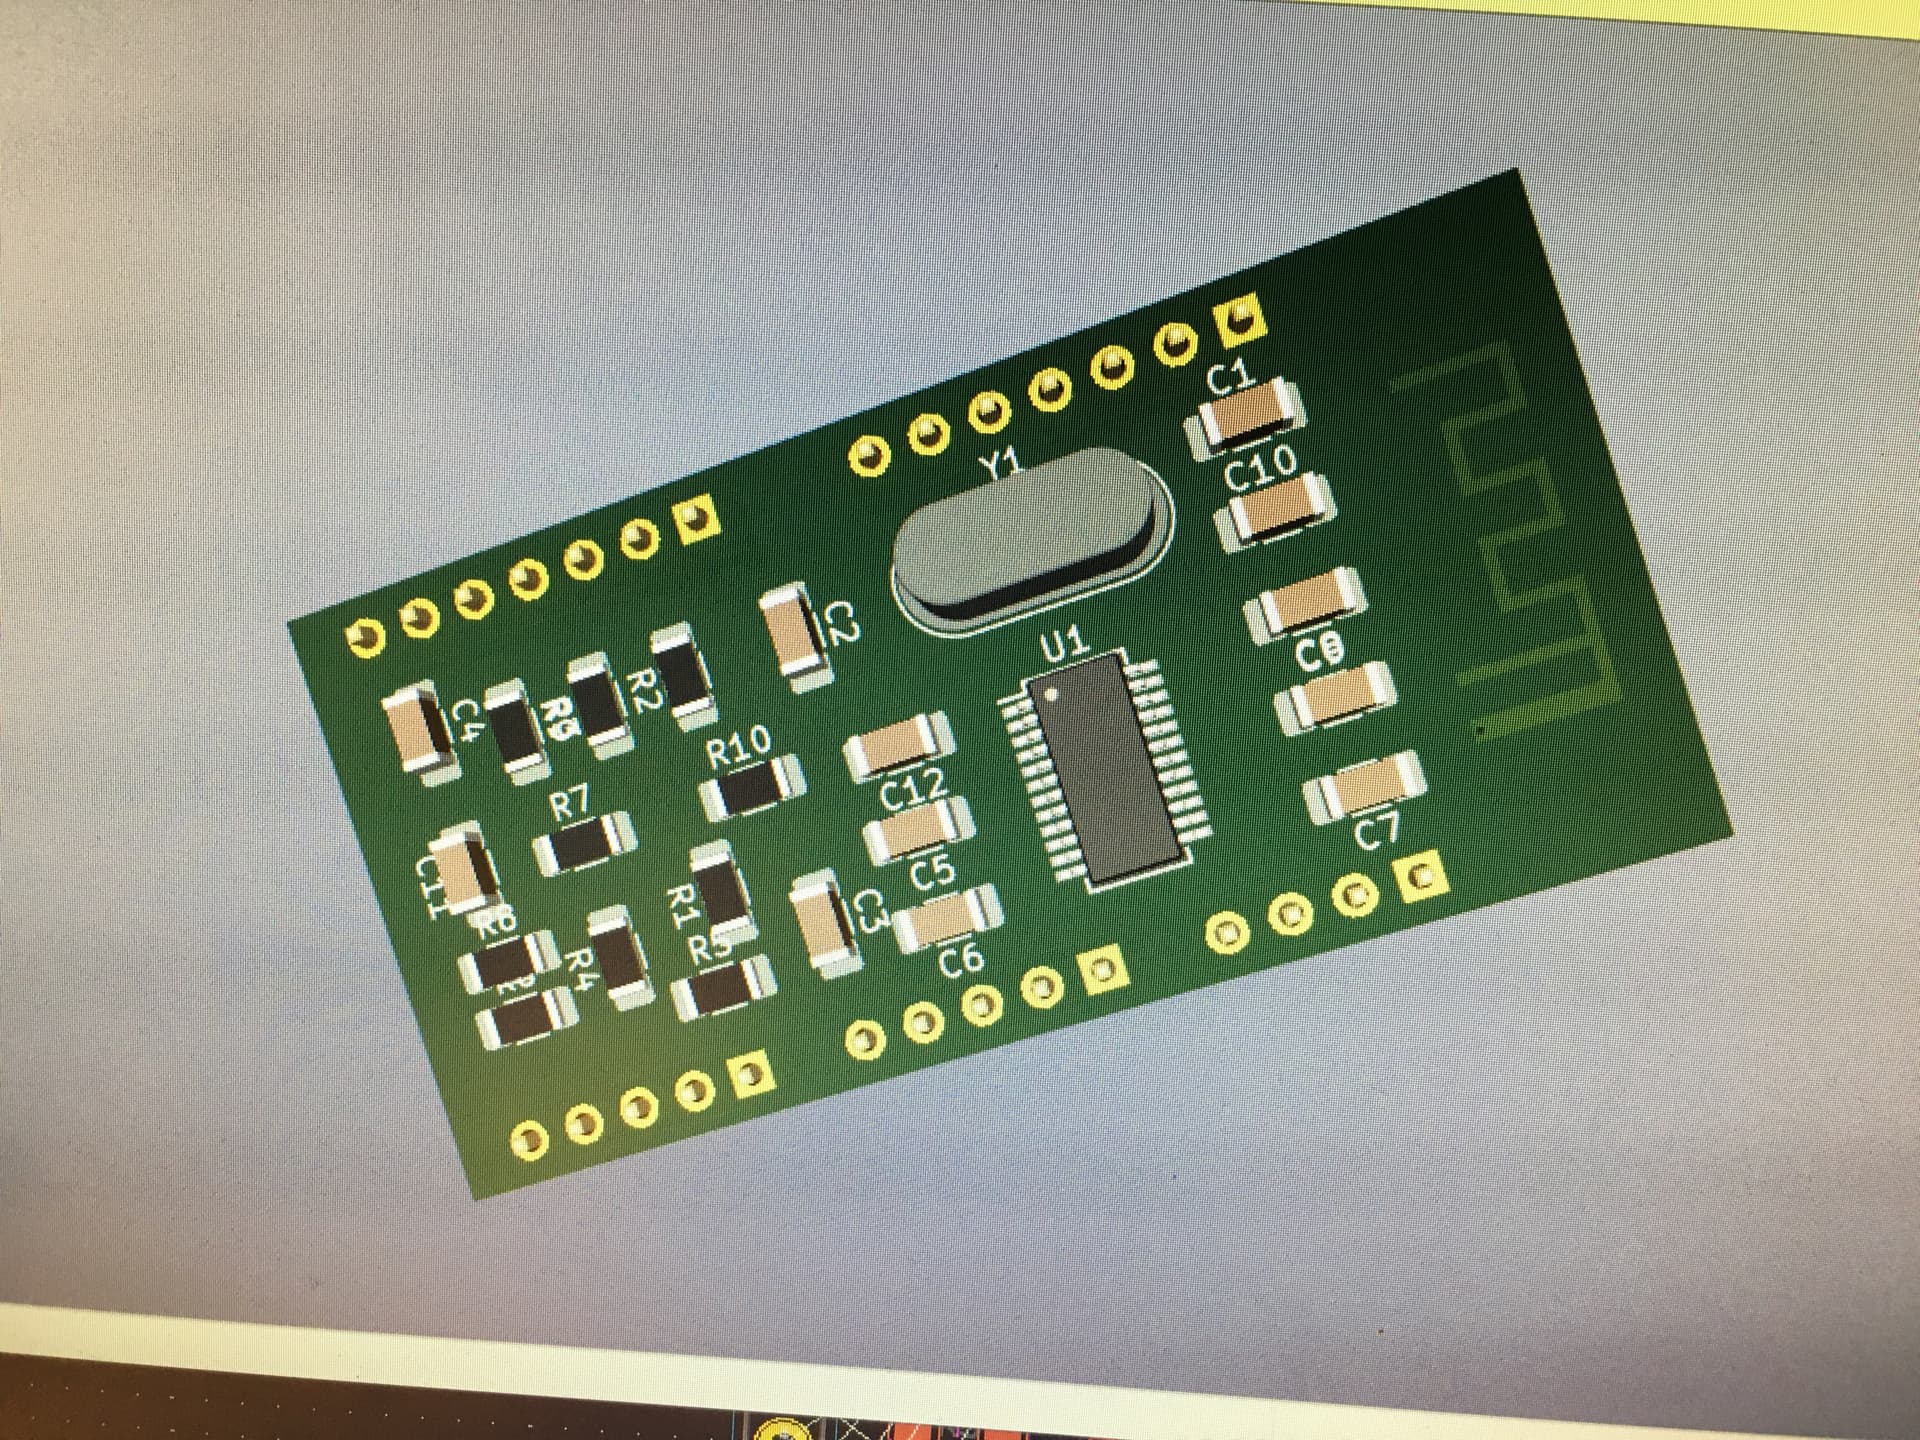

Can you share your schematic, and a top and bottom view of the PCB? If you don't want it public, you can PM me.
It is often useful to have mounting holes on PCBs and text labels on pins on the top of the board are helpful. Hiding component labels under the component may seem like a good idea until you need to quickly identify them after building the board. If any of the capacitors are polarised then I would mark the polarity and add a pin 1 marker to denote pin 1 of the IC and a polarity indicator to the diode pads
I don't know what the application is for the board but have you considered adding explicit test points to enable easy measurement of significant pins ?
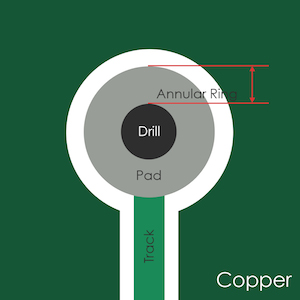
You could increase the diameters of the via annular rings.
@outbackhut After I finish it I will post it
@UKHeliBob The board is tiny, 25mm x 45mm so not much space for marking on top, but plenty on the bottom

Same goes for mounting holes, no need it is meant to go into headers. No polarised caps. Marking pin 1 is a good idea. It is alternative breakout to some Bluetooth MP3 FM Radio board. I want to separate analog ground from DAC because the board they are selling everywhere has bad ground. I bought bare chips and can reflash them with latest firmware for this type of configuration
@LarryD made them slightly larger
Good.
Gives room for the hole if it is not drilled in the centre.
EDIT
Move the Silk Screen USB i.e. B off the pad.

yeah, i’m going to turn pin labels 90 degrees so it will be off it naturally as I lift it higher
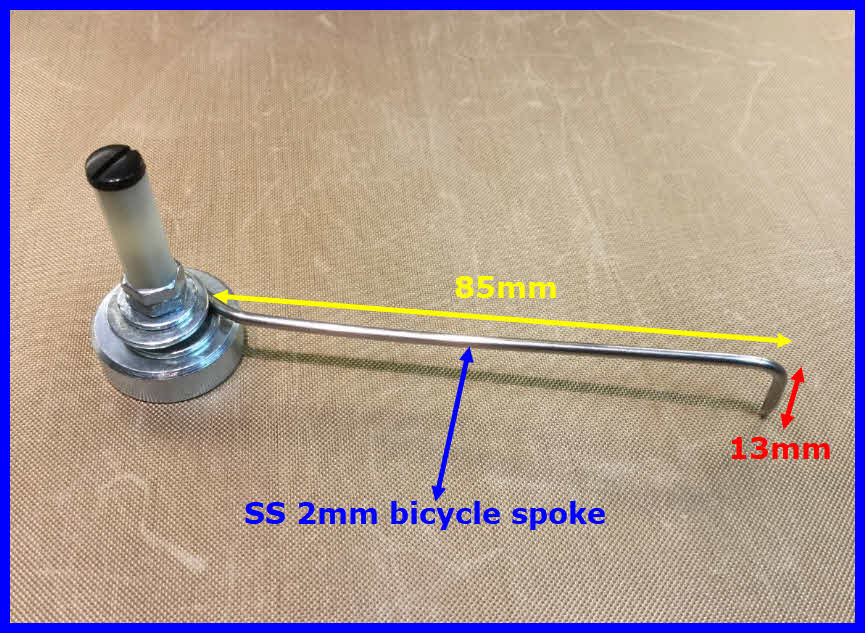
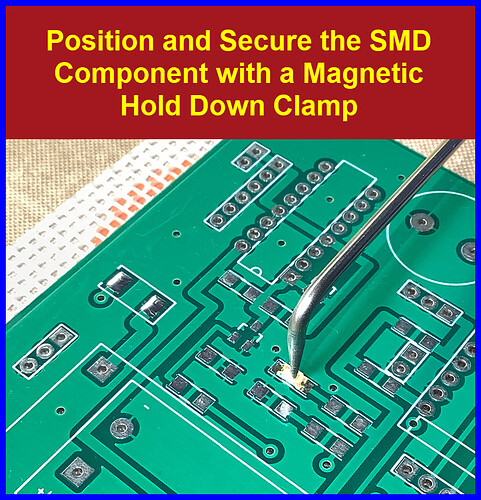
For hand soldering an smd component I put the component approximately into place then form two tiny balls of Blue Tac which are then pressed onto opposing sides of the component. Slightly varying the pressure applied to each Blue Tac ball allows the component to be moved accurately into place. Once tacked into place with some solder the proper soldering can begin. With tiny ICs (say 0.65mm pitch) bridge multiple pins then clear up with Solder Wick, one side at a time.
For raw boards I've had great success with allpcb.com. The only problem I had was that they were not very communicative when one time, a few months ago, they missed the target delivery date by a couple of weeks.