


larryd:
Hi Tom.I use this old breadboard for soldering.
Not sure where I got the board, just realized it only has one power rail on each side.I just ordered some new machine pin headers.
Looks like they now have a bit of a bulb on the pin side.

I recently had a problem with these falling out of their sockets too easily.
Certainly worse than the square ones.
Sometimes, drilling plastic can be difficult.
An: engraving/end mill/spoon/D bit can make this task easy and safe.
Chuck your bit in an electric drill or cordless screw driver.
At slow speed, advance the bit into the plastic.
These bits cut clock wise. (looking from the drill to the hole)
The single fluted bit cuts thin shavings as it advances.
Since the bits are tapered, you can drill smaller holes than the bit diameter, if you drill partly through the plastic.
However, the hole will be tapered.
These bits are made of carbide steel, avoid forcing the bit as this may result in the bit breaking.
And, these bits are SHARP!
Different bit degees available, 10,15,20 and 30°.
1/8" bits are ~$1.00 each.
Lots of suppliers on eBay:


I have used caarbide drills but find they break too easily even when used in a drill press.
The dremel drill press does not seem to be rigid enough and there is a fair amount of runout on my dremel as well.
Can you use those by hand ?
Boardburner2:
I have used caarbide drills but find they break too easily even when used in a drill press.
The dremel drill press does not seem to be rigid enough and there is a fair amount of runout on my dremel as well.Can you use those by hand ?
Yes you can use these by hand.
I use a full hand held cordless drill with these bits (@ slow speed).
They are 'very very' much less susceptible to breakage as PCB carbide bits.
I mainly use 20 and 30 degree bits with hand held drilling.
These bits are my 'go to way' for drilling plastics with no melting, burning, or cracking.
For larger diameter holes, I first drill a starter hole with these bits then adjust the size with a reamer:

I am sure you will be pleasantly surprised with the results.
These bits are also good as a vero board trace cutter.
I use the 30 degree bit for this.


Boardburner2:
I have used carbide drills but find they break too easily even when used in a drill press.
The dremel drill press does not seem to be rigid enough and there is a fair amount of runout on my dremel as well.
True (yet, frustrating) story; I have found a dremel setting of 1/4 speed works well accompanied by cleaning the PCB remains from the bit, every 10th or so hole drilled, works well- when slowly press cutting through the board.
I found a pcb made by cif which has a paper core and glass skin . This drills quite well with a steel bit without blunting too much.With vero i tend to stick with paper boards.
Make heat shrink samples ahead of time.
Cut 1” pieces of different diameter heat shrink.
Shrink about 1/3 the length.
Keep these samples handy when you are deciding which diameter to use in your application.

Make tool tip protectors.
My original tweezer tip protectors don’t seem to last very long.
Make your own protectors from of 4 to 1 heat shrink.
The 4 to 1 ratio makes a nice thick long-lasting protector.


It might be a good idea to add heat shrink to the original protectors as soon as you buy the tweezers. ![]()

Larry - where can I get the cool tool you show in post 525?
Allan
allanhurst:
Larry - where can I get the cool tool you show in post 525?Allan
Lots on Ebay, Banggood and Amazon.
They are nice for tuning holes, especially in plastics.
This is where I got the Reamer.
Out of having 4 of these, one was dull from the start.
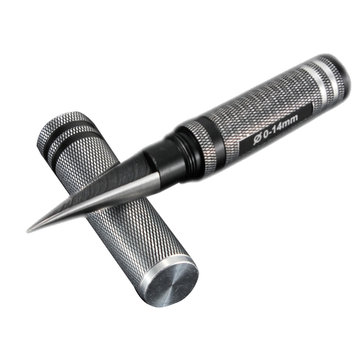
This is also a good tool to have, but the above reamer has finer action:

Henry_Best:
To reduce the evaporation of solvents, keep sealed bottles in the fridge.
If you can sneak them in the fridge. ![]()
I was looking at these a while back for storing Methylene Chloride.

The internet is great for looking up reference material.
I keep a copy of this PDF manual on the iPad.
It covers many SMDs.
There are many other offerings that you can review.
http://www.digikey.com/Site/Global/Layouts/DownloadPdf.ashx?pdfUrl=6B438F7BA5DC49E28D08B066465ABBB9
http://www.talkingelectronics.com/ChipDataEbook-1d/html/SM-Transistors.html


For some projects I set PCBs in place with UV glue.
You get a semi permanent hold within seconds.
After positioning the PCB, add a few drops of glue, expose to UV for 5 seconds.
UV glue is not very good for gluing pieces that are to be permanent.
Lots of sellers on eBay, Banggood and Amazon.


The UV light must be able to see the glue for it to cure.
If the glue is in between the PCBs, it will not harden.

Use UV glue to hold magnet or wire wrap wire in place when doing mods on PCBs.

The SMD code book is great I didn't know it exist, I discovered that google is faster.
example - smd 1a on google images.
.