No the project I always unplug it overnight and it is powered via USB
No, always the same environment. The temperature ranges from 18C to 23C. Humidity around 45-50%
Generally, I always do the first test in the morning. When it doesn't work the first time, the whole day doesn't work
Yes I have tried many times to reload the sketch when it doesn't work and it often tells me "Can't access COM 7". I have to restart the PC for the IDE to load the sketch, but even when it manages to load it, it doesn't work.
I changed 2 USB cables. Keyboard, mouse, sound card, etc. are always connected, both when it goes and when it doesn't. I tried to change all the USB on my pc but that's not the problem.
Yes, checked 5 times. Everything perfect (when it works)
This morning I brought everything into the box and connected similar cables with terminal blocks.
Specifically I connected
RTC
LDR
LCD
BUTTON
Everything was perfect.
I therefore decided to link too
DHT11
SOIL SENSOR
as soon as I connected ARDUINO to the PC I heard the Windows sound of the disconnected devices.
From the IDE I could no longer select any COM port. Even after restarting the PC, still the same problem. I changed USB cable but nothing. I changed the door but nothing.
So I tried to power everything up and check all the connections with a DMM: everything is ok.
So I unplugged DHT11 and SOIL SENSOR and restarted the PC.
Now I can select the port and upload the sketch to Arduino, but it still doesn't work.
It looks like it gets stuck in the "select mode" function, which in my opinion is a different function than "select Mode"
For me it get stuck here
void setup() {
  Serial.begin(115200); Serial.println();
  Serial.println(__FUNCTION__);

  if (! rtc.begin()) dieHere("Couldn't find RTC");
  if (! rtc.isrunning()) rtc.adjust(DateTime(F(__DATE__), F(__TIME__))); // careful will be the time when you compiled the sketch
}

void loop () {
  Serial.println(__FUNCTION__);
  selectMode ();
And when it works it goes there
void selectMode() {

  Serial.println(__FUNCTION__);
  static unsigned long lastChange = 0;
  easyRun();
  if (modeButton || (millis() - lastChange >= autoChangePeriod)) {

    // passare ad un altra funzione

   for (int i = 0; i <NUMPIXELS; i ++) pixels.setPixelColor (i, pixels.Color (0,0,0));      // turn LEDs off
    pixels.show ();

    lastChange = millis ();
    switch (mode) {
      case LIGHT: mode = SOIL; break;
      case SOIL: mode = TEMPERATURE; break;
      case TEMPERATURE: mode = LIGHT; break;
    }
  }
}
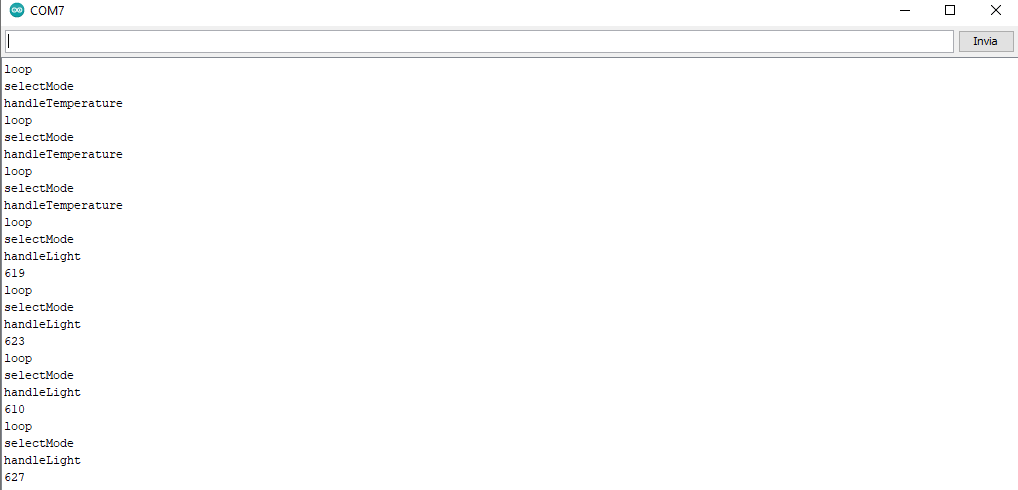
but what it actually prints, as can be seen from the screenshot (please don't post screenshots) is that it prints selectMode despite what you say
If you are printing teh function name at the start of each function then I would agree that it is just calling selectMode() from loop(), detecting no input then returning to loop()
The obvious conclusion is that either the code is not reading the button input or that the button itself or the wiring to it is faulty so that is the area to concentrate on.
Is the button wiring firmly connected ?
is the button connected correctly. You have to choose the correct terminals, not just any two
does the button work consistently or does it sometimes fail to close its contacts ?
check the voltage at pin 3 with the button pressed and not pressed. Are they what you expect ?
Hi,
Have you checked that the button actually shorts the two wires together?
Usually you connect diagonally opposite connections on the switch to ensure you have the operating contacts.