I'm new to this forum and I'm still trying to find my way around.
My project: I have replaced the two (X & Y) manual winding knobs on a small milling table with stepper motors and a toothed belt gear reduction. The motivation for this is that I got a repetitive stress injury from turning the knobs thousands of times which resulted in the loss of the use of my thumb for 5 months. I make small wooden parts with this milling table of about 28x85mm. The exact size varies from job to job.
I have been watching many video tutorials but none of them gets close enough to what I'm trying to do to be useful.
I was disallowed from uploading a photo of my project since I am a new user. A description of what was in the photo: The size of the milling table is about 100 x 300 mm. It has a feed screw for each movement, X & Y. Each feed screw had a manual knob, which has been replaced by a toothed belt pulley which runs a short toothed belt to a toothed pinion on a stepper motor. This whole thing bolts onto the table of my drillpress which runs the small milling cutter, usually 3 or 4mm diameter. That would be the manually adjusted Z. I make a pass left-right (X) and then use the Y control to move the cutter down one "row" and make another X pass. Back and forth until the area is precisely milled out leaving a ledge about 2.5mm wide on 3 sides. Then another smaller rectangular cutout is made about 1mm deeper in the middle.
I have an Arduino Uno r-3, a CNC stepper motor shield, and TMC2208 stepper motor drivers, and 2 regular Nema 17 stepper motors.
I wish to control the stepper motors in 2 different ways that suits different operations. One way is with a joystick - I have one scrounged from a drone remote controller. The other method of control would be 4 momentary button switches arranged in a "plus sign" configuration for up-down, left-right. Add to that I would like to have a manual speed control knob to govern the stepper motor speed. This is a very light duty cutting operation. The main thing I am trying to achieve is precision. Could I do this on a CNC machine? yes, except I only need one piece each time and each one is a custom design.
There are some cases when I am creating an inset for an irregular object to fit in and the joystick looks more suitable. Mostly I would be milling out a rectangular cutout where it is essential that the cutting does not drift off from strictly X or Y. The left-right-up-down button switches would be better for this type of operation. I'm not in a hurry doing this. The best way to do the job is slow and careful.
Mostly what I need is help in knowing where to look to find the specific necessary code resources. And of course if it looks like I'm heading off the edge of the cliff you might point that out to me as well.
search the web and load the grbl Arduino CNC motor controller on your Arduino.
search the web and load the Universal G-code sender application on your PC
You'll be able to do all that you need to without writing a single line of code.
There are add-ons for a lot of the CNC applications that allow physical buttons or joysticks. I don't remember specifically if UGS allows that, but it's at least a good place to start.
I think is a straightforward bit of code, I can't think of any resources specific to your application. Essentially you just need to generate steps at a particular rate while a button is pressed.
Yes it would. If that's a problem, one alternative would be looking at "complete" control systems that include a touch display like the Makerbase DLC-32. Those run around $50 or so with a display, 3-axis controller and drives. The downside is that they are not as flexible.
The most flexible method is, of course, to write your own code. I normally recommend AccelStepper, but some people seem to have a difficult time learning it.
TBC - these steppers are capable of turning the winding knobs?
And you need no feedback, you are planning to run them by pressing buttons or moving a joystick?
I don't think that's a big problem. Are you using a cheap r/c joystick that has spring return to zero?
If so, when the joystick is centered, you would respect the input of the plus-sign buttons to move at some fixed speed up down left right. When the joystick was out of a programmed deadband you would also step, now at a rate proportional to the deviation of the axis.
The deadband and springs would make it easy to ensure movement on only one axis.
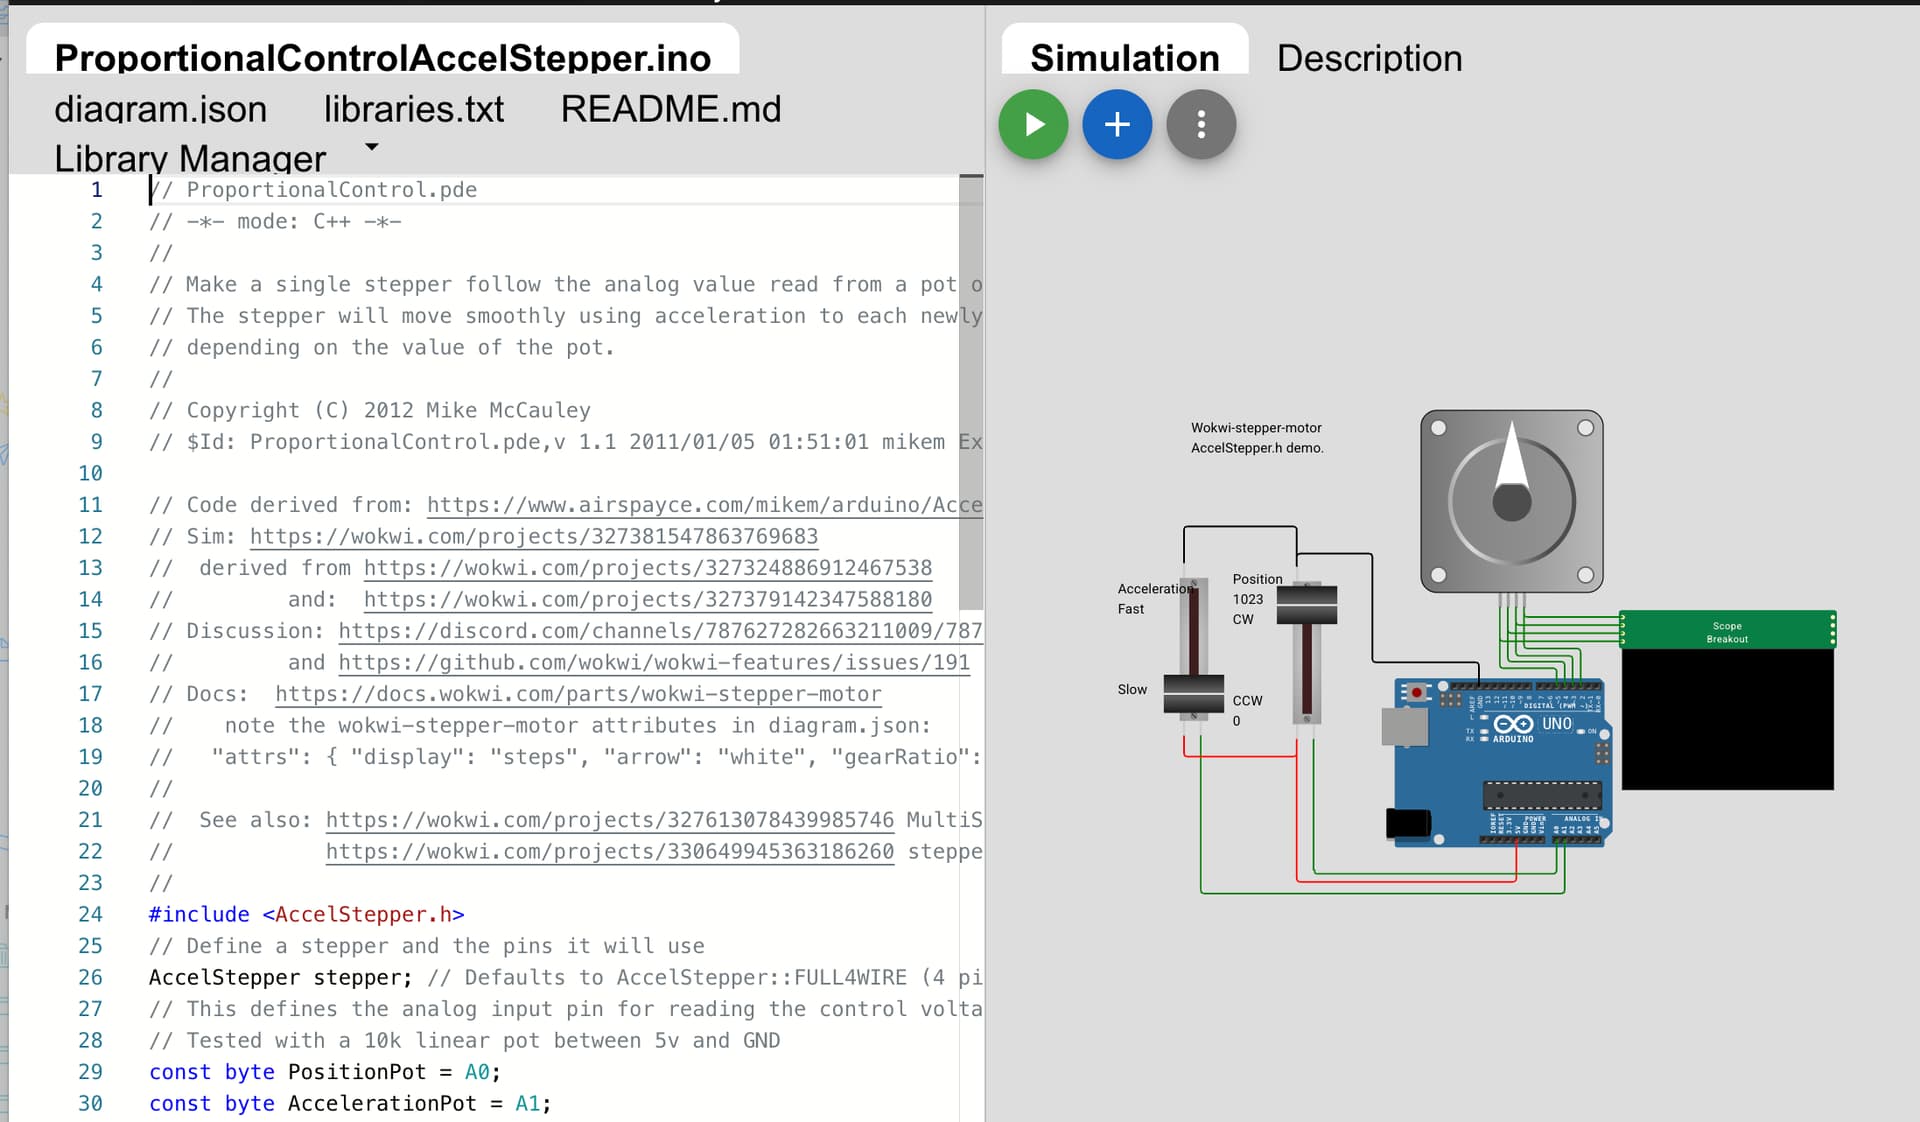
Check this out for how simple things can be using a good library:
So does that mean the Arduino Uno plus CNC shield plus physical controls such as joystick, switches, is not a self contained solution? My workshop is not a suitable environment for a computer. I need a self contained solution.
That cannot be answered as a simple no or yes. The joystick will have to be in a place where you can use it, same for the switches. The electronics can be in a simple Nema 12 or other suitable box. You then run cables to them. Switches could be mounted in the box if it is in a suitable location.
I made torque measurements on rotating the feed screws to make sure the force was within the torque capability of the motors. In addition, the stepper motors are connected via a toothed belt reduction of about 3.5:1 so that should give me some extra wiggle room.
I did not see anything simple in the Wokwi example. I'm still a novice at this stuff.
I have 3 different joystick controllers and 2 are not easy at all to confine to only x or y movements. The springs are not nearly strong enough to prevent accidental drift. The bigger joystick is about 8x bigger (55mm square) than the small ones and was designed for a radio controlled drone. It feels like it should work well in real world situations.
That looks like you want to avoid simultaneous x & y motion. An advantage of GRBL is that it can do coordinated x&y motion in straight lines at an angle while also doing smooth acceleration. That's tough to do with the standard libraries. If you don't want coordinated movement with, and can settle for individual axis movement at a time, then it's much easier.
Regarding the joystick motion-- would you want that to work much like the buttons as sort of an on-off (digital joystick)? Or do you want some analog action so that if you push the joystick farther it moves faster (analog speed control) or farther (analog position control)? If it is like a digital joystick, then perhaps it could work exacly like the buttons and be wired up in parallel with the buttons.
The Mobatools library examples are the richest examples I've seen, with "Example 3" sounding close to a 1-axis example of what you are describing, and might be easily extensible to two axes.
I don't see that you have plans for any display. Are you just reading off the machine dials?
Yeth. All wokwi steppers should by default have this attribute, all it costs is nothing, and it adds pure fun.
{ "arrow": "orange" }
Sry @fundyflutes to call any of this simple. You'd prolly say your 3.5:1 toothy belt reduction driven lead screws were simple…
A good joystick with spring centering in combination with a dead band in each axis might be safe enough. It would not be too hard to have both.
Yikes!. I stopped doing the thing I knew would lead to serious trouble like you got into long after I should have… I probably didn't literally feel your pain but certainly empathize. I won't bore you with the details, but it was a thumb and a joystick…
An alternative is to poke around on cnczone.com and see what you can find off the shelf/kit built. It's nice to DIY, but when you just need to get something done, playing around can get in the way of progress. I guarantee you that there are many others who have had the same problem you do and there are existing solutions.
Here is a photo of the small milling table with the stepper motors attached. Just so you have an overall impression of what I'm trying to do.
The next photo shows a mockup sample of a milling project. In this case I marked it on the wood with a black pen to make it more visible. This piece of wood would be clamped to the milling table and I align the wood such that it travels truly in a straight line and not crooked.
I am not using any dials or indicators. I just cut up the the lines. For example, in the small piece of wood shown in the picture. I would first cut the darkened rectangle right through the wood so it is a hole. It also becomes a reference point. Then I cut out the entire top surface, up to the boundary lines, down 2 mm. The main thing here is to have a milled surface that is dead flat. Then I mill out the smaller rectangle down 0.032". Of course the lines will have milled away in the first pass so I have to redraw them. I simply mill up to the lines, while checking with a dial caliper. No automation, no CNC programming.
This looks interesting. But as yet I have not figured out how it works. For instance, if I try to move a slider, the entire slider jumps out of place. I seem to be in the mode of building the simulation rather than running it.
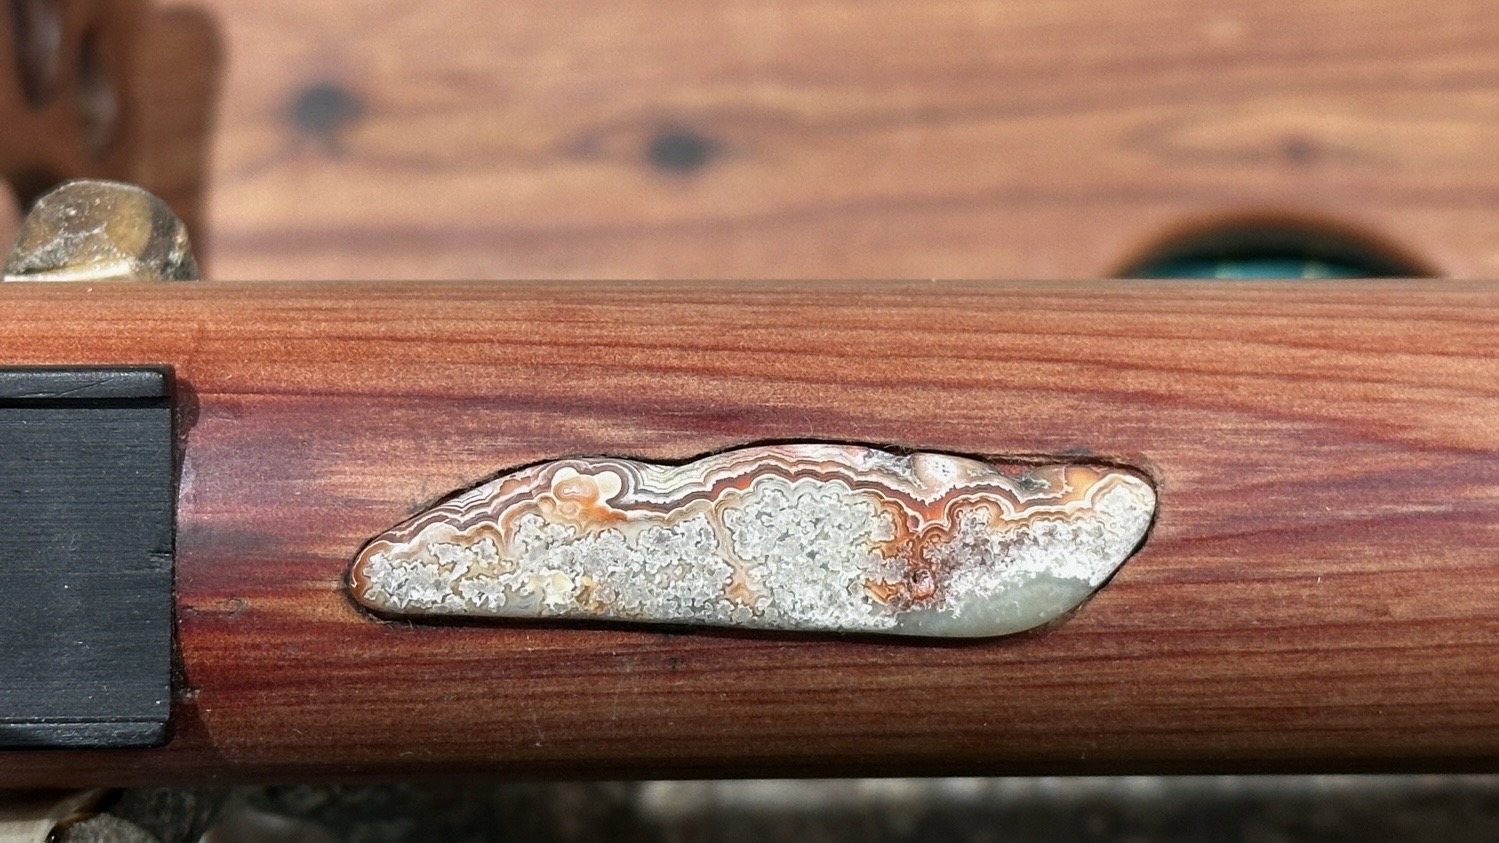
Here is a polished Agate inset onto the top of a wooden flute. This is a case where I imagine the joystick would be better than the 4 button switches for controlling movements.
In practice I would lay/clamp the agate on top of the flute and mark an outline, either with a fine tip marker or an Xacto knife blade. Then I would mill out the space inside the marked area. This is quite awkward using the 2 winding knobs.