Tested and working on Arduino Mega over Serial1. The key was opening the library .h file and discovering that the Sabertooth class allowed for a second argument, namely what Serial port, when we instantiate...an instance using Packetized Serial (mode 4) (help me out, gurus, did I say that right? Instantiate an instance? Seems awkward... but you know what I mean).
Anyway, here's the code, same as last but works with Mega on TX1/RX1 now. Booyah.
/*********** Powerwheels Sabertooth *********************
!!!!!!!!!!!!!!! IMPORTANT !!!!!!!!!!!!!!!
!!!!!!!!!!!!!!! IMPORTANT !!!!!!!!!!!!!!!
!!!!!!!!!!!!!!! IMPORTANT !!!!!!!!!!!!!!!
THIS CODE WILL ALLOW OVERRIDING OF KID'S RIDE ON TOYS
SUCH AS THOSE MADE BY POWERWHEELS AND PEG PEREGO
IT IS UNTESTED CODE IN ACTUAL RIDE ON WITH RIDER.
USE AT YOUR OWN RISK!
DO NOT, I MEAN DO NOT USE ON RIDE ON TOY WITH ANY
RIDER UNTIL IT HAS BEEN CALIBRATED AND THOROUGHLY
TESTED TO THE SATISFACTION OF A COMPETENT ADULT
CARE PROVIDER FOR THE RIDER IF THE RIDER IS NOT AN
ADULT.
THIS CODE CONTAINS NO EMERGENCY OVERRIDE AND THE TOY
SHOULD ONLY BE OPERATED WITHIN THE REACH OF A
COMPETENT ADULT CARE PROVIDER WHERE A MECHANICALLY
OPERATED EMERGENCY STOP OVERRIDE DEVICE HAS BEEN INSTALLED,
EFFECTIVELY REMOVING ALL BATTERY POWER TO THE MOTORS.
END OF IMPORTANT NOTE
--------- INSTRUCTIONS TO BUILDER ------------
Requires changes to code depending on your hardware
if using two position button type pedal, activate
the line
pinMode(sensorPin, INPUT_PULLUP);
by uncommenting it.
if using typical potentiometer, leave that line
commented out.
Also, in function void checkSpeedPot(){}
have a read through and there's some stuff to set there
Defaults to testing (printing data to PC over Serial)
and assumes pushbutton type "all-or-nothing"
throttle input. These can be adjusted according to
the notes above and the comments found throughout
this sketch.
Also, select the instance of Sabertooth class that suits you
(default is for Arduino Mega or other with Serial1 UART)
The circuit:
- potentiomenter to analog input 0
OR if you use a switch type pedal
- switch pin A0 to GND
- forward switch to D3
- reverse switch to D4
- LED on digital pin 13 to ground
- view values in Serial monitor, 9600 baud
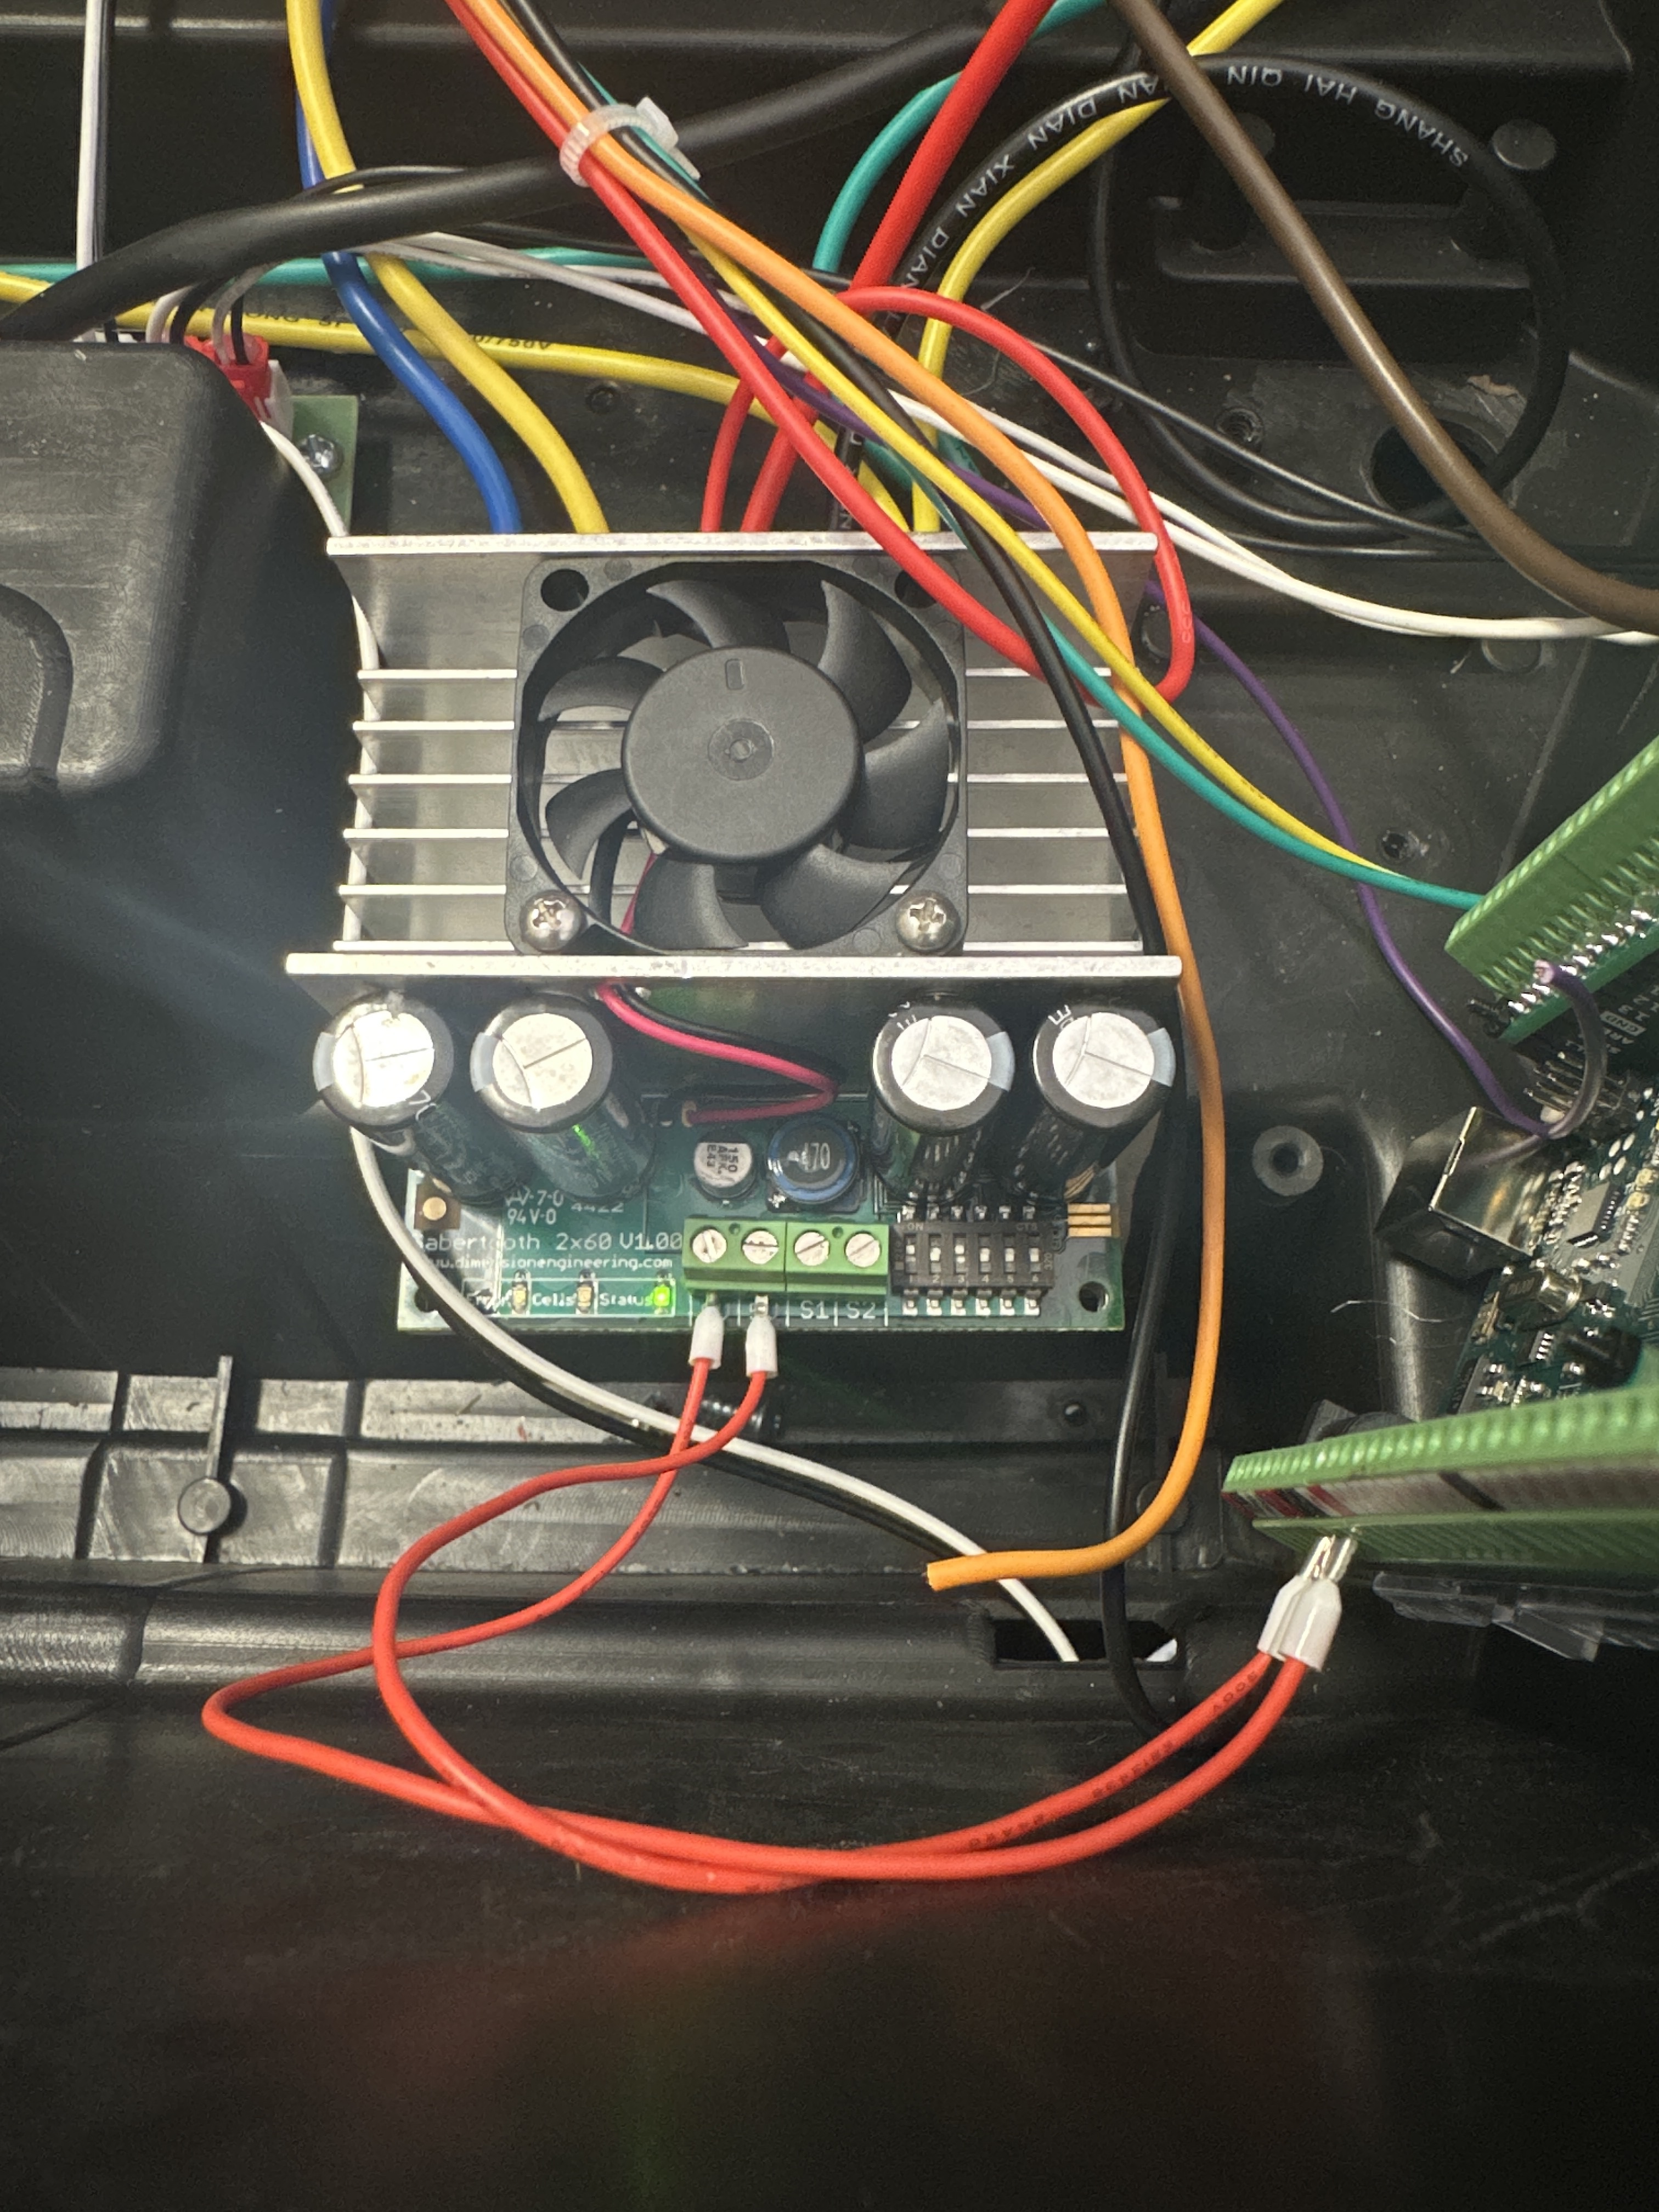
- Arduino TX to Sabertooth S1 (Uno) if selected
- Arduino RX to Sabertooth S2 (Uno) if selected
DEFAULT:
- Arduino TX1 to Sabertooth S1 (Mega)
- Arduino RX1 to Sabertooth S2 (Mega)
Tested with 2 x Razor scooter brushed motors and seems
to be working as expected.
Sabertooth DIP switch settings for this Packetized Serial Mode:
- 1: D for Packetized Serial address 128
- 2: D
- 3: D for LiPo, U for all other chemistries (battery cutoff switch)
- 4: U for 9600 baud, reverse this for 19200 baud: baud select pin 1 U for autobaud
- 5: U for 9600 baud, reverse this for 19200 baud: baud select pin 2
- 6: U for Standard Simplified Serial
by Hallowed31
2024-07-27
Library copyright Dimension Engineering, 2012
"Copyright (c) 2012 Dimension Engineering LLC
See license.txt for license details."
*/
#include <Sabertooth.h>
/* choose your version, normal or Mega. Use one only.
(or roll your own changing 2nd argument in the Sabertooth instance) */
// use line below for Uno Serial on pins 0 and 1
//Sabertooth ST = Sabertooth(128); // address 128
// use line below for Mega, Leonardo, any with a Serial1
Sabertooth ST = Sabertooth(128, Serial1); // address 128, port Serial1
#define PUSHED LOW
#define RELEASED HIGH
const int maximum = 1017;
const int minimum = 13;
const byte speedPot = A0;
const byte heartbeatLED = 13;
//Hardware Serial connected to 1;
const byte backwardSwitch = 3;
const byte forwardSwitch = 4;
//10 * 50ms = 500ms (1/2 second) before a change is validated
const byte debounceAmount = 10;
//when counters reach 10 (i.e. 10 read cycles) we assumed a valid switch change
byte forwardCounter = 0;
byte backwardCounter = 0;
byte lastForwardSwitch = RELEASED;
byte lastBackwardSwitch = RELEASED;
enum { REVERSE = -1,
NEUTRAL = 0,
FORWARD = 1
};
int directionFlag = NEUTRAL;
int speed = 0;
int m1 = 0; // signal to motor 1
int m2 = 0; // signal to motor 2
unsigned long heartbeatTime;
unsigned long checkSwitchesTime;
unsigned long checkSSpeedPotTime;
void setup() {
Serial.begin(9600);
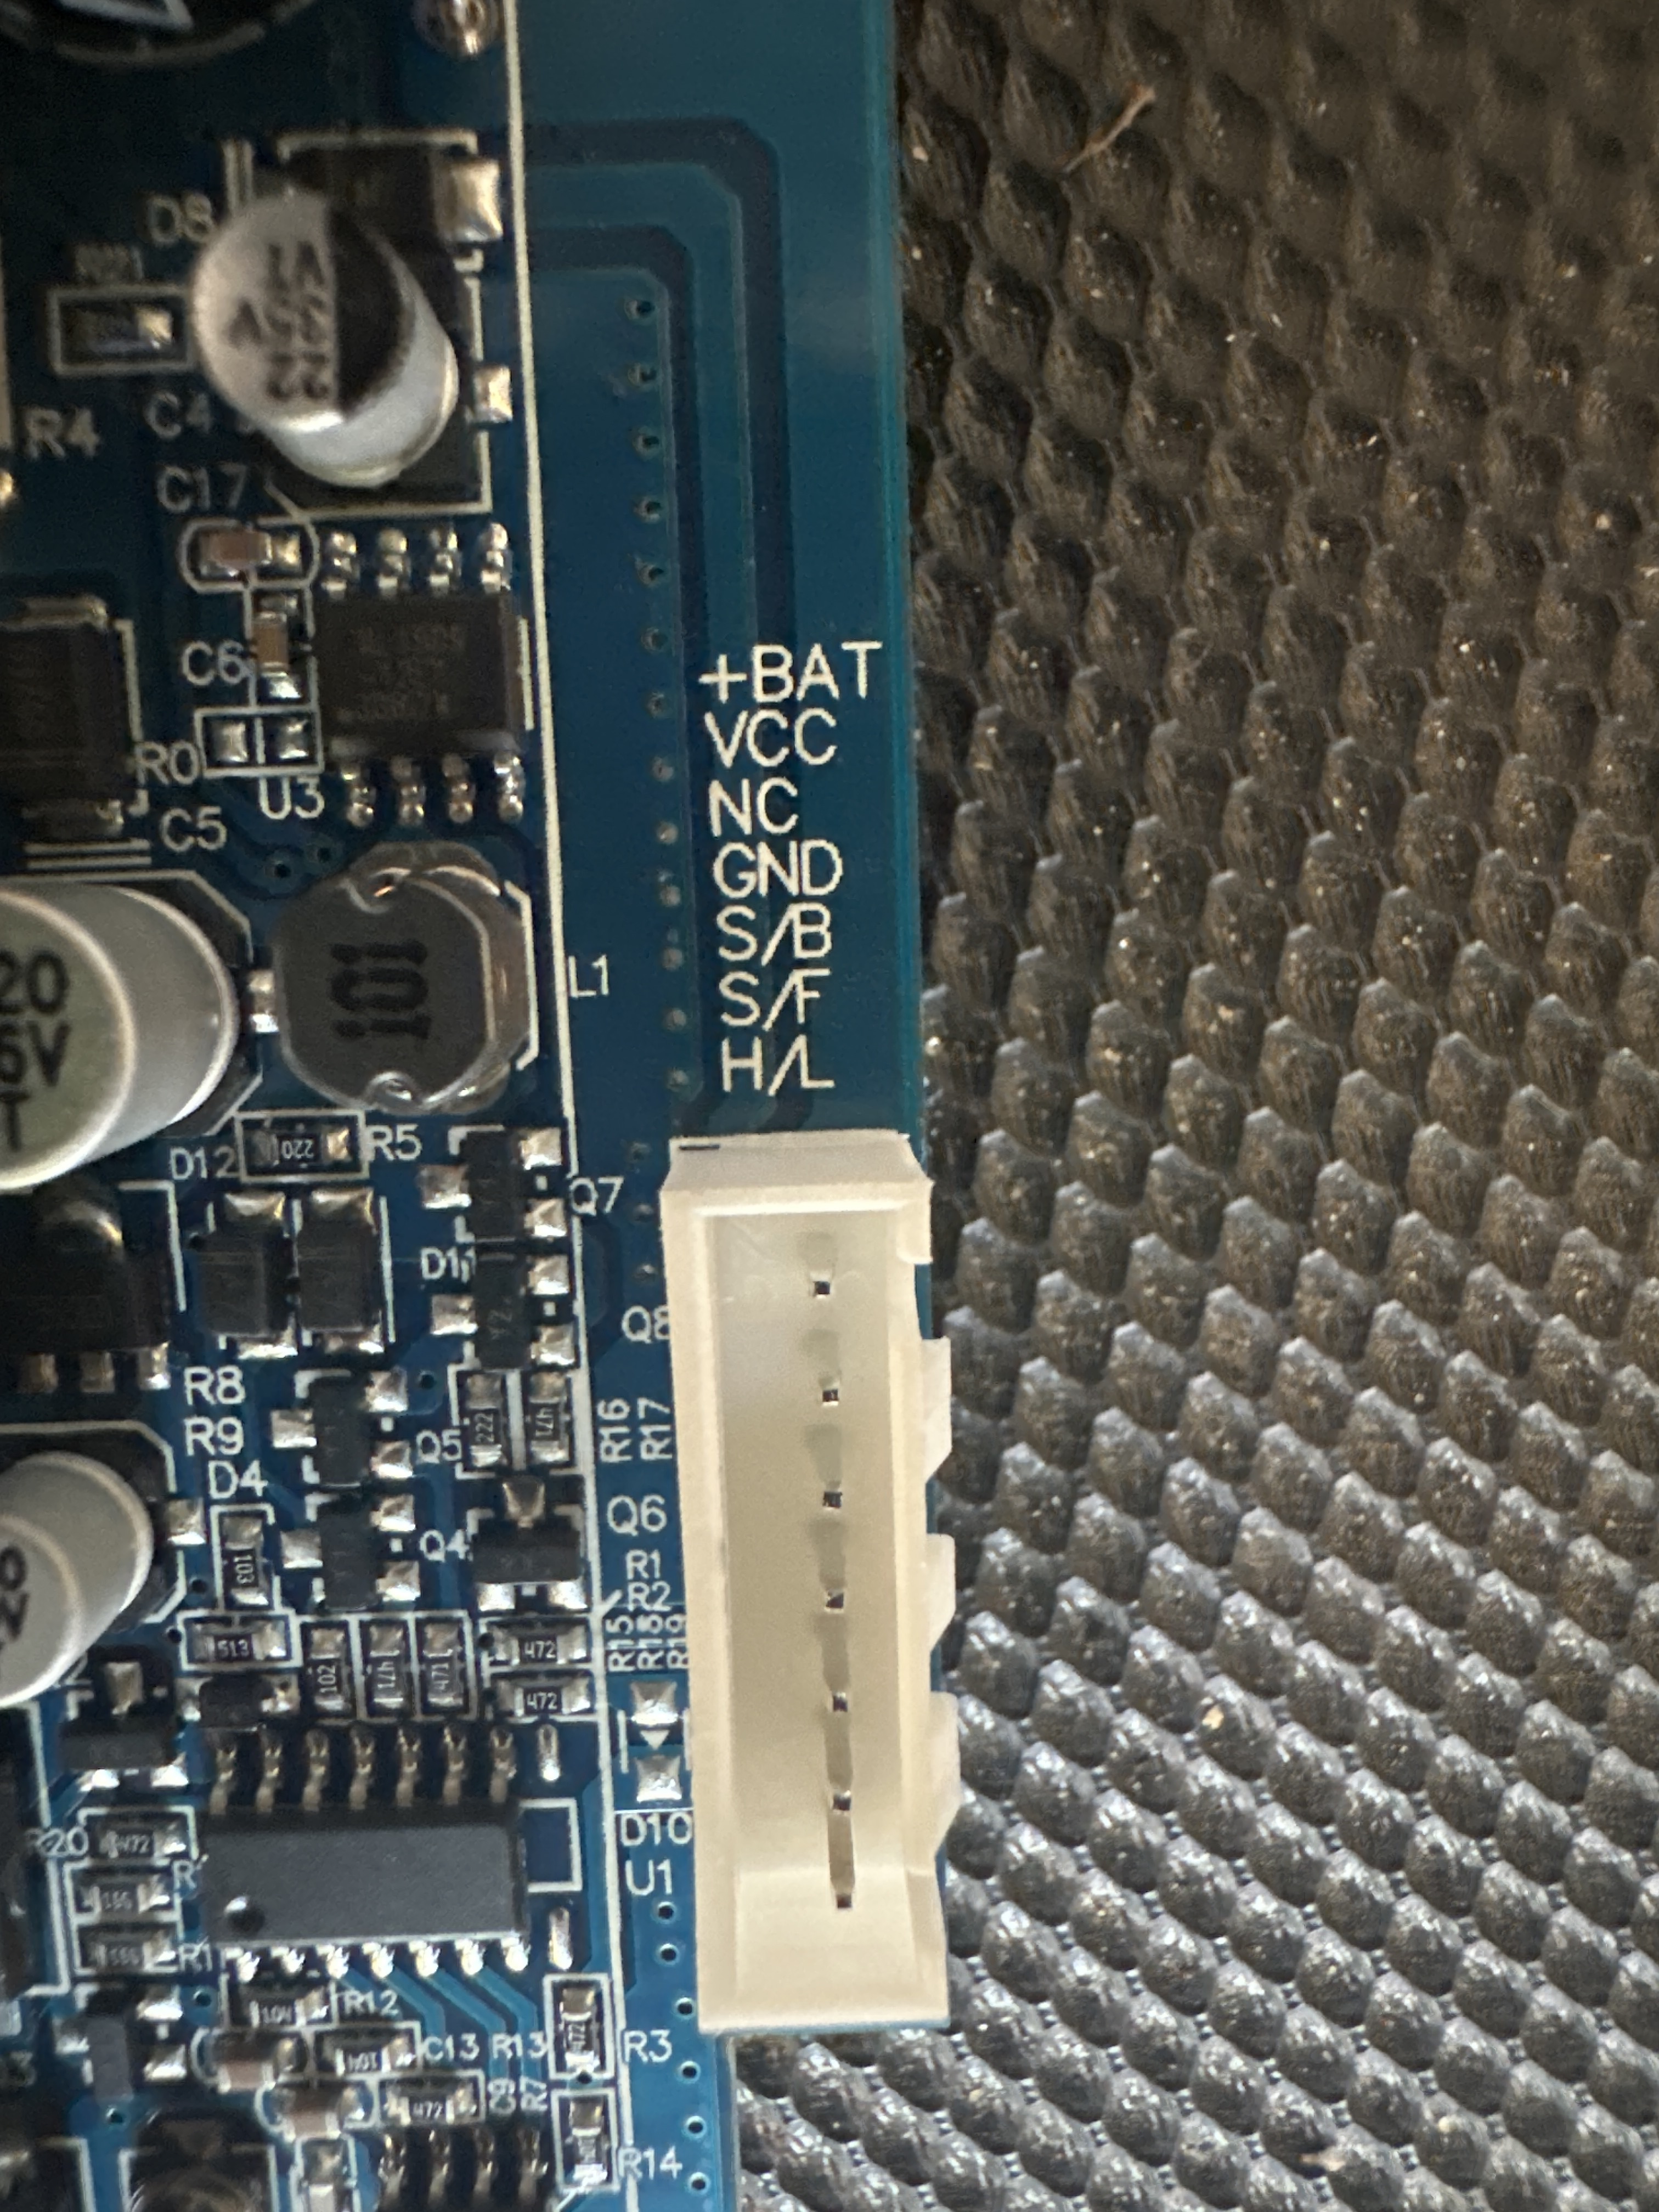
Serial1.begin(9600); // if you got a compile error here, you don't have one of these
SabertoothTXPinSerial.begin(9600);
Sabertooth::autobaud(SabertoothTXPinSerial);
// the line below is for a button type pedal
// comment this out if using potentiometer
pinMode(speedPot, INPUT_PULLUP);
pinMode(forwardSwitch, INPUT_PULLUP);
pinMode(backwardSwitch, INPUT_PULLUP);
pinMode(heartbeatLED, OUTPUT);
}
void loop() {
if (millis() - heartbeatTime >= 500ul) { //500ms
heartbeatTime = millis();
digitalWrite(heartbeatLED, !digitalRead(heartbeatLED));
}
if (millis() - checkSwitchesTime >= 50ul) { //50ms
checkSwitchesTime = millis();
checkSwitches();
}
if (millis() - checkSSpeedPotTime >= 100ul) { //100ms
checkSSpeedPotTime = millis();
checkSpeedPot();
}
/************************************************
Other non blocking code goes here.
That means no while(), no delay();
*************************************************/
}
void checkSwitches() {
// forward switch
byte state;
state = digitalRead(forwardSwitch);
if (lastForwardSwitch != state) {
forwardCounter++;
if (forwardCounter >= debounceAmount) {
//get ready for the next cycle
forwardCounter = 0;
lastForwardSwitch = state;
if (state == PUSHED) {
directionFlag = FORWARD;
}
else {
directionFlag = NEUTRAL;
// ST.drive(0);
}
}
}
else {
forwardCounter = 0;
}
// backward switch
state = digitalRead(backwardSwitch);
if (lastBackwardSwitch != state) {
backwardCounter++;
if (backwardCounter >= debounceAmount) {
backwardCounter = 0;
lastBackwardSwitch = state;
if (state == PUSHED) {
directionFlag = REVERSE;
}
else {
directionFlag = NEUTRAL;
//ST.drive(0);
}
}
}
else {
backwardCounter = 0;
}
}
void checkSpeedPot() {
speed = analogRead(speedPot);
// uncomment for testing, comment out for final install
// printRawData();
/* IMPORTANT - use only ONE of these speed = map(etc) functions at at time */
// for potentiometer type throttle
// speed = (map(speed, minimum, maximum, 0, 1023)) / 8; //for speed 0 to ±127
// for pushbutton type throttle, map is reversed because INPUT_PULLUP
speed = (map(speed, minimum, maximum, 1023, 0)) / 8; //for speed 0 to ±127
// uncomment for testing, comment out for final install
// printMappedData();
speed = constrain(speed, 0, 127); //for speed 0 to ±127
speed = directionFlag * speed;
m1 = speed;
m2 = speed;
// uncomment for testing, comment out for final install
// printFinalDriveSignal();
ST.motor(1, m1); // motor 1, speed cast to m1
ST.motor(2, m2); // notor 2, speed cast to m2
}
void printRawData() {
Serial.print("Throttle Input: ");
Serial.print(speed);
Serial.print(" ");
}
void printMappedData() {
Serial.print("Throttle Mapped To: ");
Serial.print(speed);
Serial.print(" ");
}
void printFinalDriveSignal() {
Serial.print(" Final Drive Signal M1: ");
Serial.print(m1);
Serial.print(" Final Drive Signal M2: ");
Serial.println(m2);
Serial.println();
}
More to come...maybe.