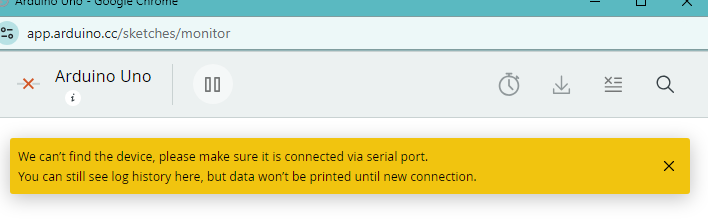
Hi, since the last week i have an issue that seems to be the bug that you said on this forum. The thing is that i can't see the monitor serial data. I tried changing my ESP8266 to ESP32 but the problem persists. I need help please.

I even tried to changing my pc, and the code. I uploaded the blink code but i still had this problem.
Details: win10 arduino uno (working)
Same issue here, uploads, but no serial out. tried changing boards, reinstall cloud agent, run cloud agent with admin perms, changeing com ports, updating device drivers to no success.
here is debug info from cloud agent:
Serial Ports:
[
{
"Name": "COM14",
"SerialNumber": "",
"IsOpen": false,
"VendorID": "0x1A86",
"ProductID": "0x7523"
}
]
Serial works fine in Arduino IDE (i had it closed while troubleshooting)
Help very much appreciated
Thanks for reporting this @marvin_serpas and @wassupgcode_24. I performed an investigation and found that I could reproduce it under the following conditions:
- The board has the WCH CH340 USB chip.
- The operating system is Windows.
- The latest version (3.9.2024.9) of the CH340 driver is installed.
I have reported the problem to the Arduino Cloud developers:
If you have a GitHub account, you can subscribe to that thread to get notifications of any new developments related to this subject:

![]() Please only comment on the GitHub issue thread if you have new technical information that will assist with the resolution. General discussion and support requests are always welcome here on the Arduino Forum.
Please only comment on the GitHub issue thread if you have new technical information that will assist with the resolution. General discussion and support requests are always welcome here on the Arduino Forum.
Until the bug is resolved, I can suggest the workaround of rolling back to a previous version of the CH340 driver. I found that Serial Monitor works perfectly when I am using that version of the driver.
- Close the Serial Monitor window if it is still open.
- Click the following link to download the previous version of the driver from the chip manufacturer's website:
https://www.wch-ic.com/downloads/file/65.html?time=2023-03-16%2022:57:59 - Wait for the download to finish.
- Run the downloaded
CH341SER.EXEfile. - A "User Account Control" dialog may now appear asking "Do you want to allow this app to make changes to your device?". Click the "Yes" button.
- A "DriverSetup(X64)" dialog will open. Click the "INSTALL" button in the dialog.
- Wait for the driver installation to finish, as indicated by the appearance of a "Driver install success!" dialog.
- Click the "OK" button in the "Driver install success!" dialog.
The dialog will close. - Click the X icon at the top right of the "DriverSetup(X64)" dialog
The dialog will close. - Close Arduino IDE if it is running.
- Connect the Arduino board to your computer with a USB cable.
- Open the Windows Device Manager.
- Select View > Devices by type from the Device Manager menus.
- Open the "View" menu.
- If there is a ✓ to the left of the "Show hidden devices" menu item, click on "Show hidden devices" to disable it.
- Open the "Ports (COM & LPT)" section of the Device Manager tree.
- You should see a port identified as "USB-SERIAL CH340 (COMn)" under the "Ports (COM & LPT)" section (where "COMn" is some serial port e.g., COM4). Double click on that item.
The "USB-SERIAL CH340 (COMn) Properties" dialog will open. - Select the "Driver" tab of the "USB-SERIAL CH340 (COMn) Properties" dialog.
- You will see a "Roll Back Driver" button in the dialog. If it is not clickable, perform the following instructions:
- Click the "Update driver" button.
An "Update Drivers Device - USB-SERIAL CH340 (COMn)" dialog will open. - Click on "Search automatically for drivers" in the "Update Drivers Device - USB-SERIAL CH340 (COMn)" dialog.
- You should now see the driver installation wizard update the driver. Wait for the update to finish, as indicated by the message "Windows has successfully updated your drivers" in the dialog.
 It is possible you will instead see the message "The best drivers are already installed". If so, please stop following the instructions here and reply on the forum thread to let me know. I'll provide alternative instructions you can follow.
 - Click the "Close" button in the "Update Drivers Device - USB-SERIAL CH340 (COMn)" dialog.
The dialog will close.
- Click the "Update driver" button.
- Click the "Roll Back Driver" button in the "USB-SERIAL CH340 (COMn) Properties" dialog.
The "Driver Package rollback" dialog will open. - Click the radio button next to "My apps don't work with this driver" in the "Driver Package rollback" dialog .
- Click the "Yes" button.
The "Driver Package rollback" dialog will close. - Click the "Close" button in the "USB-SERIAL CH340 (COMn) Properties" dialog.
- Close the Device Manager window.
Now try opening Serial Monitor again, just as you did before. Hopefully this time it will work as expected.
Please let me know if you have any questions or problems while following those instructions.
2 Likes
it worked and didnt work. I ran the exe, uninstalled the one i had and installed. It promped installation success. Driver rollback is greyed out in devices manager, and when performing the update driver for the wizerd, it prompted The best drivers are already installed ". The properties window gives the following error.

funny thing is the error goes away upon restarting pc and serial monitor works as usual. At least for a few min... Then the error pops up and serial monitor no longer works.
I have found that when the driver installation gets into this state, it can be solved by uninstalling and then reinstalling the drivers. After that, the "roll back" option should be enabled.
I'll provide instructions you can follow to do that:
- Close Arduino IDE if it is running.
- Connect the Arduino board to your computer with a USB cable.
- Open the Windows Device Manager.
- Select View > Devices by type from the Device Manager menus.
- Open the "View" menu.
- If there is a ✓ to the left of the "Show hidden devices" menu item, click on "Show hidden devices" to disable it.
- Open the "Ports (COM & LPT)" section of the Device Manager tree.
- You should see a port identified as "USB-SERIAL CH340 (COMn)" under the "Ports (COM & LPT)" section (where "COMn" is some serial port e.g., COM4). Double click on that item.
The "USB-SERIAL CH340 (COMn) Properties" dialog will open. - Select the "Driver" tab of the "USB-SERIAL CH340 (COMn) Properties" dialog.
- Click the "Uninstall Device" button.
The "Uninstall Device" dialog will open. - Check the box next to "☐ Attempt to remove the driver for this device.".
- Click the "Uninstall" button.
The "Uninstall Device" and "USB-SERIAL CH340 (COMn) Properties" dialogs will close. - Disconnect the USB cable of the Arduino board from your computer.
- Reconnect the USB cable of the Arduino board to your computer.
- Wait for the "USB-SERIAL CH340 (COMn)" device to appear under the "Ports (COM & LPT)" section of the Device Manager tree.
This will take a couple of minutes as Windows must first automatically reinstall the driver.
It might appear first as a "USB2.0-Serial" device under the "Other devices section of the tree. Just wait for a little longer and it will appear in its final place under the "Ports (COM & LPT)" section. - Click the following link to download the previous version of the driver from the chip manufacturer's website:
https://www.wch-ic.com/downloads/file/65.html?time=2023-03-16%2022:57:59 - Wait for the download to finish.
- Run the downloaded
CH341SER.EXEfile. - A "User Account Control" dialog may now appear asking "Do you want to allow this app to make changes to your device?". Click the "Yes" button.
- A "DriverSetup(X64)" dialog will open. Click the "INSTALL" button in the dialog.
- Wait for the driver installation to finish, as indicated by the appearance of a "Driver install success!" dialog.
- Click the "OK" button in the "Driver install success!" dialog.
The dialog will close. - Click the X icon at the top right of the "DriverSetup(X64)" dialog.
The dialog will close. - Switch back to the Windows "Device Manager".
- Double click on the "USB-SERIAL CH340 (COMn)" device under the "Ports (COM & LPT)" section.
The "USB-SERIAL CH340 (COMn) Properties" dialog will open. - Select the "Driver" tab of the "USB-SERIAL CH340 (COMn) Properties" dialog.
- Click the "Update driver" button.
An "Update Drivers Device - USB-SERIAL CH340 (COMn)" dialog will open. - Click on "Search automatically for drivers" in the "Update Drivers Device - USB-SERIAL CH340 (COMn)" dialog.
- You should now see the driver installation wizard update the driver. Wait for the update to finish, as indicated by the message "Windows has successfully updated your drivers" in the dialog.
- Click the "Close" button in the "Update Drivers Device - USB-SERIAL CH340 (COMn)" dialog.
The dialog will close. - Click the "Roll Back Driver" button in the "USB-SERIAL CH340 (COMn) Properties" dialog.
The "Driver Package rollback" dialog will open. - Click the radio button next to "My apps don't work with this driver" in the "Driver Package rollback" dialog .
- Click the "Yes" button.
The "Driver Package rollback" dialog will close. - Click the "Close" button in the "USB-SERIAL CH340 (COMn) Properties" dialog.
Now start Arduino IDE again and repeat whatever you were doing before when you encountered that error before. Hopefully this time you will not encounter that "can't set com-state" error during the sketch upload.
2 Likes
had to do it twice but i am able to roll back driver and serial monitor works for now. Will conduct furthur testing too with esp32 with the ch340 chip etc. Will edit this soon. Thank you for your time.
edit: esp32s straight up refuse to upload no matter if it contain siLabs chips or ch304. Error code here:
"esptool write_flash: error: argument : [Errno 2]
No such file or directory: 'C:/Users/xxxx/AppData/Local/Temp/extrafilesxxxxx/new_sketch_xxxx.bootloader.bin'
Executing command: exit status 2"
That is an issue all on its own as it was working fine a few month ago. Might post on diffrent forum page. I do not know if issues are related.
After a while my Arduino uno uploads but not the serial monitor just refuses to open:

all is normal as said previously in the IDE. only issue is that compiling for the esp takes a solid minute or so with my slow PC. Just rather unpleasant. Especially with a paied cloud subscription so it can compile faster. I will just use ide in the meantime and wait for an updated cloud agent i guess. Appologise if this wasted your time.
You are welcome. I'm glad it is working now.
Regards, Per
Hi, I installed the driver and after a few tries it finally works, by the way I only tried with the esp8266 and it is excellent. Thank you so much for your help!
1 Like
Same problem here using an ESP32 as target.
Hi @bruguer. Did you try following the instructions I provided in post #4? If not, please give that workaround a try.
This topic was automatically closed 180 days after the last reply. New replies are no longer allowed.