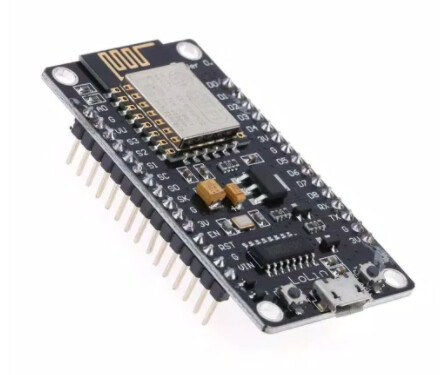
Hey, I am very new to Arduino and programming, I'm making a so-called pocket weather station that transmits the data wirelessly to Thingspeak via ESP8266 Module on an Uno board, the code for the data to transmit to the Thingspeak is only working if the Arduin are connected to my computer, is there any other way to make it truly wireless? because i am very amateur and just kit bashing the program code from various sources. Thanks in advance!
here is my code :
#include <stdlib.h>
#include <SoftwareSerial.h>
#include <SPI.h>               //include Serial Peripheral Interface library
#include <Wire.h>              //include Two Wire Interface library
#include <Adafruit_GFX.h>      // include Adafruit graphics library
#include <Adafruit_ST7735.h>   // include Adafruit ST7735 TFT library
#include <Adafruit_BMP280.h>   // include Adafruit BMP280 sensor library
#include "DHT.h"               //include DHTXX sensor library
#define DHTPIN 4               //DHT11 data pin connected to arduino pin D2
#define DHTTYPE DHT11          //specifying the type of DHT sensor used
#define TFT_RST   8            // TFT RST pin is connected to arduino pin D8
#define TFT_CS    10           // TFT CS  pin is connected to arduino pin D9
#define TFT_DC    9            // TFT DC  pin is connected to arduino pin D10
#define SSID "------";
#define PASS "---------";
#define IP "184.106.153.149" // thingspeak.com IP
SoftwareSerial monitor(2, 3); //Serial communication to ESP8266 module (RX, TX)
String GET = "GET /update?key=&field1="; //replace ZZZZZ by your ThingSpeak channel write key


// initialize ST7735 SERIES TFT library
Adafruit_ST7735 tft = Adafruit_ST7735(TFT_CS, TFT_DC, TFT_RST);

// define device I2C address: 0x76 or 0x77 (0x77 is the library default address)
#define BMP280_I2C_ADDRESS  0x76

Adafruit_BMP280  bmp280;       // initialize Adafruit BMP280 library
DHT dht(DHTPIN, DHTTYPE);      // initialize DHT sensor
unsigned long starttime;
unsigned long sampletime_ms = 10000;
unsigned long delay_time = 60000;

void setup(void)
{
  //start serial communications
  Serial.begin(9600);
  monitor.begin(9600);
  Serial.println("Initializing...");

  //communication with wifi module
  monitor.flush();
  monitor.println("AT");
  delay(2000);

  if (monitor.find("OK")) {
    Serial.println("Communication with ESP8266 module: OK");
  }
  else {
    Serial.println("ESP8266 module ERROR");
  }
  //connect wifi router


  Serial.print("Sampling (");
  Serial.print(sampletime_ms / 1000);
  Serial.println("s)...");

  //initialize timer
  starttime = millis();

  dht.begin();                                         // synchronizing DHT sensor
  tft.initR(INITR_BLACKTAB);                        // initialize a ST7735S chip, black tab
  tft.fillScreen(ST77XX_BLACK);                        // setting black background
  tft.drawFastHLine(0, 15 ,  tft.width(), ST77XX_CYAN);// draw horizontal seperation line at position (0, 15)

  tft.setTextColor(ST77XX_CYAN, ST77XX_BLACK);         // set text color to white and black background
  tft.setTextSize(1.5);                                  // setting text size to 1
  //tft.setCursor(4, 0);                               // move cursor to position (4, 0) pixel
  //tft.print("ARDUINO + ST7735 TFT");
  tft.setCursor(30, 5);                                // move cursor to position (25, 5) pixel
  tft.print("P.A.R.A MK.3");

  // initialize the BMP280 sensor
  if ( bmp280.begin(BMP280_I2C_ADDRESS) == 0 )
  { // connection error or device address wrong!
    tft.setTextColor(ST77XX_RED, ST77XX_CYAN);         // set text color to red and black background
    tft.setTextSize(2);                                // setting text size to 2
    tft.setCursor(5, 76);                              // move cursor to position (5, 76) pixel
    tft.print("Connection");
    tft.setCursor(35, 100);                            // move cursor to position (35, 100) pixel
    tft.print("Error");
    while (1); // stay here
  }

  tft.drawFastHLine(0, 55,  tft.width(), ST77XX_CYAN);  // draw horizontal seperation line at position (0, 55)pixel
  tft.drawFastHLine(0, 95,  tft.width(), ST77XX_CYAN);  // draw horizontal seperation line at position (0, 195)pixel
  tft.setTextColor(ST77XX_GREEN, ST77XX_BLACK);           // set text color to red and black background
  tft.setCursor(30, 20);                                // move cursor to position (30, 20) pixel
  tft.print("TEMPERATURE ");                            // setting heading for first section
  tft.setTextColor(ST77XX_GREEN, ST77XX_BLACK);          // set text color to cyan and black background
  tft.setCursor(40, 60);                                // move cursor to position (40, 60) pixel
  tft.print("HUMIDITY ");                               // setting heading for second section
  tft.setTextColor(ST77XX_GREEN, ST7735_BLACK);         // set text color to green and black background
  tft.setCursor(40, 100);                               // move cursor to position (40, 100) pixel
  tft.print("PRESSURE ");                               // setting heading for third section

  tft.setTextSize(2);                                   // setting text size to 2
}

// main loop
void loop()
{
  connectWiFi();
  char _buffer[10];
  // read temperature, humidity and pressure from the BMP280 sensor
  float temp = bmp280.readTemperature();    // get temperature in °C
  float hum = dht.readHumidity();           // get humidity in rH%
  float pres = bmp280.readPressure();       // get pressure in hPa

  // print temperature (in °C)
  if (temp < 0)                             // if temperature < 0
    sprintf( _buffer, "-%02u.%02u", (int)abs(temp), (int)(abs(temp) * 100) % 100 );
  else                                      // if temperature >= 0
    sprintf( _buffer, " %02u.%02u", (int)temp, (int)(temp * 100) % 100 );// setting the value approximation
  tft.setTextColor(ST77XX_YELLOW, ST77XX_BLACK);  // set text color to yellow and black background
  tft.setCursor(11, 34);                          // move cursor to position (11,34) pixel
  tft.print(_buffer);                             // print temperature from BMP-280 sensor
  tft.drawCircle(89, 34, 2, ST77XX_YELLOW);       // print the degree symbol ( ° )(can be omitted if * is used instead)
  tft.setCursor(95, 34);                          // move cursor to position (95,34) pixel
  tft.print("C");                                 // print the Celcius symbol

  // 2: print humidity (in %)
  sprintf( _buffer, "%02u ", (int)(hum));          // setting the value approximation
  tft.setTextColor(ST77XX_YELLOW, ST77XX_BLACK);  // set text color to magenta and black background
  tft.setCursor(45, 74);                           // move cursor to position (45,74) pixel
  tft.print(_buffer);                              // print humidity from DHT-11 sensor
  tft.setCursor(75, 74);                           // move cursor to position (75,74) pixel
  tft.print("%");                                  // print the percentage symbol


  // 3: print pressure (in hPa)
  sprintf( _buffer, "%04u.%02u", (int)(pres / 100), (int)((uint32_t)pres % 100) ); // setting the value approximation
  tft.setTextColor(ST77XX_YELLOW, ST77XX_BLACK);  // set text color to orange and black background
  tft.setCursor(3, 112);                          // move cursor to position (3,112)pixel
  tft.print(_buffer);                             // print atmospheric pressure from BMP-280
  tft.setCursor(91, 112);                         // move cursor to position (91,112)pixel
  tft.print("hPa");                               // print unit of atmospheric pressure as hecto pascal

  delay(10000);                                    // wait 1 second before taking next sensor reading

  //convert sensor values to strings

  String temperatureStr = dtostrf(temp, 4, 1, _buffer);
  temperatureStr.replace(" ", "");
  String humidityStr = dtostrf(hum, 4, 1, _buffer);
  humidityStr.replace(" ", "");
  String pressureStr = dtostrf(pres, 4, 1, _buffer);
  pressureStr.replace(" ", "");

  updateSensors(temperatureStr, humidityStr, pressureStr);

  //wait next sampling cycle
  Serial.print("Wait ");
  Serial.print(delay_time / 1000);
  Serial.println("s for next sampling");
  Serial.println();
  delay(delay_time);

  //initialize new cycle
  Serial.println();
  Serial.print("Sampling (");
  Serial.print(sampletime_ms / 1000);
  Serial.println("s)...");
  starttime = millis();
}


void updateSensors(String temperatureStr, String humidityStr, String pressureStr) {

  String cmd = "AT+CIPSTART=\"TCP\",\"";
  cmd += IP;
  cmd += "\",80";
  monitor.println(cmd);
  delay(1000);

  cmd = GET;
  cmd += temperatureStr;
  cmd += "&field2=";
  cmd += humidityStr;
  cmd += "&field3=";
  cmd += pressureStr;
    cmd += "\r\n";
  delay(1000);
  int strsize = cmd.length();
  monitor.println("AT+CIPSEND=" + String(strsize));
  delay(1000);

  monitor.print(cmd);
  if (monitor.find("OK")) {
    Serial.println("Transmission completed with success");
  } else {
    Serial.println("Transmission failed!");
  }
}

boolean connectWiFi()
{
  Serial.println("Connecting wi-fi...");
  String cmd = "AT+CWMODE=1";
  monitor.println(cmd);
  delay(1000);
  monitor.flush(); //clear buffer
  cmd = "AT+CWJAP=\"";
  cmd += SSID;
  cmd += "\",\"";
  cmd += PASS;
  cmd += "\"";
  monitor.println(cmd);
  delay(250);

  if (monitor.find("OK")) {
    Serial.println("Connection succeeded!");
    return true;
  } else {
    Serial.println("Connection failed!");
    return false;
  }
  Serial.println();
}

The diagram is more or likely like this, I know its an nano board, the problem is as same as when I use the uno