Bonjour,
Je suis actuellement bloqué avec mon capteur URM37 V5.0 que je n'arrive pas à faire marcher avec un Arduino uno.
Je ne sais pas si c'est un problème de code ou de branchement ou un truc que j'ignore.
C'est mon premier projet de robot, le Devastator Robot de Dfrobot.
J'ai testé le mon code avec Arduino IDE en branchant un câble USB sur la Arduino Uno. Les roues et le servo marchent bien, eux.
Mais en utilisant la librairie NewPing, mon capteur affiche toujours 0 cm.
En utilisant un code PWM trigger mode deDFRobot sur le guide URM37
Le ping reste à 6cm. Approcher ma main du capteur le fait varier autour de 2cm
Impossible d'avoir quelque chose plus grand que 6 cm.
Pouvez-vous m'aider svp ?
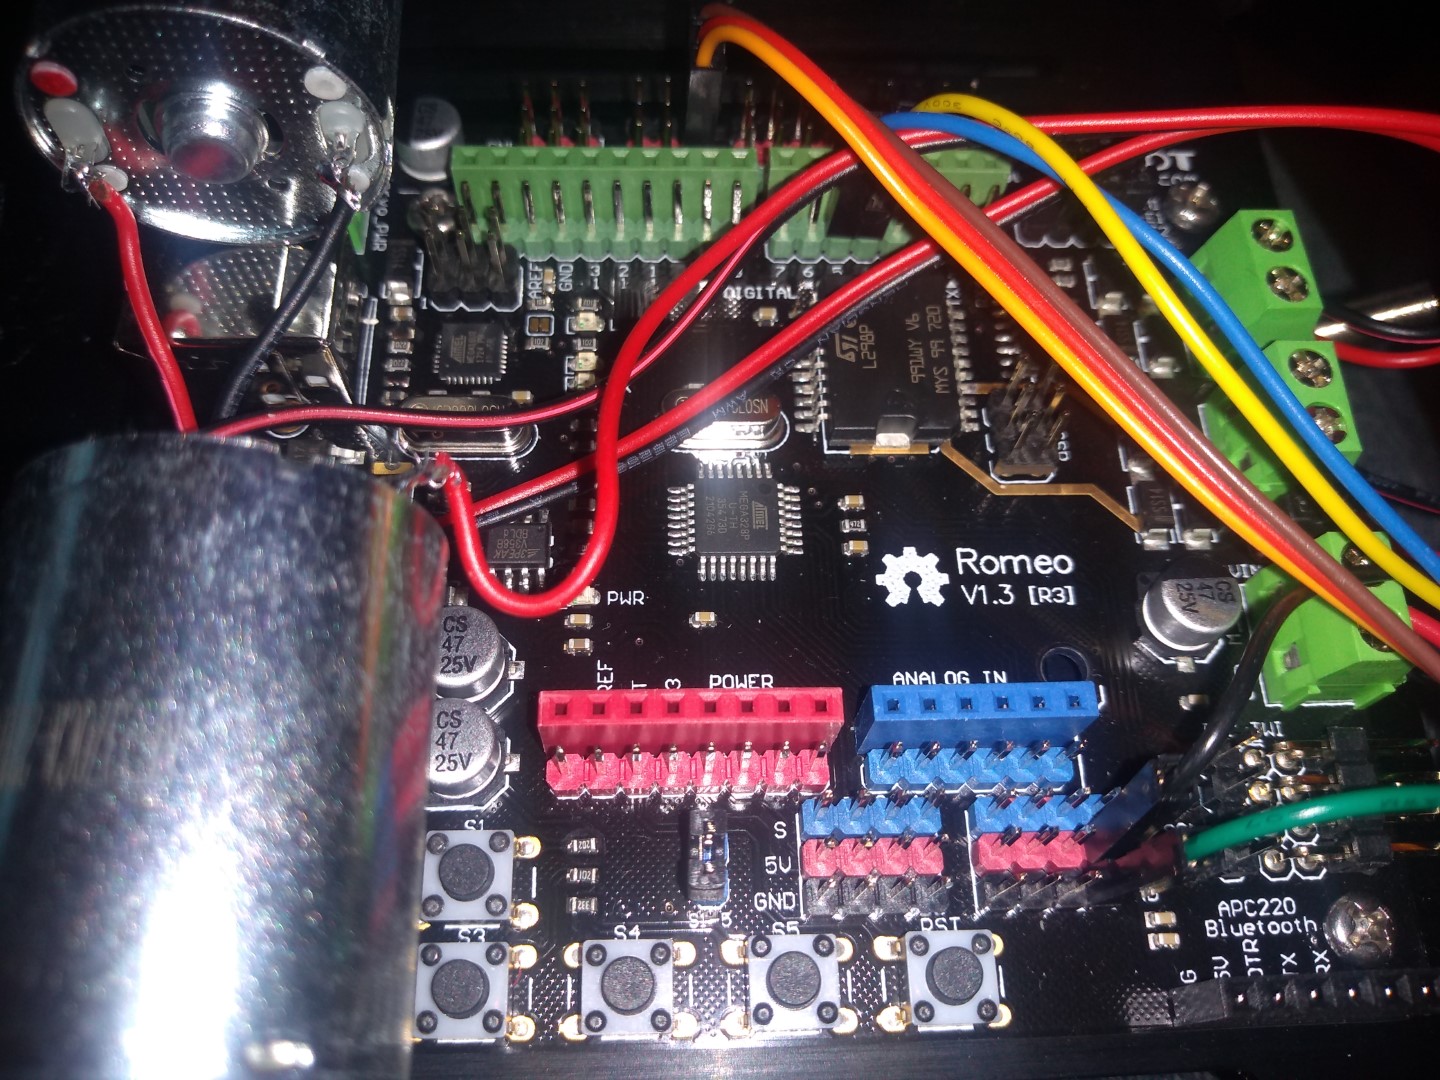
Mes connexions :
Sur le capteur URM37 :
- Noir pour VCC
- Vert pour ground
- Bleur pour ECHO
- Jaune pour Trigger

sur mon Arduino Uno :
- Echo sur PIN 5
- TRIG sur PIN 4
Voici mon code avec la librairie NewPing. Résultat : 0cm
#include <Servo.h>
#include <NewPing.h>

#define TRIG_PIN 4
#define ECHO_PIN 5
#define MAX_DISTANCE 200
#define MAX_SPEED 200 // sets speed of DC  motors
#define MAX_SPEED_OFFSET 20

int E1 = 5;     //M1 Speed Control
int E2 = 6;     //M2 Speed Control
int M1 = 4;     //M1 Direction Control
int M2 = 7;     //M1 Direction Control

NewPing sonar(TRIG_PIN, ECHO_PIN, MAX_DISTANCE);
Servo myservo;

int distance = 100;
boolean goesForward=false;
int speedSet = 0;

void setup(void)
{
  Serial.begin(9600);
  myservo.attach(8);
  myservo.write(115);
  delay(2000);
  distance = readPing();
  delay(100);
  distance = readPing();
  delay(100);
  distance = readPing();
  delay(100);
  distance = readPing();
  delay(100);
  Serial.println(distance);
}

void loop(void)
{
 int distanceR = 0;
 int distanceL =  0;
 delay(40);

 if(distance<=20)
 {
  stop();
  delay(100);
  moveBackward();
  delay(500);
  stop();
  delay(200);
  distanceR = lookRight();
  delay(200);
  distanceL = lookLeft();
  delay(200);

  if(distanceR>=distanceL)
  {
    turnRight();
    stop();
  }else
  {
    turnLeft();
    stop();
  }
 }else
 {
  moveForward();
 }
 distance = readPing();
}

void turnRight() {

  analogWrite (E1,155);
  analogWrite (E2,155);
  digitalWrite(M1,LOW);
  digitalWrite(M2,HIGH);
  delay(1400);
  digitalWrite(M1,HIGH);
  digitalWrite(M2,HIGH);
}

void turnLeft()
{
  analogWrite (E1,155);
  analogWrite (E2,155);
  digitalWrite(M1,HIGH);
  digitalWrite(M2,LOW);
  delay(1600);
  digitalWrite(M1,HIGH);
  digitalWrite(M2,HIGH);
}

void stop(void)                    //Stop
{
  digitalWrite(E1,0);
  digitalWrite(M1,LOW);
  digitalWrite(E2,0);
  digitalWrite(M2,LOW);
}

void moveBackward()
{
  goesForward=false;
  digitalWrite(M1,LOW);
  digitalWrite(M2,LOW);
  for (speedSet = 0; speedSet < MAX_SPEED; speedSet +=2) // slowly bring the speed up to avoid loading down the batteries too quickly
  {
    analogWrite (E2,speedSet);
    analogWrite (E1,speedSet+MAX_SPEED_OFFSET);
    delay(5);
  }
}

int lookRight()
{
    myservo.write(50);
    delay(500);
    int distance = readPing();
    delay(100);
    myservo.write(115);
    Serial.print("Looking right. Distance:");
    Serial.println(distance);
    return distance;
}

int lookLeft()
{
    myservo.write(170);
    delay(500);
    int distance = readPing();
    delay(100);
    myservo.write(115);
    Serial.print("Looking left. Distance:");
    Serial.println(distance);
    return distance;
}

int readPing() {
  delay(70);
  int cm = sonar.ping_cm();
  if(cm==0)
  {
    cm = 250;
  }
  return cm;
}

void moveForward() {

 if(!goesForward)
  {
    goesForward=true;
    digitalWrite(M1,HIGH);
    digitalWrite(M2,HIGH);
   for (speedSet = 0; speedSet < MAX_SPEED; speedSet +=2) // slowly bring the speed up to avoid loading down the batteries too quickly
   {
     analogWrite (E2,speedSet);      //PWM Speed Control
     analogWrite (E1,speedSet+MAX_SPEED_OFFSET);
     delay(5);
   }
  }
}
Voici mon code URM37. Résultat : 6 cm
// # Editor     : roker
// # Date       : 05.03.2018

// # Product name: URM V5.0 ultrasonic sensor
// # Product SKU : SEN0001
// # Version     : 1.0

// # Description:
// # The Sketch for scanning 180 degree area 2-800cm detecting range
// # The sketch for using the URM37 PWM trigger pin mode from DFRobot
// #   and writes the values to the serialport
// # Connection:
// #       Vcc (Arduino)    -> Pin 1 VCC (URM V5.0)
// #       GND (Arduino)    -> Pin 2 GND (URM V5.0)
// #       Pin 3 (Arduino)  -> Pin 4 ECHO (URM V5.0)
// #       Pin 5 (Arduino)  -> Pin 6 COMP/TRIG (URM V5.0)

// # Working Mode: PWM trigger pin  mode.

int URECHO = 5;         // PWM Output 0-50000US,Every 50US represent 1cm
int URTRIG = 4;         // trigger pin

unsigned int DistanceMeasured = 0;

void setup()
{
  //Serial initialization
  Serial.begin(9600);                        // Sets the baud rate to 9600
  pinMode(URTRIG, OUTPUT);                   // A low pull on pin COMP/TRIG
  digitalWrite(URTRIG, HIGH);                // Set to HIGH
  pinMode(URECHO, INPUT);                    // Sending Enable PWM mode command
  delay(500);
  Serial.println("Init the sensor");

}
void loop()
{
  Serial.print("Distance=");
  digitalWrite(URTRIG, LOW);
  digitalWrite(URTRIG, HIGH);

  unsigned long LowLevelTime = pulseIn(URECHO, LOW) ;
  if (LowLevelTime >= 50000)              // the reading is invalid.
  {
    Serial.println("Invalid");
  }
  else
  {
    DistanceMeasured = LowLevelTime / 50;  // every 50us low level stands for 1cm
    Serial.print(DistanceMeasured);
    Serial.println("cm");
  }

  delay(200);
}