Thanks for all the work on this project! Sorry for the noob question... This reader is unable to recognize which Famicom/NES ROM is inserted without manual input, right?
Hello and thank you for your work here. I'm now trying to build this myself and already ran into a bit of an obstacle with the arduino. When trying to figure out which parts I have to desolder I noticed that my arduino looks a little bit different than the one in the video and the other ones here in this thread.

Can anyone confirm that the parts I marked here are the ones that I need to desolder?

The middle leg on the part I marked on the left is cut off completely and not soldered to the PCB, I don't think I have seen this on other arduinos here.
After desoldering I think I have to connect them like this:

Can anyone please confirm that this is correct? Or is this completely wrong?
Hi Sanni,
I have a repro which has a game on it which doesn't have the crc32 in the n64.txt and so the cart reader errors when I try to read or dump the game.
I'm trying to update the n64.txt crc file but I'm having a bit of trouble knowing what values to put where and was hoping you could clear up my confusion?

Great job on the reader! I still remember when you reversed engineered an N64 lodgenet controller on the N64 forums years ago.
Hey. I haven't followed the forum in a long time. in fact the work is all Sanni, I only made a pocket variant, and since the idea was to make it as simple and low cost as possible, one of the cut items was precisely the pic12f629 (necessary for SA-1) however as the @ dendy9 said, it is possible to add additional soldering connections, but it would be hung or you could put it under the PCB. Thinking about it, I should have left the option of soldering it to the PCB, and whoever wanted to could include it or not. I think that in a new release or another version I will do that.
Cool! for my SFMC cartridges, I use an old version of "NP.ino" without using the clock generator. Works great with me, even though it's very old (before 1.0 ![]() )
)
I measured zero ohms, full continuity, between my black ground cable to both of the two GND points the U4 leg arrow leads to.

VCC can be measured as zero ohms to the USB pin pointed to by the arrow on the bottom of the board. For it, I circled both the point I used and the U6 pin it's continuous with.
Edit: I just realized your picture has a micro USB connector, so it would be pin 1 on the "Micro-B" connector. Pin 1 (VCC) should be the rightmost pin on top of the board, looking at the back of the connector, according to this:


So, I'd say you're probably correct, but you can make sure by using a multimeter and testing your selected points with the ones I pointed out.
I hope that helps, although this is such a late reply, you probably already have it working.
Sorry about the quality of my scribbling, and the corrections. ![]()
You're probably going to be irritated that you didn't realize yourself, but that information is available in cartreader/sd/README.md at master · sanni/cartreader · GitHub.
It says:
n64.txt
This file stores the N64 database which is needed because the save type and rom size are not stored inside the rom.
The CRC32 checksum is used to verify a good dump.Example:
002c3b2a,NO7P,32,0
CRC32, game id, size in MByte, savetypeSavetypes:
0 = no save chip
1 = SRAM
4 = Flashram
5 = 4K Eeprom
6 = 16K Eeprom
I hope that helps! ![]()
I created an adapter for NGP. Then I tried to dump some NGP cartridges. The game with a rom size of 8M was successful. However, it fails in 4M games and 32M games. So I have a question. Does ngp.ino support other than 8M?
@Niltonn
This was always going to pick at my brain. If/how you were doing it. Not at all what I expected the answer to be. Very cool.
On full size Sanni the barrel plug ends up being useless. I like to pull it out. This is a case .stl that has that hole filled if you are willing to rip it off. Cleaner look. I also removed the hole for N64 cord. It can be easily fed through anywhere else on the case or even socketed. I plan on tweaking this case design a bit more. Stay tuned.
SanniCaseNoBarrel.zip (53.6 KB)


How did you find NGP cart port?
I refuse to harvest from old hardware. No judgement, I just try to fix/restore original hardware is all.
Same issue Wonderswan. All stock of cartridge ports dried up it appears.
I took it out of the broken hardware.
This may be helpful for some but its a bit of fiddly work.
I will be getting a resin 3d printer soon. I want to try these, VB and WS cart ports. I have the PCBs. I can likely pull off WS and NGP with .1mm layer FDM and made or found pins, but Im not sure if its the best way to attack the issue.
From what I've been told VB cart ports are very hard to fashion or mfr.
I know VB does not pertain to Sanni (currently anyway) but its cart ports are the same sort of unobtainium as NGP and WS ports.
I checked the source code of ngp.ino.
I found the following line.
switch (romSize)
{
case 0x2c98:
cartSize = 1048576;
break;
}
It looks like there is no description of what to do if the cartSize is 524288 or 2097152.
Is ngp.ino only compatible with 8M games?
I'm not a programmer, so I don't know any more.
Can anyone please tell me how to dump a 4M or 16M game?
So I built the cartreader this weekend but I currently have trouble getting the screen to work. It just stays black. Also the LED will not turn on. The connections seem absolutely fine and I was not able to find a faulty solder point yet.
Whenever I disable the OLED and enable die serial monitor the LED will however turn on. Still in this case I will get an "SD Error" thrown at me over the serial monitor but I suspect that this is a separate problem.
Any idea how to debug this?
Take a really good look at the screen under a bright light and make sure none of the bottom corners are cracked or broken. You'll probably have to pull it out to do so.
Put the SD files on an SD card and put it in the Sanni. It always has the SD card error if you do not have one inserted and the files on it.
Connected to the serial console on it appears to be working just your screen/rgb connections are not right. ( this is a guess confirm it by the step above)
Start with the screen make sure you have the jumper settings correct on the back of the board. The OLED come in two different pin assignments you have to make sure the Sanni set up for the correct one. Make sure you saw it at the jumpers and if you did take a multimeter to the ground and voltage on the OLED points on PC board and compared it to the screen pin assignment
Don't worry about the RGB LED until you get the screen working it's superfluous right now, but you probably either got common cathode type instead of common anode or the anode is not in the correct hole. I would take it out until the screen is working.
Finally when it's sandwiched together make for darn sure the OLED pins are not shorting against the RGB LED. The RGB LED can also possibly short against some of the cartridge pins so watch that as well.
If you can't get it p.m. me perhaps I can fix it for you.
I was surprised to see that the card reader takes into compatible my Star Fox 2 (Classic Mini) cartmod !!!!


I'm very interested in buying a PCE adapter for the Sanni/Retrode2.
I am having this exact same problem as well. I successfully dumped several GBA games that run fine in emulators, however, when I try to dump my Mother1+2 (Japanese) GBA cart there are approximately 150,000 erronneous bits that are spread out fairly randomly throughout the ROM file when compared against a correct ROM. The cart reader tells me that the checksum is accurate, but the hex editor clearly shows that it is not. I have played around with the readWord_GBA() function by increasing the delays between address write and data read times but this has not helped. The errors usually show up as one bit in the word being incorrect (0x08 when 0x00 is correct) but I do not believe that this is the result of poor contact of the cart pins to the slot contacts because the errors show up roughly once ever 1,000 words and a particular word value (e.g. 0x00) will be represented correctly many times before it shows up incorrectly in the ROM. The GBA cart that I am trying to dump runs correctly when played in a GBA.
I have no idea what might be causing this problem. The errors seem somewhat random, but are not completely so. I have tried reading the ROM 9 times and then used a python script to do a bit-by-bit tournament selection thinking that I could sift out the erroneous bit values, the result was there was some improvement but nowhere enough to result in a ROM that could run correctly.
I would be very appreciative if somebody here has any ideas on how I might be able to fix this issue. Thank you.
Hello, I have a few MX29F1610 that I would like to use on some projects.
I was thinking to build a rewritable GB cart, by replacing the ROM with the 29f160, but would such a cart be compatible with the cartreader?
The supported list states:
Programs custom-made Game Boy (Color) flashcarts with AM29F016, AM29F032, MBM29F033 flashrom
But what about if I use a different flash chip such as the one I mentioned above, would it still be programmable?
*edit 7/17
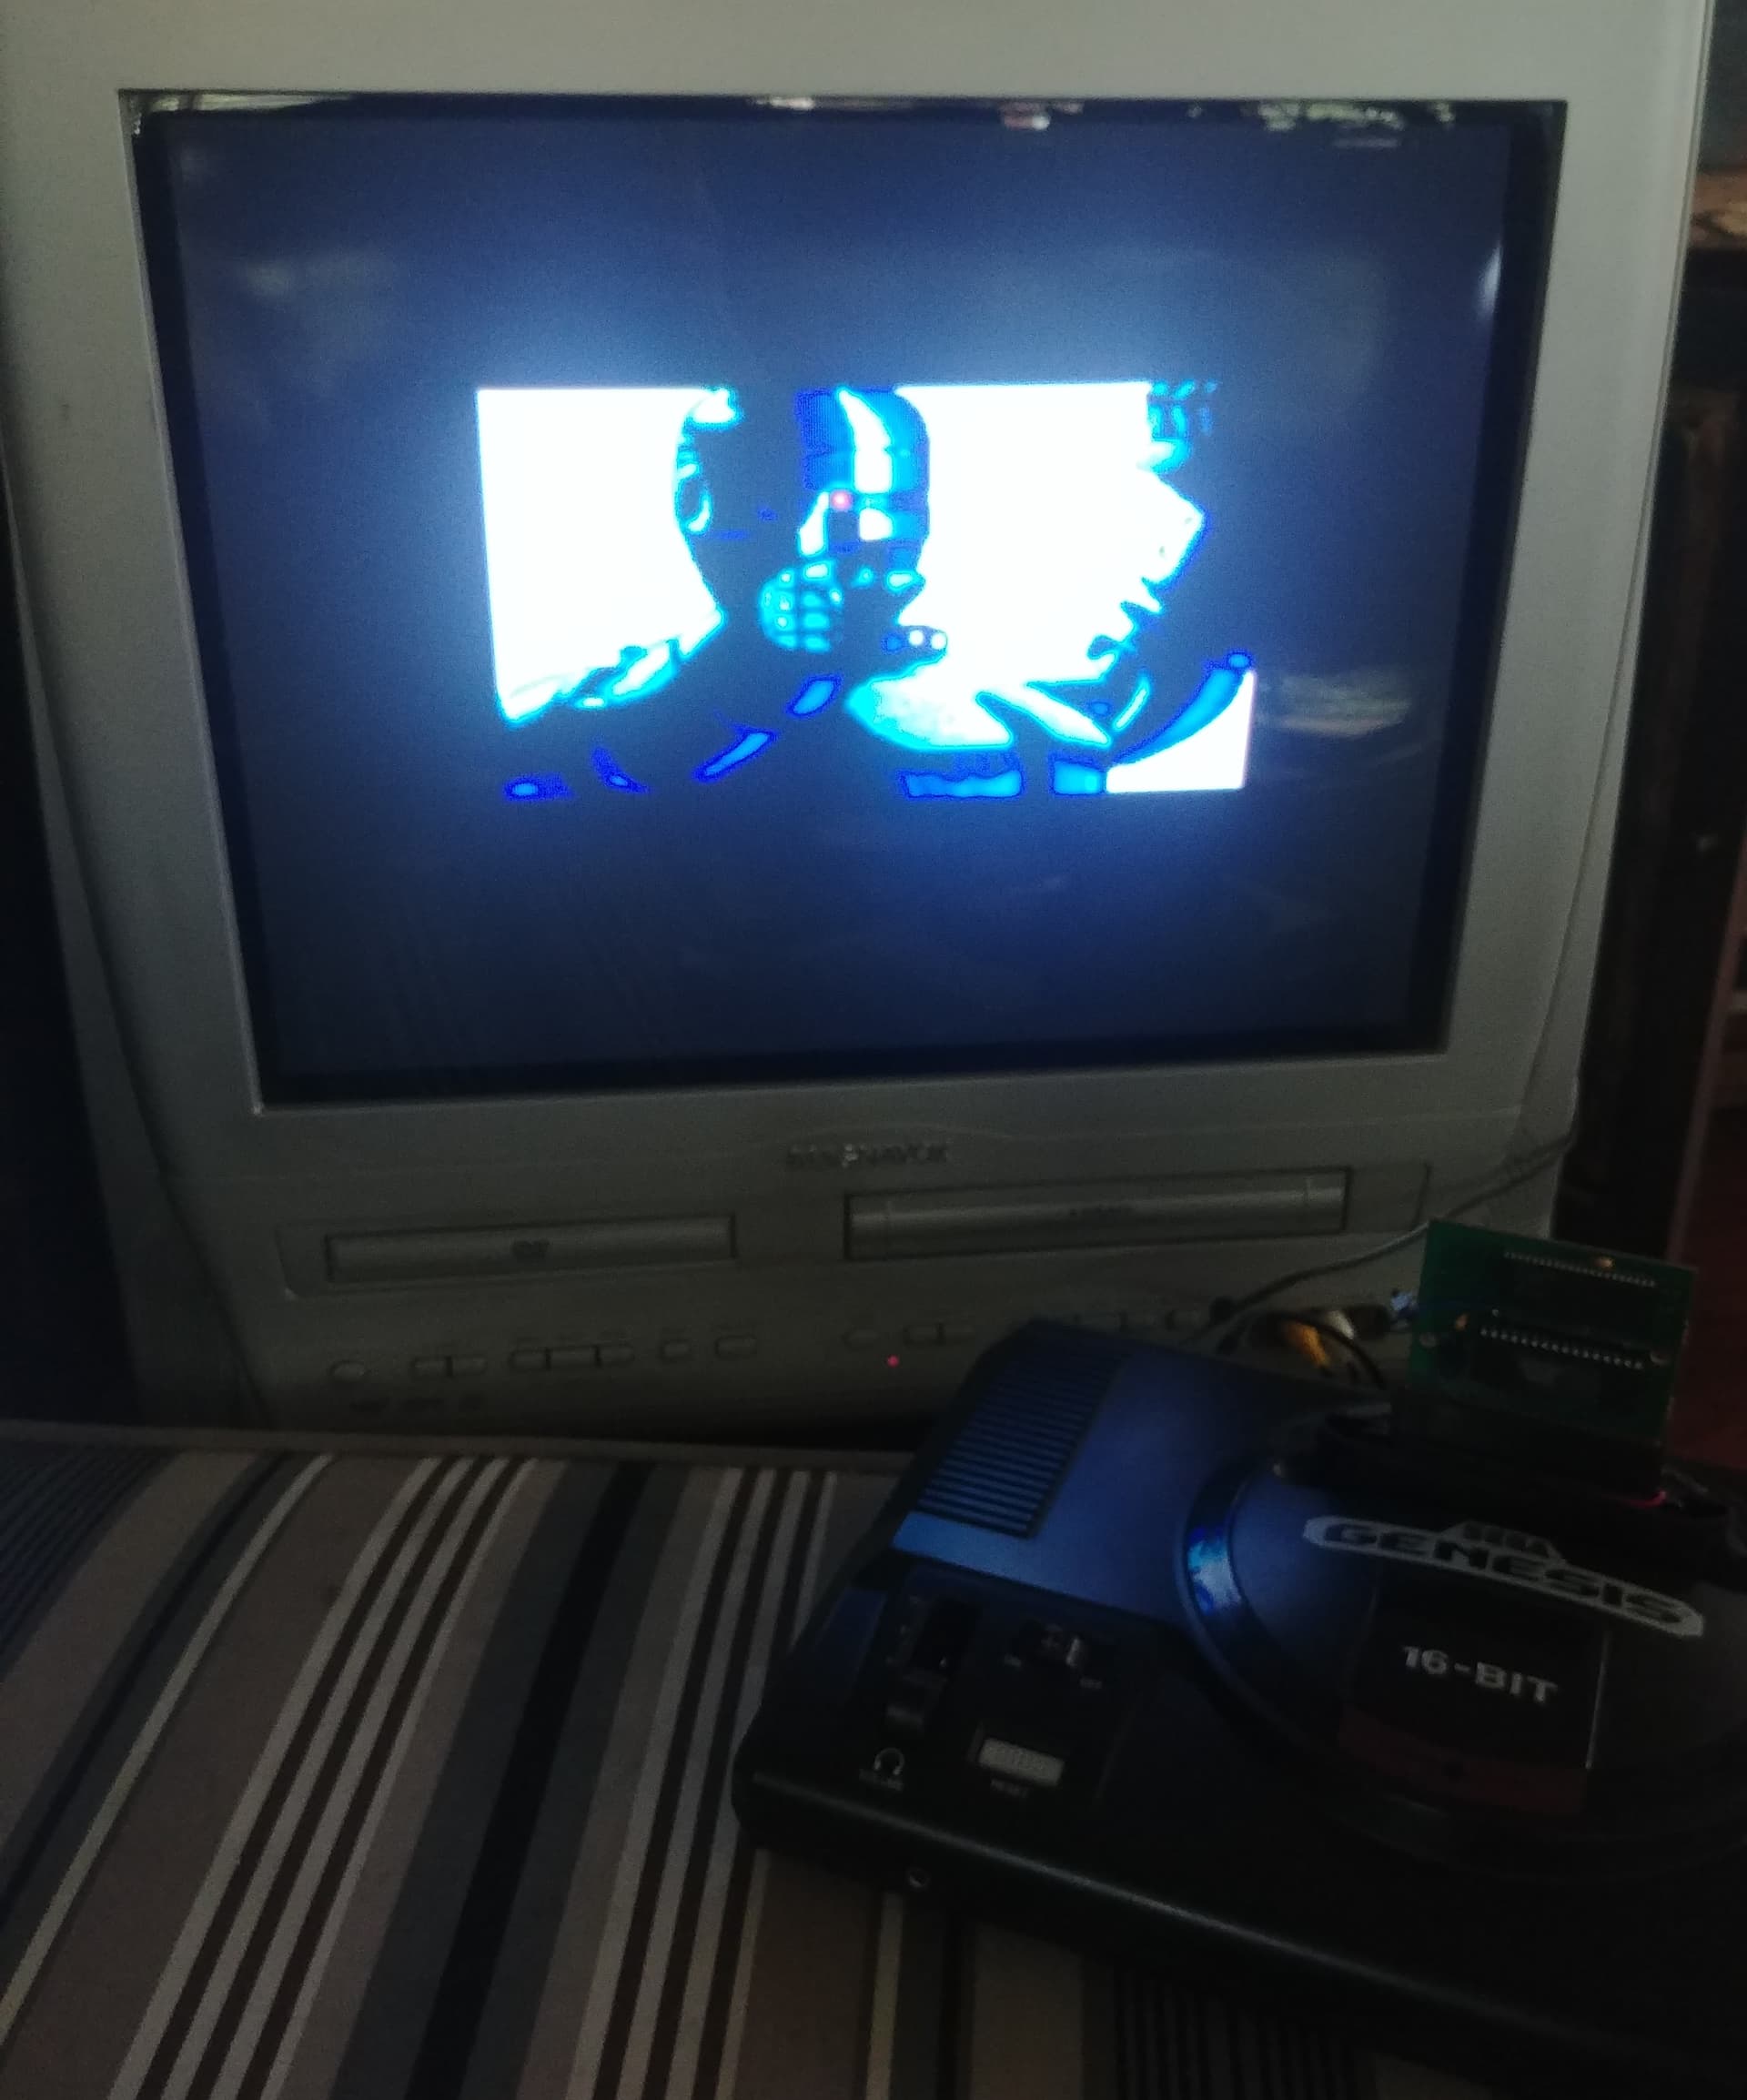
I got really curious about the SMS adapter and its ability to function as a power base for SMS games on Genesis/MD.
I got all this info from
This is what the Sanni SMS adapter is based off of. Just short R2, R3 R4 and R7. When I added the resistor to R1 for pause that function did not work and it would not work for dumping. Corrupted SD card!! Like this it still works for dumping and power basing.
It differs from other adapters with the R7 that needs grounding so the cart detect and another line go low on Genesis side. Must short that R7. This is what stumped me until I traced the signals.
I added the stack initialization circuit so all games boot no issue on MD/Genesis based on the multiuse PCB. My Afterburner cart was iffy and I would have to toggle on and off quick to get it to boot. The stack circuit fixed it. Something with that games code does not always initialize stack interestingly. You dont have to do this but its a bit of a pain to swap games and get them working correctly for no stack ones like Shinobi. Its an easy circuit and you don't need SMD parts at all if so inclined.
I booted up Monster World and the controls went nuts. Looked on Raphnet and sure enough need to build adapter with select held high for a few games. On the to do list.
*edit.
I treated myself to a Retro-bit Genesis wireless arcade pad and much to my delight it works with Wonder boy ML. No need to build a dongle.
I have not tried dumping now that stack circuit is added yet.


Don't mind the power light being out. I need to fix that.


Added Stack circuit

Atmega 8 binary. HFUSE=0xD9 LFUSE=0xDF
stackchip.zip (390 Bytes)