Servo with joystick x and y question

Hello all.
I am trying to control a servo with a joystick.
The following code worked great with the x axis . I would like to add the y function to control the servo at a slower speed. X at current speed and Y at a slower speed. Can someone help me please. Its just a one time project to control a tunning knobe from a distance . Here is the code I found on a forum.

#include <Servo.h>

// Give names to pins

const byte JoystickInputPinx = A0;

const byte ServoPin = 4;

// Define global objects

Servo s360;

void setup()

{

s360.attach(ServoPin);

}

void loop()

{

s360.writeMicroseconds(1000 + analogRead(JoystickInputPinx));

}

I appreciate your help.
Sincerely
Joey

What do you mean? The servo moves as you move the joystick.

You control the horizontal. You control the vertical. You control the speed.

a7

I understand you want to use one axis of the joystick to adjust movement in a direction and another axis of the joystick to adjust the speed of the movement.

However; the 360 servo control is one dimensional - a value, a pulse width - that increases or decreases. When the value decreases toward the minimum pulse width, the servo rotates counter-clockwise at increasing speed, and when the value increases toward the maximum pulse width the servo rotates clockwise increasing speed. Also, the properties of a joystick returns the stick to center, which would be a "stop" value for the pulse width, and the servo.

But, you could use one potentiometer for speed, and a button for direction. Your code must stop the servo momentarily before changing direction.

Your code only sweeps a 360 servo between stop and medium speed.

Thank you so much for the response. So I had a Parallax Basic Stamp 2 quite a few years ago. I used this idea to move a knob on a part of a antenna. Servo moved the knob via friction. I posted it on YT years ago .

X ( Up / Down ) moves the servo one way at Speed 1 lets say. Y ( left / right ) does the same as x but at speed 2 ( a bit slower than speed 1 ). Used to fine tune the knob.

Cant figure out how to do it with Arduino though Im close ... LOL

Thanks for your help.

Joey

That red thing that you keep obscuring is essentially four buttons. Left, right, increase, decrease.

The code from the Basic Stamp2 will be recognizable (post it?). Many people here still have working BS2.

#include <Servo.h>
Servo servo;
byte servoPin = 4;
byte buttonpin[] = { 2, 3, 5, 6, 7 };                         // declare button pins in an array
byte element;                                                 // indicates pressed button/pin
byte buttonArray = sizeof(buttonpin) / sizeof(buttonpin[0]);  // get number of elements in button array

unsigned long timer;          // timer keeps track of length of button press (or noise/ringing).
unsigned long timeout = 100;  // timeout (in milliseconds) is the minimum for "a button is pressed".

byte redPin = 11, grnPin = 9, bluPin = 8;  // pins for the common cathode RGBLED

void setup() {
  Serial.begin(115200);                   // start serial monitor
  for (int i = 0; i < buttonArray; i++)   // count to number of elements in button array
    pinMode(buttonpin[i], INPUT_PULLUP);  // configure button pins for reading (LOW when pressed)
  servo.attach(servoPin);
}

void loop() {
  if (element > buttonArray)                  // count through array... do not use for() loops. they blocking program flow.
    element = 0;                              // if beyond the array size, start again from the first element
  if (!digitalRead(buttonpin[element])) {     // button may have been pressed, or just noise/ringing
    if (millis() - timer > timeout) {         // measure time from last "press" to this "press. replaces delay();
      if (digitalRead(buttonpin[element])) {  // valid button was released after debounce timeout
        timer = millis();                     // reset timer after valid button press
        switch (element) {
          case 0: red(); break;
          case 1: grn(); break;
          case 2: blk(); break;
          case 3: blu(); break;
          case 4: yel(); break;
          default: break;
        }
      }
    }
  }
  element++;  // next array element
}

void blk() {
  digitalWrite(redPin,  LOW);
  digitalWrite(grnPin,  LOW);
  digitalWrite(bluPin,  LOW);
  servo.write(90); // left slow
}

void blu() {
  digitalWrite(redPin,  LOW);
  digitalWrite(grnPin,  LOW);
  digitalWrite(bluPin, HIGH);
  servo.write(45); // left slow
}

void yel() {
  digitalWrite(redPin, HIGH);
  digitalWrite(grnPin, HIGH);
  digitalWrite(bluPin,  LOW);
  servo.write(0); // left fast
}

void grn() {
  digitalWrite(redPin,  LOW);
  digitalWrite(grnPin, HIGH);
  digitalWrite(bluPin,  LOW);
  servo.write(135); // right slow
}

void red() {
  digitalWrite(redPin, HIGH);
  digitalWrite(grnPin,  LOW);
  digitalWrite(bluPin,  LOW);
  servo.write(180); // right fast
}
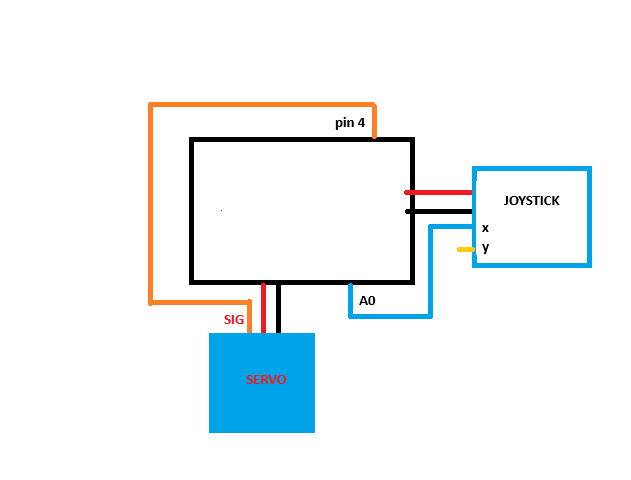
diagram.json for wokwi
{
  "version": 1,
  "author": "Anonymous maker",
  "editor": "wokwi",
  "parts": [
    { "type": "wokwi-arduino-nano", "id": "nano", "top": 4.8, "left": -0.5, "attrs": {} },
    {
      "type": "wokwi-pushbutton",
      "id": "btn1",
      "top": -51.4,
      "left": 134.4,
      "attrs": { "color": "red" }
    },
    {
      "type": "wokwi-pushbutton",
      "id": "btn3",
      "top": -99.4,
      "left": 134.4,
      "attrs": { "color": "green" }
    },
    {
      "type": "wokwi-pushbutton",
      "id": "btn4",
      "top": -51.4,
      "left": -48,
      "attrs": { "color": "yellow" }
    },
    {
      "type": "wokwi-pushbutton",
      "id": "btn6",
      "top": -99.4,
      "left": -48,
      "attrs": { "color": "blue" }
    },
    {
      "type": "wokwi-rgb-led",
      "id": "rgb1",
      "top": -207.2,
      "left": 20.3,
      "attrs": { "common": "cathode" }
    },
    {
      "type": "wokwi-text",
      "id": "legendservo1",
      "top": -86.4,
      "left": -124.8,
      "attrs": { "text": "L slow (45)" }
    },
    {
      "type": "wokwi-text",
      "id": "legendservo2",
      "top": -38.4,
      "left": -124.8,
      "attrs": { "text": "L fast (0)" }
    },
    {
      "type": "wokwi-text",
      "id": "legendservo3",
      "top": -86.4,
      "left": 201.6,
      "attrs": { "text": "R slow (135)" }
    },
    {
      "type": "wokwi-text",
      "id": "legendservo4",
      "top": -38.4,
      "left": 201.6,
      "attrs": { "text": "R fast (180)" }
    },
    { "type": "wokwi-servo", "id": "servo1", "top": -194, "left": 144, "attrs": {} },
    {
      "type": "wokwi-pushbutton",
      "id": "btn2",
      "top": -147.4,
      "left": -48,
      "attrs": { "color": "grey" }
    },
    {
      "type": "wokwi-text",
      "id": "legendservo5",
      "top": -134.4,
      "left": -124.8,
      "attrs": { "text": "STOP (90)" }
    }
  ],
  "connections": [
    [ "nano:GND.2", "btn1:2.l", "black", [ "v0" ] ],
    [ "nano:GND.2", "btn3:2.l", "black", [ "v0" ] ],
    [ "nano:2", "btn1:1.l", "orange", [ "v0" ] ],
    [ "nano:GND.2", "btn4:2.r", "black", [ "v0" ] ],
    [ "nano:GND.2", "btn6:2.r", "black", [ "v0" ] ],
    [ "nano:6", "btn6:1.r", "blue", [ "v0" ] ],
    [ "nano:7", "btn4:1.r", "yellow", [ "v0" ] ],
    [ "nano:GND.2", "rgb1:COM", "black", [ "v0" ] ],
    [ "nano:8", "rgb1:B", "green", [ "v0" ] ],
    [ "nano:9", "rgb1:G", "green", [ "v0" ] ],
    [ "nano:11", "rgb1:R", "green", [ "v0" ] ],
    [ "nano:GND.2", "servo1:GND", "black", [ "v0" ] ],
    [ "nano:4", "servo1:PWM", "#8f4814", [ "v0" ] ],
    [ "nano:GND.2", "btn2:2.r", "black", [ "v0" ] ],
    [ "nano:5V", "servo1:V+", "red", [ "v0" ] ],
    [ "nano:3", "btn3:1.l", "green", [ "v0" ] ],
    [ "nano:5", "btn2:1.r", "gray", [ "v0" ] ]
  ],
  "dependencies": {}
}

Oh, for some reason

analogRead(JoystickInputPinx)

I thought you had a joystick, not a five-way button switch.

Nevermind.

a7

Hi alto777.
Thanks for response. My apologies to all for my very minimal knowledge of programming.

So the video shows a Joystick on the Basic stamp 2 board controlling a servo.
I wish I would have saved the code but that was like a decade ago. I never saved it.

The following code I found in the internet works great but only in the x axis ( up / down ). Using the following code with joystic at up direction the servo rotates one way and will continue rotating until i release the joystic. With the joystick at the down direction the servo rotates in the opposite direction until i release it. Speeds are equal each way. That is exactly what i desire to happen.

What i would like to add is the left right ( y ) of the joystick to do the same as X but slower.

I really appreciate all the views and responses . Your time is valuable.

I actually dont need the Y function just wanted to try to add that feature.

thanks all

#include <Servo.h>

// Give names to pins
const byte JoystickInputPinx = A0;
const byte ServoPin = 4;
// Define global objects
Servo s360;

void setup()
{
  s360.attach(ServoPin);
}

void loop()
{
  s360.writeMicroseconds(1000 + analogRead(JoystickInputPinx));
}


Ok, we all maybe in the same page now.

This

1000 + analogRead(JoystickInputPinx)

is 1000 (don't be moving) or 2023 (move like a rabbit) depends on the switch.

So this

1000 + analogRead(JoystickInputPinx) / 2

would give you 1000 and 1511, stopped and moving slower.

This

int XX = 500;
digitaRead(JoystickInputPinx) ? 1000 : XX;

would let you adjust the speed 500. Lower slower.

Servo s360;
Servo another360;

void setup()

{
  s360.attach(ServoPin);
  another360.attach(ADifferentServoPin);
}

void loop()
{

  s360.writeMicroseconds(1000 + analogRead(JoystickInputPinx));

  another360.writeMicroseconds(1000 + analogRead(JoystickInputPinx) / 2);
}

This is not bidirectional. The original code makes no sense as the pulse for not moving should be 1500, I would expect to see 1000 for going CCW and 2000 for going CW, viz:

# include <Servo.h>

const byte JoystickInputPinXUp = A0;
const byte JoystickInputPinXDown = A1;

const byte ServoPin = 4;

Servo s360;

void setup()
{
  s360.attach(ServoPin);

// joyswitches read LOW when pressed
  pinMode(JoystickInputPinXUp, INPUT_PULLUP);
  pinMode(JoystickInputPinXDown, INPUT_PULLUP);
}

void loop()
{
  int direction;

  if (digitalRead(JoystickInputPinXUp) == LOW) direction = 45;
  if (digitalRead(JoystickInputPinXDown) == LOW) direction = -45;

  s360.write(90 - direction);
}

Actually here I switched to angles, just because the 1000 was odd to me as I have said.

45, the deviation from 90 (stopped) will result in a certain speed. A lower value would move it slower both ways, a high value (up to 90) will make it go faster.

@xfpd presents more comprehensive sketch for doing all directions slow and fast. My sketch just uses the same level of coding as the original and naively adds bidirectionality.

You could learn from and use @xfpd's code. You could do the same thing I did above, slavishly duplkicate the existing logic copy/paste/edit a second axis.

a7

@jhndzbass - This is a simulation of the code in Post #5. The "180" servo commands will work with the "360" servo. I used four arbitrary values for the speed of the "360" (0 = Lfast, 45 = Lslow, 90 = stop, 135 = Rslow, 180 = Rfast). The LED is just to show the button pressed (not needed).
ezgif-6-53b070cc5a

I hijacked @xfpd's hardware and made one channel slow fast forward and reverse using code you should be able to understand.

It would be possible if cumbersome to add a second servo. If you really meant a second servo that just runs slower, as opposed to being able to run one servo at two speeds.

But that is fraught, and your time would better be spent looking at all the things @xfpd brought to this and figure it out, ask questions we love to answer.

Take this link to the live simulation:


Wokwi_badge Servo C/CW slow/FAST


As @xfpd explained, the regular servo moves to angles, these angles would make your continuous rotation servo move, or not, slow or fast and CW or CCW.

// https://forum.arduino.cc/t/servo-with-joystick-x-and-y-question/1322442
// https://wokwi.com/projects/414736427464105985

# include <Servo.h>

# define bRedFast    2
# define bGreenSlow  3
# define bBlueSlow   6
# define bYellowFast 7

# define bStop       5   // unused here?

# define xServoPin   4
# define yServoPin   12

const byte ServoPin = 4;

Servo sx360;

void setup()
{
  sx360.attach(xServoPin);

  pinMode(bRedFast, INPUT_PULLUP);
  pinMode(bGreenSlow, INPUT_PULLUP);
  pinMode(bStop, INPUT_PULLUP);
  pinMode(bBlueSlow, INPUT_PULLUP);
  pinMode(bYellowFast, INPUT_PULLUP);
}

void loop()
{
  int direction;

  direction = 0;
  if (digitalRead(bRedFast) == LOW) direction = 90;
  if (digitalRead(bGreenSlow) == LOW) direction = 45;
  if (digitalRead(bBlueSlow) == LOW) direction = -45;
  if (digitalRead(bYellowFast) == LOW) direction = -90;


  sx360.write(90 + direction); 
}

HTH

a7

1 Like

Hi, @jhndzbass
Welcome to the forum.

What model Arduino are you using?

Can you please post a copy of your circuit, a picture of a hand drawn circuit in jpg, png?
Hand drawn and photographed is perfectly acceptable.
Please include ALL hardware, power supplies, component names and pin labels.

Thanks.. Tom... :smiley: :+1: :coffee: :australia:

I like the "deadman" switch effect. Much better.
@jhndzbass - Post #10 for the win.

Thanks Tom ! Sorry for the late response.
I will include a vid/ drawing etc. soon.
Thanks again.

@xfpd - you have fallen victim to a pernicious flaw in the wokwi.

You have no pins set to mode OUTPUT, yet the LED segments light up. Wokwi has extremely low current LEDs. When you write 1, it turns on the internal pullup which probides enough.

I only noticed this because I was mining your code for a few lines I needed for my version and could not figure out how you were getting OUTPUT mode set.

I forgot this happened to me before when I moved from the wokwi to real life.

a7

oops.

I forget to do that on real LEDs, too. As I should, I get bad results.

Hello again everyone.
Here is a 15 sec vid of the circuit.

I just want to add the y of the joystick to control the motor slower than the way the x control does.

Here is the code that works with x and shown in video.

#include <Servo.h>

// Give names to pins

const byte JoystickInputPinx = A0;

const byte ServoPin = 4;

// Define global objects

Servo s360;

void setup()

{

s360.attach(ServoPin);

}

void loop()

{

s360.writeMicroseconds(1000 + analogRead(JoystickInputPinx));

}

This is the third time you have posted the same sketch without trying any of the suggestions.

Are you not understanding the code suggestions?
Are you meaning "someone, write my code for me?"
You did not put your code in a code block... again.

#include <Servo.h>
const byte x = A0, y = A1, sp = 4;
Servo s;

void setup() {
  s.attach(sp);
}

void loop() {
  if (analogRead(x) > 512)
    s.write(0);
  if (analogRead(x) < 512)
    s.write(180);
  if (analogRead(y) > 512)
    s.write(45);
  if (analogRead(y) < 512)
    s.write(135);
}

xfpd . I apologize. Your response is a bit "snippy". Im 58 years old and dont need to be snapped at.

Thanks for responding,
Im sorry i didnt put the code in the brackets. I have not been in a Forum in years and now I know why.

Take care . Dont bother responding.

Adios!

Kids sure act funny when they don't get a good nights' sleep, or get dressed in the wrong skivvies.

Those "snappy, bothersome" issues are points to be addressed, not spankings. It is okay to not understand the code... "no" and "yes" are valid answers. Wanting someone to write your code is VERY prevalent here, and "no" or "yes" are valid answers. And, you did not format you code as you have been instructed (from the CBT that you underwent to gain access).

You got a bunch of help from a bunch of people that you did not ack, then did your own thing again. How should people react, who give you help, that you do not use, and you continue asking the same (already answered) question? You seem interested in a solution, but you have not taken the time to try the several solutions given.

Don't be sorry for not putting code in a code block, or not responding. Just correct it.

And turn the light on before opening your dresser drawer.

This topic was automatically closed 180 days after the last reply. New replies are no longer allowed.