Circuit Prototyping Construction
A new user eventually asks: “Now that I have made my circuit work on a solderless breadboard, how do I make it permanent.”
-
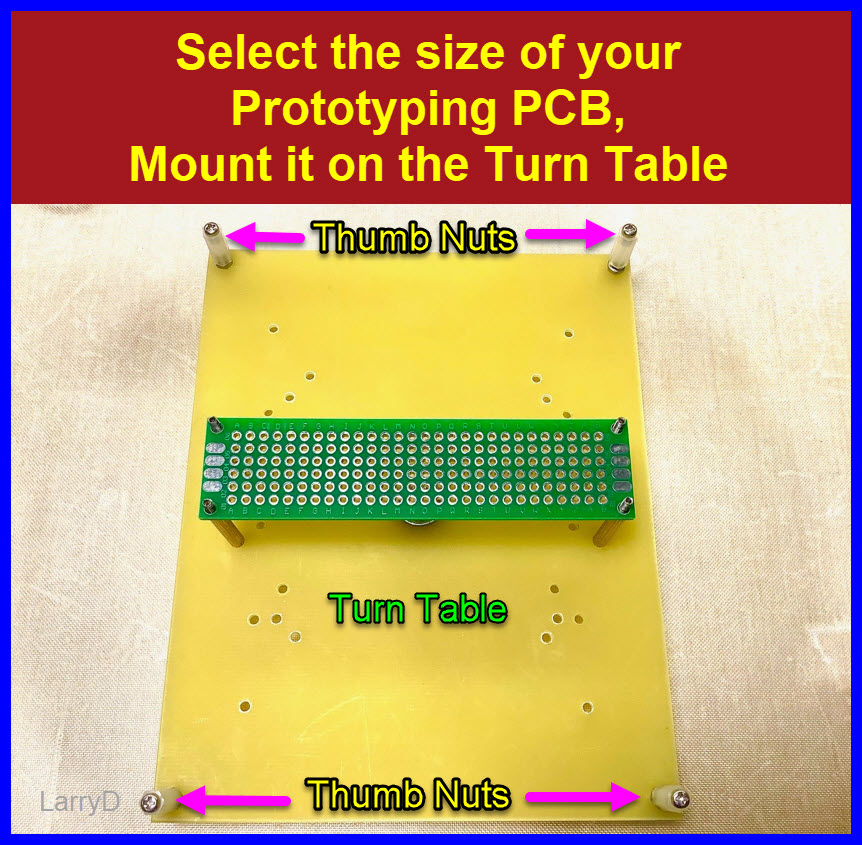
The following images show a technique I use to make a one time, Point-to-Point circuit on a prototyping PCB.
This is a valid way of wiring up a project circuit board; when you need to make several such circuits, it might be time to get PCBs made.
If others have additional suggestions they can pass on, please do. -
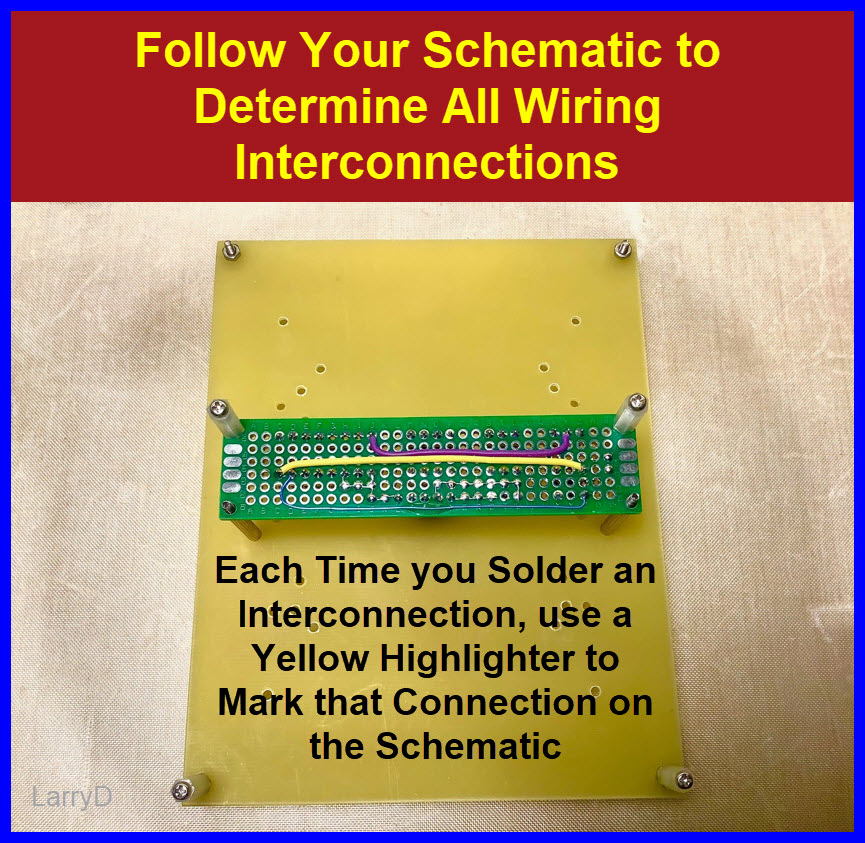
The first thing we need is a schematic showing ALL the electrical connections in our project.
-
Flux will help during soldering.
-
After we solder a wire connection, use a Highlighter to mark that connection on the schematic.
-
Highly recommend you use heat resistant Kynar insulated 30AWG wire wrap wire, and/or 16 strand, 28AWG Silicone insulated wire.
-
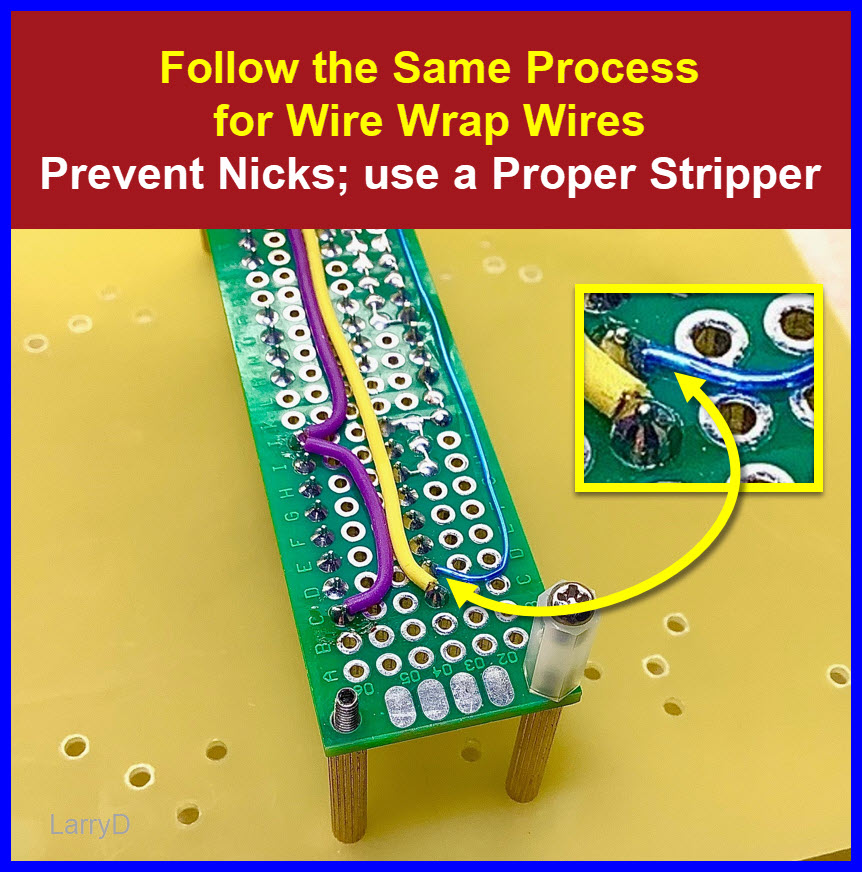
Use a proper non-nicking stripper when removing insulation from wire wrap wire.
-
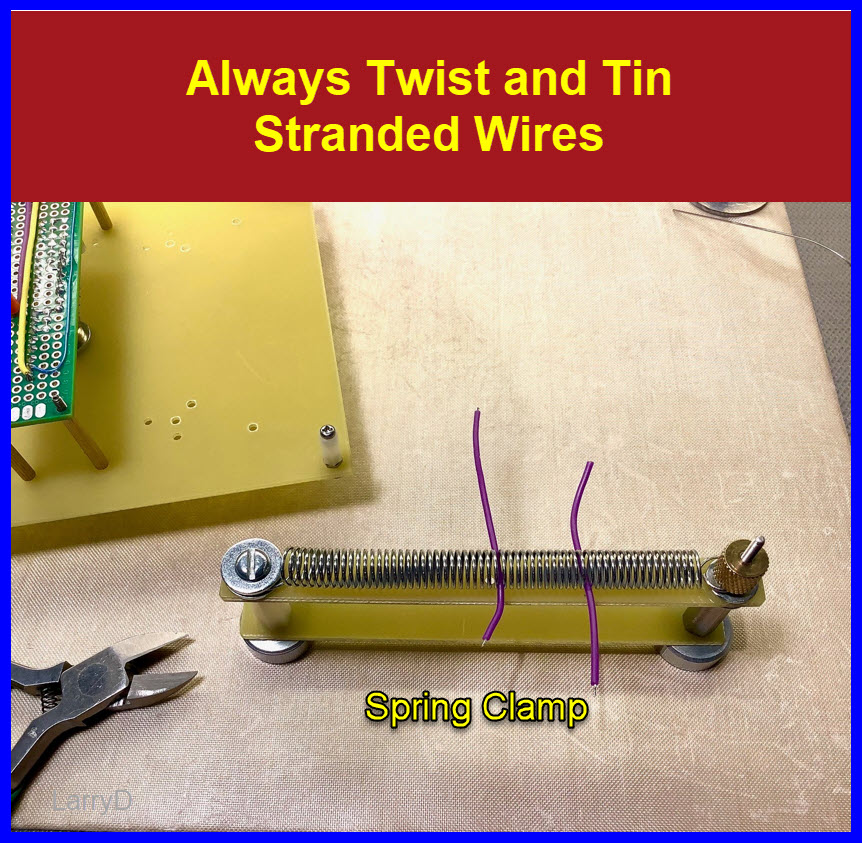
Strip, twist and tin stranded wire.
-
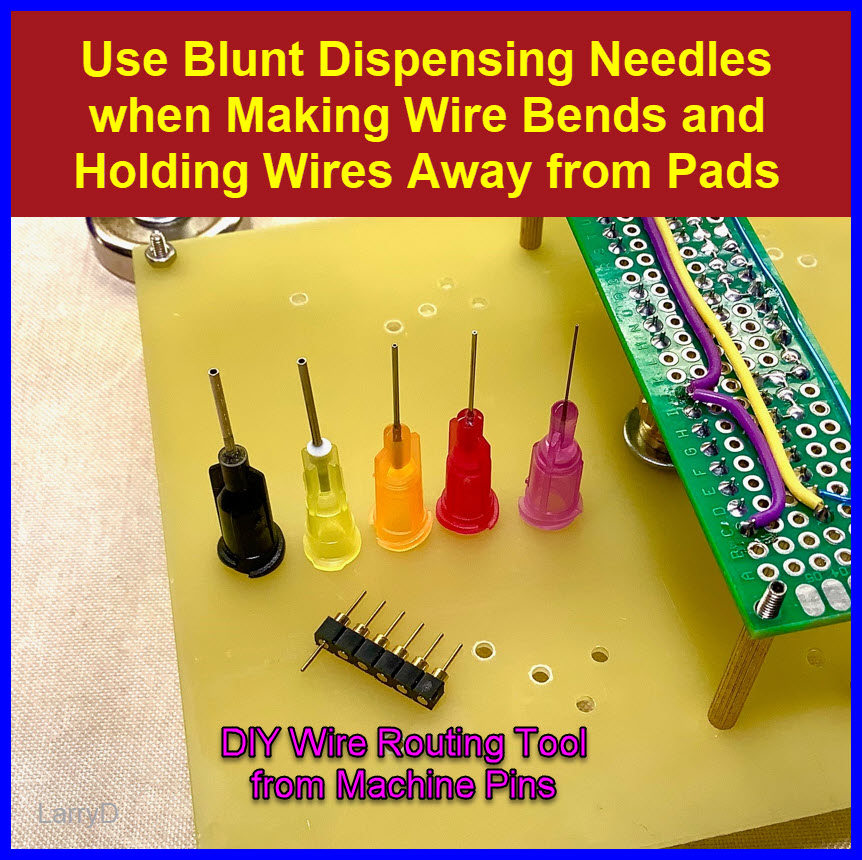
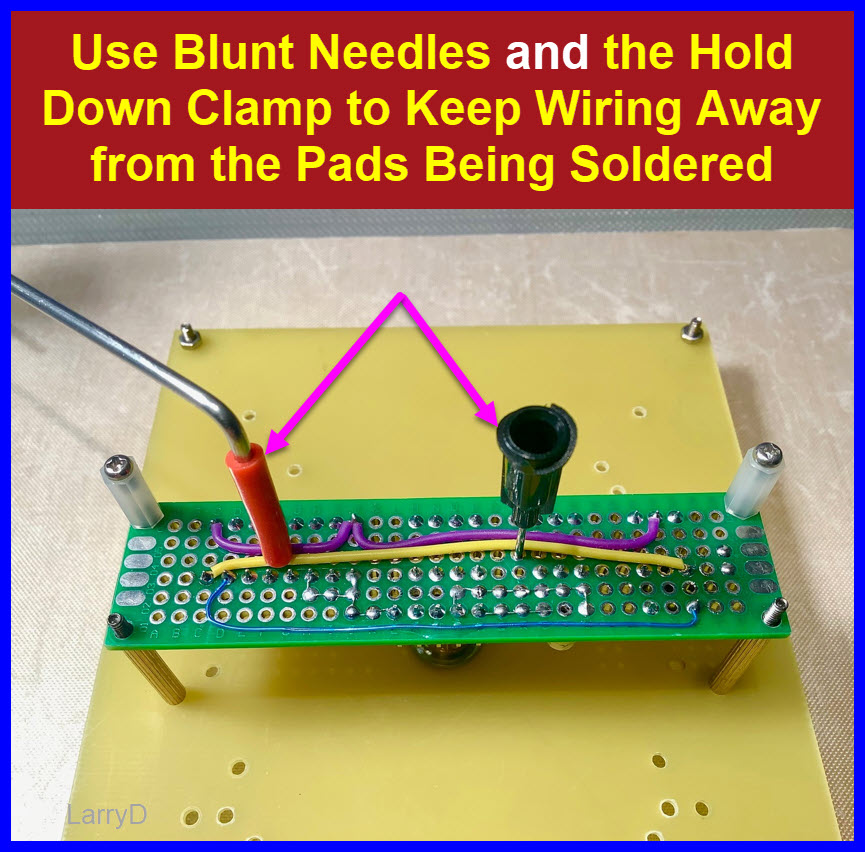
Use Blunt Dispensing Needles when routing wires.
-
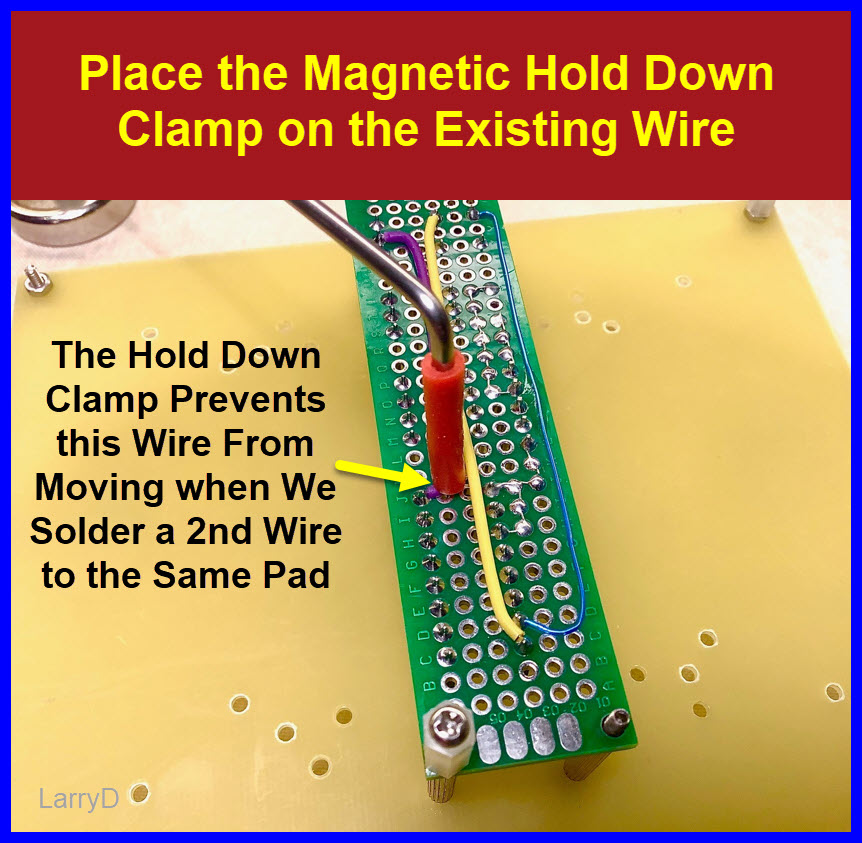
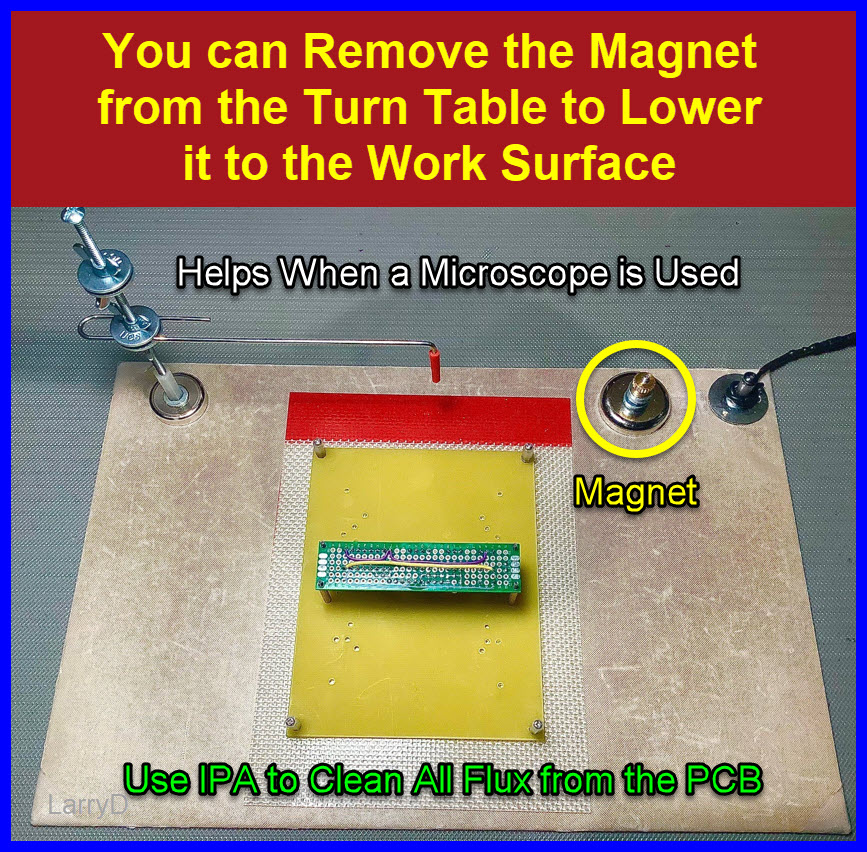
The Magnetic Hold Down Clamp is a must have tool to stop wire movement while soldering. The bend on this tool seems to work best when set to ~93°.
-
If there is excess solder on a pad, it will be more difficult to make your wire connections. Remove the excess with Solder Wick.
-
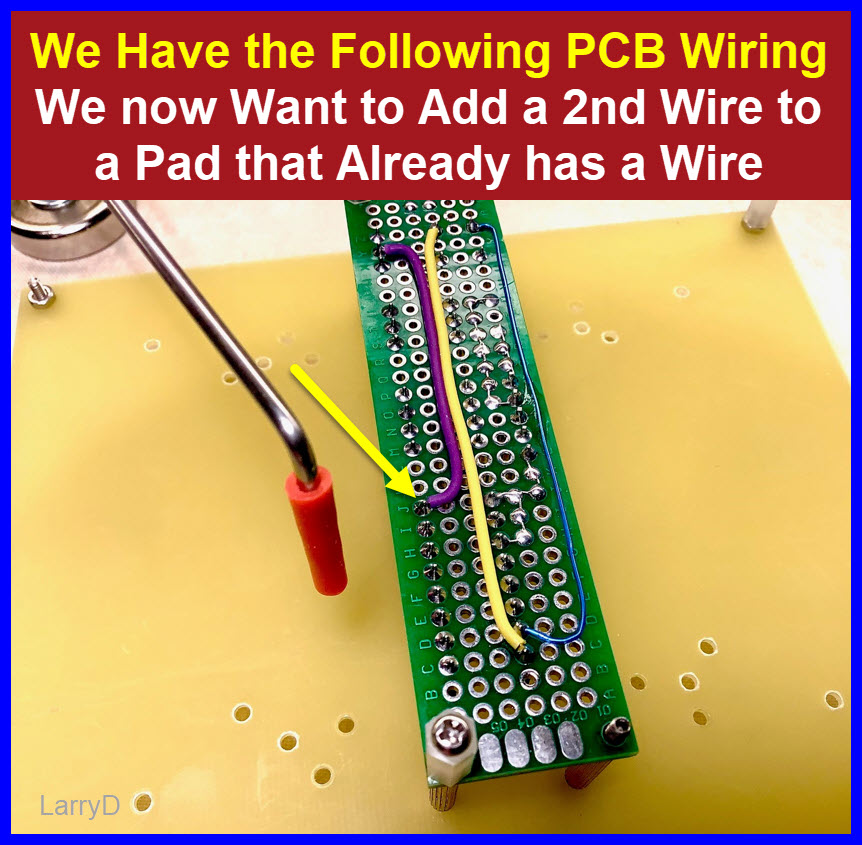
Aim for no more than 2 stranded wires per pad, 3 for wire wrap wire.
The Hold Down tool is indispensable when attaching multiple wires to a single pad. -
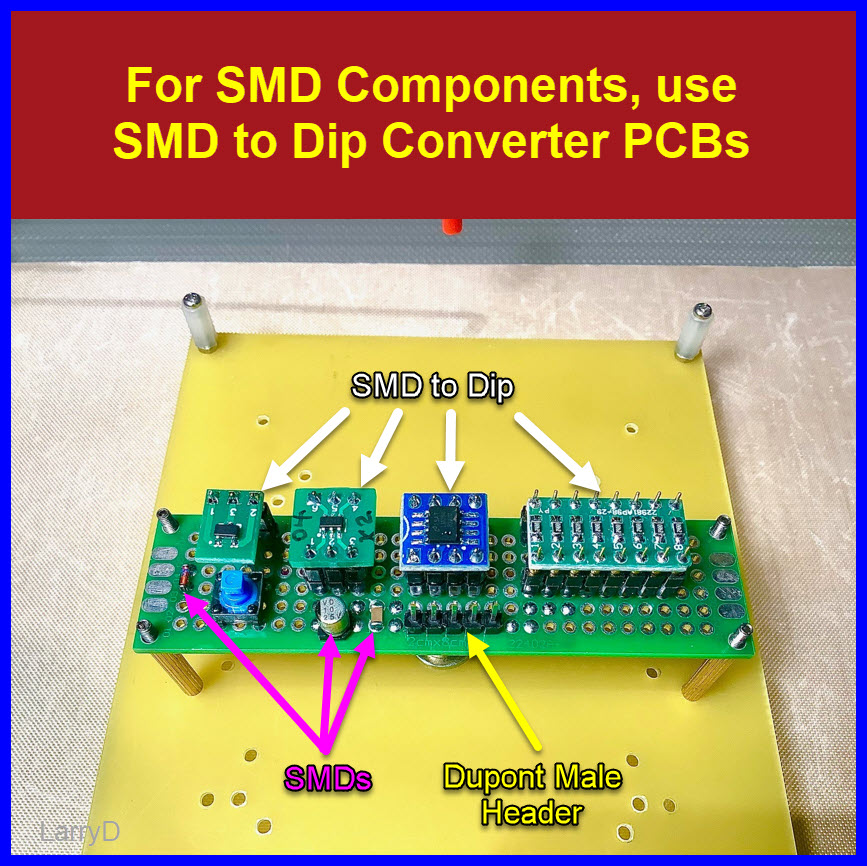
Inexpensive SMD to DIP conversion PCBs are a real help when today’s SMD components are used.
-
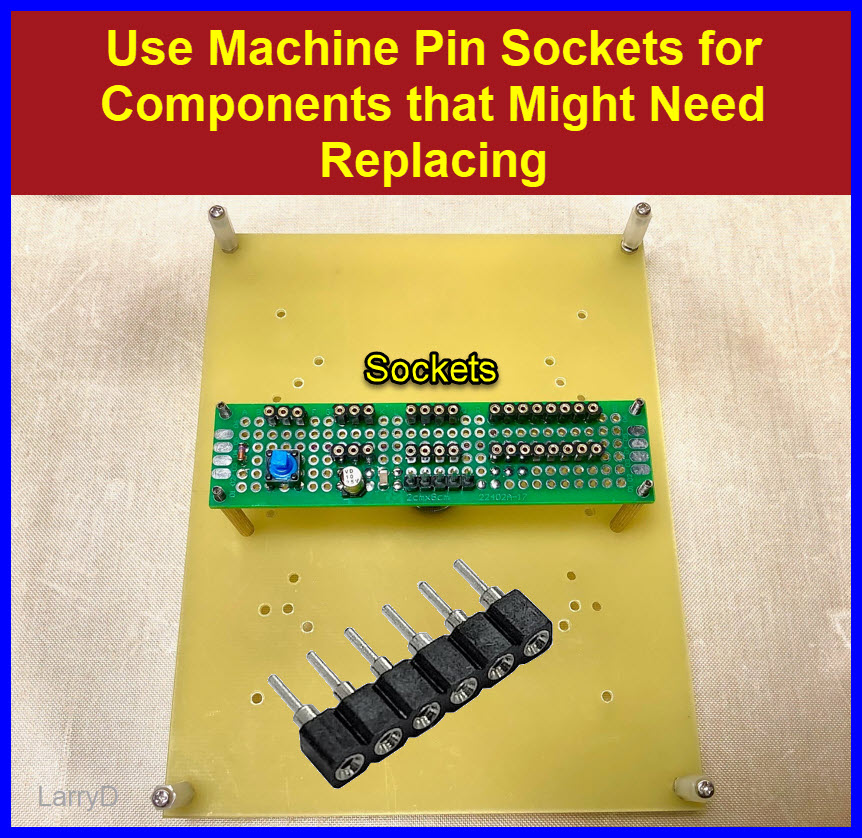
Machine pin sockets should be used if there is a possibility of device failure.
-
Keep Components on one side, wire connections on the other.
-
If the need arises, use UV glue to secure wires to the PCB.
-
Off board wire connections should be made using Dupont or JST connectors.
-
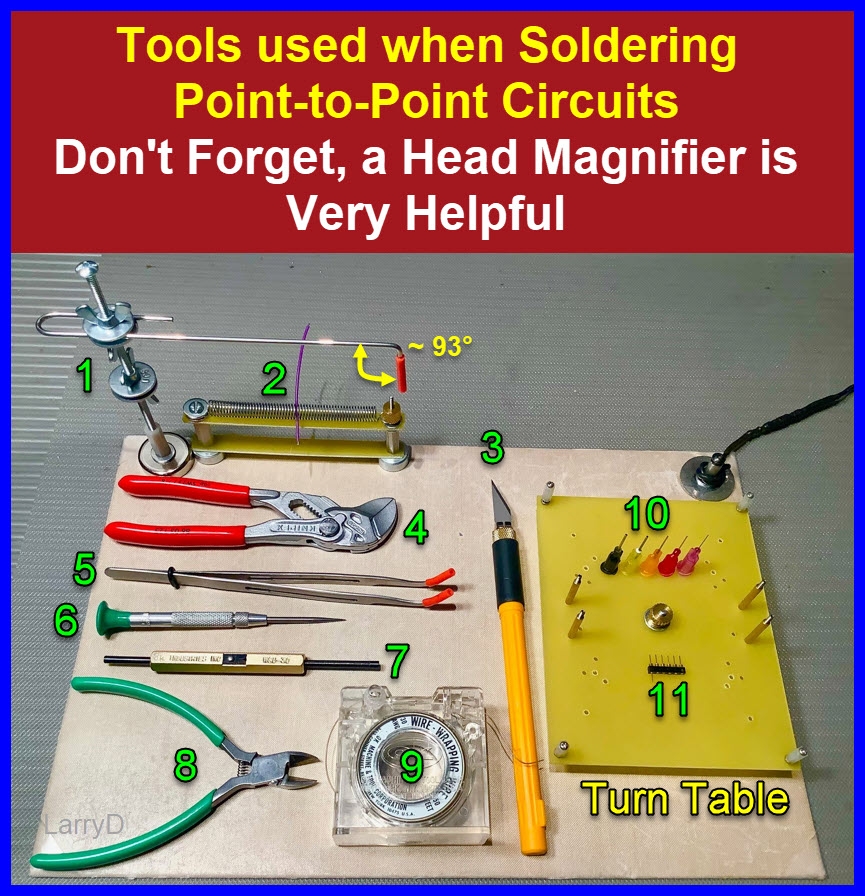
Recommended tools in this discussion
1 Tall Magnetic Hold Down Clamp
2 Spring Clamp for tinning wires
3 Sharp hobby knife to cut excess wire wrap wire after soldering
4 Knipex Pliers for holding wire wrap wire while stripping
5 45° Tweezers
6 Sharp Awl
7 Wire Wrap Wire Stripper, non nicking
8 Flush Cut Nippy cutters
9 Wire Wrap Wire with Cutter and Stripper
10 Blunt Dispensing Needles for routing wires
11 DIY wire routing tool
-
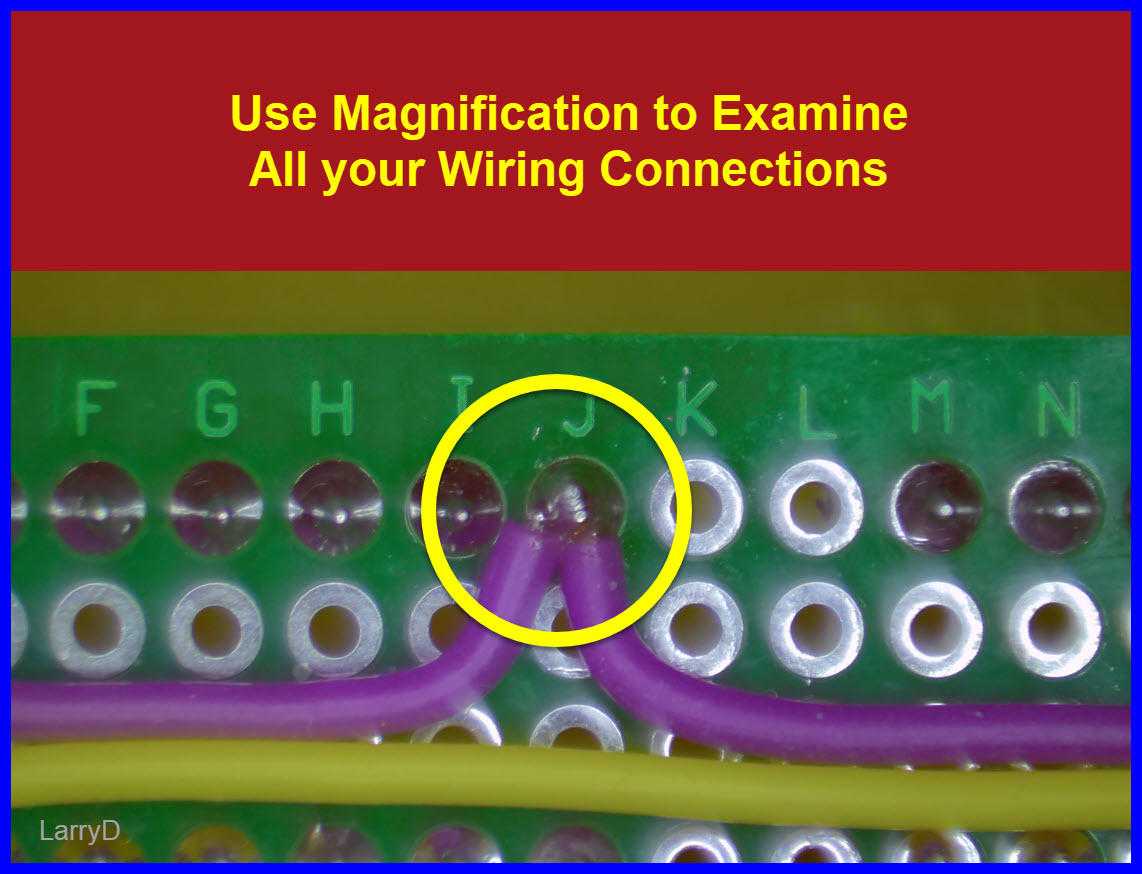
Use Magnification to confirm all joints are properly soldered.
If rework is required, make sure you use soldering flux. -
Use a soft toothbrush to clean the PCB , use IPA (Isopropyl Alcohol)