i was a starving entrepreneur when i passed outside anca's place on 14th street 6 years ago. the sight of all the food stopped me. the room was full of people socializing and nobody was eating - i crashed the party. i still remember the desert fruit cake when i finally looked up to see where i was. there were computers, 3d printers, electronics everywhere and people working on complicated looking diy projects. then anca came said hi and my life changed some. i had crashed techlinimal during it's first anniversary/end of year party - on the weekly electronics hack night. i had not starting building electronics into farming yet and i was thinking of z80's (i learned how to program using this instruction set, build my first computer using a z80 and did many projects using this in early college
.

anca kept mentioning arduino - and i kept asking arduwho. in the end she gave up and handed me a copy of the arduino handbook (and bag of leftovers). i did not sleep the entire night, i was at anca's door at 8 am bumming an arduino. i was there the next morning asking for another one as i literally smoked the first. on the next electronics hack night, i was flashing lamps, controlling heaters and fans at the techiminal with my first arduino demo.
i quickly saw the advantages and limitations of the arduino i also found it easy to learn and challenging to use. i was discussing with anca when chris pointed me to mightohms wifi project.
the integration of linux with the arduino was appealing as many of my applications required security, were frequently in remote locations, often different problems and usually critical in nature – eg in the case of aquaponics - plants, fish, bacteria die offs, fire hazards and injury from water leaks etc. being able to monitor and control these reliably turned out to be challenging as even the tiniest oop's often means using a mop.
so after various versions e.g. v1, v1.1, v1.3 (shown below), v1.5
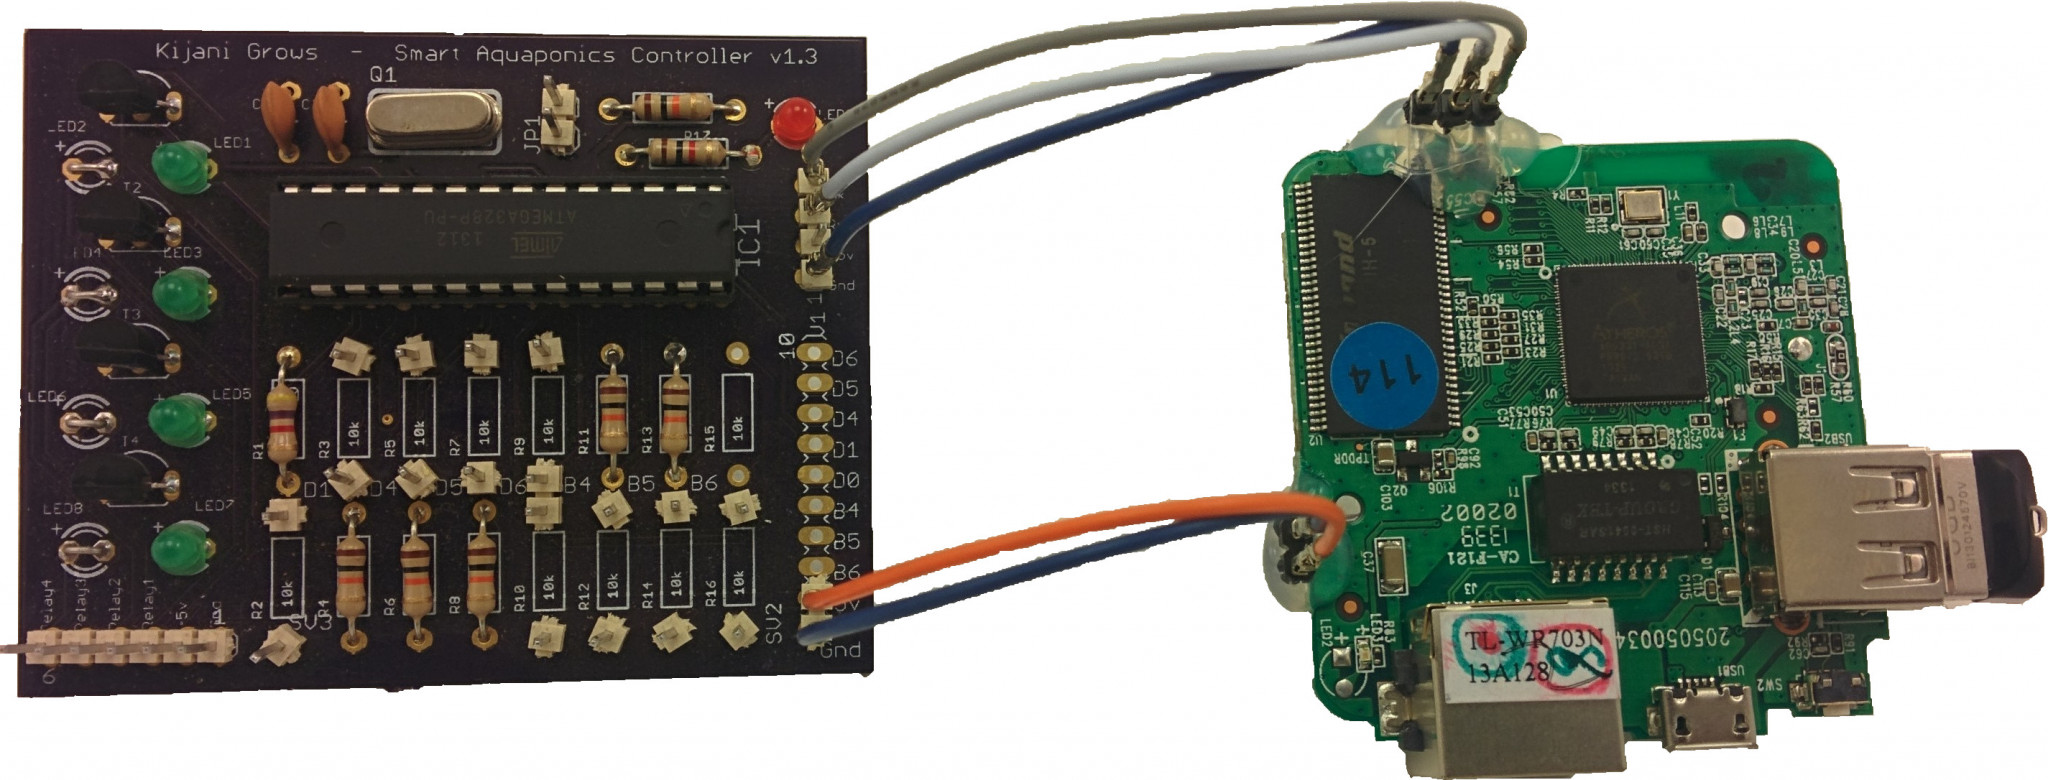
the v2 controller a combined linux, atmega2560 with multiple shields on the same board is my second generation platform
why is v2 really easy to use. well, first because i designed and built it. the platform works by abstraction physical inputs so one can focus on how things interrelate as compared to the details.
for instance this is what google search for aquaponics returns
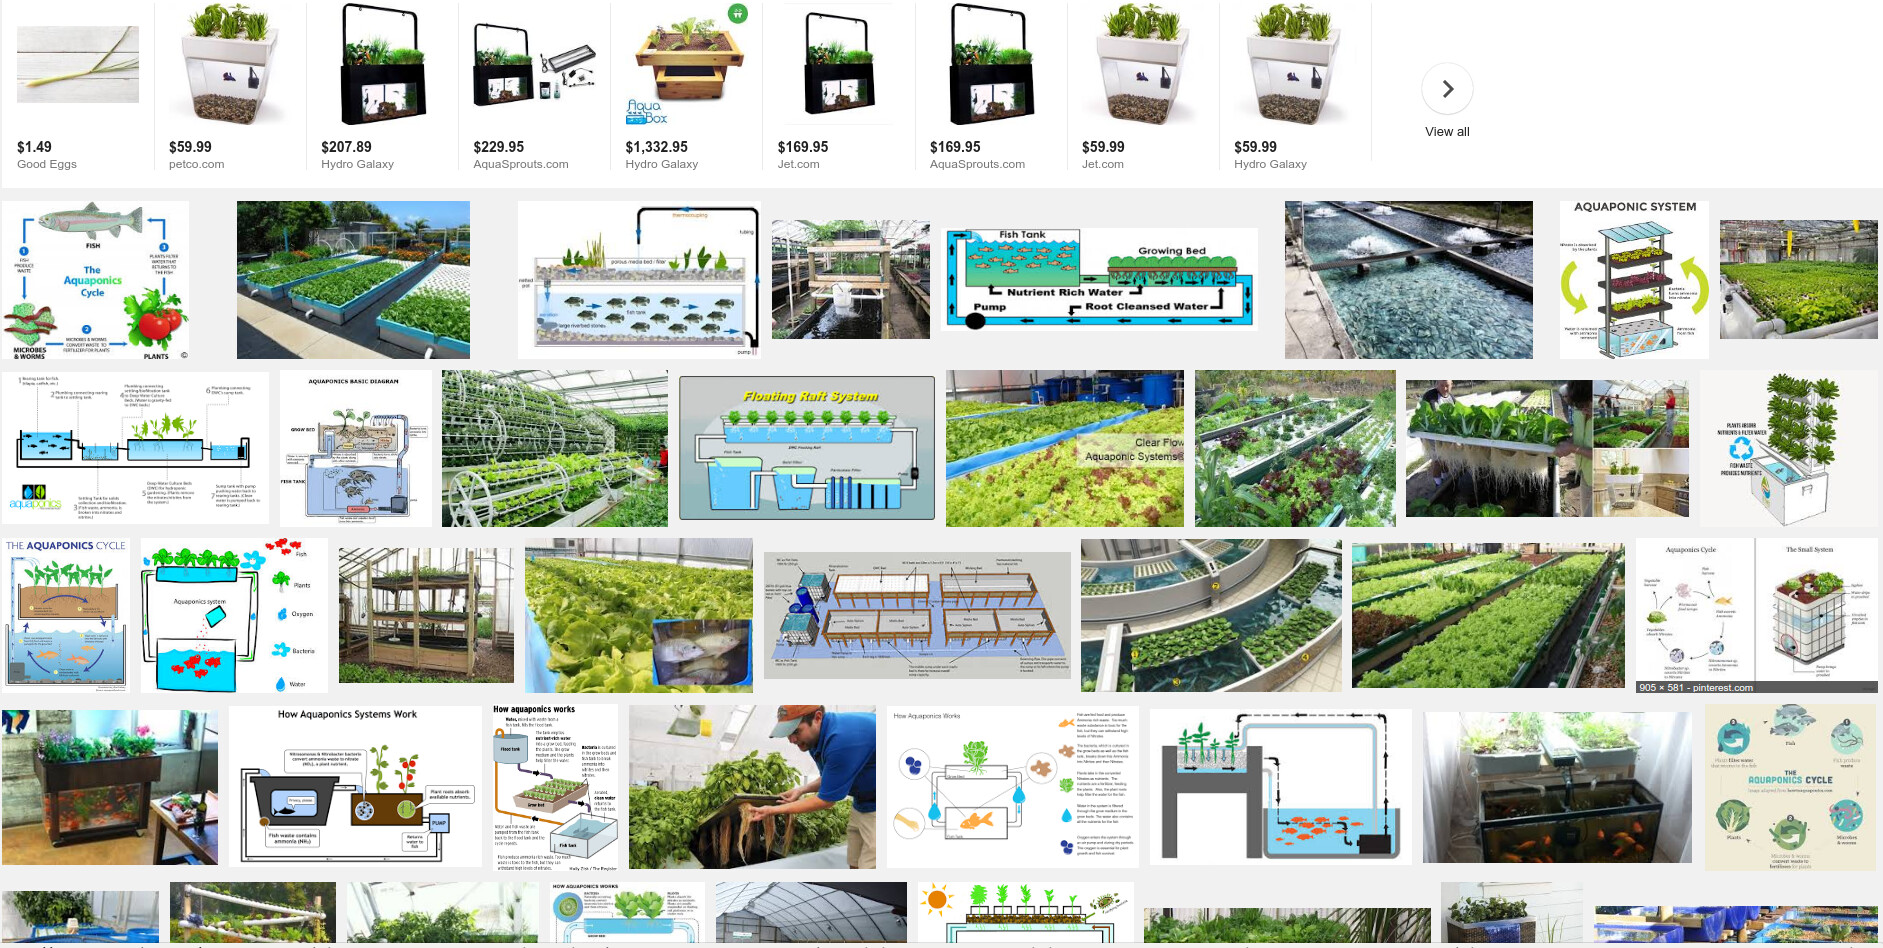
which interestingly shows, my sketch diagram, a picture of my garden and 3 gardens straight from my door - without credits.
what the results show is that aquaponics is technology. so to automate this would be relatively easy as one can probably easily get sensors and shields for every component in such a system. the end result is a perfectly make project

which is ok - but not ok ... it is a byproduct of technological way of thinking .ie. focusing on the end as compared to the journey.
aquaponics mimics nature -is a better way of thinking about problems for physical applications that will eventually run and benefit from machine learning and AI. we need more basic abstractions to be able to model using hardware and software efficiently. i think a better way to visualize such a process is as shown below
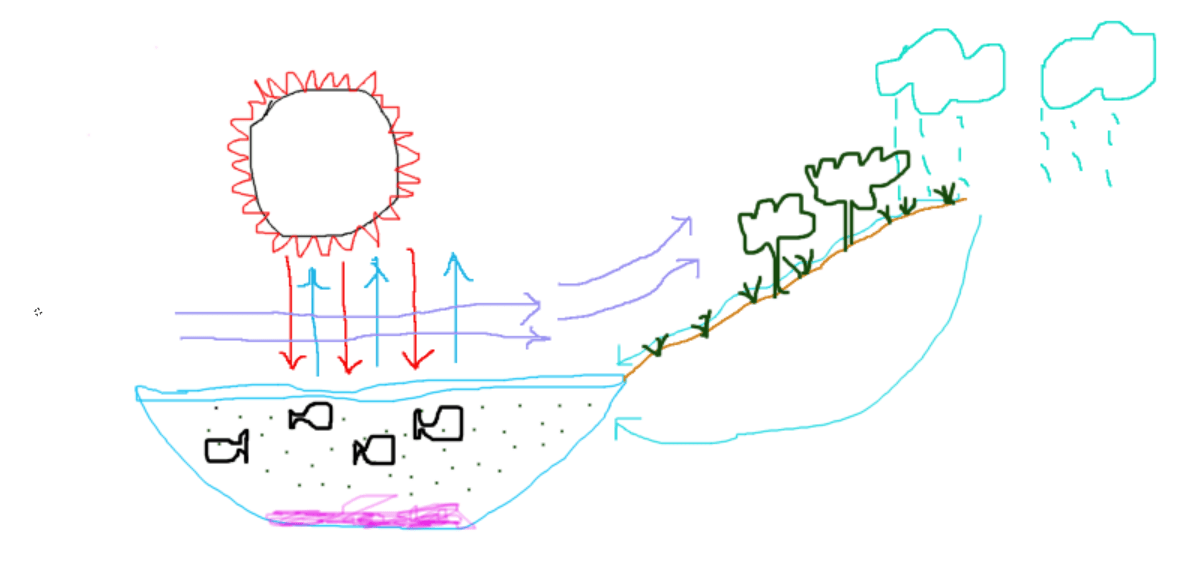
from there it is very easy to move to here
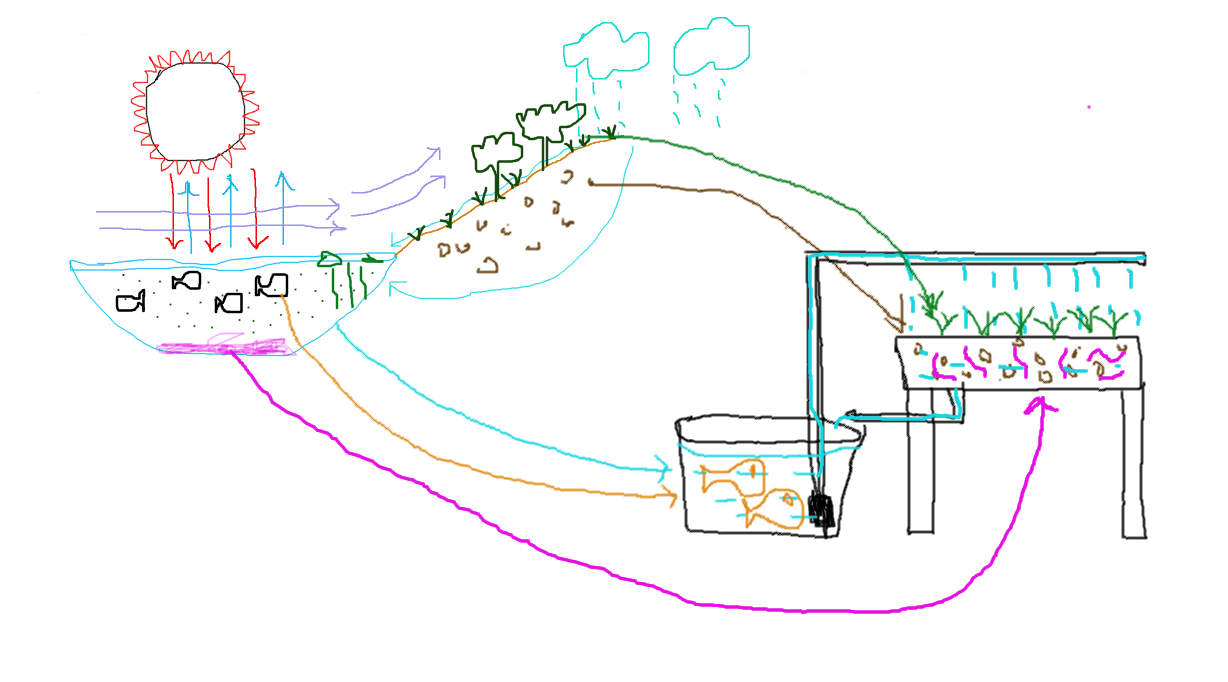
and even easier to get here

at this point really my concerns are what is digital, what is analogue and what is streaming with a timing of it's own - rather than questions like what sensors are good for aquaponics. the v2 controller works on the idea that the first 3 concerns will be the same for every physical project, whereas the last question will change for every application. it means data collection, communications, security layers can be the same for different applications whereas data analysis and presentation are different and can be done later in the chain.
traditionally, one connects a sensor, say temperature to a pin and writes code that ties that pin to that functionality. then you connect another sensor say a photocell to another pin and code that pin for a photocell. and you do the same for every peripheral on your board. combine the stack of hardware shield boards on the arduino above with software like this and you never have to spend another idle day depending on what you are trying to accomplish.
abstracting inputs into their basic forms also means that only raw data values are of interest rather than what they mean. so you can connect any sensor in any appropriate pin ie analogue sensors to any analogue pin, digital to any digital pin and streaming sensor to any of the streaming pins (1-wire, i2c, uart). streams are broken down into discrete values using the eol characters.
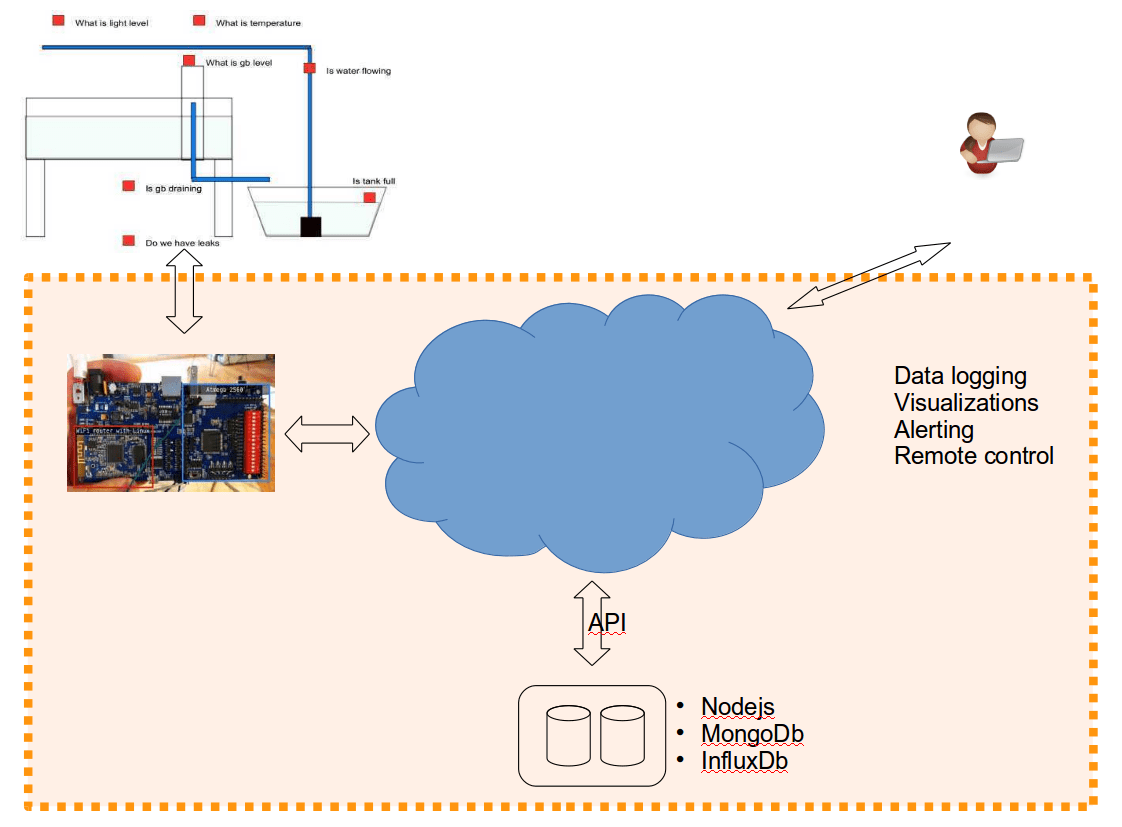
the default program on the atmega2560 polls the state of all pins and transmits these as a json string to the ar9331 soc running openwrt linux. the data is processed for any immediate action and the enriched data object is send to remote data servers for processing through the api.
a typical data object string is shown below
{"baudRate": 38400, "name": "manylabs", "uptime": "3 days, 3:26:08.680000", "pins": {"temperature_0": 69.69, "relay6": 0, "D38": 1, "D39": 1, "D36": 1, "D37": 1, "D34": 1, "D35": 1, "D32": 1, "D33": 1, "D30": 0, "D31": 0, "humidity_temperature": 18.0, "A15": 322.0, "A14": 284.0, "temperature_sensor_count": 1, "A11": 300.0, "A10": 258.0, "A13": 343.0, "A12": 340.0, "relay8": 0, "UART3": 0, "A1": 290.0, "A0": 330.0, "A3": 372.0, "A2": 348.0, "A5": 361.0, "A4": 360.0, "A7": 376.0, "A6": 384.0, "A9": 134.0, "A8": 375.0, "D29": 0, "D28": 0, "nutrientTemp": 20.94, "corizHumidity": 0.2, "D23": 0, "D22": 0, "D25": 1, "UART2": 0, "D49": 0, "D48": 0, "corizCo2": 2, "D43": 1, "D42": 0, "D41": 1, "D40": 1, "D47": 1, "D46": 0, "D45": 1, "D44": 1, "rtc": "2000/1/4 5:4:10", "humidity": 22.0, "flow_rate_sensor": 0.0, "D8": 1, "D9": 0, "D6": 1, "D7": 0, "D4": 1, "D5": 1, "D3": 0, "corizTemp": -99.8}, "version": "v2.0.0", "wlan0": "192.168.1.79", "initialize": 0, "atmegaUptime": "02:01:38:04"}
the data object then takes the following trip down the net
using the v2 api, it is very easy to query your raw data back
curl http://api.kijanigrows.com/v2/device/get/manylabs
what remains is to tell the server which sensors are connected to which pins, so the useful data can be presented for visualization or further processing eg for alerts. that is the function of the kj2arduino library. this takes raw data, runs the appropriate methods against and returns the sensor data in human form - converted, units, icons, set points and other properties that go along with the sensor data
the process for mapping sensors is as easy as selecting your board, choosing the pin and selecting what things are connected to it using the api

the API can then be queried for the mapped data object eg
http://api.kijanigrows.com/v2/device/sensors/json/manylabs
which can be presented further as follows

i just noticed that was the indoor irrigation system at many labs. if an aquaponic garden it can be further visualized as
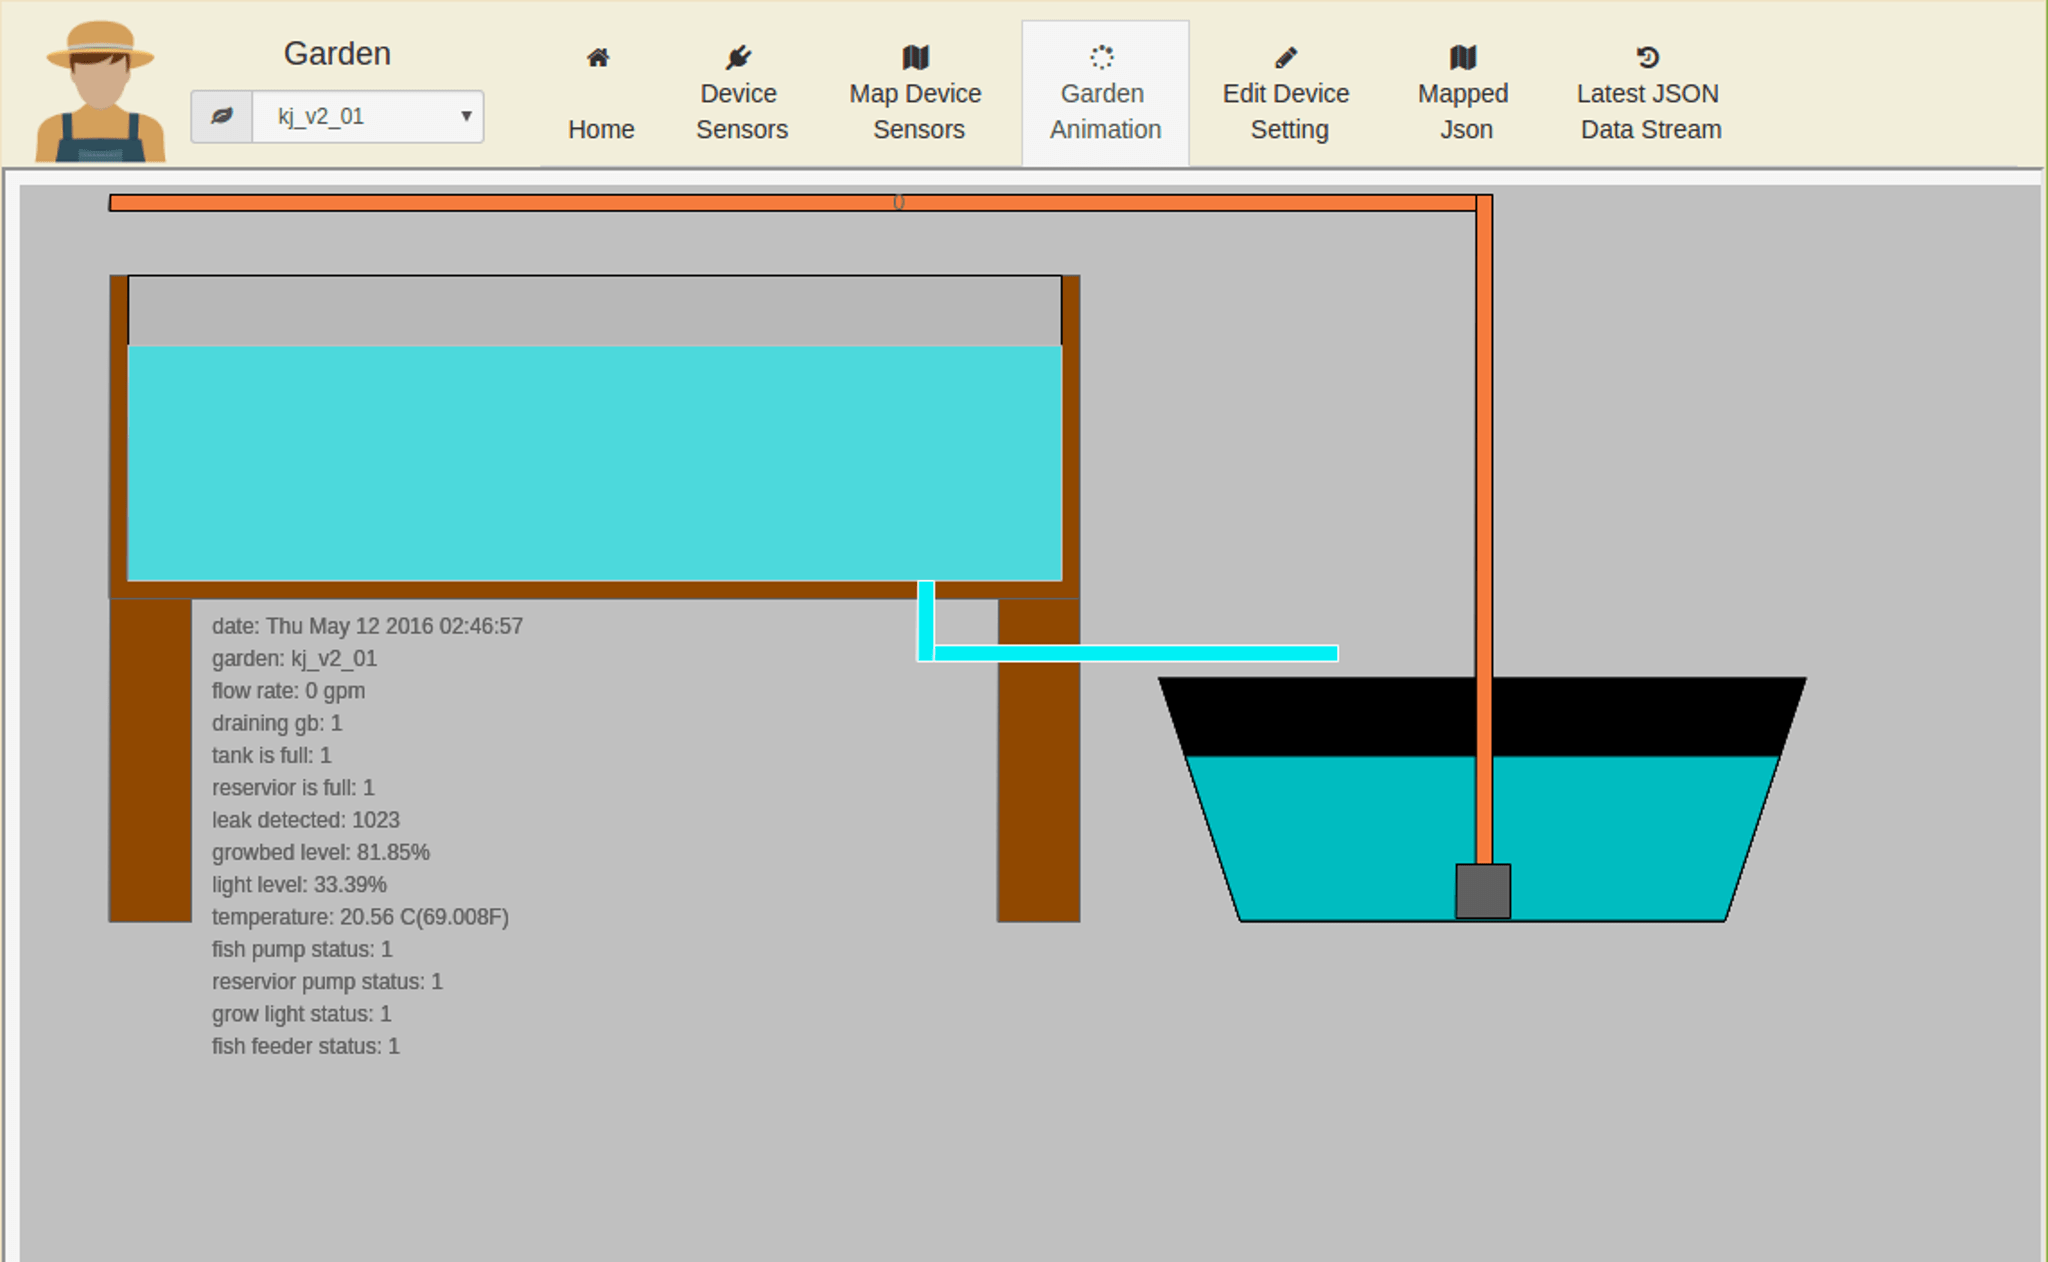
or presented further as

![]() i just ran out of 9000 words
i just ran out of 9000 words
please let me know what you think and get a v2 smart controller board
