Wifi Data exchange between Portenta H7 and an my own Android app developed using Android Studio

Hey everyone, A few years back, I worked on an IoT project that involved data exchange over WIFI using the ESP8266 and an app I built in Android Studio. Now, I'm looking to transition to the Portenta H7, but I'm not sure how to adapt the project for that. Any guidance on how to rebuild the project would be greatly appreciated. Thanks!

Here is my code:

#include <ESP8266WiFi.h>   //library for ESP8266
#include <ESP8266WebServer.h>   //library for server
#include <ArduinoJson.h>   //library for json

IPAddress local_IP(192,168,11,4);   // Server IP
IPAddress subnet(255,255,255,0);
 
ESP8266WebServer server;
DynamicJsonDocument doc(1024);

void sensorActivity(){
   String Webpage;
   int sensorVal=100;
   doc["sensornow"] =sensorVal;
   serializeJson(doc,Webpage);   
   server.send(200, "text/plain",Webpage + "\n" );  
}

void setup() {
  Serial.begin(115200);
  WiFi.softAPConfig(local_IP,local_IP,subnet);
  WiFi.softAP("MySSID", "MyPass",1,1);
  WiFi.softAPIP();
  WiFi.mode(WIFI_AP); 
  server.on("/sensorVal", sensorActivity); 
  server.begin();
  delay(10000);
}
 
void loop() {
   server.handleClient(); 
}

Does the old code compile?
If it compiles, does it work?
Do you know how to change the Board Libraries?

Dear Sonofcy, Thanks for the response. As you know, the ESP8266WiFi.h and ESP8266WebServer.h libraries are specifically for the ESP8266, so they won't compile on the Portenta H7 board. My main question is, which library should I use for the Portenta H7? I found a demo example for blinking an RGB LED on the Portenta using the web server, and it works great on my board. However, I'm not sure how to modify it to exchange data with a mobile app created in Android Studio. Thanks again.

Here is the demo example:

#include <WiFi.h>
//#include "arduino_secrets.h"

///////please enter your sensitive data in the Secret tab/arduino_secrets.h
char ssid[] = "SECRET_SSID";    // your network SSID (name)
char pass[] = "SECRET_PASS";    // your network password (use for WPA, or use as key for WEP)
int keyIndex = 0;             // your network key Index number (needed only for WEP)

int status = WL_IDLE_STATUS;

WiFiServer server(80);

void setup() {
  // put your setup code here, to run once:
  Serial.begin(9600);
  while (!Serial) {
    ; // wait for serial port to connect. Needed for native USB port only
  }
  
  Serial.println("Access Point Web Server");

  pinMode(LEDR,OUTPUT);
  pinMode(LEDG,OUTPUT);
  pinMode(LEDB,OUTPUT); 

  // by default the local IP address of will be 192.168.3.1
  // you can override it with the following:
  // WiFi.config(IPAddress(10, 0, 0, 1));

  if(strlen(pass) < 8){    
    Serial.println("Creating access point failed");
    Serial.println("The Wi-Fi password must be at least 8 characters long");
    // don't continue
    while(true);
  }
    
  // print the network name (SSID);
  Serial.print("Creating access point named: ");
  Serial.println(ssid);

  //Create the Access point
  status = WiFi.beginAP(ssid,pass);
  if(status != WL_AP_LISTENING){
    Serial.println("Creating access point failed");
    // don't continue
    while (true);
  }
  // wait 10 seconds for connection:
  delay(10000);

  // start the web server on port 80
  server.begin();

  // you're connected now, so print out the status
  printWiFiStatus();
  
}

void loop() {

 // compare the previous status to the current status
  if (status != WiFi.status()) {
    // it has changed update the variable
    status = WiFi.status();

    if (status == WL_AP_CONNECTED) {
      // a device has connected to the AP
      Serial.println("Device connected to AP");
    } else {
      // a device has disconnected from the AP, and we are back in listening mode
      Serial.println("Device disconnected from AP");
    }
  }

  WiFiClient client = server.available();   // listen for incoming clients

  if (client) {                             // if you get a client,
    Serial.println("new client");           // print a message out the serial port
    String currentLine = "";                // make a String to hold incoming data from the client
  
    while (client.connected()) {            // loop while the client's connected
     
      if (client.available()) {             // if there's bytes to read from the client,
        char c = client.read();             // read a byte, then
        Serial.write(c);                    // print it out the serial monitor
        if (c == '\n') {                    // if the byte is a newline character

          // if the current line is blank, you got two newline characters in a row.
          // that's the end of the client HTTP request, so send a response:
          if (currentLine.length() == 0) {
            // HTTP headers always start with a response code (e.g. HTTP/1.1 200 OK)
            // and a content-type so the client knows what's coming, then a blank line:
            client.println("HTTP/1.1 200 OK");
            client.println("Content-type:text/html");
            client.println();

            // the content of the HTTP response follows the header:
            client.print("<html><head>");
            client.print("<style>");
            client.print("* { font-family: sans-serif;}");
            client.print("body { padding: 2em; font-size: 2em; text-align: center;}");            
            client.print("a { -webkit-appearance: button;-moz-appearance: button;appearance: button;text-decoration: none;color: initial; padding: 25px;} #red{color:red;} #green{color:green;} #blue{color:blue;}");
            client.print("</style></head>");
            client.print("<body><h1> LED CONTROLS </h1>");
            client.print("<h2><span id=\"red\">RED </span> LED </h2>");
            client.print("<a href=\"/Hr\">ON</a> <a href=\"/Lr\">OFF</a>");
            client.print("<h2> <span id=\"green\">GREEN</span> LED </h2>");
            client.print("<a href=\"/Hg\">ON</a> <a href=\"/Lg\">OFF</a>");
            client.print("<h2> <span id=\"blue\">BLUE</span> LED </h2>");
            client.print("<a href=\"/Hb\">ON</a> <a href=\"/Lb\">OFF</a>");
            client.print("</body></html>");

            // The HTTP response ends with another blank line:
            client.println();
            // break out of the while loop:
            break;
          } else {      // if you got a newline, then clear currentLine:
            currentLine = "";
          }
        } else if (c != '\r') {    // if you got anything else but a carriage return character,
          currentLine += c;      // add it to the end of the currentLine
        }

        // Check to see if the client request was "GET /H" or "GET /L":
        if (currentLine.endsWith("GET /Hr")) {
          digitalWrite(LEDR, LOW);               // GET /Hr turns the Red LED on
        }
        if (currentLine.endsWith("GET /Lr")) {
          digitalWrite(LEDR, HIGH);                // GET /Lr turns the Red LED off
        }
        if (currentLine.endsWith("GET /Hg")){
          digitalWrite(LEDG, LOW);                // GET /Hg turns the Green LED on
        }
        if (currentLine.endsWith("GET /Lg")){
          digitalWrite(LEDG, HIGH);                // GET /Hg turns the Green LED on
        }
        if (currentLine.endsWith("GET /Hb")){
          digitalWrite(LEDB, LOW);                // GET /Hg turns the Green LED on
        }
        if (currentLine.endsWith("GET /Lb")){
          digitalWrite(LEDB, HIGH);                // GET /Hg turns the Green LED on
        } 
        
      }
    }
    // close the connection:
    client.stop();
    Serial.println("client disconnected");
  }
  
}

void printWiFiStatus() {
  // print the SSID of the network you're attached to:
  Serial.print("SSID: ");
  Serial.println(WiFi.SSID());

  // print your Wi-Fi shield's IP address:
  IPAddress ip = WiFi.localIP();
  Serial.print("IP Address: ");
  Serial.println(ip);

  // print where to go in a browser:
  Serial.print("To see this page in action, open a browser to http://");
  Serial.println(ip);
}

Are you using the NEW boards entry NOT the DEPRECATED version?
What core are you using

There is only one WiFi example for the Portenta H7 (M4 and M7), here it is

/*
  Web client

 This sketch connects to a website (http://example.com) using the WiFi module.

 This example is written for a network using WPA encryption. For
 WEP or WPA, change the Wifi.begin() call accordingly.

 Circuit:
 * Arduino Portenta H7

 created 13 July 2010
 by dlf (Metodo2 srl)
 modified 31 May 2012
 by Tom Igoe
 */

#include <WiFi.h>

#include "arduino_secrets.h" 
///////please enter your sensitive data in the Secret tab/arduino_secrets.h
char ssid[] = SECRET_SSID;        // your network SSID (name)
char pass[] = SECRET_PASS;        // your network password (use for WPA, or use as key for WEP)
int keyIndex = 0;                 // your network key Index number (needed only for WEP)

int status = WL_IDLE_STATUS;
// if you don't want to use DNS (and reduce your sketch size)
// use the numeric IP instead of the name for the server:
// IPAddress server(93,184,216,34);  // IP address for example.com (no DNS)
char server[] = "example.com";       // host name for example.com (using DNS)

WiFiClient client;

void setup() {
  //Initialize serial and wait for port to open:
  Serial.begin(9600);
  while (!Serial) {
    ; // wait for serial port to connect. Needed for native USB port only
  }

  // check for the WiFi module:
  if (WiFi.status() == WL_NO_SHIELD) {
    Serial.println("Communication with WiFi module failed!");
    // don't continue
    while (true);
  }

  // attempt to connect to Wifi network:
  while (status != WL_CONNECTED) {
    Serial.print("Attempting to connect to SSID: ");
    Serial.println(ssid);
    // Connect to WPA/WPA2 network. Change this line if using open or WEP network:
    status = WiFi.begin(ssid, pass);

    // wait 3 seconds for connection:
    delay(3000);
  }
  Serial.println("Connected to wifi");
  printWifiStatus();

  Serial.println("\nStarting connection to server...");
  // if you get a connection, report back via serial:
  if (client.connect(server, 80)) {
    Serial.println("connected to server");
    // Make a HTTP request:
    client.println("GET /index.html HTTP/1.1");
    client.print("Host: ");
    client.println(server);
    client.println("Connection: close");
    client.println();
  }
}

void loop() {
  // if there are incoming bytes available
  // from the server, read them and print them:
  while (client.available()) {
    char c = client.read();
    Serial.write(c);
  }

  // if the server's disconnected, stop the client:
  if (!client.connected()) {
    Serial.println();
    Serial.println("disconnecting from server.");
    client.stop();

    // do nothing forevermore:
    while (true);
  }
}

void printWifiStatus() {
  // print the SSID of the network you're attached to:
  Serial.print("SSID: ");
  Serial.println(WiFi.SSID());

  // print your board's IP address:
  IPAddress ip = WiFi.localIP();
  Serial.print("IP Address: ");
  Serial.println(ip);

  // print the received signal strength:
  long rssi = WiFi.RSSI();
  Serial.print("signal strength (RSSI):");
  Serial.print(rssi);
  Serial.println(" dBm");
}

I really need you to answer post #4

Based on the datasheet, the Wifi module on portenta H7 interacts with M4 core. Hence, I use it for this aim.

You have found the equivalent for running your board as a WiFi Access Point. The ESP8266 hosted a WebServer, i.e. an HTTP server; whereas this is running a WiFiServer, which means no specific protocol support at all. It just reads and writes bytes, as reflected in the client.read and client.print calls.

But HTTP is simple enough for simple stuff. Your original handles a single path to return JSON. In lieu of finding an equivalent HTTP server class, manually performing HTTP would look like

  if (client) {
    Serial.println("new client");

    while (client.connected()) {
      if (client.available()) {
        String request_line = client.readStringUntil('\n');
        Serial.println(request_line);
        while (String header_line = client.readStringUntil('\n')) {
          header_line.trim();  // lines should end with \r\n, so remove trailing \r
          if (header_line.isEmpty()) {
            break;  // blank line indicates end of request headers
          }
          // ignoring headers for now
          Serial.println(header_line);
        }
        String body;
        if (request_line.startsWith("GET /sensorval")) {
          body = R"({"sensornow":100})";  //TODO replace with actual JSON string
          client.println("HTTP/1.1 200 OK");
          client.println("Content-Type: application/json");
        } else {
          client.println("HTTP/1.1 404 Not Found");
        }
        client.print("Content-Length: "); client.println(body.length());
        client.println("Connection: close");
        client.println();  // blank line ends response headers
        client.print(body);
        delay(1);
        break;
      }
    }

    // close the connection:
    client.stop();
    Serial.println("client disconnected");
  }
1 Like

Thank you dear #kenb4 for the response and sorry for the late reply. I changed the Arduino code as below. The code compiled and uploaded successfully to H7 portenta. Then I successfully connected the android device to the defined ssid. But it seems data is not exchanged well between H7 Portenta and android app via Json.

#include <WiFi.h>
//#include "arduino_secrets.h"

///////please enter your sensitive data in the Secret tab/arduino_secrets.h
char ssid[] = "SECRET_SSID";    // your network SSID (name)
char pass[] = "SECRET_PASS";    // your network password (use for WPA, or use as key for WEP)
int keyIndex = 0;             // your network key Index number (needed only for WEP)

int status = WL_IDLE_STATUS;

WiFiServer server(80);

void setup() {
  // put your setup code here, to run once:
  Serial.begin(9600);
  while (!Serial) {
    ; // wait for serial port to connect. Needed for native USB port only
  }
  
  Serial.println("Access Point Web Server");


  // by default the local IP address of will be 192.168.3.1
  // you can override it with the following:
  // WiFi.config(IPAddress(10, 0, 0, 1));

  if(strlen(pass) < 8){    
    Serial.println("Creating access point failed");
    Serial.println("The Wi-Fi password must be at least 8 characters long");
    // don't continue
    while(true);
  }
    
  // print the network name (SSID);
  Serial.print("Creating access point named: ");
  Serial.println(ssid);

  //Create the Access point
  status = WiFi.beginAP(ssid,pass);
  if(status != WL_AP_LISTENING){
    Serial.println("Creating access point failed");
    // don't continue
    while (true);
  }
  // wait 10 seconds for connection:
  delay(10000);

  // start the web server on port 80
  server.begin();

  // you're connected now, so print out the status
  printWiFiStatus();
  
}

void loop() {

 // compare the previous status to the current status
  if (status != WiFi.status()) {
    // it has changed update the variable
    status = WiFi.status();

    if (status == WL_AP_CONNECTED) {
      // a device has connected to the AP
      Serial.println("Device connected to AP");
    } else {
      // a device has disconnected from the AP, and we are back in listening mode
      Serial.println("Device disconnected from AP");
    }
  }

  WiFiClient client = server.available();   // listen for incoming clients

 if (client) {
    Serial.println("new client");

    while (client.connected()) {
      if (client.available()) {
        String request_line = client.readStringUntil('\n');
        Serial.println(request_line);
        while (String header_line = client.readStringUntil('\n')) {
          header_line.trim();  // lines should end with \r\n, so remove trailing \r
          if (header_line.isEmpty()) {
            break;  // blank line indicates end of request headers
          }
          // ignoring headers for now
          Serial.println(header_line);
        }
        String body;
        if (request_line.startsWith("GET /sensorval")) {
          body = R"({"sensornow":100})";  //TODO replace with actual JSON string
          client.println("HTTP/1.1 200 OK");
          client.println("Content-Type: application/json");
        } else {
          client.println("HTTP/1.1 404 Not Found");
        }
        client.print("Content-Length: "); client.println(body.length());
        client.println("Connection: close");
        client.println();  // blank line ends response headers
        client.print(body);
        delay(1);
        break;
      }
    }

    // close the connection:
    client.stop();
    Serial.println("client disconnected");
  }
  
}

void printWiFiStatus() {
  // print the SSID of the network you're attached to:
  Serial.print("SSID: ");
  Serial.println(WiFi.SSID());

  // print your Wi-Fi shield's IP address:
  IPAddress ip = WiFi.localIP();
  Serial.print("IP Address: ");
  Serial.println(ip);

  // print where to go in a browser:
  Serial.print("To see this page in action, open a browser to http://");
  Serial.println(ip);
}

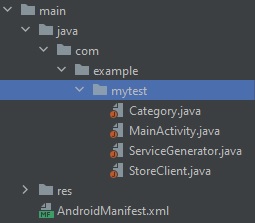
In android studio side, I have four Java files as below:

first I read the IP from serial in Arduino and updated the IP address in “ServiceGenerator” file to http://192.168.3.1/

public class ServiceGenerator {
    public static final String API_BASE_URL = "http://192.168.3.1/";
    private static OkHttpClient httpClient = new OkHttpClient.Builder().build();
    private static Retrofit.Builder builder = new Retrofit.Builder().baseUrl(API_BASE_URL).addConverterFactory(GsonConverterFactory.create());
    public static <S> S createService(Class<S> serviceClass){
        Retrofit retrofit = builder.client(httpClient).build();
        return retrofit.create(serviceClass);
    }
}

In “StoreClient” file, I send “sensorVal” request to Arduino.

public interface StoreClient {
    @GET("sensorVal")
    Call<Category> getData();
}

Based on the Arduino code, whenever “sensorVal” is requested, then "sensornow" must be sent from Arduino to android studio in JSON format and will be received in “Category” file.

public class Category {

    @SerializedName("sensornow")
    @Expose
    private Integer sensornow;
    public Integer getSensornow() {
        return sensornow;
    }
}

In the mainActivity.java the received "sensornow" is then displayed in a textview named TSensor. If no response received, the textview is set to "failed!!".

So, what is displayed in android app, is always “failed”. Hence, it seems there is a problem in requesting and responding.

Thank you again for your helping me.

You had

and now

But I had

This is a case-sensitive check, so make it match.

Thank you. The typo error corrected. Still failed to receive “sensornow”.

Calling from a browser on the same WiFi, does http://192.168.3.1/sensorVal work?

1 Like

Yes it works. when http://192.168.3.1/sensorVal pressed, “sensornow” value (100) is displayed on the browser. It seems the problem is on the android side.

Does the Arduino print "new client" and the request-line and headers when called by Android? (As noted in the comment, the headers are ignored; although there does have to be a blank line to end the request.)

Huh, they two names are almost-anagrams
arduino
arddino

Thank you, this is the serial in android case:

And in browser case:

In android case, only when the android is connected to the AP, the program detects a new client but seems the request is not received at all.

Just don't be surprised if you see “rpmVal“ in Serial monitor screenshot. I changed “sensorVal” to “rpmVal” as well as “sensornow” to “rpmnow” in both Arduino and Android codes. Sorry for the inconvenience.

You can see a request is received: GET / and the HTTP version. The hand-crafted web server returns 404 for everything except a single URL-path; which is now /rpmVal. Of course, you can modify the code to support more.

Should the Android program be requesting the / path? If so, what does it expect in return? You can try returning 200 OK with an empty body, just like with the 404.

One other difference is that, as with most Arduino web server examples, the connection is forcibly closed after every response. Clients should be able to handle this, but maybe the underlying Java library doesn't like it. (ESP8266WebServer only handled one client at a time, so maybe it did not bother.) To test whether it makes any difference, comment out two lines

        // client.println("Connection: close");
        client.println();  // blank line ends response headers
        client.print(body);
        delay(1);
        // break;

Now the client has to disconnect. A browser will tend to hold this open for several seconds in case there is another request. During that time, nothing else can connect -- which might be fine in your case.

Changing the program to return a 200 OK with an empty body didn’t make any difference. The output on the Android side remained the same. The two lines you said have been commented out. In this scenario, the Android app behaves the same, but the web server in the browser is in a worse situation (it didn’t receive the request).

What did you try, exactly? In the mean time, could try always returning a payload, even if you don't ask for it specifically.

        String body = R"({"rpmnow":100})";  //TODO replace with actual JSON string
        client.println("HTTP/1.1 200 OK");
        client.println("Content-Type: application/json");
        client.print("Content-Length: "); client.println(body.length());
        client.println("Connection: close");
        client.println();  // blank line ends response headers
        client.print(body);
        delay(1);
        break;

Can then add different bodys for specific requests. Also restored the one-response-per-connection. It would help to know what's expected with GET / on the Android side.

If you still have that ESP8266, can insert a proxy server in the middle that will dump the entire conversation between it and the Android.

First of all, sorry for my lack of knowledge on such sophisticated terms related to web servers, HTTP, and so on.

In my last try, I might not have fully understood. What do you mean by an empty body? Are you suggesting defining the body as body = R"({})";?
How do I add a proxy server in the middle of the ESP8266 program? Could you clarify that a bit more?

body is HTTP terminology. A request or response comprises

  • request or response line
    • request
      • method/verb, e.g. GET or POST
      • URI-path, starting with /
      • HTTP version
    • response
      • HTTP version
      • status code, e.g. 200, 404
      • status text or message, e.g. OK, Not Found
  • headers
  • blank line
  • optional body

If there is a body, the message's headers should indicate the exact Content-Length, or use Transfer-Encoding: chunked, which includes lengths for each chunk. This way, the other side does not have to wait an arbitrary amount of time for more bytes that may not be coming.

With JSON, {} is an empty object, but that is usually not considered its "body" (it also has no "head").

In this case, try both

String body;  // String objectj is empty by default, resulting in Content-Length: 0
body = R"({})";  // Empty JSON object instead

Another refinement that shouldn't hurt

        client.print("Content-Length: "); client.println(body.length());
        if (body.length()) {
          client.println("Content-Type: application/json");
        }

As for the proxy server, it would be a separate "box".

  android --> box --> ESP8266  request
  android <-- box <-- ESP8266  response

Android uses the box's IP address; which in turn knows the ESP8266. Box receives request bytes, sends those bytes along; receives response bytes, sends those bytes back. Prints the bytes going both ways so you can see the whole "conversation".

The box could be your dev machine running the IDE, where it would run a proxy server program, maybe written in Golang or Python; or even the H7, but I don't see any Arduino proxy server implementations after five seconds of searching. Not too hard to write a simple one.