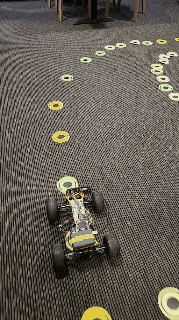
I have an RC car that controls the drive motor with what I assume is an 8.4V PWM signal. I want to capture that signal using an Arduino (Typically I use the PortentaH7 but have lots of other alternatives) so I have the option of RC fallback when my Arduino controlled car does not do what it should.
Anyone go a quick and easy way to reduce that voltage to something acceptable to be read by the Arduino. I assume, I should use some kind of a voltage divider but not really sure how to connect it. Also, anyone got ideas on how to do the actual reading? Once again I can just try stuff until something works, but better if someone actually knows what they are doing.
The car is actually doing some cool vision Machine Learning self-driving, but I want the RC controller as a backup when things go bad. Any suggestions or wiring diagrams would be appreciated.
@PaulRB Thanks, that is kind of what I was thinking. That should be all I need. I should be able to work with pulseIn() and
.
is enough to figure out the resistors. Since this is a ratio or resistors is it better to go with higher resistance for both resistors or lower resistance? I am guessing a really high resistance would be helpful so as to not drain the RC battery much.
.
So if Vin is 8.4 V and Vout must be <= 3.3V
Then Z2 = 120K ohms and Z1 >= 200K ohm works for me. Anyone who knows what they are doing have any problem with this?
I have 120K resistors and can put them in parallel series to make a 240K ohm resistor which would be more than enough to drop the voltage below 3.3V.
Is this enough resistance to reduce the drain on the cars battery?
If all you have is 120K resistors, then Z2=120K and Z1= 120K+120K =240K
So the ratio will be 120/360 = 1/3, or vout = vin/3.
You put the resistors in SERIES when you want to have them add.
With 360K the current drain will be E/R = 8.4V/360K = 23.3 microamps, pretty small.
If you go too high, the Arduino input may be susceptible to electrical noise from motors etc. and cause errors in the readings.
Even with resistors 100x lower than the ones you are proposing, the battery drain would be insignificant compared to the current consumed by your motors.
I would recommend 10K & 22K or similar. This would be a drain of only a fraction of a milliamp on your battery.
Thanks @PaulRB@jim-p@kolaha I love talking to people who know what they are doing.
The parallel comment was my brain fart.
The current drain is very good for me to know. I am a little embarrassed I didn't figure that out by myself. LOL
The comment about the resistance being too high I would never have thought of myself. That is what is so nice about talking to others. That has saved me hours of extra debugging.
I am a little confused by this comment.
How do I monitor the PWM signal without pulseIn()? Yes it does measure time, but that is what you want to find to determine the gap between the PWM pulse. Is there another way to monitor it. I could try a DAC channel and try to measure the voltage. Any suggestions here?
If you know the PWM frequency, you can calculate the duty cycle from a single call to pulseIn(). If you don't know the frequency, you need to call pulseIn() twice in order to measure the lengths of the high and low parts of the cycle. Then you can calculate the duty cycle.
It's not the gap, it's the length of the pulses you want to measure. You only need to measure the length of the gap if you don't know the PWM frequency.
@kolaha I am used to using pulseIn() for the rangefinder that has a trigger and then an echo pin. I was wondering how to use it for PWM on one wire. That code uses only one pin more like what I need to do.
there is 2 types of ultrasonic rangefinder modules - 3 and 4 pin. i have seen sketches for both.
in yours case you don't need to generate US pulse before running pulseIn().
I can't think of a way to use a DAC for that. A DAC is an output, not an input.
I think an ADC could be used. Perhaps that is what you meant to say. You would need use a circuit to smooth out the PWM signal into a steady DC voltage. The voltage would depend on the duty cycle. You could then measure the voltage with an ADC. Much more complex and potentially inaccurate than measuring the pulse length directly.
A PWM signal is just a stream of pulses. The frequency is fixed but the duty cycle is variable. When the pulses are short, the duty cycle is low. When the pulses are long, the duty cycle is high.
One difficulty you might face is that when the duty cycle is 0% or 100%, there are no pulses. The signal is a constant LOW or HIGH. So pulseIn() won't work, it won't detect a pulse will eventually time out. Fortunately, you can specify what timeout to use. Set this to a little more than the period of the PWM signal. Then your code can detect when a timeout occurred and use digitalRead() to figure out if the signal is HIGH (=100% duty cycle) or LOW (=0% duty cycle).
So here is my code for the Nano33BleSense just using generated PWM not the external PWM yet.
// PWM in to measure using pulseIn() on a Nano33BleSense


//pin 2 set for PWM out say as a servo
//pin 3 set for PWM in using pulseIn() to measeure the duration

#include <Arduino.h>  // only needed for https://platformio.org/
#include <Servo.h>

Servo myServo_D2;

int myDelayBig = 3000;   // non-block delay in milliseconds
unsigned long myStartBig;

int myDelaySmall = 1000;   // non-block delay in milliseconds
unsigned long myStartSmall;

// this constant won't change. It's the pin number of the sensor's output:
const int pwmPin = 2;   // D2 near GND on right side
const int pingPin = 3;  // D3
int myPWM = 0;   //0-255
unsigned long myPulseDuration = 0;

void setup() {
  Serial.begin(115200);
  myServo_D2.attach(2);   // D2 should do PWM on Nano33BleSense
  myStartBig = millis();   // set delay
  myStartSmall = millis();
  pinMode(LED_BUILTIN, OUTPUT);

}

void loop() {

  long myDuration;

  if ( (millis() - myStartBig ) >= myDelayBig) {
    myStartBig = millis();           //  reset the delay time
    myPWM = random(0, 255);       // 0-255
    if (myPWM <= 50){myPWM = 0;}     // test zero
    if (myPWM >= 230){myPWM = 255;}  // test full on
    myServo_D2.write(myPWM);
    Serial.println();
    Serial.println("The PWM has been set to: "+ String(myPWM) + " for "+ String(myDelayBig) + " milliseconds.");

  }
  if ( (millis() - myStartSmall ) >= myDelaySmall) {
    myStartSmall = millis();
    pinMode(pingPin, OUTPUT);
    digitalWrite(pingPin, LOW);
    delayMicroseconds(2);
    digitalWrite(pingPin, HIGH);
    delayMicroseconds(5);
    digitalWrite(pingPin, LOW);

    pinMode(pingPin, INPUT);
    myDuration = pulseIn(pingPin, HIGH);

    Serial.println("The PWM is measured at: "+ String(myDuration) + ", a reading every "+ String(myDelaySmall) + " milliseconds.");

  }


}
And here is the very useable output. I could use some equation to convert it to PWM estimates but I don't really need that. I had no problem with either the high or low values. Not really sure why.
I just finished some code to add 10 channel RC control to the Portenta H7 on UART3 (breakout board). Maybe it can help with the RC part of your system:
Look at the bottom of the post for the solution...
Your code is generating the PWM signal using Servo.write(). This may not be representative of the external PWM signal you want to measure.
Servo control signals are a specific type of PWM signal. The frequency is low, usually around 50Hz. The pulse widths are normally between 1ms and 2ms. So the duty cycle varies in a narrow range between around 5% and 10%. You never get the problem I described at 0% and 100%. A circuit inside the servo motor measures the pulse length and moves the motor to a corresponding position. It does not care too much about the frequency, or the duty cycle, only the pulse length, so if the frequency was 25Hz or 100Hz it would still work correctly.
The type of PWM signal used to control the speed of a DC motor is different to a servo motor signal. With this type of PWM signal, you will see the duty cycle change in the full range of 0% to 100%. With this type of signal, it is the duty cycle that is important, not the pulse length. But you can calculate the duty cycle from the pulse length, so pulseIn() can still be used, if you know the frequency. The frequency is much higher than for servo signals, for example 500Hz or 30,000Hz.
Do you know which type of PWM signal you need to measure?
If you want the Arduino to simulate the other type of PWM signal, use analogWrite() instead of Servo.write().