I recently connected a LDJ Laser Distance Sensor to my Arduino UNO and wanted to share the simple wiring and sample code with fellow makers. This setup is ideal for anyone interested in precise distance measurement in projects like robotics, automation, or object detection.
![]() What I Used:
What I Used:
- Laser Distance Sensor (UART communication, 3.3V logic)
- Arduino UNO R3
- Jumper wires
- Power via USB
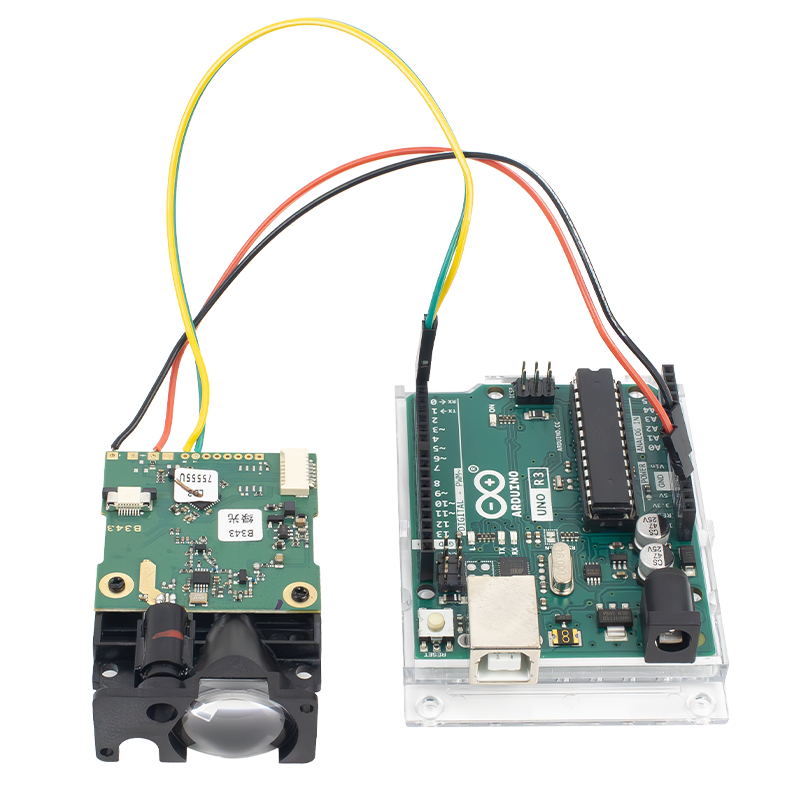
Wiring Guide (as shown in the image):
| Laser Sensor Wire Color | Connection | Arduino Pin |
|---|---|---|
| Black | GND | GND |
| Red | 3.3V | 3.3V |
| Yellow | RX | D3 |
| Green | TX | D2 |

Note: Since Arduino UNO uses 5V logic and this sensor uses 3.3V, ensure your sensor can tolerate 5V signals on RX or use a voltage divider/logic level converter if needed.
Sample Arduino Code (Using SoftwareSerial):
#include <SoftwareSerial.h>

SoftwareSerial mySerial(2, 3); // RX, TX (Sensor TX -> D2, Sensor RX -> D3)

void setup() {
  Serial.begin(9600);
  mySerial.begin(115200); // Or the baud rate your sensor requires
  Serial.println("Laser Distance Sensor Initialized...");
}

void loop() {
  if (mySerial.available()) {
    while (mySerial.available()) {
      char c = mySerial.read();
      Serial.print(c);
    }
    Serial.println(); // Print a new line after each reading
  }

  delay(100); // Polling delay
}
Real Photo:
As shown in the image above, I used direct jumper wires to connect the module and Arduino. The wiring is clean and easy to reproduce.
Tips:
- Make sure to check your sensor’s datasheet for proper voltage levels and serial baud rate.
- You can visualize the distance readings using Serial Monitor (Ctrl+Shift+M in Arduino IDE).
- Some sensors return binary data or need command requests — adapt the code accordingly.
Hope this helps you integrate a laser distance sensor into your next Arduino project!
Feel free to ask questions or share your own setup ![]()