@horace
Thankyou for your link , it worked perfectly.
Now what do you say let's move toward oled ?

what OLED do you have?

have a look at guide-for-oled-display-with-arduino
get it working then worry about adding it to your program
1 Like
Hi , @horace I have tried the link which you provided and oled is working fine with arduino. Now comes the ethernet part.
Actually I want it to work like the led one which you provided in post#39.
Like when ever check box was clicked led was on and off vice versa.
Similarly as shown below that when ever I click a check box out of four check boxes. For eg a text 'Go Up' is displayed with the arrow in that direction.

if it is a choice "one out of four" you should use a fieldset with 4 radio buttons.
Don't use checkboxes, otherwise the user could check several checkboxes at once.
Try it yourself:
1 Like
Ethernet W5500 - simple webpage with radio buttons
// Ethernet web page with radio buttons

// original code from https://startingelectronics.org/tutorials/arduino/ethernet-shield-web-server-tutorial/web-server-LED-control/

#include <SPI.h>
#include <Ethernet.h>

// MAC address from Ethernet shield sticker under board
byte mac[] = { 0xDE, 0xAD, 0xBE, 0xEF, 0xFE, 0xED };
IPAddress ip(192, 168, 1, 177);  // IP address, may need to change depending on network
EthernetServer server(80);       // create a server at port 80

void setup() {
  Serial.begin(115200);
  while (!Serial) {
    ;  // wait for serial port to connect. Needed for native USB port only
  }
  delay(2000);
  Serial.println("Ethernet WebServer Example");
  // start the Ethernet connection:
  // attempt to configure using DHCP if it fails static IP address
  Serial.println("Initialize Ethernet with DHCP:");
  if (Ethernet.begin(mac) == 0) {
    Serial.println("Failed to configure Ethernet using DHCP");
    Serial.println(" attempt to set static IP address");  // start the Ethernet connection and the server:
    Ethernet.begin(mac, ip);
  }
  // Check for Ethernet hardware present
  if (Ethernet.hardwareStatus() == EthernetNoHardware) {
    Serial.println("Ethernet shield was not found.  Sorry, can't run without hardware. :(");
    while (true) {
      delay(1);  // do nothing, no point running without Ethernet hardware
    }
  }
  delay(1000);  // FIX: added to give DUE time to find the Ethernet cable
  if (Ethernet.linkStatus() == LinkOFF) {
    Serial.println("Ethernet cable is not connected.");
  }
  // print your local IP address:
  Serial.print("My IP address: ");
  Serial.println(Ethernet.localIP());
  delay(2000);
  server.begin();  // start to listen for clients
}

// possible commands
enum command { UP,
               DOWN } command = UP;
const char* commands[] = { "UP", "DOWN" };

void loop() {
  static char line[100] = { 0 };               // holds line of text from client
  static int lineIndex = 0;                    // index into line
  EthernetClient client = server.available();  // try to get client

  if (client) {  // got client?
    while (client.connected()) {
      if (client.available()) {                       // client data available to read
        char c = client.read();                       // read 1 byte (character) from client
        if (c >= ' ') {                               // if printable character add to line
          if (lineIndex < 99) line[lineIndex++] = c;  // array overflow?
          line[lineIndex] = 0;
          //Serial.print(c);
        } else {
          // if none printable character check for \n and lastline was enpty - if so transmit HTTP
          if (c == '\n' && lineIndex == 0) {
            client.println("HTTP/1.1 200 OK");
            client.println("Content-Type: text/html");
            client.println("Connection: close");
            client.println();
            // send web page
            client.println("<!DOCTYPE html>");
            client.println("<html>");
            client.println("<head>");
            client.println("<title>Arduino radio button Control</title>");
            client.println("</head>");
            client.println("<body>");
            client.println("<h1>Controls</h1>");
            client.println("<form method=\"get\">");
            // send radio buttons checked if required
            if (command == UP)
              client.println("<input type=\"radio\" id=\"go_up\" name=\"command\" value=\"UP\" checked>");
            else
              client.println("<input type=\"radio\" id=\"go_up\" name=\"command\" value=\"UP\">");
            client.println("<label for=\"go_up\">UP</label><br>");
            // print radio buttons checked or not
            if (command == DOWN)
              client.println("<input type=\"radio\" id=\"go_down\" name=\"command\" value=\"DOWN\" checked>");
            else
              client.println("<input type=\"radio\" id=\"go_down\" name=\"command\" value=\"DOWN\">");
            client.println("<label for=\"godown\">DOWM</label><br><br>");
            client.println("<input type=\"submit\" value=\"Submit\">");
            client.println("</form>");
            client.println("</body>");
            client.println("</html>");
            break;
          }
          // if end of line check for GET
          Serial.println(line);  // print all response
          if (strstr(line, "GET /?command") != NULL) {
            // set up command to UP or DOWN
            if (strstr(line, "command=UP") != NULL) command = UP;      // UP is selected
            if (strstr(line, "command=DOWN") != NULL) command = DOWN;  // UP is selected
            Serial.print("******** command = ");
            Serial.println(commands[command]);
          }
          lineIndex = 0;  // zero for next line of text
          line[0] = 0;
        }
      }             // end if (client.available())
    }               // end while (client.connected())
    delay(1);       // give the web browser time to receive the data
    client.stop();  // close the connection
    //Serial.print("\n******** command = ");
    //Serial.println(commands[command]);
    Serial.println();
  }  // end if (client)
}
serial monitor output as UP and DOWN buttons pressed and Submit clicked
Ethernet WebServer Example
Initialize Ethernet with DHCP:
My IP address: 192.168.1.177
GET / HTTP/1.1

GET /favicon.ico HTTP/1.1

GET /?command=DOWN HTTP/1.1
******** command = DOWN

GET /favicon.ico HTTP/1.1

GET /?command=UP HTTP/1.1
******** command = UP

GET /favicon.ico HTTP/1.1

GET /?command=DOWN HTTP/1.1
******** command = DOWN

GET /favicon.ico HTTP/1.1
the webpage

Edit: worth noting the the original LCD code used a String Class object to hold the received data
OK on a microprocessor like the ESP32 but not recommended for a micro with low SRAM like the UNO - memory becomes fragmented and can cause problems
the radio button code above uses a char array to hold the received data
1 Like
@horace , Thankyou I am in process of attempting it.
However I have one question is it possible to use long wires connection like 1m between w5500 and arduino uno , I tried to do it but it said ethernet shield not detected.
both SPI and I2C were intended to interconnect devices on PCBs or PCBs close to each other
I have used I2C with 1 meter long low capacitance cable - never attempted it with SPI
move the W5500 close to the UNO and use a longer ethernet cable??
1 Like
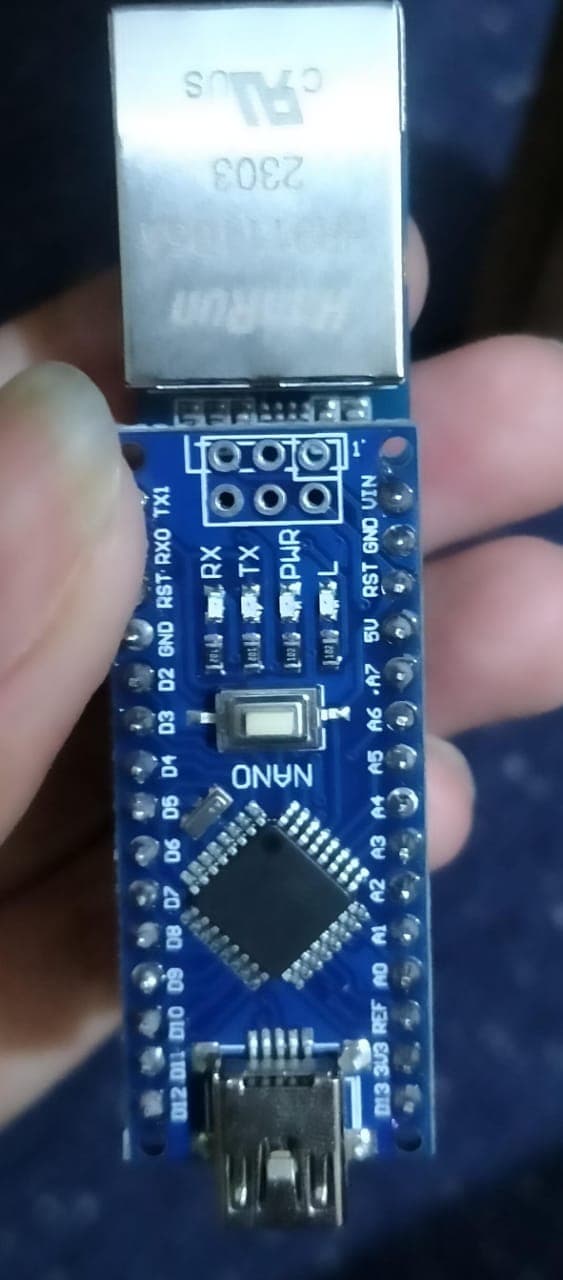
@horace Hi horace I finalized everything regarding the ip to oled connection but , sadly due to small enclosure size of my hardware(received) I had to change the ethernet shield and get a smaller one which is enc28j60.
It arrived yesterday, I wanted to request that maybe the arduino forum could help me for only the basic verification of ip opening process similar to the 'webserver code'. I read about the UIP library and everything but needs some assurance on it's connections+code+library.


you just plugin the nano into the Ethernet shield as shown in your third photo
using the EthernetENC library I run the following code
/*  Web Server  using a ENC28J60 ethernet shield

https://github.com/JAndrassy/EthernetENC

 A simple web server that shows the value of the analog input pins.
 using an Arduino Wiznet Ethernet shield.

 Circuit:
 * Ethernet shield attached to pins 10, 11, 12, 13
 * Analog inputs attached to pins A0 through A5 (optional)

 created 18 Dec 2009
 by David A. Mellis
 modified 9 Apr 2012
 by Tom Igoe
 modified 02 Sept 2015
 by Arturo Guadalupi

 */

#include <EthernetENC.h>

// Enter a MAC address and IP address for your controller below.
// The IP address will be dependent on your local network:
byte mac[] = {
  0xDE, 0xAD, 0xBE, 0xEF, 0xFE, 0xED
};
IPAddress ip(192, 168, 1, 177);

// Initialize the Ethernet server library
// with the IP address and port you want to use
// (port 80 is default for HTTP):
EthernetServer server(80);

void setup() {
  // You can use Ethernet.init(pin) to configure the CS pin
  Ethernet.init(10);  // Most Arduino shields
  //Ethernet.init(2);   // MKR ETH shield
  //Ethernet.init(0);   // Teensy 2.0
  //Ethernet.init(20);  // Teensy++ 2.0
  //Ethernet.init(15);  // ESP8266 with Adafruit Featherwing Ethernet
  //Ethernet.init(33);  // ESP32 with Adafruit Featherwing Ethernet
  //Ethernet.init(11);  // ESP8266 with Adafruit Featherwing Ethernet

  // Open serial communications and wait for port to open:
  Serial.begin(115200);
  while (!Serial) {
    ; // wait for serial port to connect. Needed for native USB port only
  }
  delay(1000);
  Serial.println();
  Serial.println("Ethernet WebServer Example");

  // start the Ethernet connection and the server:
  Ethernet.begin(mac, ip);

  // Check for Ethernet hardware present
  /*if (Ethernet.hardwareStatus() == EthernetNoHardware) {
    Serial.println("Ethernet shield was not found.  Sorry, can't run without hardware. :(");
    while (true) {
      delay(1); // do nothing, no point running without Ethernet hardware
    }
  }
  if (Ethernet.linkStatus() == LinkOFF) {
    Serial.println("Ethernet cable is not connected.");
  }*/

  // start the server
  server.begin();
  Serial.print("server is at ");
  Serial.println(Ethernet.localIP());
}


void loop() {
  // listen for incoming clients
  EthernetClient client = server.available();
  if (client) {
    Serial.println("new client");
    // an http request ends with a blank line
    boolean currentLineIsBlank = true;
    while (client.connected()) {
      if (client.available()) {
        char c = client.read();
        Serial.write(c);
        // if you've gotten to the end of the line (received a newline
        // character) and the line is blank, the http request has ended,
        // so you can send a reply
        if (c == '\n' && currentLineIsBlank) {
          // send a standard http response header
          client.println("HTTP/1.1 200 OK");
          client.println("Content-Type: text/html");
          client.println("Connection: close");  // the connection will be closed after completion of the response
          client.println("Refresh: 5");  // refresh the page automatically every 5 sec
          client.println();
          client.println("<!DOCTYPE HTML>");
          client.println("<html>");
          // output the value of each analog input pin
          for (int analogChannel = 0; analogChannel < 6; analogChannel++) {
            int sensorReading = analogRead(analogChannel);
            client.print("analog input ");
            client.print(analogChannel);
            client.print(" is ");
            client.print(sensorReading);
            client.println("<br />");
          }
          client.println("</html>");
          break;
        }
        if (c == '\n') {
          // you're starting a new line
          currentLineIsBlank = true;
        } else if (c != '\r') {
          // you've gotten a character on the current line
          currentLineIsBlank = false;
        }
      }
    }
    // give the web browser time to receive the data
    delay(1);
    // close the connection:
    client.stop();
    Serial.println("client disconnected");
  }
}
when run serial monitor displays
Ethernet WebServer Example
server is at 192.168.1.177
new client
GET / HTTP/1.1
Host: 192.168.1.177
User-Agent: Mozilla/5.0 (Windows NT 10.0; Win64; x64; rv:122.0) Gecko/20100101 Firefox/122.0
Accept: text/html,application/xhtml+xml,application/xml;q=0.9,image/avif,image/webp,*/*;q=0.8
Accept-Language: en-GB,en;q=0.5
Accept-Encoding: gzip, deflate
DNT: 1
Sec-GPC: 1
Connection: keep-alive
Upgrade-Insecure-Requests: 1

client disconnected
the webclient displays

1 Like
@horace Hope you are doing good , I was'nt able to give you update because my ethernet shield got burned and as it is not available in my country , I have to wait for atleast one month to reach it here. So finally I received it checked it with arduino nano, it worked fine then moved for the oled process and as you mentioned in your post # 48 that due to low memory it will cause problems and yes exactly the same thing is happening.
Therefore I wanted to ask you is there a possibility that we can do like Only creating a text box through html where we can type any command like forward , left , right etc and these commands being displayed on oled. without have low memory problem.
the SSD1306Ascii text only OLED library only uses a few bytes of memory
it may help!
Edit: running File>Examples>SSD1306Ascii>wire128x64 on a Nano

1 Like
Thankyou , I tried the example and it worked fine, however I am confused how to use the SSD1306Ascii library along the relevant code.
I tried few ways but unfortunately either the HTML did'nt worked or ethernet shield was'nt communicating with oled.
try Nano Webserver with OLED
/*  Web Server  using a ENC28J60 ethernet shield

https://github.com/JAndrassy/EthernetENC

 A simple web server that shows the value of the analog input pins.
 using an Arduino Wiznet Ethernet shield.

 Circuit:
 * Ethernet shield attached to pins 10, 11, 12, 13
 * Analog inputs attached to pins A0 through A5 (optional)

 created 18 Dec 2009
 by David A. Mellis
 modified 9 Apr 2012
 by Tom Igoe
 modified 02 Sept 2015
 by Arturo Guadalupi

 */

#include <EthernetENC.h>

// Enter a MAC address and IP address for your controller below.
// The IP address will be dependent on your local network:
byte mac[] = {
  0xDE, 0xAD, 0xBE, 0xEF, 0xFE, 0xED
};
IPAddress ip(192, 168, 1, 177);

// Initialize the Ethernet server library
// with the IP address and port you want to use
// (port 80 is default for HTTP):
EthernetServer server(80);

#include <Wire.h>
#include "SSD1306Ascii.h"
#include "SSD1306AsciiWire.h"

// 0X3C+SA0 - 0x3C or 0x3D
#define I2C_ADDRESS 0x3C

// Define proper RST_PIN if required.
#define RST_PIN -1

SSD1306AsciiWire oled;

void setup() {
  Wire.begin();
  Wire.setClock(400000L);

#if RST_PIN >= 0
  oled.begin(&Adafruit128x64, I2C_ADDRESS, RST_PIN);
#else   // RST_PIN >= 0
  oled.begin(&Adafruit128x64, I2C_ADDRESS);
#endif  // RST_PIN >= 0

  oled.setFont(System5x7);

#if INCLUDE_SCROLLING == 0
#error INCLUDE_SCROLLING must be non-zero.  Edit SSD1306Ascii.h
#endif  //  INCLUDE_SCROLLING
  // Set auto scrolling at end of window.
  oled.setScrollMode(SCROLL_MODE_AUTO);

  // You can use Ethernet.init(pin) to configure the CS pin
  Ethernet.init(10);  // Most Arduino shields
  //Ethernet.init(2);   // MKR ETH shield
  //Ethernet.init(0);   // Teensy 2.0
  //Ethernet.init(20);  // Teensy++ 2.0
  //Ethernet.init(15);  // ESP8266 with Adafruit Featherwing Ethernet
  //Ethernet.init(33);  // ESP32 with Adafruit Featherwing Ethernet
  //Ethernet.init(11);  // ESP8266 with Adafruit Featherwing Ethernet

  // Open serial communications and wait for port to open:
  Serial.begin(115200);
  while (!Serial) {
    ;  // wait for serial port to connect. Needed for native USB port only
  }
  delay(1000);
  Serial.println();
  Serial.println("Ethernet WebServer Example");
  oled.println("Ethernet WebServer");
  // start the Ethernet connection and the server:
  Ethernet.begin(mac, ip);

  // Check for Ethernet hardware present
  /*if (Ethernet.hardwareStatus() == EthernetNoHardware) {
    Serial.println("Ethernet shield was not found.  Sorry, can't run without hardware. :(");
    while (true) {
      delay(1); // do nothing, no point running without Ethernet hardware
    }
  }
  if (Ethernet.linkStatus() == LinkOFF) {
    Serial.println("Ethernet cable is not connected.");
  }*/

  // start the server
  server.begin();
  Serial.print("server IP ");
  Serial.println(Ethernet.localIP());
  oled.print("Web IP ");
  oled.println(Ethernet.localIP());
}


void loop() {
  // listen for incoming clients
  EthernetClient client = server.available();
  if (client) {
    Serial.println("new client");
    oled.println("new client");
    // an http request ends with a blank line
    boolean currentLineIsBlank = true;
    while (client.connected()) {
      if (client.available()) {
        char c = client.read();
        Serial.write(c);
        // if you've gotten to the end of the line (received a newline
        // character) and the line is blank, the http request has ended,
        // so you can send a reply
        if (c == '\n' && currentLineIsBlank) {
          // send a standard http response header
          client.println("HTTP/1.1 200 OK");
          client.println("Content-Type: text/html");
          client.println("Connection: close");  // the connection will be closed after completion of the response
          client.println("Refresh: 5");         // refresh the page automatically every 5 sec
          client.println();
          client.println("<!DOCTYPE HTML>");
          client.println("<html>");
          // output the value of each analog input pin
          for (int analogChannel = 0; analogChannel < 6; analogChannel++) {
            int sensorReading = analogRead(analogChannel);
            client.print("analog input ");
            client.print(analogChannel);
            client.print(" is ");
            client.print(sensorReading);
            client.println("<br />");
          }
          client.println("</html>");
          break;
        }
        if (c == '\n') {
          // you're starting a new line
          currentLineIsBlank = true;
        } else if (c != '\r') {
          // you've gotten a character on the current line
          currentLineIsBlank = false;
        }
      }
    }
    // give the web browser time to receive the data
    delay(1);
    // close the connection:
    client.stop();
    Serial.println("client disconnected");
  }
}
photo
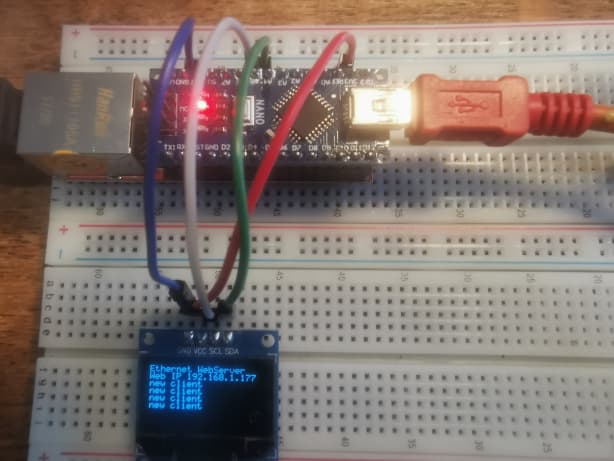
1 Like
@horace
Hi Horace, Hope you're doing well.
I got it working through your help and everyone's guide but was not able to update due to exams and studies, just took a moment to thankyou guys.
probably worth clicking the Solution button at the bottom of the reply that answered the question - this helps others with a similar question
1 Like
This topic was automatically closed 180 days after the last reply. New replies are no longer allowed.