The article you're working from has left out most of the information, and the method you're using cannot possibly work.
There is a lot more to it than that article says. It's just one more example of the garbage that's floating around on the internet.
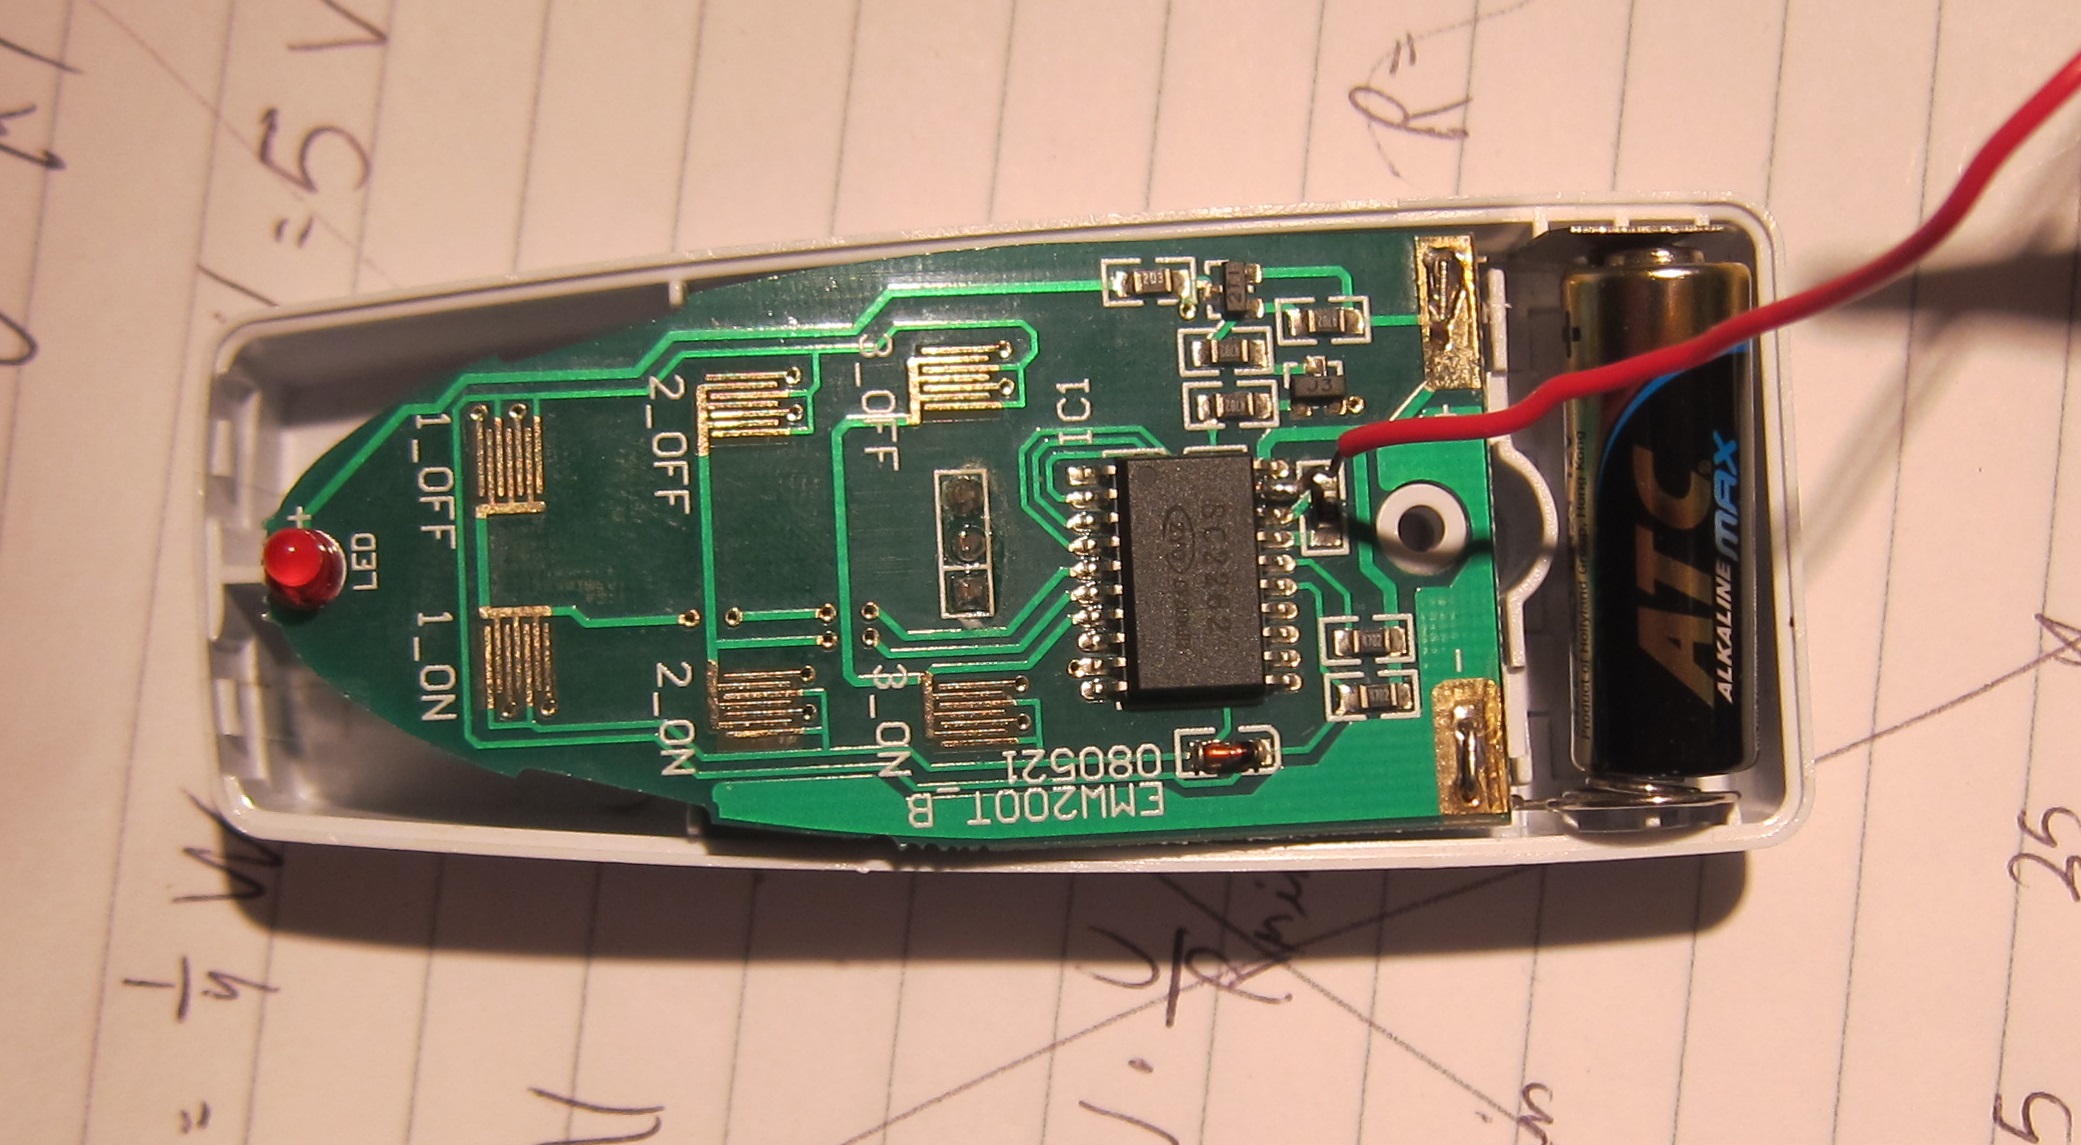
First point, you're connecting an Arduino output to the output pin of the SC2262 chip, to drive the input pin of the RF transmitter. You risk destroying the SC2262, your Arduino, or both by doing that. You can't ever connect two outputs together.
Ignoring that for the moment, an SC2262 is an encoder, which sends a unique code for each button pressed. Your receiver will not work unless you send the correct codes. The codes are set on the SC2262 and the SC2272 by connecting some address/data pins high, some low and some open, (tri-state).
Before doing anything else, you need to use the RCSwitch library to record the codes received at the receiver, (or possibly by recording the codes from the transmitting SC2262's "Dout" pin), when each button is pressed. Then you set up the transmitting Arduino to send those same codes using the "RCSwitch" library's transmitting methods.
For instance, here's the simple example from the RCSwitch library to receive and display codes:-
(In this example, you'd need to connect Arduino pin 2 to the "Din" pin of the SC2272 chip in the receiver.)
#include <RCSwitch.h>

RCSwitch mySwitch = RCSwitch();

void setup() {
  Serial.begin(9600);
  mySwitch.enableReceive(0);  // Receiver on interrupt 0 => that is pin #2
}

void loop() {
  if (mySwitch.available()) {

    int value = mySwitch.getReceivedValue();

    if (value == 0) {
      Serial.print("Unknown encoding");
    } else {
      Serial.print("Received ");
      Serial.print( mySwitch.getReceivedValue() );
      Serial.print(" / ");
      Serial.print( mySwitch.getReceivedBitlength() );
      Serial.print("bit ");
      Serial.print("Protocol: ");
      Serial.println( mySwitch.getReceivedProtocol() );
    }

    mySwitch.resetAvailable();
  }
}
This is the library's basic code to send codes:-
#include <RCSwitch.h>

RCSwitch mySwitch = RCSwitch();

void setup() {

  Serial.begin(9600);

  // Transmitter is connected to Arduino Pin #10
  mySwitch.enableTransmit(10);

  // Optional set pulse length.
  // mySwitch.setPulseLength(320);

  // Optional set protocol (default is 1, will work for most outlets)
  // mySwitch.setProtocol(2);

  // Optional set number of transmission repetitions.
  // mySwitch.setRepeatTransmit(15);

}

void loop() {

  /* See Example: TypeA_WithDIPSwitches */
  mySwitch.switchOn("11111", "00010");
  delay(1000);
  mySwitch.switchOn("11111", "00010");
  delay(1000);

  /* Same switch as above, but using decimal code */
  mySwitch.send(5393, 24);
  delay(1000);
  mySwitch.send(5396, 24);
  delay(1000);

  /* Same switch as above, but using binary code */
  mySwitch.send("000000000001010100010001");
  delay(1000);
  mySwitch.send("000000000001010100010100");
  delay(1000);

  /* Same switch as above, but tri-state code */
  mySwitch.sendTriState("00000FFF0F0F");
  delay(1000);
  mySwitch.sendTriState("00000FFF0FF0");
  delay(1000);

  delay(20000);
}
As you can see, you need to do a fair bit more work to get your setup working. I've never used the "RCSwitch" library, so can't help you to work out exactly what you need to do.
If you study the documentation and examples for the "RCSwitch" library, you'll soon get the idea. There are a number of examples.
Then, in your transmitter, to avoid damage you should disconnect the SC2262 "Dout" pin from the RF transmitter first, then connect your Arduino output pin instead, to replace it. Don't have both outputs connected together the way you have it now.
I've attached the datasheets for the SC2262 and SC2272 to give you a clearer idea of what's going on.
(If you want even better info, do a search for the PT2262 and PT2272 datasheets. The ones for the SC2262 and SC2272 aren't the best.)
Most importantly, ignore that crap on the Hack Some Remote Controlled Sockets page - it cannot possibly work.
SC2262.pdf (223 KB)
SC2272.pdf (324 KB)