Developing a flower dryer

I thought I'd take a moment to share my current project with the arduino world because I have some downtime. I still just can't believe I got 4 bad 9g servos all in nice packaging from amazon.
But I've been developing this thing for a while now. I think I finally have a design that looks like a real product (but made by someone in his garage).


The idea is that I pull a vacuum to draw water out of the plant material, then open the lid to blow it off. Keep doing that until it reaches a certain moisture level. Mold is taken care of with an ozone generator. The moisture content is estimated with two humidity sensors and also a load cell measures the amount of water lost.
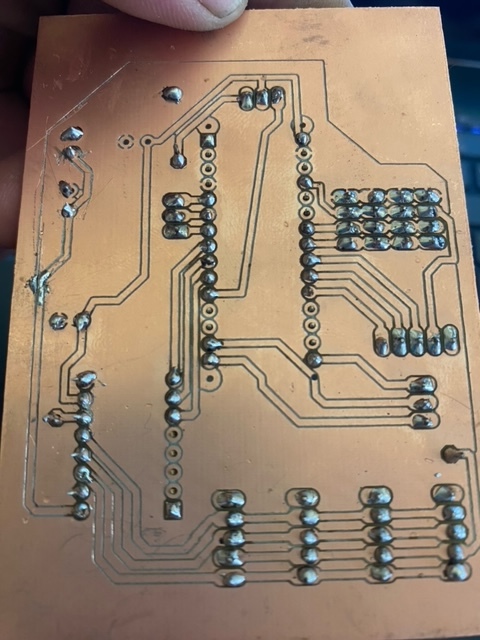
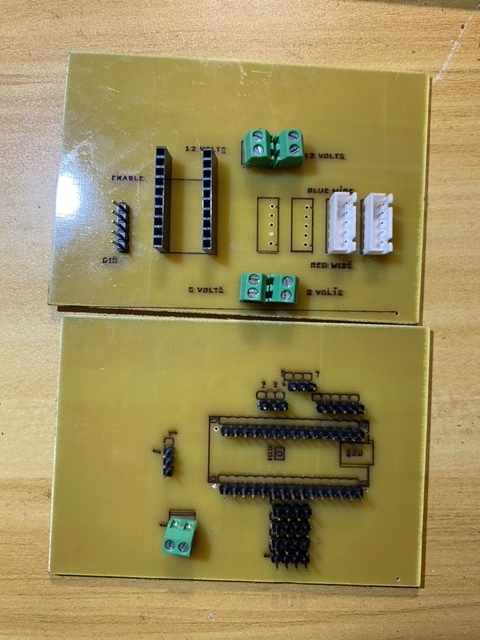
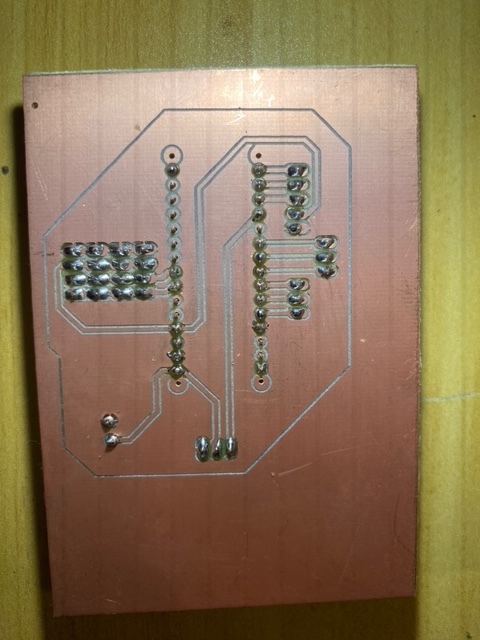
Some details: the lid opens and closes with 4 28byj stepper motors. The baine marie is about 3.5 quarts and the whole frame fits it like a glove. I'm using two humidity sensors that cost about 15$ a piece but still their always 10% off from each other. The load cell is 2kg and has a good resolution at the gram level (crosses fingers). I'm using my own pcb's for right now, made on a 3018 cnc.
Where i'm at right now and where I've been for the last week: I'm spending my days doing things on the computer and my nights putting things together in the workshop. This is my first time going at something of this scale, and its fought me every step of the way. Just about nothing has not been poured over because I can't figure out what is going on. My worst fear is that its hocus pocus and I give up on it (and burn it at the stake). But the whole project burned down just last night, I figured out after tearing everything apart that I had the red wire and the black wire hooked up on the relays! But you know it still worked mostly, except the i2c line kept getting hung up talking to the arduino reading the load cell. But it all just seemed really unstable. Oh well, then I get a bunch of 9g servos and none of them work. I checked everything! But amazon is famous for having broken junk. I have some coming tomorrow.
If anyone is curious why I'm going through all the trouble of preserving flowers, I think of it as an art. If you can take something living and just keep halving what it has, so that it hardly notices, until its to the very edge of death and you just tip it over, thats something like the art that the gods are involved in. Plus I have no way to make any real amount of money unless its through this thing. I'm hoping to develop it into a full fledge device with a TFT display instead of the rotary encoder and LCD setup.

Finally dispelled the hocus pocus, either amazon sent me 4 bad servos or I had put the GND to GND from my power supply to arduino wrong. Funny how I come up with the one possible solution right as I'm about to solve the equation. And I finally came up with a good pcb after two failed attempts. It takes so long to cut these out! But I got all the variables down the chute and cut a good one.


You should solder all the pins to give strength to the entire connector assembly.

2 Likes

FYI, those depend on a stable temperature and air pressure to work.

1 Like

Sounds like a lot of marriages.

Do you understand the humidity level is a ratio of the water molecules to the number of molecules of air? Humidity in less than normal atmospheric pressure in your device will be much different than humidity at normal pressure. Off the shelf sensors must be calibrated individually. Did you do that for each sensor? That will result in a different calculation for each sensor, in your code.

1 Like

You have the idea a bit mixed up. The low pressure AKA “vacuum “ causes the water to boil off at room temperature. This water vapor then causes the pressure in your vessel to rise slightly. By keeping the vacuum pump running you draw off that vapor. This is done on refrigerant systems to remove moisture from the system before it is recharged with the refrigerant fluid. By continually opening the chamber all you are doing is admitting more moist air into it which is then drawn out by the vacuum pump.

If you wish to save run time on the pump use a pressure sensor and start the pump when the pressure gets too high.

1 Like

Yes, the vacuum pump will pump out water vapour. It will be "spitting" water at its output port. If it has a collection tank, you need to empty it periodically, or it will rust out.

3 Likes

Two methods come to mind, the way my grandma did it was to hang them upside down near the old gravity furnace in the basement or freeze drying (lipolozation). The latter will last over 50 years, many commercial flower shops offer this service.

I haven't really done the calibration yet, but hope to do it soon. I'm actually really curious why it is such a hard thing to do right. So i actually have a pressure sensor, and the purpose of the vacuum is that your sucking the water out from the inside, and exchanging the air too. Any humidity reading done while under pressure doesn't have to be counted.
I was really shocked that my 20$ air pump from china eventually got down the same PSI as my 60$ compressor from amazon. About 4 PSI, which is enough to make the 3D printed lid look like its about to implode.

Because, what are you going to use as a reference standard?

Oh nothing, I have the weight to go on. So what I do is take a representative flower and dry it all the way out, then weigh it to get the moisture content. Say its 80% water, then I will set a target weight close to that to get the correct moisture content. I'm using the humidity sensor to just let me know how fast its going into equilibrium vapor pressure. The humidity sensor just lets me drive it to its destination. But if I could somehow get a good sensor for 15$ I could use that only. Then again I'm also using the load sensor to inform when the lid is closed. Oh well, I'm really just starting out here!

I would think an induction coil method of measuring relative moisture content could be more accurate and easier. If you can get a coil around the stem and some leaves, like that. An RF oscillation in the coil, enables a change in impedance depending on the magnetic absorption of the material in the core. Water is, I believe, diamagnetic.

When I read what you say, I'm not sure where the humidity sensor is placed. That would normally be a very critical matter since, they are very slow to register changes, they are also temperature sensitive, and it is hard for me to picture how the usual kind of sensor could measure the inside of a stem, for example.

What I'm driving at, in a varying pressure system like yours, it would be likely that humidity could vary quite a lot from place to place, material to material. So measuring it at "A" doesn't necessarily mean "B" is the same.

However, my original response to your question may have missed the mark. Because, I was indicating first, the general problem of calibrating sensors. To calibrate, you need some standard, if instead calibrating to a calibrated unit, it is second hand. If you do it again, the error is now tripled, and so on.

In reality, humidity sensors ultimate reference is in a container of certain salt liquids, which by some fancy chemistry, the air inside can only be, by the laws of physics, a certain percentage humidity. This is obviously not a do it at home project. Hence I am just pointing out that off the shelf sensors are unlikely to be very accurate, especially after some aging. Your idea of end to end calibration is good, provides a maximum and minimum response that is nearly perfect, but you are only guessing the actual endpoint humidity values. This may or may not be important to you in your application.

I"m not sure if you understand that its a vacuum chamber design, and the humidity inside will reach equilibruim with the plant material depending on its moisture content. I'm 3D printing the lid and putting silicon around the perimeter. I have qwiic cables going into the chamber, through the top of the lid.


Yes I was also assuming I would calibrate the humidity sensor with a saturated salt, or a humidor pouch.
So when i was first developing this prototype I figured I would try to make some gears for the stepper motors to drive the lid

This was one hell of a mistake since it neither worked as well as directly driving them and offset the steppers so much that I had to make two smaller boards to control everything with. So I just went back and redesigned the pcb (post #2) and that went good but I had a huge bomb waiting for me with the rotary encoder. First the stupid thing wouldn't stop scrolling around the menu. After completely giving up until the last thing I could think to do was as chatgpt if he could find the problem. He couldn't find anything but upon taking his advice I realized I hadn't reset the flag variable before the loop restarts! I was so happy, but that was short lived because the encoder didn't really work still. You could scroll with some difficulty, and no button press. Ok so upon closer inspection with the multimeter I found that I had not attached ground to the pcb for the encoder. Boom! well evidently you can use the encoder without power, but when power is there I can only use the button, no scrolling! So I finally have what I think is the correct and final solution: you cannot use pins (13,12,11) for a rotary encoder! I've been so perplexed for the last day!

After a few hours or maybe days.

Also when you cal the sensor it will be at STP.

But it's your project. Good luck.

I"m not sure if you understand that its a vacuum chamber design

Well, I referenced a vacuum pump, so that is busted.

Well, the lid isn't airtight, it gets back up to STP pretty quick. I'm just drawing a vacuum maybe 5 minutes every hour. The humidity sensors do start going off on there own when the pressure drops but they return back to normal.
I've already tested a little bit and even at just 5 minutes every hour the plant dries really fast. It takes maybe a few minutes when it first goes in. Then once it loses about 30% of its water content it starts to take a few hours for the humidity to level off.
Seems I have hit the jackpot in extra work to do. I saw that someone has built a fully DIY'd smartknob with haptic feedback and i just got to have it for this guy once I get it put together. But you know at 200$ its not so great, plus the motor isn't even available anymore. Oh well, there goes all that open source down the drain! I'm thinking I'll build a lower quality one that costs about 15$ using a pico and a microwave switch, with 3D printed parts.

I accidently put twelve volts on the 5v line and lost a humidity sensor, so I decided to double down on my pcb making. I figured out that I was way off on my numbers, I was using .05mm depth at 35mm/min feed rate, when the best results where at .2mm depth and 60mm/min. Quite the difference when i don't have to scrap the traces! I also decided to use my laser cutter to put on some signage. Its actually really easy to do, and I did these from design to finished in just one day.


Looks a little rough, but on the next design I will know exactly what I am doing!

I have a neighbor that preserves flowers. Each batch takes about 30 days give or take a week. He says his vacuum is less then 500 microns and holds it for the entire time. He also ballasts the chamber with a very small amount of dry nitrogen. The roses look great. He also feeds (some custom chemical he buys) them before drying to keep them from becoming to fragel. Your sensor will not be accurate in a vacuum, it may not even work. This link will help you: https://www.rotronic.com/media/productattachments/files/b/e/beginners_guide_to_humidity_measurement_v0_1.pdf

That is quite impressive. I can get down to 4 psi and it only holds for a short time. But I can dry out plant material really quick. I wonder how he is avoiding mold holding it for 30 days?
Thanks for the read. Now that I have this machine in working order I have another project to see if a thermoelectric petlier will be able to control drying, this one is much simpler though. But I'm pretty ignorant of the concepts of dew point, lol.