Don't use Serial.print, use this instead

Hello Everyone,

I found this tip by Kevin Bacon on youtube, It's a great tip. https://www.youtube.com/watch?v=--KxxMaiwSE&t=965s

I added this tip to a simple state machine script, that I wrote, to turn on my sump pump via a tiny water sensor.
that I found on Amazon

My master sump pump is in the same sump pump hole "small hole diameter", as my second backup sump pump, and the big float that turns on the master sump pump would sometimes get hung up on the backup sump pump, and then the pump would run continuously. So to fix that issue I used a small water sensor to replace the huge floating ball.

It works great, I hope this helps someone

CREDITS:
//Kevin Bacon Tip 224-Superior-Serial.print-statements/Simple_Example at main · RalphBacon/224-Superior-Serial.print-statements · GitHub

Constructive comments are welcomed.

// DECLARATIONS
//Kevin Bacon Tip https://github.com/RalphBacon/224-Superior-Serial.print-statements/tree/main/Simple_Example

//This allows all debug statements to be switched on or off with one setting.
#define DEBUG 0  //all debug controlled here, set DEBUG 0 to DEBUG 1 to turn on debug, set DEBUG 1 to DEBUG 0 to turn off debug
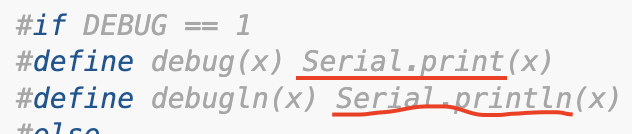
#if DEBUG == 1
#define debug(x) Serial.print(x)
#define debugln(x) Serial.println(x)
#else
#define debug(x)
#define debugln(x)
#endif

// Define pin connections
const int waterSensorPin = 2; // Water sensor connected to digital pin 2
const int relayPin = 8;       // Relay module connected to digital pin 8

// Enum to represent the states of the system
enum PumpState
{
  IDLE,      // Waiting for water detection
  PUMP_ON,   // Pump is running
  PUMP_OFF   // Pump turned off after running for a duration
};

// Variables to keep track of the state, timing, and sensor
PumpState Call_Case_Code_Block = IDLE;


unsigned long pumpStartTime = 0; //used with millis
const unsigned long pumpDuration = 30000; // 30 seconds in milliseconds, used with millis

// BEGIN void SETUP
void setup()
{
  // Initialize the water sensor pin as an input
  pinMode(waterSensorPin, INPUT);

  // Initialize the relay pin as an output
  pinMode(relayPin, OUTPUT);

  // Ensure the relay is off initially
  digitalWrite(relayPin, LOW);
  debugln("Setup complete."); //debug statements
}

// BEGIN void LOOP
void loop()
{
  // Read the water sensor value
  int waterDetected = digitalRead(waterSensorPin);

  // Switch between states
  switch (Call_Case_Code_Block)
  {
    case IDLE:
      // In IDLE, we are waiting for water detection
      if (waterDetected == HIGH)
      {
        // Water detected, move to PUMP_ON state
        Call_Case_Code_Block = PUMP_ON;
        digitalWrite(relayPin, HIGH); // Turn on the pump
        pumpStartTime = millis();     // First initialization of millis, Record the start time, and on each loop if (waterDetected == HIGH); reset the pumpStartTime
        debugln("water detected calling case PUMP_ON"); //debug statements
      }
      break;

    case PUMP_ON:
      // The pump is running, check if the duration has passed
      if (millis() - pumpStartTime >= pumpDuration)
      {
        // Time to turn off the pump
        Call_Case_Code_Block = PUMP_OFF;
        digitalWrite(relayPin, LOW); // Turn off the pump
        debugln("30 seconds has passed turning the pump off, calling case PUMP_OFF "); //debug statements
      }
      break;

    case PUMP_OFF:
      // The pump is off, return to IDLE state once the water is no longer detected
      if (waterDetected == LOW)
      {
        // Water no longer detected, go back to IDLE
        Call_Case_Code_Block = IDLE;
        debugln("water no longer detected, calling case IDLE "); //debug statements
      }
      break;

     default:
     //nothing to do here
     break;

  }
}
// END void loop

Don't use Serial.print, use this instead

????????????????????

Don't you understand something?

A question for you

What does the sketch use instead of Serial.print() ?

1 Like

Hello, it uses debugln, and only if you make #define DEBUG 0 true

debugln("Setup complete."); //debug statements

How does the debugln() macro do its printing ?

1 Like

I don't know all the black box stuff, take a look at the link from Kevin Bacon

//Kevin Bacon Tip 224-Superior-Serial.print-statements/Simple_Example at main · RalphBacon/224-Superior-Serial.print-statements · GitHub

How many Degrees of Separation are Kevin Bacon from Ralph Bacon?

2 Likes

Why not just look at your post #1?

1 Like

I will give you a clue

It uses Serial.print()

2 Likes

The basics from 2010 (first topic that I could find quickly): Toggling Debug Code - #2 by GrooveFlotilla

And I'm sure that if you don't limit your search to Arduino forum you will find it way back.

But I think that it's always useful to have the occasional refresher.

There is no blackbox; it's just a macro. debug(x) is replaced by Serial.print(x) by the C++ preprocessor if DEBUG equals 1 and else by nothing.

2 Likes

Here is a youtube link https://www.youtube.com/watch?v=--KxxMaiwSE&t=965s

A way to save program memory by turning on/off debug at will, of course on a small program it doesn't really matter. Just good to know.

The title should mention it's a way to easily add or remove debug statements.

I'm often using this for debug

#define DEBUG 1    // SET TO 0 OUT TO REMOVE TRACES

#if DEBUG
#define D_begin(...)       Serial.begin(__VA_ARGS__)
#define D_print(...)       Serial.print(__VA_ARGS__)
#define D_write(...)       Serial.write(__VA_ARGS__)
#define D_println(...)     Serial.println(__VA_ARGS__)
#else
#define D_begin(...)
#define D_print(...)
#define D_write(...)
#define D_println(...)
#endif

these macros will deal with multiple parameters

instead of Serial.print() or Serial.write() you use D_print() and D_write()

if you set the DEBUG macro to 0 then all traces and opening of the Serial port will go away

It's not something new, it's a very usual way to switch debugging on/off. Here is a discussion about this topic.

The title is nonsense. Of course it uses Serial.print. The macro's are only a means to switch it on/off globally. And you can do that much more sopisticated :wink: .

1 Like

1 Like

Wow, "The title is nonsense". Talk about nitpicking. The YouTube video states, "STOP using Serial.print in your Arduino code! THIS is better" My title was Don't use Serial.print, use this instead. Shoot me. I only posted this to help people just trying to learn.

You believe everything you see on Youtube? Wit, I have bridge to sell, let me post the pitch video for you ..

1 Like

You believe everything you see on Youtube?

What an asinine statement, it helps no one.

That technique is usually learned on the first or second day of learning how to program in C or C++ and a few other languages. If you really wanted to inform some users, check out how at compile time you can turn on debug with a /D option. That is a little less known, and many/most IDE users do not know how to add an option to the compiler. It is not very convenient to do it this way in the Arduino IDE environment, but if you are a CLI guru, it is standard fare as it was in my C days.
This is just a small sample of possibilities


From my personal sketch folders

The need for that has been eliminated after Arduino changed their code but I kept it around (as it is now a null statement) just in case.

1 Like