Hi Guys,
This is going to be a bit of a play around with ESP32 Wroom
ADDRESSING :
- Multi Processing
- Multi Tasking
- Multi Core Use
- How to gain manipulation and Control over tasks
While running Tasks on both core and on only 1 Core.
This starts as some interest sparked off on this thread which was supposed to be a few short questions and answers, and it became something else
Feel free to jump in and contribute - Newbies welcome to have some fun as well.
there are no stupid questions here, I mean.. there are 
But we're not going to tell you that , We're gonna be nice 
I'm interested in getting something like 20 Tasks happening simultaneously .
I'm tired of seeing the same basic internet examples, Here is a Task here is another and it stops there. I WANT TO GO TO 20 ! (At least 10)
Basically speaking , I have 2x WS2812B LED Strips
1 on Pin 18 and the other on Pin 19
I know they work, Voltage and wiring is all taken care off , We are just sticking to LEARNING about Dual Core Programming here and sharing some ideas and experimenting .
I also have a DFrobot and i would like to get to a point where i'm running a few light sequences and some sound files at the same time so they don't conflict.
I'm already very familiar with DFrobot and not starting from scratch.
So to kick it off
Here is a Hardware reference link
Hardware Reference Manual
Here is a Datasheet Link
ESP32 Datasheet
Here is the Sketch that i'm starting with, it's very Basic and we are going to play with it and see what we can learn.
/*//////////////////////////////////////////////////////////////////////////////////////////
 INITIATES THE TASKCODES FOR THE CORES
*///----------------------------------------------------------------------------------------
void TaskCode1( void *pvParameters );  //Initiates TaskCode1
void TaskCode2( void *pvParameters );  //Initiates TaskCode2
///////////////////////////////////////////////////////////////////////////////////////////

/*//////////////////////////////////////////////////////////////////////////////////////////
 POINTS THE TASK HANDLE TO THE TASK BLOCK
*///---------------------------------------------------------------------------------------
TaskHandle_t Task1;  //Assigned to Core 1
TaskHandle_t Task2;  //Assigned to Core 1
///////////////////////////////////////////////////////////////////////////////////////////

/*/////////////////////////////////////////////////////////////////////////////////////////
 BEGIN SETUP
*//////////////////////////////////////////////////////////////////////////////////////////
void setup()
{  // OPENS the void setup
Serial.begin(115200);         // Baud Rate for Serial Monitor
/*//////////////////////////////////////////////////////////////////////////////////////////////////////////////////////////////////
//                                    TASK PARAMETERS
*///////////////////////////////////////////////////////////////////////////////////////////////////////////////////////////////////
/*/////////////////////////////////////////////////////////////////////////////////////////
------------------------------------------ TASK 1 -----------------------------------------
///////////////////////////////////////////////////////////////////////////////////////////
 TASK NAME - Task1
 TASK CREATION , CORE EXECUTION AND PRIORITY
-------------------------------------------------------------------------------------------
 Create Task1 , Executed in TaskCode1() function , On Core 0 , Priority 0
-------------------------------------------------------------------------------------------
*///  xTaskCreatePinnedToCore(TaskCode1, "Task1", 10000, NULL, 0, &Task1,  0);
xTaskCreatePinnedToCore(
  TaskCode1,          // Task function.
    "Task1",          // name of task.
      10000,          // Stack size of task
       NULL,          // parameter of the task
          0,          // priority of the task 0 - 3
     &Task1,          // Task handle to keep track of created task
         1);          // pin task to core X
delay(5);
/*/////////////////////////////////////////////////////////////////////////////////////////

///////////////////////////////////////////////////////////////////////////////////////////
------------------------------------------ TASK 2 -----------------------------------------
///////////////////////////////////////////////////////////////////////////////////////////
 TASK NAME - Task2
 TASK CREATION , CORE EXECUTION AND PRIORITY
-------------------------------------------------------------------------------------------
 Create Task2 , Executed in TaskCode2() function , On Core 0 , Priority 0
-------------------------------------------------------------------------------------------
*///  xTaskCreatePinnedToCore(TaskCode2, "Task2", 10000, NULL, 0, &Task2,  0);
xTaskCreatePinnedToCore(
  TaskCode2,          // Task function.
    "Task2",          // name of task.
      10000,          // Stack size of task
       NULL,          // parameter of the task
          1,          // priority of the task 0 - 3
     &Task2,          // Task handle to keep track of created task
         1);          // pin task to core X
delay(5);
/*/////////////////////////////////////////////////////////////////////////////////////////


*//////////////////////////////////////////////////////////////////////////////////////////
// CLOSE SETUP
///////////////////////////////////////////////////////////////////////////////////////////
} // CLOSES the void setup

///////////////////////////////////////////////////////////////////////////////////////////
//---------------------------------------- TASKCODE 1 ---------------------------------------
///////////////////////////////////////////////////////////////////////////////////////////
//  TaskCode1:  -
//-------------------------------------------------------------------------------------------
void TaskCode1( void * pvParameters )
{ // OPENS TaskCode1
vTaskDelay(500);
  Serial.println("----------------------------------------------------------------");
  Serial.println("---------------------------- TaskCode1 -------------------------");
  Serial.println(" DETAILS :");
  Serial.print(" TaskCode1 - Task1       - Running On CORE ");
  Serial.println(xPortGetCoreID());
  Serial.println(" TaskCode1 - Task1       - COMPLETED");
  Serial.println("----------------------------------------------------------------");
for(;;)
  {// OPENS TaskCode1 Main FOR Loop
  Serial.println(" Task1 - TERMINATED");
  Serial.println("");

vTaskDelete(NULL);

  }  // CLOSES TaskCode1 Main FOR Loop
} // CLOSES TaskCode1

///////////////////////////////////////////////////////////////////////////////////////////

///////////////////////////////////////////////////////////////////////////////////////////
//---------------------------------------- TASKCODE 2 ---------------------------------------
///////////////////////////////////////////////////////////////////////////////////////////
//  TaskCode2:  -
//-------------------------------------------------------------------------------------------
void TaskCode2( void * pvParameters )
{ // OPENS TaskCode2
vTaskDelay(500);
  Serial.println("----------------------------------------------------------------");
  Serial.println("---------------------------- TaskCode2 -------------------------");
  Serial.println(" DETAILS :");
  Serial.print(" TaskCode2 - Task2       - Running On CORE ");
  Serial.println(xPortGetCoreID());
  Serial.println(" TaskCode2 - Task2       - COMPLETED");
  Serial.println("----------------------------------------------------------------");
for(;;)
  {// OPENS TaskCode2 Main FOR Loop
  Serial.println(" Task2 - TERMINATED");
  Serial.println("");

vTaskDelete(NULL);

  }  // CLOSES TaskCode2 Main FOR Loop
} // CLOSES TaskCode2


///////////////////////////////////////////////////////////////////////////////////////////
// BEGIN LOOP -----------------------------------------------------------------------------
///////////////////////////////////////////////////////////////////////////////////////////
void loop()
{ // OPENS void loop
delay(1);
} // CLOSES void loop
I'm going to initially run 4 Tests
All tests will have 2 Tasks and they will be tested across all cored ,
there will be a basic Serial Output
The Sketch has a 200ms Delay to allow for the Serial Text to appear
Also i am using vTaskDelay and not delay
TEST 1 -
TASK 1 - Core 0
TASK 2 - Core 0
Screenshot as Proof

Output...
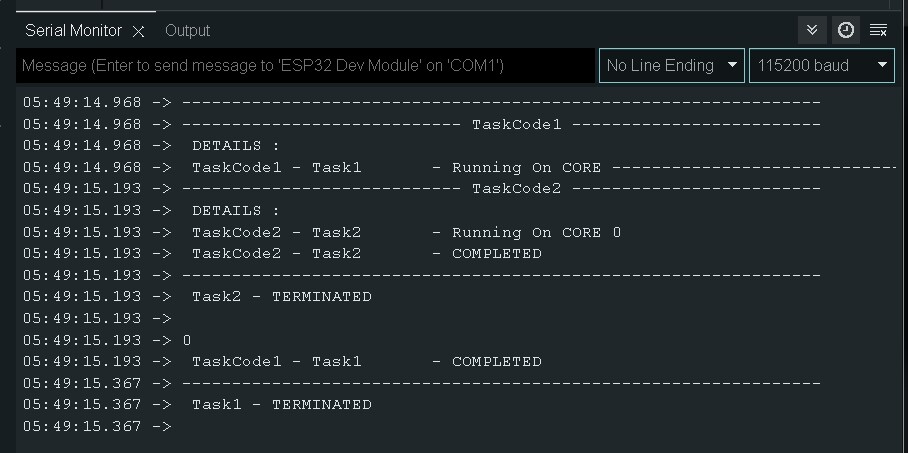
RESULT : Not as Expected
TEST 2 -
TASK 1 - Core 1
TASK 2 - Core 0
Screenshot as Proof

Output...

THIS IS WHAT WE WANT TO SEE
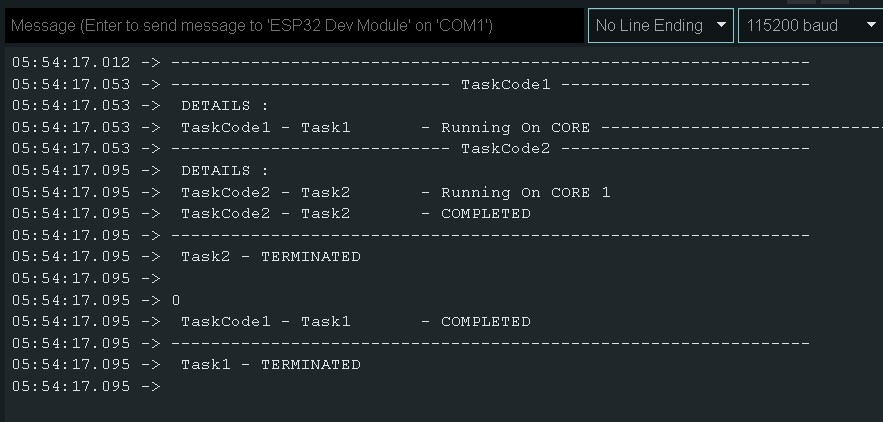
TEST 3 -
TASK 1 - Core 0
TASK 2 - Core 1
Screenshot as Proof

Output...
TEST 4 -
TASK 1 - Core 1
TASK 2 - Core 1
Screenshot as Proof
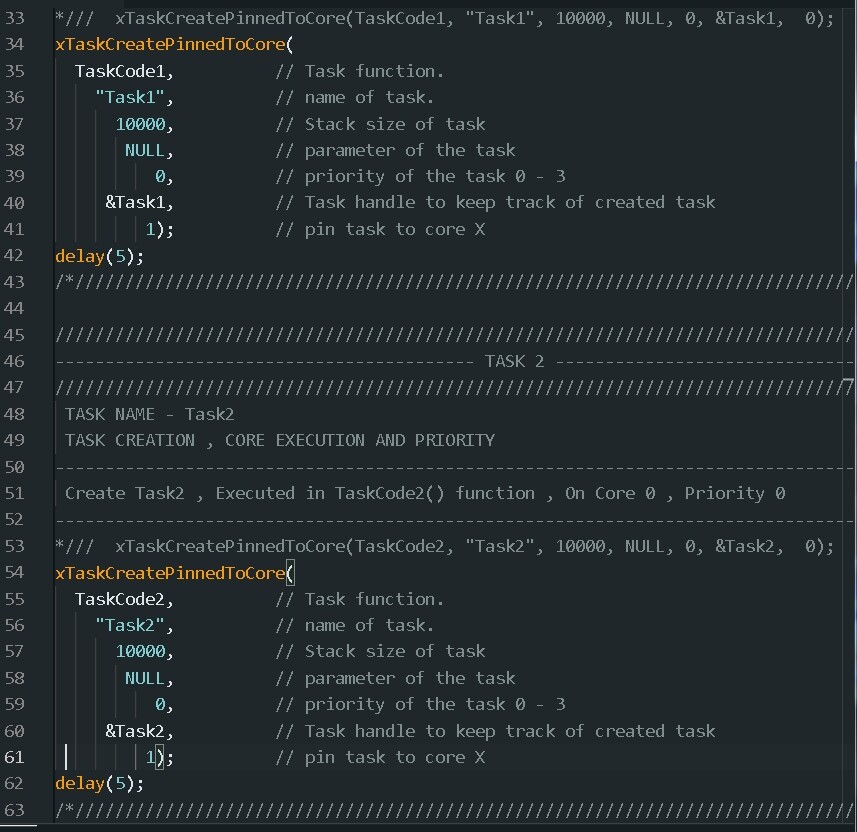
Output...

It Seems that when use Task1 on Core 0 That First line gets thrown to the end.
Anyway Let's start it there .....
