Help needed with tutorial of Built-In-Examples

Today I made the tutorial "Read ASCII String"(see url below)

I wrote everything of the code that was standing in the tutorial web page (see url above). The RGB LED didn't went on. Was that the intention because I imaged that it would go on?

Here is the code:

/*
  Reading a serial ASCII-encoded string.

  This sketch demonstrates the Serial parseInt() function.
  It looks for an ASCII string of comma-separated values.
  It parses them into ints, and uses those to fade an RGB LED.

  Circuit: Common-Cathode RGB LED wired like so:
  - red anode: digital pin 3
  - green anode: digital pin 5
  - blue anode: digital pin 6
  - cathode: GND

  created 13 Apr 2012
  by Tom Igoe
  modified 14 Mar 2016
  by Arturo Guadalupi

  This example code is in the public domain. 
*/

// pins for the LEDs: <<<<<<<<<<< aanpassen!!!
const int redPin = 3;
const int greenPin = 5;
const int bluePin = 6;

void setup() 
{
  // initialize serial
  Serial.begin(9600);
  // make the pins outputs:
  pinMode(redPin, OUTPUT);
  pinMode(greenPin, OUTPUT);
  pinMode(bluePin, OUTPUT);

}

void loop() 
{
  // if there's any serial available, read it:
  while(Serial.available() > 0)
  {
    // look for the next valid integer in the incoming serial stream:
    int red = Serial.parseInt();
    // do it again:
    int green = Serial.parseInt();
    // do it again:
    int blue = Serial.parseInt();
    //look for the newline. That's the end of yur sentence:
    if(Serial.read() == '\n')
    {
      // constrain the values to 0 - 255 and invert
      // if you're using a common-cathode LED, just use "constrain(color, 0, 255);"
      red = 255 - constrain(red, 0, 255);
      green = 255 - constrain(green, 0, 255);
      blue = 255 - constrain(blue, 0, 255);
      // fade the red, green and blue legs of the LED
      analogWrite(redPin, red);
      analogWrite(greenPin, green);
      analogWrite(bluePin, blue);
      // print the three numbers in one string as hexadecimal:
      Serial.print(red, HEX);
      Serial.print(green, HEX);
      Serial.print(blue, HEX);
    }
  }

}

I am new in programming ArduinoCode for a circuit.

What line ending do you have set in the serial monitor?
Do you see the values printed back?

It looks like tutorial about one single function - parseInt()

Are you sure that your RGB LED is common cathode? There are also common anode RGB LEDs. The common anode RGB LED is wired slightly differently, the common lead goes to Vcc. With the common anode, a 0 will turn a LED on and 255 will be off.

image

1 Like

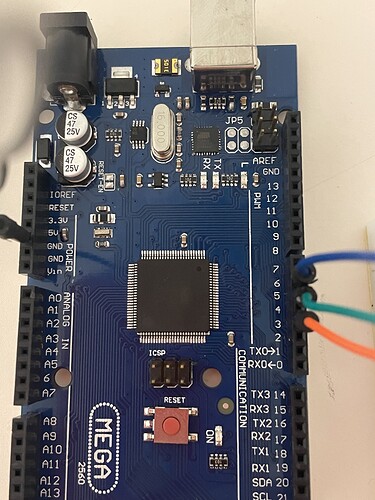
Please post a photo of your actual hardware connections. Did you test the LEDs independently, by loading the blink sketch and changing the pin number to each LED, in turn?

I will come back on this

Thank you. Any answer to my question? Also consider post #4.

I didn’t because it‘s one single RGB LED and not 3 separate LED’s. This has 4 legs.

That means it IS 3 separate LEDs. They just happen to be all enclosed in the same plastic package.

How do you think the colours of an RGB LED are controlled? You are evidently missing the main learning point of the exercise.


You mean this? Nothing seems to be wrong here.

By creating a tutorial for others, you learn yourself :slight_smile:

No.
See post 2

Then I have no idea what you mean.

In the serial monitor, what is the line-ending control set to?
In the serial monitor, do you see the results of the serial prints in your sketch?

Is that any clearer?

1. Upload your sketch of post #1 into Arduino.
2. Open the Serial Monitor (Fig-1) by clicking on the Serial Monitor Icon of the IDE.


Figure-1:

3. Click on "Line ending tab" of Serial Monitor and then select the "Newline" option.
4. Place the cursor in the InputBox of Serial Monitor, enter the following string from Keyboard of the PC, and then click on the Send Button.
123, 213, 135

5. Check the brightness of the LEDs.
6. Report what you have got on the OutputBox of Serial Monitor.