Help with code - play tone sequence if input LOW

Hello,

Iam totally new with Arduino (Attiny25/45/85).

Iam trying to program an Attiny45 with a special tone sequence.

The sequence consists of two tones A=2kHz and B=3,2kHz ( A,A,B,mute,B,A).

A member of a German forum helped me with the sequence:

include <avr/io.h>
#define F_CPU 16000000L
#include <util/delay.h>
void A (void) {
  for(int i=0; i<100; i++) { // A: 2kHz, 50ms
    PORTB = 0x01;
    _delay_us(250);
    PORTB = 0x00;
    _delay_us(250);
  }
}
void B (void) {
  for(int i=0; i<160; i++) { // B: 3k2Hz, 50ms
    PORTB = 0x01;
    _delay_us(155);
    PORTB = 0x00;
    _delay_us(156);
  }
}
int main(void)
{
  DDRB = 0x01; // B0 = LED
  while(1)
  {
    // 50ms Ton an, 20ms Pause Tonfrequenz A: 2000Hz Tonfrequenz B: 3200Hz
    // Die Sequenz ist: A,A,B,still,B,A Das ganze dauert 6*70ms = 420ms
    A();
    _delay_ms(20);          // kurze Pause
    A();
    _delay_ms(20);          // kurze Pause
    B();
    _delay_ms(20);          // kurze Pause
    _delay_ms(50);          // still
    _delay_ms(20);          // kurze Pause
    B();
    _delay_ms(20);          // kurze Pause
    A();
        
    _delay_ms(3000); // wart mal ab...
  }                      
}

This works perfectly. Now I want to toggle this sequence with a LOW signal on the input (PB1).

I figured out how to switch on an LED (for 500ms) with LOW on the input:

const int led = 0;
const int button = 1;
void setup() {
  pinMode(button, INPUT_PULLUP);
  pinMode(led, OUTPUT);
}
void loop() {
  if (digitalRead(button)== HIGH)digitalWrite(led, LOW); // Turn LED on if button is not pressed
  else {
    digitalWrite(led, HIGH); // Turn LED off if button is pressed
   
    delay(500); 
  }
}

This works as supposed.

I know that I cant just put these codes after each other, but Iam missing some basic understanding how to stack the different code parts toghether logically. :slight_smile:

What would I have to add/change to get the code working like it should?

I would be very happy if anyone here has some suggestions or hints, so that I maybe can get in the right direction.

Best regards and thank you very much for your help.

Alex

Welcome to the forum

You have 2 separate sections of code. One reads the input and when it is in a LOW state it triggers the second section to play the tone sequence

What I would do is to declare a global boolean variable, let's name it playSeq and set it to false. Read the state of the input in loop() and if it is LOW set playSeq to true. Later in loop() test the state of playSeq and if it is true then play the sequence. At the end of the sequence set playSeq back to false to prevent the sequence playing again until the LOW input is detected again

An extension to this would be to put the input detection and sequence playing code each in their own named function to keep things neat and tidy in the sketch

  • Rewrite the first code using the Arduino setup() and loop() function, i.e. no main().
    Add your second code block to the loop() function.

  • Your 2nd code should be written to look for a switch change in state not the switches current state.
    This should also handle switch bouncing.

  • You do know using delay(. . .) blocks code execution for the delay interval ?

This code is not Arduino code. I hope the forum you mentioned is not the German category of the Arduino forum!

It may run ok because the Arduino IDE is backwards compatible with AVR code and you are running it on an ATtiny45.

If you tried to run this code on other Arduino based on other AVR chips like ATmega328, it would not compile without errors. It would certainly not work on non-AVR Arduino/chips like ESP32 or ARM-based chips!

But if it was written in Arduino code, it would work with minimal changes (e.g. pin numbers) on the wide range of different Arduino and Arduino-compatible boards/chips.

I will attempt to translate it for you. Please test it and describe any problems.

const int pin = 1;

void setup() {
}

void loop()
{
  // 50ms Ton an, 20ms Pause Tonfrequenz A: 2000Hz Tonfrequenz B: 3200Hz
  // Die Sequenz ist: A,A,B,still,B,A Das ganze dauert 6*70ms = 420ms
  tone(pin, 2000, 50);
  delay(70);
  tone(pin, 2000, 50);
  delay(70);
  tone(pin, 3200, 50);
  delay(70);
  delay(50);
  tone(pin, 3200, 50);
  delay(70);
  tone(pin, 2000, 50);
  delay(70);
  delay(3000);
}

Hello :slight_smile: Thank you very much for all the fast replies!
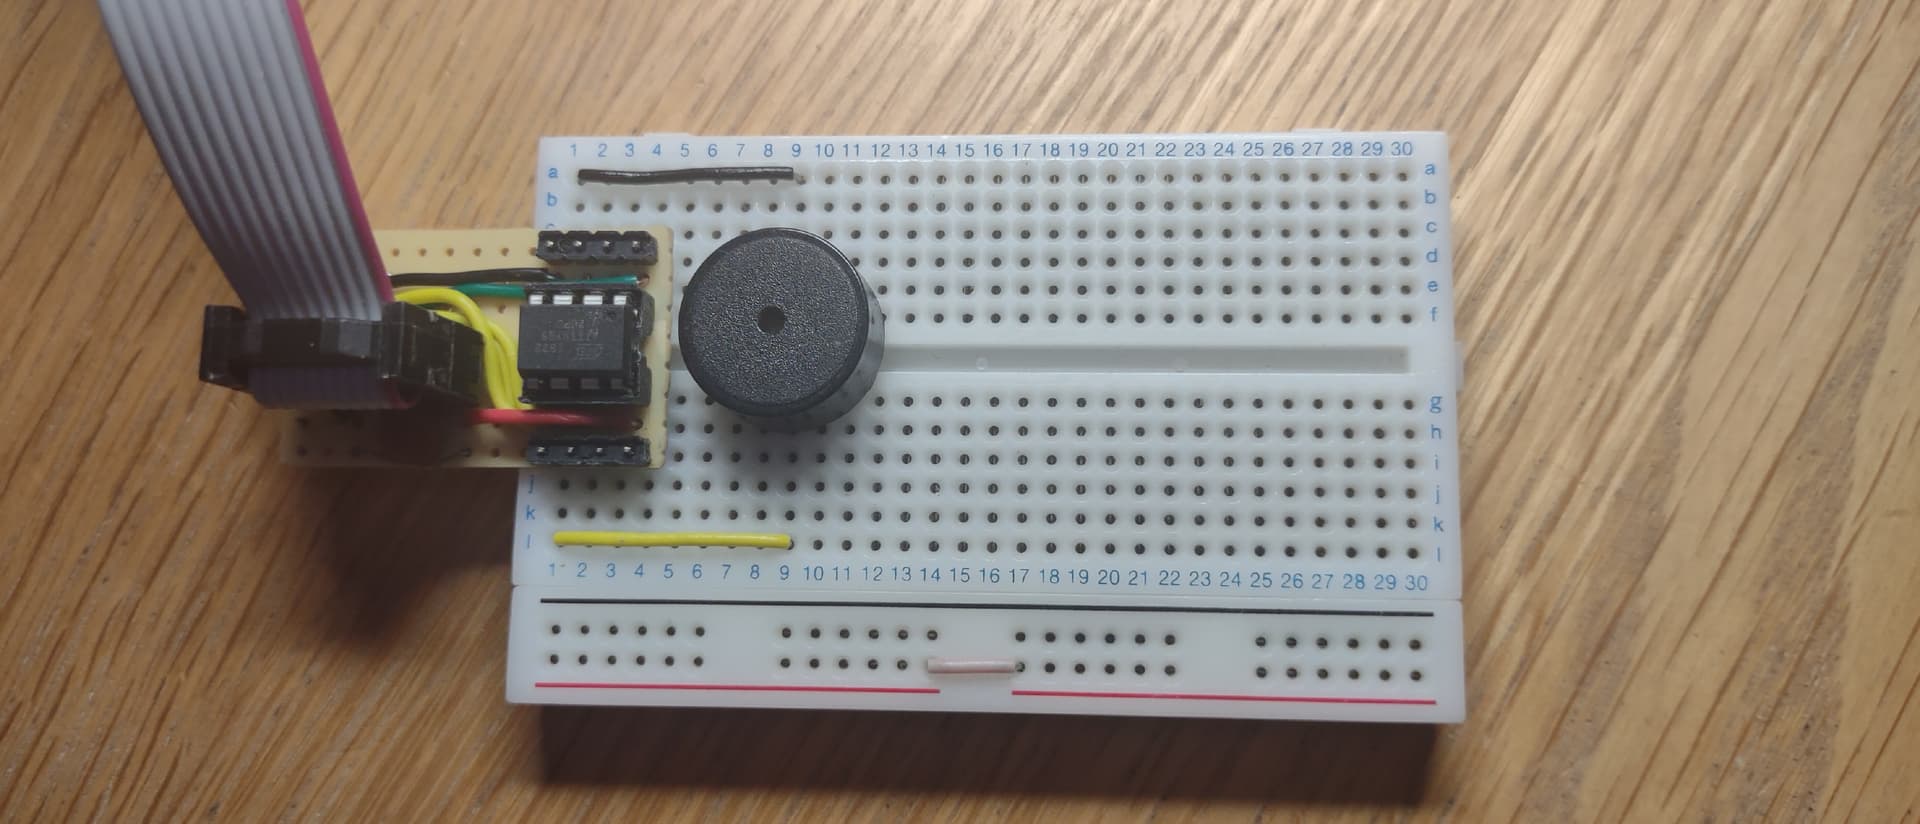
I still have to learn all basics, so I might ask very unlogical stuff :)

Hi Paul, it does compile, but unfortunately I cant hear anything.

Maybe you did not set the value of pin to match the Arduino pin number of the pin you have your speaker/sounder connected to?

I recommend this core/board package for ATtiny chips:

I think your original code was using pin 0 of port B, written B0, which is Arduino pin 0.

Yes, I changed it to 0 (PB0) but it made no difference.

Please post your updated code.

Ah, I may have forgotten something!

const int pin = 0;

void setup() {
  pinMode(pin, OUTPUT);
}

void loop()
{
  // 50ms Ton an, 20ms Pause Tonfrequenz A: 2000Hz Tonfrequenz B: 3200Hz
  // Die Sequenz ist: A,A,B,still,B,A Das ganze dauert 6*70ms = 420ms
  tone(pin, 2000, 50);
  delay(70);
  tone(pin, 2000, 50);
  delay(70);
  tone(pin, 3200, 50);
  delay(70);
  delay(50);
  tone(pin, 3200, 50);
  delay(70);
  tone(pin, 2000, 50);
  delay(70);
  delay(3000);
}

Won't hurt, can't help. It will cut down on questions, though.

  if (outputPin != lastOutputPin)
  {
    lastOutputPin = outputPin;
    digitalWrite(outputPin, LOW);
    pinMode(outputPin, OUTPUT);
    toneIsActive = true;
  }

The tone() function sets the pin mode the first time it uses a different pin, which pin starts basically as "no pin".

a7

You are correct. It works fine without pin mode().

It's working ok for me.

From a musical point of view, using the tone() function will provide you with a lot of detuned notes. The function uses timers and therefore has difficulty getting the frequency of notes close enough to sound really good. That said, with timers the note will be produced in the background.

I wanted to play a whole melody on an Attiny13a for that i needed to use progmem, It does use delayMicroseconds() but i guess you could also poll a switch during the silent period of a note

Hi Larry, thanks for your reply. This seems spot on!

How would the code look like?

Iam confused how I would have to change it.

Maybe like this:

void setup()
{
#define F_CPU 16000000L
#include <util/delay.h>
void A (void) {
  for(int i=0; i<100; i++) { // A: 2kHz, 50ms
    PORTB = 0x01;
    _delay_us(250);
    PORTB = 0x00;
    _delay_us(250);
  }
}
void B (void) {
  for(int i=0; i<160; i++) { // B: 3k2Hz, 50ms
    PORTB = 0x01;
    _delay_us(155);
    PORTB = 0x00;
    _delay_us(156);
  }
}

void loop()
{
  DDRB = 0x01; // B0 = LED
  while(1)
  {
    // 50ms Ton an, 20ms Pause Tonfrequenz A: 2000Hz Tonfrequenz B: 3200Hz
    // Die Sequenz ist: A,A,B,still,B,A Das ganze dauert 6*70ms = 420ms
    A();
    _delay_ms(20);          // kurze Pause
    A();
    _delay_ms(20);          // kurze Pause
    B();
    _delay_ms(20);          // kurze Pause
    _delay_ms(50);          // still
    _delay_ms(20);          // kurze Pause
    B();
    _delay_ms(20);          // kurze Pause
    A();
        
    _delay_ms(3000); // wart mal ab...
  }                      
}

Would it be a problem if I use delay(…)?

For a change in state detection I found this:

State Change Detection (Edge Detection) for pushbuttons | Arduino Documentation

const int pin = 0;

void setup() {
  pinMode(pin, OUTPUT);
}

void loop()
{
  // 50ms Ton an, 20ms Pause Tonfrequenz A: 2000Hz Tonfrequenz B: 3200Hz
  // Die Sequenz ist: A,A,B,still,B,A Das ganze dauert 6*70ms = 420ms
  tone(pin, 2000, 50);
  delay(70);
  tone(pin, 2000, 50);
  delay(70);
  tone(pin, 3200, 50);
  delay(70);
  delay(50);
  tone(pin, 3200, 50);
  delay(70);
  tone(pin, 2000, 50);
  delay(70);
  delay(3000);
}

Hi, I tried it and still cant get a sound out of the magnetic buzzer.

But maybe I better use the the tone generated with delay(…) , because it sounds good and the code uses very little storage space.

Are you SURE your wiring is correct?

For the more experienced users of the forum—would the type of buzzer make a difference while using “tone”? A passive buzzer verses an active buzzer?

That exact code worked perfectly for me, in the circuit I posted the pic. I could hear the "tune" quite loud.

But what do you mean by "magnetic buzzer"?

The Arduino tone() function is meant to be used with a passive sounder like a passive piezo sounder.

It can be used with a magnetic speaker, but a magnetic speaker should never be connected directly to an Arduino pin. That could damage the Arduino. A transistor or small amplifier circuit is needed to drive a magnetic speaker.

I don't know what exactly would happen if you tried to use tone() with an active sounder. It might work, or not work at all.

This makes me believe that @alex_at25 is using a passive sounder of some kind, or if it is an active sounder, it should also work with tone().

@alex_at25 did you follow my recommendation?

Yes, I used your suggested core https://drazzy.com/package_drazzy.com_index.json (tried http/https).

Still no sound :slight_smile:

I use this kind of passive buzzer(electromagnetic, because I can clearly see the coil):

1.5V 5V 12V 85dB Split Magnetic Buzzer - Manorshi

What is the working principle of the buzzer? - Quisure

Can someone check my code suggestion, if Iam on the right track?

In the picture on your link, the coil is not visible.

Perhaps you could post some close-up, bright, clear photos.

Also, measure the resistance between the two pins with your multimeter. A passive electromagnetic buzzer will have a resistance of a few ohms. A passive piezo buzzer will have a resistance in the hundreds of Kilo-ohms.

Did we eliminate the possibility that you have an active buzzer? A simple test was suggested earlier.

Your original code worked for me with the passive piezo buzzer in the photo I posted.

The sound was lower pitch and the delays were longer because my ATtiny was running at 8MHz not 16MHz.

That looks like an active buzzer to me. Part of the specification says

Frequency: 2000±500Hz

To me that indicates that it works at a fixed frequency when power is applied to it

This was just meant as an example.

I found the exact model I use:

CEM-1203(42) Datasheet - Audio Transducers | Buzzers | CUI Devices