You have not yet said the range you are trying to measure. Or anything about common mode voltage. Measuring a small signal is one thing, measuring a small signal riding on top of a large common mode voltage is a more complicated thing.
These high resolution ADC numbers that get tossed around - they don't mean jack in terms of measuring very small signals because infinite resolution of analog noise is just analog noise. Who cares about low microvolt resolution when you are struggling to get low millivolt readings with any real accuracy?
Have you established even a rudimentary evaluation protocol?
Before you waste a lot of time chasing microscopic rabbits that may not exist, set up a precision voltage source and a series of precision resistor voltage dividers, and work your way down to maybe 1000-800 uV with valid linearity plot. That should be doable for a diligent hobbyist with single digit % accuracy on a decent quality breadboard with proficient technique and only 16bits.
Working that down to 100uV range with any accuracy will be a real challenge.
Working that down to 10s of uV with any accuracy is a career path. All the 24bit ADCs in the world are not gonna get you there.
This is exactly the point we're trying to make. It's not that the reading is noisy (well, depending on the ADC and its layout it could be): it's that you're measuring noise that you need to ensure isn't there in the first place.
robertnc makes a very good point about how to get started.
You're welcome. To get any more help here you're going to have to show us a schematic diagram of your setup as well as a clear photo of the actual hardware wired up.
Follow the suggestions from @TomGeorge in post #18 as well about forum protocol.
Well alrighty. I followed up with a few reads on you subject matter. Most reenforces my theory of never go near the materials lab during my working career. On a scale of 1 to 10 with a 10 me being knowledgeable on the subject matter I come in about a minus 3.
On a more serious note obviously materials labs out there are doing these systems.
The Van der Pauw (VDP) method measures the average resistivity and Hall coefficient values on thin samples (approximately two-dimensional) by applying current and measuring the voltage along the sample perimeter . This allows irregular shapes as well as more traditional structures to be evaluated.
If I were you I would try calling a few of the companies that make equipment for taking these measurements. Four Point Probe Systems, Lake Shore Instruments, and Tektronix / Keithly to name a few. You want to get connected with one of their applications engineers.
I can tell you right now you will not get anywhere playing around with even a 24 bit ADC because of the noise base. The current source for these measurements needs to be precise and I have no clue how stable. Units use numbers like 10 nA to 100 mA. Also measurments are taken forward and reverse and must agree to within 3% based on my reads. I did see mention of low thermal leads which I suspected earlier.
All in all I can tell you designing a system to do what you want to do is not a simple kitchen table project. The probe design is critical and the probe spacing and amount of pressure the probes exert on the sample is critical. Takes a well designed procedure and method. I wish I could be of some help to you but all of this is well outside my scope and knowledge base.
I have successfully used a keithley micro-ohm-meter to get van der paw measurements of metallic thin films, it is rather straightforward. Typically you do it in AC mode, then you eliminate thermocouple effects, otherwise you have to measure the resistance in both directions. More than measuring the voltage, it is a problem of having a reliable current source.
MY company used to build similar devices for a customer. They were inside a cast aluminum enclosure with a cast aluminum lid and would not function until the lid was completely closed and making a good electrical contact all around the lid.
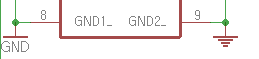
Sadly I cant read some of the information on your schematic. I'm guessing these are the voltage input probes, but what is the 2N3904 doing? Ah the "thing" is a relay. With no diode???
and this is protection and filtering?
Have you maintained separation between analog and digital and high current grounds?
These aren't my original works, I guess I took them from https://blog.naver.com/dgfiel/222952007894 . I searched many places so not able to remember the exact place from where it was. But it worked for my needs.
I used ads1248 ADC in the beginning, I was not happy with the results, so went with ads1232, which still was neither accurate nor precise to my needs. So purchased the ads1256 "module". There are different kinds of ads1256 modules, I purchased "the green one from China" , which comes inside a plastic box. It cost higher compared to the other ads1256 modules. But the results were crisp and clear.
That relay ("thing"), is used to make a chopper circuit. Visit the website, he has explained everything clearly. In my case, I didn't have to use an additional relay, because I had the provision to change the polarity of the voltmeter in my main circuit itself.
And yes, it does protection and filtering.
I used LM334 (for up to 10mA) and LM3092 (above 10mA to 200mA) for current sources. I only needed it till there. So I didn't have to use any bulky heatsinks. And supplied 36V to both of them in order for it to provide me with a constant precise reading up to the micro-level scale. However, LM334 provided me with constant reading up to 6kohm load then I had to switch the current source using a relay to the next current source (LM3092), to handle high resistance above 6k. Anyway I am pretty happy with my readings.
Try making it by yourself once. Even I myself had 1000s of questions before starting the project but eventually did many adjustments, and now I am able to get it precisely.
The chats which you have tagged are those when I used ads 1248. I prefer using ads1256 or ads1262, which is a 32-bit adc. Look at its datasheet to know more features of that chip. Currently, I am using it.