This is the second microC that Im working with from Atmega (the first one was TQFP32 ATmega328P).
-And I want to program it. And being the first time for me, I need some guidance. What circuit to use? probably some ICSP wiring? and what library to download ?
In my mind this older uC should still be programmed with Arduino Uno R3 that I have.
Thank you !
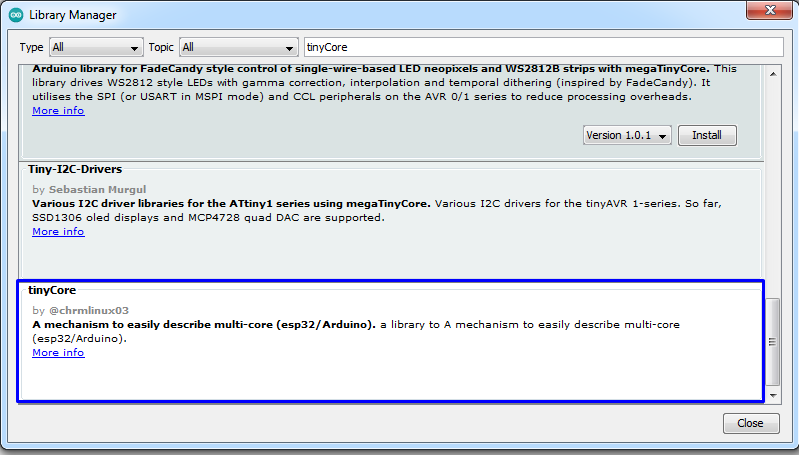
It's been a while since I used IDE v1, but it looks like you're using v1, meaning you have to download the TinyCore and install yourself, just like you did with MiniCore.
I read their page and I can not see a clear way of how to install that ATTinyCore.
I write to them about this issue. Hope they can respond /or help.
I used MiniCore for programming ATmega328P chips in my recent past.
Here is the link to their page (as an example), that includes a clear way of how to install it:
But on the ATTinyCore page, there is no such Install chapter !
The only way to install this ATTinyCore is to download the zip and place it somewhere in arduino folder... I have to figure out where....hmmm
aaaaaaa. I had to clik on that [ Installation.md] fileeeeeee....
I didnt see it. I mean I see it but I was looking into that long (ass) page of theirs, as usually people put there all the basics ... my expectations were violated with that file. Ok thanks !
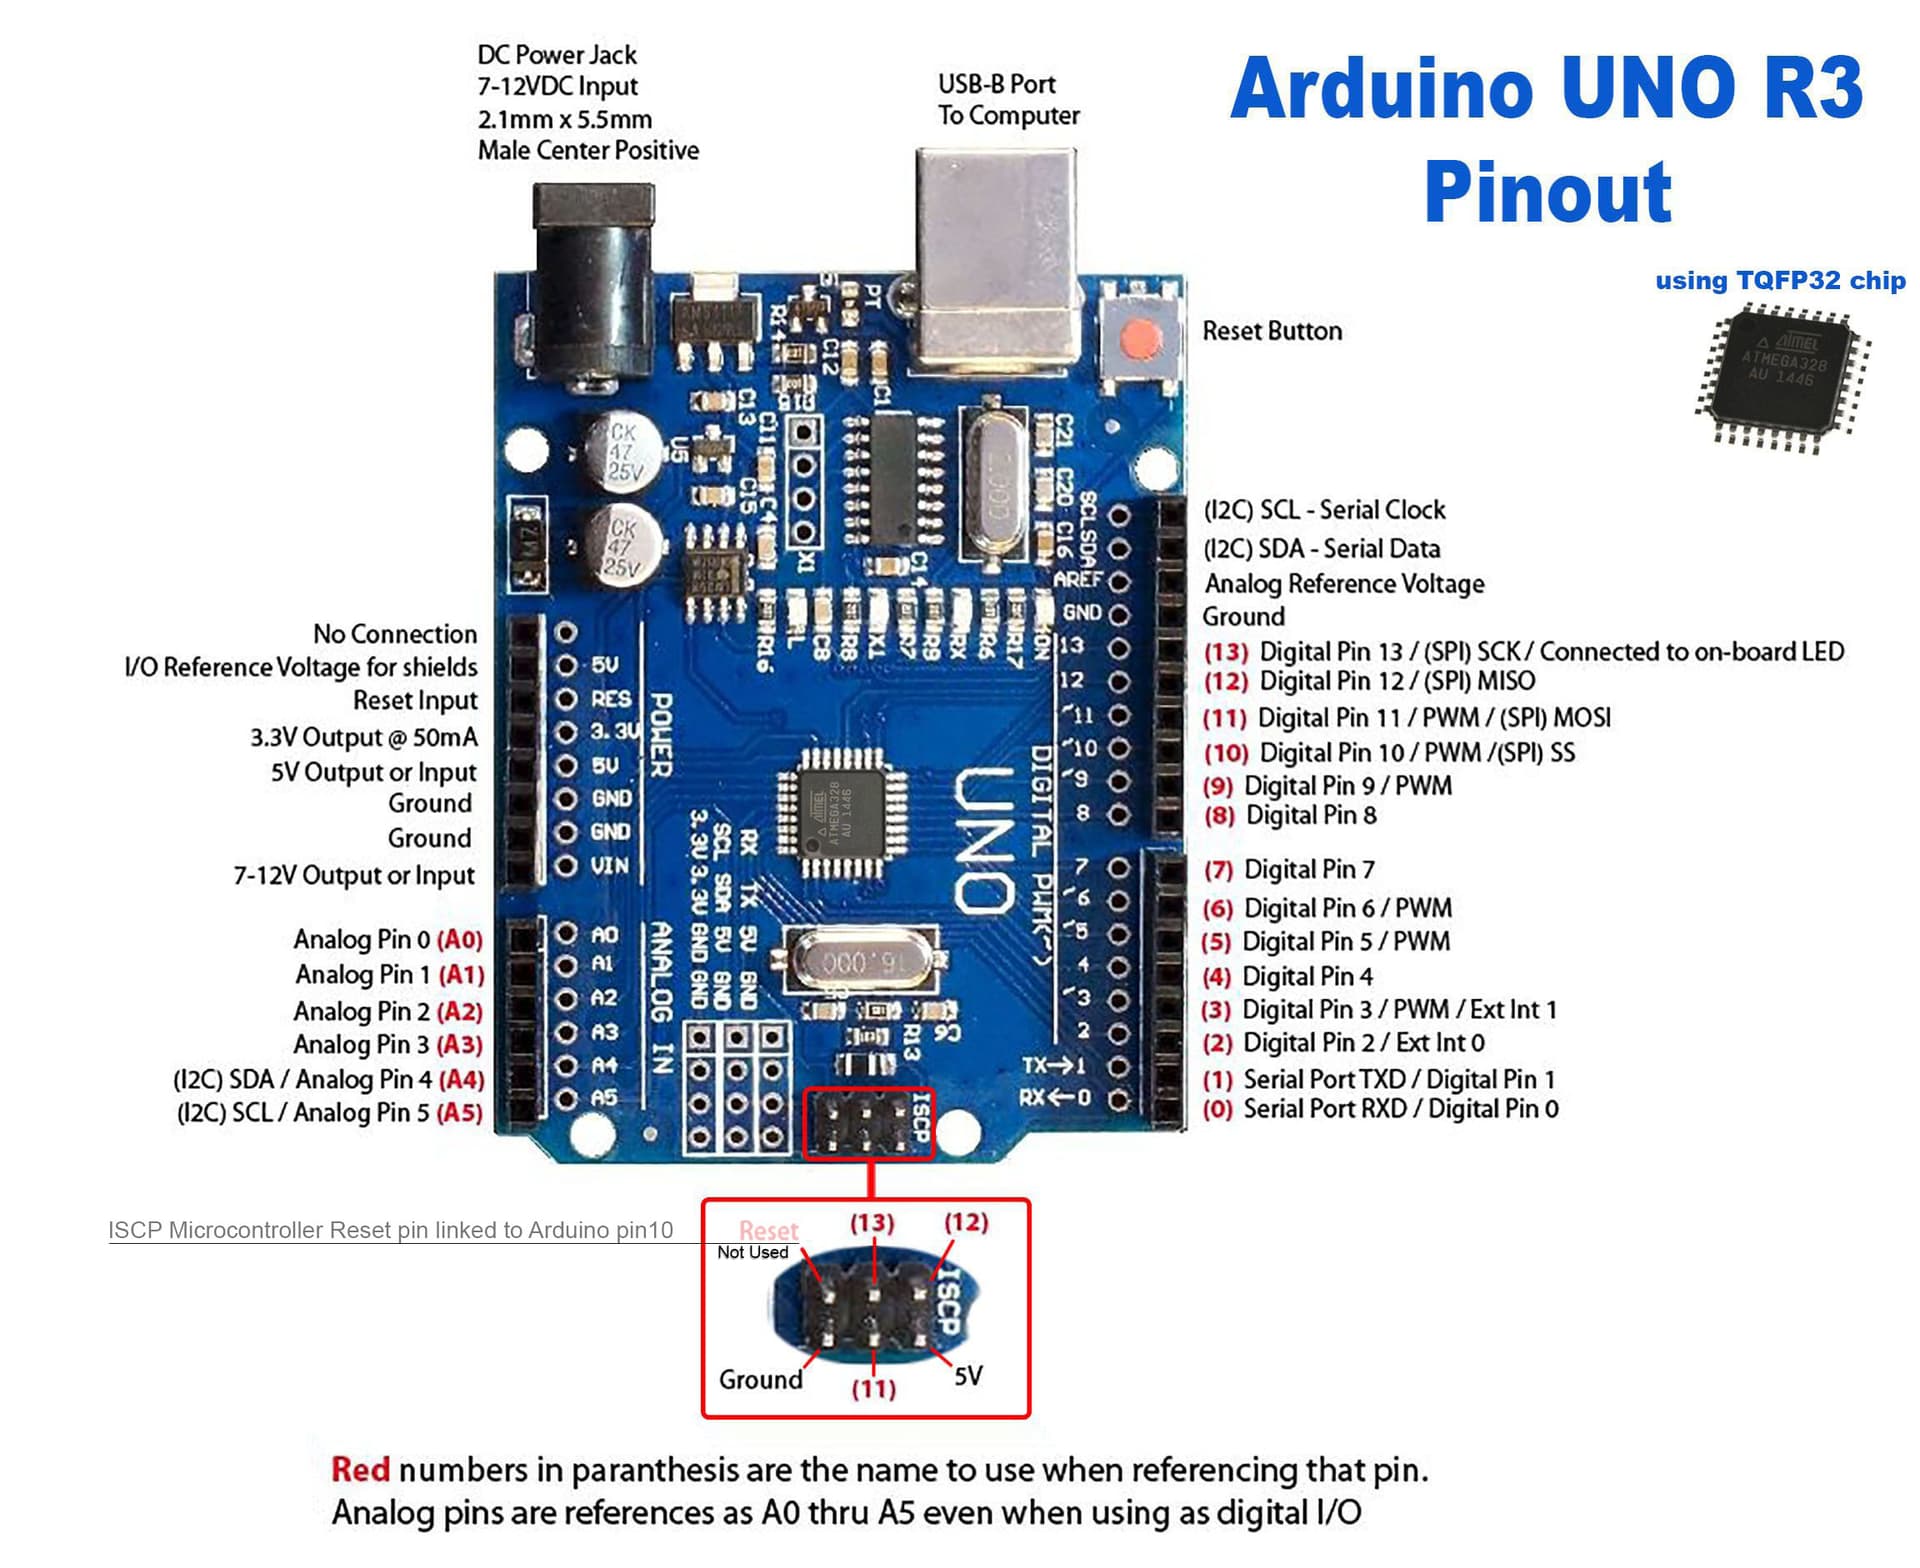
Uno got a 6 pin header that you will find corresponds to digital pins 10-13, +5 V and GND. If you programmed 328P with the Uno you should be familiar with the ICSP hookup.
I know it's said to be one of the best Windows, but..
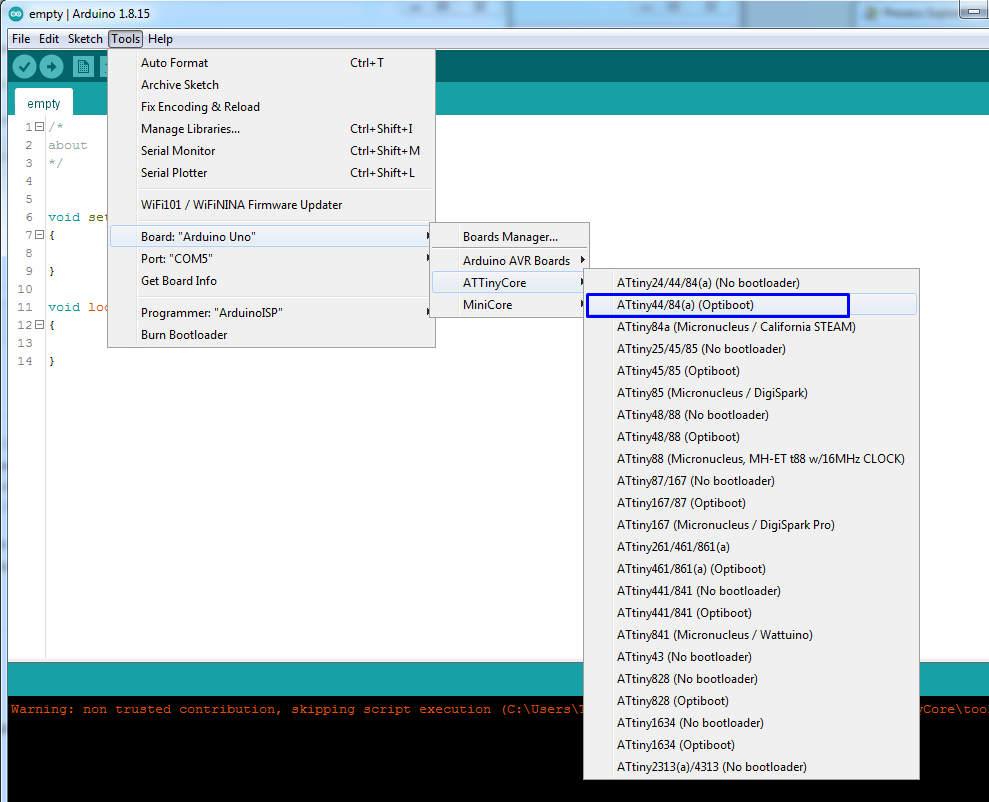
I don't think ATtiny44/84 supports that, only ISP programming (also called ICSP programming). You can use Uno as a programmer for that by running the ArduinoISP sketch.
Where did you see that? I think it may be possible using Digistump bootloader.
But with only 4K of flash memory, any bootloader is going to take a significant % of flash, leaving you with less for your sketch. Maybe stick to using ISP!
When I programmed 328P, I used only the ICSP port, not the arduino pins. So I was unaware of it's corresponding arduino pin number.
Thanks to you, now I updated my reference pins image with that ICSP port down in the image.
The Reset pin was actually not used in 328P ICSP programming PORT/pins.
I had to link a wire to pin 10. Should I update my image with this little detail as well? as being a general rule? or it was only specific to 328P but not to the other chips?
Thanks !
Yes, you can program your ATmega microcontroller using your Arduino Uno R3 as an ISP. You'll need to connect it via ICSP wiring and upload the Arduino as ISP sketch in the Arduino IDE. Make sure to wire MISO, MOSI, SCK, RESET, VCC, and GND correctly. If the chip doesn’t have a bootloader, you may need to burn one first.