Oh dear.. so you where at step program the programmer ![]()
Don't forget the capacitor before you upload anything to the tiny!
Oh dear.. so you where at step program the programmer ![]()
Don't forget the capacitor before you upload anything to the tiny!
Post the sketch.
YES !!!!! I made IT !!!!
It is working NOW !!!!
Ohooa !!! Thank you mister @ledsyn !!!!
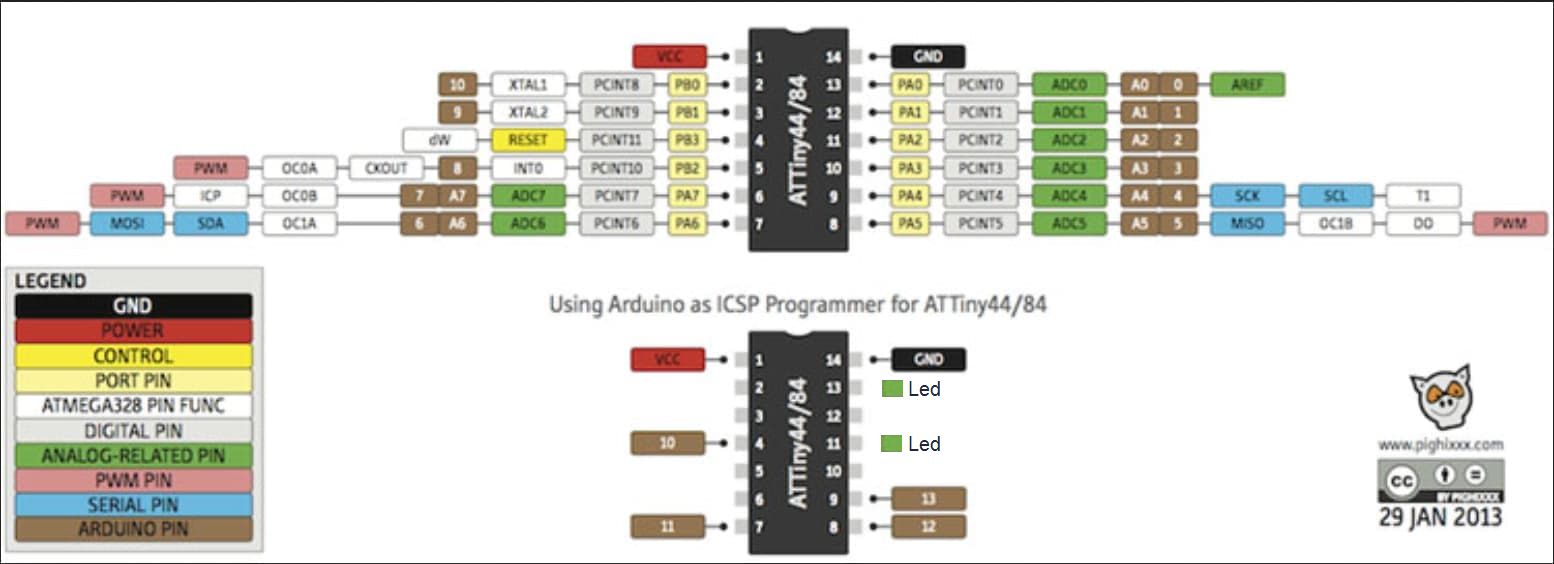
The pins declaration was wrong, because I used the chip pin numbers. Rookie mistake, I know. Haha.
So I quickly realized that those are digital pins I need to insert in my code. The Gray marked ones.
And finally!!! Here is the working code:
/*
  Test code for ATtiny44A
*/

int led1 = 0;
int led2 = 2;

void setup()
{
  pinMode(led1, OUTPUT);
  pinMode(led2, OUTPUT);
}

void loop()
{
  digitalWrite(led1, LOW);
  digitalWrite(led2, HIGH);
  delay(100);
  digitalWrite(led1, HIGH);
  digitalWrite(led2, LOW);
  delay(100);
}
I had a sneaky suspicion ![]()
And you're given the choice of two different pin numberings, when about to burn the (bootloader) fuses.
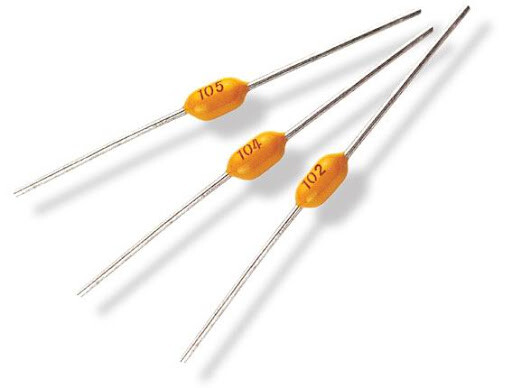
Hey, that 100 nF capacitor, I've never seen something like it. You sure it's a cap and not a resistor? But resistors usually have 4 stripes.. ![]()
Sure you've seen them !!!
Mine are scrapped capacitors from miscellaneous boards.
It is also an old type, with old markings as they used to do it in the past 80's 90's probably.
The equivalent or better say the make up ones you encounter today are these ones:
Inside this zip file, I put for you a small 5sec movie (highly compressed) with the thing in operation ! Watch it now ! And praise it !
00020250316 203428-1.zip (374.8 KB)
Maybe but didn't pay any attention. I use mostly radial MLCC, works for both breadboards and PCB.
Speaking of boards, did you attach the tiny circuit on a bit of cardboard? Very cool and minimalistic.
Yes ... it is MY WAY of working in everything electronics, even with uC. Im working like this from the 90's, in my early and very poor beginnings (also poor now).
I have hundreds of videos on Youtube how Im making my cardboard Boards with a lot of projects. This ATtiny44A here, will add to my projects as well.
Thank you for noticing this insignificant detail. You have good eye and an inquisitive mind. Also thank you for praising it.
I am officially THANK YOU for all your support and staying beside me all this time !!! You're a very good friend !
One additional question !
In my sketch_program I specified originally delay(1000); (=1sec)
But in reality, it was running at a VERY SLOW timing, like 5 sec between LEDs switching!
So I change it at delay(100); so now it is ~1sec LEDs switching.
I remember I specified ![]() - is this might be the cause ?
- is this might be the cause ?
I just 'look back' on my other uC ATmega328 and I used exactly the same 8MHz (internal) clock to that as well.
What might be the problem? -Also you can see the real speed in my small video !!!
I've only read about it but never experienced it. Maybe if the (No) bootloader was burned using one clock speed and the sketch was uploaded and the clock speed was set to something different, I dunno.
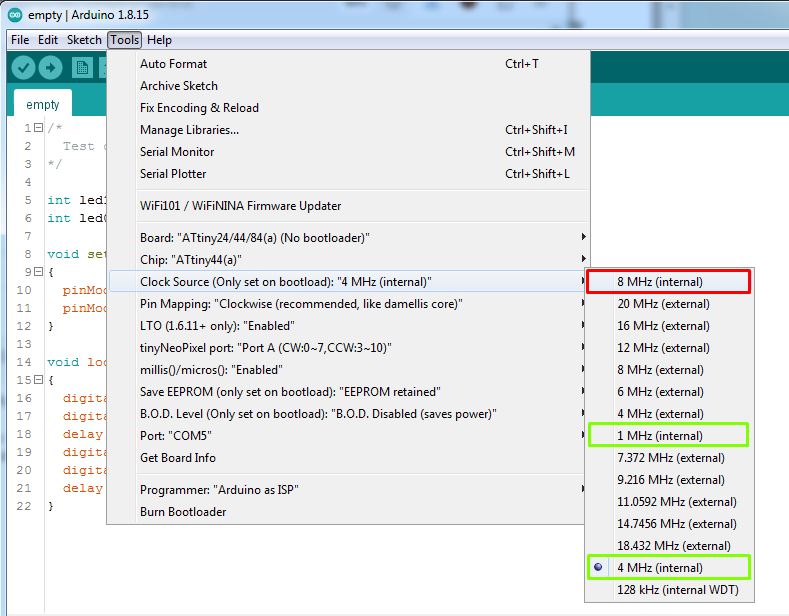
I solved the clock speed problem !
If Im choosing 1MHz OR 4MHz (internal) options, both of them are driving the code correctly, the speed is as in my delay function in reality as well.
But ONLY when Im choosing the 8MHz (internal) option, everything is slowing down 10 times !!!!
So this must be a BUG - probably specific for my ATtiny44A chip? or for the entire series of ATtiny24,44,84 chips.
The whole ATtinyX4 family share the same core. It's the amount of mem that differs.