Also I used other Arduino Nano's they are working fine with the same Arduino IDE, mean to say no issue with the drivers of ports and Arduino IDE
Another Important thing is that I connect no pins just to connect Arduino UNO with my computer and it's leds on which are:
L, TX and ON continuously
I think there must be error at TX pin however I press reset button several time also connect GND with RESET by pulgging off to it also connect TX and RX with GND to reset them but the error remains
I select the Arduino UNO borad in the Arduino IDE
It's TX pin continuously on and it's led L and also the ON ked
when i want to upload the code it takes time and then it shows above errors
I think there may be issue with TX pin as it transmits data continuously that'swhy it's led on
Connecting TX to ground is unhealthy for the 328P microprocessor; you might have damaged the pin that way. And it will never reset a pin; I'm not sure where you did get that idea from.
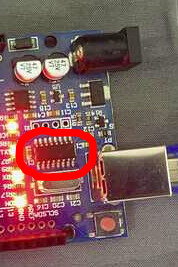
When you did that, did the TX LED stop flashing? If not, I suspect that the CH340 serial-to-usb converter (next to the 12MHz crystal near the USB connector) is damaged. The TX and RX LEDs are controlled by that serial-to-usb converter.
Can you tell some of the history of the board. Did it ever work? If yes, what was the last project that you were working on when it died?
I made line following robot at that time with 4 motors and 2 IR sensors
At that time the code was uploaded and worked fine
but when I tried after a 1 or 1.5 year now it is not working
Also when I connect TX with GND the RX led is on with this TX led has no effect it still on as it is earlier in the above picture you see
Here how it looks:
It could be a serial flood. Try resetting with the button on the arduino and see if it takes a moment before it comes on, if so the odds are high you are flooding the serial port.
--------------------------[ Serial Flood ]-----------------------------------------
Take these steps:
Power off the board completely
Remove the USB cable
Hold down the Reset button
keep it held down (or, run a jumper wire from the RESET pin to the GND pin).
Still holding down Reset reconnect the USB cable.
Start uploading a sketch that does not have this problem (I use the Blink sketch).
When you see the Receive light blink, release the Reset button
Note: I have seen this happen several times when I flood the serial output. An indication is the tx light is stuck on.
Let us know if this happens. I always put a 5 second delay in the beginning of setup to make recovery from something like this. Expect you may have to try several times to get it to take the blink sketch.
Also when i select Arduino UNO board in Arduino IDE it not shows me any of it's bootloader processor
I tried to burn bootloader in this with the working arduino nano but still bootloader also not burned in it
That is normal. An official Uno only exists with the 328P processor and optiboot bootloader.
In post #8 I stated that "(at least) the serial-to-usb converter" is faulty. Assuming that your wiring for the burning of the bootloader is correct (I can check it now), this now sounds like there is more wrong; I suggest that you get a new board for your project (and basically throw this Uno away).