Lcd_countdown_w_LEDnBuzzer

I NEED HELPP!
Hi I’m currently enrolled in a mechatronics and robotics class and I want to make a countdown in my lcd screen wired to arduino. I want to use the lcd, 3 led lights, active buzzer, and push button. Although I’m stuck in the coding part, I have looked at many videos and read all of the other post for coding here but I’m unable to find what I want.

I want my my lcd to always say welcome until button is touched then when button is touch I want it to say time and have at least 2 min of countdown while green led stays on. At half time I want my yellow led to turn on and green to turn off, when the timer is 20 seconds I want the red led to turn on and at 10 sec I want my buzzer to go on. To the final screen saying thank you for playing, and when button is push again the progress will reset to the beginning. If anyone can help I would appreciate it.

What is your problem, exactly? You've said what you want, but you haven't said what part you're having trouble with (or shown the code you can't get working for that matter).

But if you're expecting to be able to find a pre written sketch that will do exactly what you want it to do without writing anything yourself, you will be disappointed.

I do have a code I will show it down below, I tested everything and I upload it to arduino coding but it’s says so many errors. I’m not sure if I did it right I have never used an lcd before.

#include <LiquidCrystal.h>

const uint8_t button = 8;

const uint8_t LedG = 6, LedY = 13, LedR = 7:

const uint8_t Buzzer = 9;

const int rs = 12, en = 10, d4 = 5, d5 = 4, d6 = 3, d7 = 2;

LiquidCrystal lcd(rs,en,d4,d5,d6,d7);

const unsigned long TURN_MS = 10000;

const unsigned long WARN_Y_MS = 4000;

const unsigned long WARN_R_MS = 2000;

Volatile bool buttonPressed = false;

Unsigned long lastbuttonTime = 0;

enum state {IDLE, RUNNING, TIMEOUT } state = IDLE;

unsigned long deadline = 0;

Void onButton() {

Unsigned long now = millis();

If (now - lastbuttonTime > 80) {

buttonpressed = true;

lastbuttonTime = now;

}

}

Void beep(int fre, int ms, int pause=60){

tone(Buzzer, freq, ms);

delay(ms + pause);

Void startTurn(){

deadline = millis() + TURN_MS;

state = RUNNING;

for (int i=0; i<2; i++) { beep(1000, 80, 70); }

}

void lightsFor(unisgned long remain){

digitalWrite(LedG, remain > WARN_Y_MS);

digitalWrite(LedY, (remain <= WARN_Y_MS && remain > WARN_R_MS));

digitalWrite(LedR, remain <= WARN_R_MS);

}

void lcdShow(unisgned long remainMs){

lcd.setCursor(0,0): lcd. print(“ Timer Run “);

lcd.setCursor(0,1);

char line2[17];

snprintf(line2, 17, “Time: %3lus “, remainMs/1000);

lcd.print(line2);

}

void setup(){

pinMode (button, INPUT_PULLUP);

attachInterrupt(digitalPinToInterrupt(button), onButton, FALLING);

pinMode (LedG, OUTPUT);

pinMode (LedY, OUTPUT);

pinMode (LedR, OUTPUT);

pinMode (Buzzer, OUTPUT);

lcd.init();

lcd.backlight();

lcd.setCursor(0,0);

lcd.print(“Press to start “);

lcd.setCursor(0,1);

lcd.print(“ Brain Countdown Timer “);

}

void loop(){

If (buttonPressed){

buttonPressed = false;

startTurn();

}

if (state == RUNNING) {

long remain = (long)deadline - (long)millis();

if (remain <= 0) {

state = TIMEOUT;

int tones[] = {1200, 1000, 800, 600, 400};

for (uint8_t i = 0; i < 5; i++) { beep(tones[i], 120, 30); }

for (int i=0; i<3 && state==TIMEOUT; i++) {

digitalWrite(LedR, HIGH);

delay(150);

digitalWrite(LedR, LOW);

delay(150);

}

lcd.clear();

lcd.setCursor(0,0);

lcd.print (“ TIME IS UP “);

lcd.setCursor(0,1);

lcd.print (“Thanks For Playing”);

} else {

lightsFor(remain);

lcdShow(remain);

}

}

}

I'm not going to lie to you; that's really bad code. It's gibberish, in fact. Let me guess; you asked an AI to generate it for you?

Umm…no I did not, I have many videos and the only one that I understood was on of a women wiring the same thing as I and it worked for her. Although I think that she was using something else like the site to code it or a different lcd not sure. I’ll put the link below

Excuse my spelling :expressionless_face:

If this is important you will read the forum guidelines about posting code and using code tags. The next thing that will help us help you is to post your annotated schematic. I do not use frizzes, they are wiring diagrams not schematics.

You need to post links to technical information on all the hardware devices you are using. I have several LCD devices and they all wire different, when wired properly they work.

You have LED lights?? Arduino?? Active Buzzer?? Hint the reset button on most Arduinos will start the code over.

The first recommendation I will make is you go to your library or purchase a copy of the Arduino Cookbook, you will find most of what you need along with examples, code, and explanations of how it works. The material in there is mostly basic Arduino.

This should get you started with the basics.

The compiler does not excuse poor spelling, I'm afraid. Nor does it excuse capitalized keywords, procedures nested within other procedures, etc., etc. And those 3 things are the cause of most, if not all, of your error messages.

I could go through your code, correct your spelling, fix your keywords, move procedures to their proper syntactical positions, but that wouldn't help you. You wouldn't understand why I'd done what I'd done.

What will help you is starting with the first error message, fixing that, recompiling, fixing the next top error message, and continuing on through your code until it compiles cleanly. The compiler's error messages are generally quite helpful; at least for the first error. After that it tends to get very confused.

So: look at the first error message, fix that, recompile. Repeat.

And as @gilshultz suggested, get yourself a beginner's Arduino book and start reading. Me, I started with the "Arduino for Dummies" book way back in the day. The Dummies series is great for assuming nothing and quickly bringing you up to speed on any number of subjects. I've lost count of the number of topics I began learning about with one of their books.

@gilshultz
@van_der_decken

Well, thank you to you to both of you I’m going to try to do what you both have said and improve my code and skills to post and follow the guideline for further help.

If you don’t mind receiving another tip: start slowly. Divide to conquer.

  1. make the button work. You will have to learn debouncing;
  2. make the LEDs go on and off in order within the required timestamps;
  3. make the buzzer work;
  4. make the LCD work. You’ll have to improve soldering skills if you’re not using a LCD with the I2C adapter;
  5. start putting everything together.

The people here can help you if you encounter difficulties at any of the steps.

Videos are eye candy. Find articles with diagrams and descriptions, some even have code snippets. Build the project in stages using the examples provided with each library. The hard part is deciding which library to use. Searching via google and/or searching the library manager is what I do.
When you were born did you come into the world running a marathon, or just crawling. Same with code.
HINT, see tutorials here re 'doing many things at once', and 'state machine'. It would be wise to look at at least 3 tutorials on the same subject as there are many solutions.

Yes, that’s how I started making the code and wiring for button, LED lights, and buzzer work because I have worked with them on past robots. The only one that I don’t understand the coding for is lcd since I have never worked with it. And I made it work by following what @sonofcy said, looking at diagrams and articles but not sure on how to put everything together. Im currently working on trying to put everything together on one code, I’ll seek further help if I need it. Tyy

@sonofcy
@Brazilino

The key for the final step is also in @sonofcy post: a state machine.

In a state machine, you can combine different actions within the same sketch. In each state, a group of tasks is performed. And that is exactly what you described.

State 1: Welcome message is displayed on the LCD until a button is pressed
State 2: after the button press, green LED lights, LCD shows time and countdown.
State 3: after half time passed, yellow LED lights, green goes off.
State 4: at 20 secs left, red led turns on
State 5: at 10 secs left, buzzer is on.
State 6: all goes off, LCD shows “Thank you” message until the button is pressed again.

States 2 through 5 can be put together and reduce the system to 3 states: idle, working, finished.

Anyway, there are many different ways to go further.

Just look at the examples (circled in RED) for the LiquidCrystal I2C library. Make sure you get the I2C in order to save pins.

Those two won't go together.
Only a passive buzzer can play tones.
An active buzzer makes a tone by itself by just powering it on.
Leo..

I hope you know mechatronics is not about finding pre-written code to fit an assignment, to copy and turn in as your work.

@xfpd I understand that, that’s why I am asking for help because Im unable to do it and we are on spring break so my teacher is unable to help. My last resource being searching on the internet. I’m not asking for a pre-written code if you interpret it that way then I can’t do anything about it.

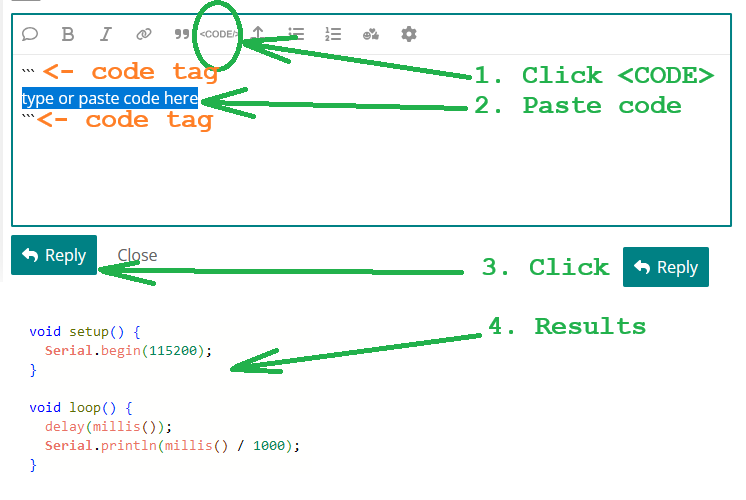
Here is some important help: In post #3, format your code and put it in a <code>block (as you have been asked), like this:

Show these errors, also in their own <code> block.

What are you unable to do?

More help: I see you used a converter to scan an image into text. The scanner did not work. Now you get to correct all the errors... Spelling counts.
-- Change Void to void.
-- Change Unsigned to unsigned
-- Change Volatile to volatile
-- Change If to if
-- Change “ (ASCII #342 a Windows character) to " (ASCII #34, a double-quote)
-- Change ” (ASCII #128, a Windows character) to " (ASCII #34)
-- Change unisgned to unsigned
-- Change mills to millis
-- Change buttonpressed to buttonPressed
-- Change fre to freq
-- Change the two, badly placed line terminators from : to ;
-- lcd.init() and lcd.backlight() are for an I2C LCD, not your 4-bit command LCD.

That will get you to the state of "compiling"... and then you will see that your code is a mix of bad code that needs to be corrected.
-- Only pins 2 and 3 can generate interrupts (try swapping 2 and 8 in code and wiring)
-- LCD is only 16 characters wide.
-- LCD characters written to the screen must be over-written, or they persist

In the end, it "works."


About the spelling with the capital letters it was my mistake because I was doing the code in my phone since I was not home but honestly the other ones I had no idea so thank you. Looking at the wiring everything I did is okay, I’m currently working on the code after I have watched many videos on how to understand the coding for lcd. I’m doing what @Brazilino said which was doing it step by step and fixing my spelling but I really appreciate your help. I’ll post the code and seek further help if it doesn’t work.

I got some of it working this is my code

#include <LiquidCrystal.h>
int seconds = 0;
int buttonP = 8;
int buttonState;
int yellow;
int green;
int red;

const int rs = 12, en = 10, d4 = 5, d5 = 4, d6 = 3, d7 = 2; 
  LiquidCrystal lcd(rs,en,d4,d5,d6,d7);


void setup() {
   yellow = 13;
  green = 6; 
  red = 7;
    lcd.begin(16,2);
  pinMode(buttonP, INPUT_PULLUP);
  pinMode(yellow, OUTPUT);
  pinMode(green, OUTPUT);
  pinMode(red, OUTPUT);
}

void loop() {
    buttonState = digitalRead(buttonP);
  if(buttonState == HIGH){
    digitalWrite(green, LOW);
    digitalWrite(yellow, LOW);
    digitalWrite(red, LOW);
    lcd.clear();
    lcd.print("Press To Start");
  }

  else{
    digitalWrite(green, HIGH);
    lcd.clear();
    lcd.print("You have 2min");
  }
  delay(100);
}

You must use pin 3 or pin 2 for the button to generate an interrupt. Exchange pin 8 and pin 2 in the code and wiring.