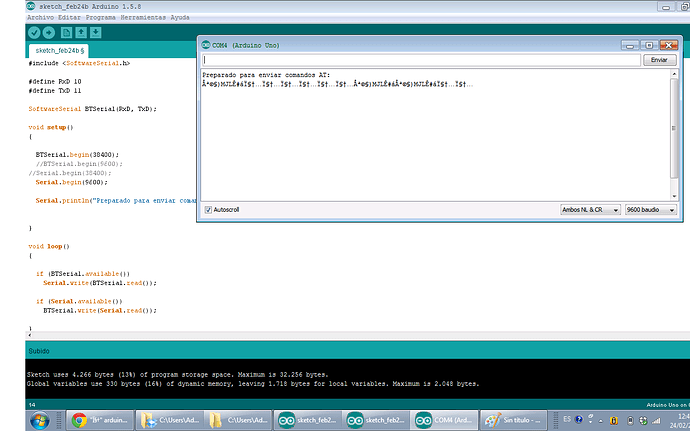
I know this is a really old thread but just in case anyone else has run into these problems I will post my solution,..
After a day of seriously frustrating trial and error, I can now reliably use the BT module in AT mode.
So, some boards have the EN pin (instead of KEY) which is not connected to PIN34 (PI011) and needs a jumper wire soldered to this pin (the upper-most pin on the right of the HC-05, or the 5th pin from the bottom on the HC-06). Other boards have a WAKEUP pin which I assume is equivalent to the EN pin. Anyway, my BT module did not have a button, but some do which needs to be depressed before and during power-up to put the module into "half" AT mode, in which not all AT commands will work. To put it into "full" AT mode, the jumper wire on PIN34 needs to be held HIGH at 3.3V.
It is easier to simply connect the jumper wire to 3.3V before power up, and this is necessary anyway if the module does not have a button. Now, the LED on the module should be blinking slowly (on 2s, off 2s).
Ok, so this will set the module into AT mode, but at a set baud rate of 38400. When using this baud rate, I had a similar problem to others in this thread: the module was returning weird characters like ϧ
instead of "OK". It would seem that the SoftwareSerial library can't work on 38400 baud as suggested earlier in this thread and produces errors if it is on 38400. Either that, or it is a problem with the IDE version I have.
Update: I read on this instructable - http://www.instructables.com/id/Modify-The-HC-05-Bluetooth-Module-Defaults-Using-A/ - that there is a problem with IDE versions below 1.6.1 in linux that doesn't work with 38400 baud. To use the module's 38400 baud rate, upgrade your IDE to 1.6.1 and it should not be displaying strange characters.
The solution: The module can be set to a user-defined rate, which by default is 9600 baud, known to work with SoftwareSerial previous IDE versions. This is done by pulling PIN34 HIGH after power-up of the module. Unlike with the first AT method, this method does not make the led blink slowly; it continues blinking quickly as it would if it was trying to pair with another device. Although there is no indication that it's mode has changed, the module should now be in AT mode at 9600 baud.
Once in "full" AT mode, the baud rate can be configured with the AT+UART=<baudrate>,<numberofstopbits>,<paritybit> command.
Here is my code, which I have tested with an Arduino UNO, IDE version 1.0.3 on Linux. I also used a buffer to store the AT commands before sending/receiving them.
#include <SoftwareSerial.h>

int buf[64]; //buffer to store AT commands
int len = 0; //stores the length of the commands

SoftwareSerial mySerial(10,11); //RX, TX

void setup()
{
  Serial.begin(9600);
  Serial.println("Enter AT commands:");
  mySerial.begin(9600);
}

void loop()
{
  if(Serial.available())
  {
    delay(100); //wait for serial data to arrive
    len = Serial.available(); //store number of bytes to read
    for(int i = 0; i<len; i++) //store all bytes into the buffer
    {
      buf[i] = Serial.read();
    }
    for(int i = 0; i<len; i++)
    {
      mySerial.write(buf[i]);
    }
  }

  if(mySerial.available())
  {
    delay(100); //wait for serial data to arrive
    len = mySerial.available();
    for(int i = 0; i<len; i++)
    {
      buf[i] = mySerial.read();
    }
    for(int i = 0; i<len; i++)
    {
      Serial.write(buf[i]);
    }
  }

}
