Problems uploading to Mega328PB / CH340 UNO clone

Continuing the discussion from Arduino nano ATmega328PB upload issue:

I also bought a bunch of Mega328PB UNO clones that have been super difficult to get to work properly in IDE 2.X. I finally loaded the MiniCore boards file and was able to burn the bootloader using "Arduino as ISP". But like others, trying to get a program to load using the "AVRISP mkII" option never worked. As I was reading this post and saw the suggestion to set the Baud rate to "Default", I recalled reading that the MiniCore bootloader had the ability to "automatically" negotiate/recognize baud rates. Light bulb goes off, so I change the baud rate to 9600 and IDE loads the program no problem, problem solved - NOT. When I try to upload the next version, it fails again. I change the baud rate to 19200 and it loads like a charm but only once. Apparently, the bootloader can pick up on the baud rate if it's changing in the tools menu but not if it's already been set. I just stumbled onto this fix tonight and I wanted to add this info to the thread so others might be able to use their Mega328PB UNO clones with the no-name CH340 chipset.

I also bought a bunch of Mega328PB UNO clones that have been super difficult to get to work properly in IDE 2.X

@malukens Can you post a link to the exact boards you got? Chances are that these are lacking an HV protection diode on the RST pin. The ATmega328PB has slightly different voltage threshold levels compared to 328P, so it’s more likely to accidentally “bump” this into HV programming mode when the diode is not there. I would also be interested to see the error you're getting when using an AVRISPmkII to program the bootloader.

The bootloader, Urboot, has automatic baud rate detection. The host (your PC/Avrdude) sends out a few 0x55 characters, and the bootloader receives these and finds a suitable UBRR value so it can actually see the incoming data as a bunch of 0x55’s. It does this every time you upload.

Default is also a pre-defined baud rate. It’s just a number that usually works well with the clock frequency the user has selected. Since you’re using a 16 MHz external crystal, you should try a baud rate that has 0% error, like 250000 baud. Baud rate error can easily be calculated here, and is very trivial.

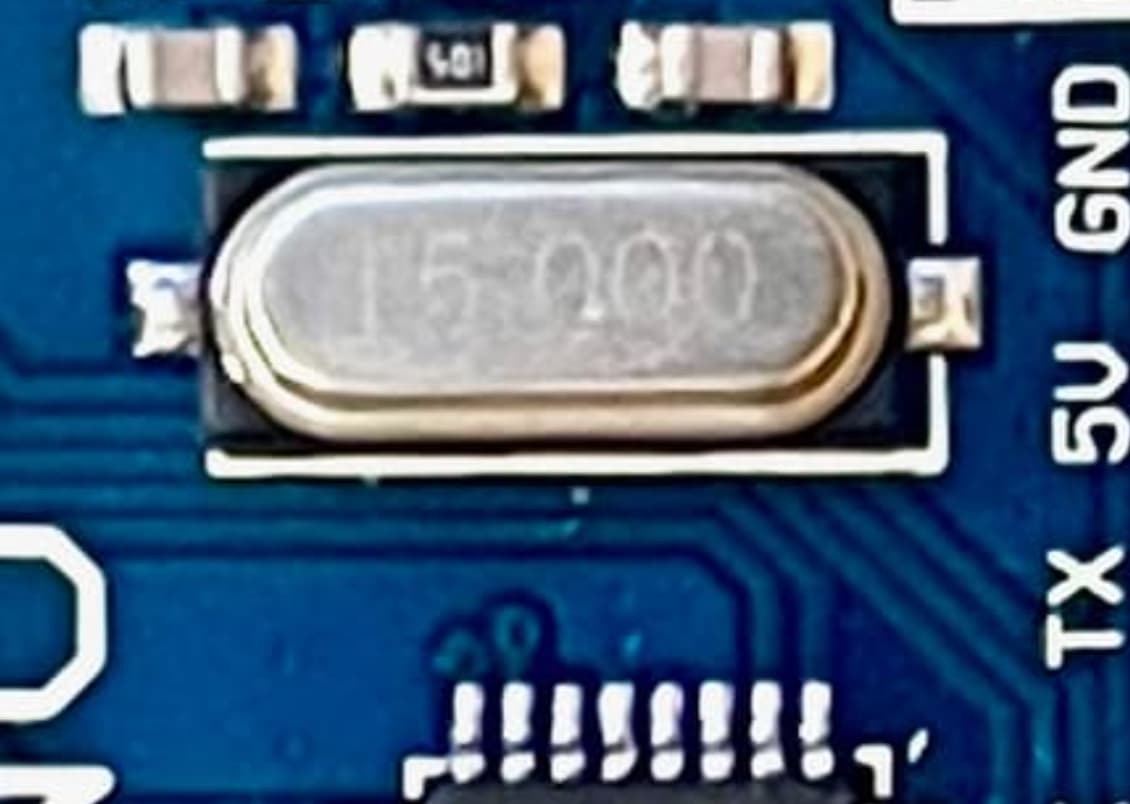
I bought these clones on AliExpress in 2022. I should pay more attention to the feedback as there are only 2 ratings and looking back now, they could well be seller-planted links.
aliexpress.us/item/3256804378059025.html


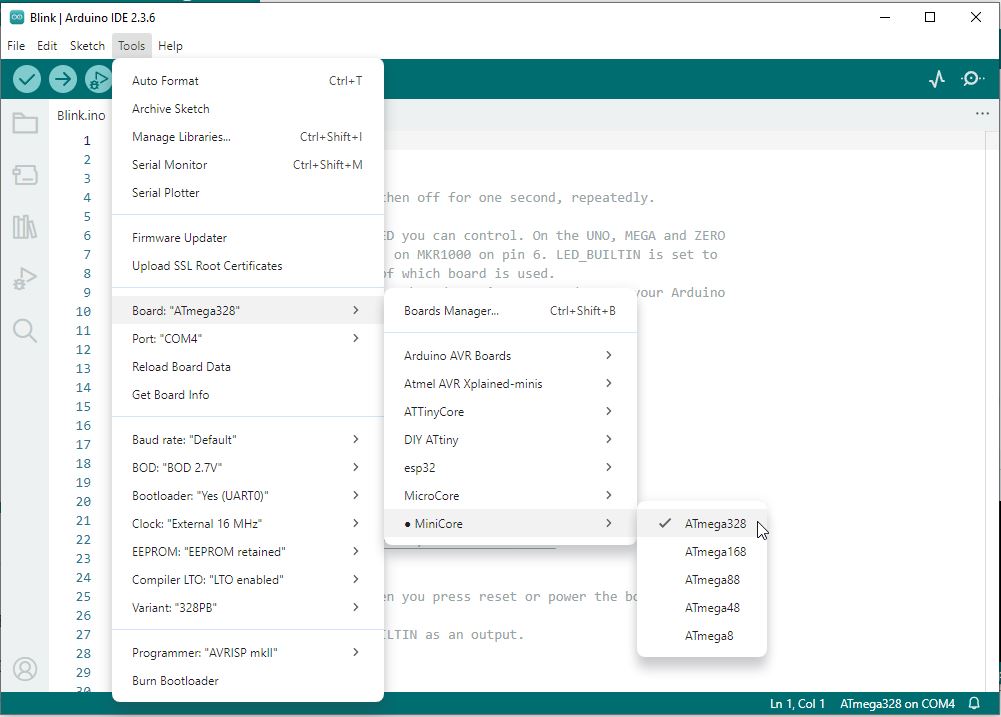
Here is the text from the upload using AVRISPmkII:
uino.1
Copyright see avrdude/AUTHORS at main · avrdudes/avrdude · GitHub

System wide configuration file is C:\Users\malukens\AppData\Local\Arduino15\packages\MiniCore\tools\avrdude\8.0-arduino.1\etc\avrdude.conf

Using port : COM4
Using programmer : urclock
Setting baud rate : 115200
Error: cannot set com-state for \.\COM4
Error: unable to open port COM4 for programmer urclock

Avrdude done. Thank you.
Failed uploading: uploading error: exit status 1


Here is the text after setting baud rate to 9600:
Avrdude version 8.0-arduino.1
Copyright see avrdude/AUTHORS at main · avrdudes/avrdude · GitHub

System wide configuration file is C:\Users\malukens\AppData\Local\Arduino15\packages\MiniCore\tools\avrdude\8.0-arduino.1\etc\avrdude.conf

Using port : COM4
Using programmer : urclock
Setting baud rate : 9600
AVR part : ATmega328PB
Programming modes : SPM, ISP, HVPP, debugWIRE
Programmer type : Urclock
Description : Urboot bootloaders using urprotocol
Protocol : Urprotocol

AVR device initialized and ready to accept instructions
Device signature = 1E 95 16 (ATmega328PB)

Processing -U eeprom:w:C:\Users\malukens\AppData\Local\arduino\sketches\61A957A3F6D9D5799D38488415E5A45A/Blink.ino.eep:i
Warning: no eeprom data found in Intel Hex file C:\Users\malukens\AppData\Local\arduino\sketches\61A957A3F6D9D5799D38488415E5A45A/Blink.ino.eep
Reading 0 bytes for eeprom from input file Blink.ino.eep
in 0 sections of [0, -1]: 0 pages and 0 pad bytes
Writing 0 bytes to eeprom
Writing | ################################################## | 100% 0.00s
0 bytes of eeprom written

Processing -U flash:w:C:\Users\malukens\AppData\Local\arduino\sketches\61A957A3F6D9D5799D38488415E5A45A/Blink.ino.hex:i
Reading 1084 bytes for flash from input file Blink.ino.hex
in 1 section [0, 0x43b]: 9 pages and 68 pad bytes
Preparing flash input for device bootloader
1280 bytes in 2 sections of [0, 0x7e7f]: 10 pages and 0 pad bytes
Writing 1280 bytes to flash
Writing | ################################################## | 100% 1.46s
1280 bytes of flash written
Avrdude done. Thank you.


Here is the upload log if I simply hit UPLOAD again:
Avrdude version 8.0-arduino.1
Copyright see avrdude/AUTHORS at main · avrdudes/avrdude · GitHub

System wide configuration file is C:\Users\malukens\AppData\Local\Arduino15\packages\MiniCore\tools\avrdude\8.0-arduino.1\etc\avrdude.conf

Using port : COM4
Using programmer : urclock
Setting baud rate : 9600
Error: cannot set com-state for \.\COM4
Error: unable to open port COM4 for programmer urclock

Avrdude done. Thank you.
Failed uploading: uploading error: exit status 1


If I change the baud rate to 19200 it works again.
If I change baud rate to "Default" it fails.
I tried changing baud rates again and the only two that work are 19200 and 9600.
At least it is reproducible so I can get them to load, these board will get consumed in the next projects I do that are not space limited.

Hi @malukens.

This error occurs when uploading to the boards that use specific batches of the WCH CH340 USB chip (note the fact that the "CH340" chip on your board is not labeled). The problem only occurs when using the latest version of the CH340 Windows driver.

The workaround for the problem is to perform a "roll back" to an older version of the driver that is compatible with these problematic "CH340" chips. I'll provide instructions you can follow to do that:

  1. Click the following link to download the previous version of the driver from an archive of the chip manufacturer's website:
    https://web.archive.org/web/20220519153932/https://www.wch-ic.com/downloads/file/65.html
  2. Wait for the download to finish.
  3. Run the downloaded CH341SER.EXE file.
  4. A "User Account Control" dialog may now appear asking "Do you want to allow this app to make changes to your device?". Click the "Yes" button.
  5. A "DriverSetup(X64)" dialog will open. Click the "INSTALL" button in the dialog.
  6. Wait for the driver installation to finish, as indicated by the appearance of a "Driver install success!" dialog.
  7. Click the "OK" button in the "Driver install success!" dialog.
    The dialog will close.
  8. Click the X icon at the top right of the "DriverSetup(X64)" dialog
    The dialog will close.
  9. Close Arduino IDE if it is running.
  10. Connect the Arduino board to your computer with a USB cable.
  11. Open the Windows Device Manager.
  12. Select View > Devices by type from the Device Manager menus.
  13. Open the "View" menu.
  14. If there is a to the left of the "Show hidden devices" menu item, click on "Show hidden devices" to disable it.
  15. Open the "Ports (COM & LPT)" section of the Device Manager tree.
  16. You should see a port identified as "USB-SERIAL CH340 (COMn)" under the "Ports (COM & LPT)" section (where "COMn" is some serial port e.g., COM4). Double click on that item.
    The "USB-SERIAL CH340 (COMn) Properties" dialog will open.
  17. Select the "Driver" tab of the "USB-SERIAL CH340 (COMn) Properties" dialog.
  18. You will see a "Roll Back Driver" button in the dialog. If it is not clickable, perform the following instructions:
    1. Click the "Update driver" button.
      An "Update Drivers Device - USB-SERIAL CH340 (COMn)" dialog will open.
    2. Click on "Search automatically for drivers" in the "Update Drivers Device - USB-SERIAL CH340 (COMn)" dialog.
    3. You should now see the driver installation wizard update the driver. Wait for the update to finish, as indicated by the message "Windows has successfully updated your drivers" in the dialog.
      :red_exclamation_mark: It is possible you will instead see the message "The best drivers are already installed". If so, please stop following the instructions here and reply on this forum topic to let us know. I'll provide alternative instructions you can follow.
    4. Click the "Close" button in the "Update Drivers Device - USB-SERIAL CH340 (COMn)" dialog.
      The dialog will close.
  19. Click the "Roll Back Driver" button in the "USB-SERIAL CH340 (COMn) Properties" dialog.
    The "Driver Package rollback" dialog will open.
  20. Click the radio button next to "My apps don't work with this driver" in the "Driver Package rollback" dialog .
  21. Click the "Yes" button.
    The "Driver Package rollback" dialog will close.
  22. Click the "Close" button in the "USB-SERIAL CH340 (COMn) Properties" dialog.

Now start Arduino IDE again and repeat whatever you were doing before when you encountered that error before. Hopefully this time everything will work as expected.

1 Like

I got to step 18.3 and received the dreaded "The best drivers are already installed "

I have found that when the driver installation gets into this state, it can be solved by uninstalling and then reinstalling the drivers. After that, the "roll back" option should be enabled.

I'll provide instructions you can follow to do that:

  1. Close Arduino IDE if it is running.
  2. Connect the Arduino board to your computer with a USB cable.
  3. Open the Windows Device Manager.
  4. Select View > Devices by type from the Device Manager menus.
  5. Open the "View" menu.
  6. If there is a to the left of the "Show hidden devices" menu item, click on "Show hidden devices" to disable it.
  7. Open the "Ports (COM & LPT)" section of the Device Manager tree.
  8. You should see a port identified as "USB-SERIAL CH340 (COMn)" under the "Ports (COM & LPT)" section (where "COMn" is some serial port e.g., COM4). Double click on that item.
    The "USB-SERIAL CH340 (COMn) Properties" dialog will open.
  9. Select the "Driver" tab of the "USB-SERIAL CH340 (COMn) Properties" dialog.
  10. Click the "Uninstall Device" button.
    The "Uninstall Device" dialog will open.
  11. Check the box next to "☐ Attempt to remove the driver for this device.".
  12. Click the "Uninstall" button.
    The "Uninstall Device" and "USB-SERIAL CH340 (COMn) Properties" dialogs will close.
  13. Disconnect the USB cable of the Arduino board from your computer.
  14. Reconnect the USB cable of the Arduino board to your computer.
  15. Wait for the "USB-SERIAL CH340 (COMn)" device to appear under the "Ports (COM & LPT)" section of the Device Manager tree.
    :red_exclamation_mark: This will take a couple of minutes as Windows must first automatically reinstall the driver.
    :red_exclamation_mark: It might appear first as a "USB2.0-Serial" device under the "Other devices section of the tree. Just wait for a little longer and it will appear in its final place under the "Ports (COM & LPT)" section.
  16. Click the following link to download the previous version of the driver from an archive of the chip manufacturer's website:
    https://web.archive.org/web/20220519153932/https://www.wch-ic.com/downloads/file/65.html
  17. Wait for the download to finish.
  18. Run the downloaded CH341SER.EXE file.
  19. A "User Account Control" dialog may now appear asking "Do you want to allow this app to make changes to your device?". Click the "Yes" button.
  20. A "DriverSetup(X64)" dialog will open. Click the "INSTALL" button in the dialog.
  21. Wait for the driver installation to finish, as indicated by the appearance of a "Driver install success!" dialog.
  22. Click the "OK" button in the "Driver install success!" dialog.
    The dialog will close.
  23. Click the X icon at the top right of the "DriverSetup(X64)" dialog.
    The dialog will close.
  24. Switch back to the Windows "Device Manager".
  25. Double click on the "USB-SERIAL CH340 (COMn)" device under the "Ports (COM & LPT)" section.
    The "USB-SERIAL CH340 (COMn) Properties" dialog will open.
  26. Select the "Driver" tab of the "USB-SERIAL CH340 (COMn) Properties" dialog.
  27. Click the "Update driver" button.
    An "Update Drivers Device - USB-SERIAL CH340 (COMn)" dialog will open.
  28. Click on "Search automatically for drivers" in the "Update Drivers Device - USB-SERIAL CH340 (COMn)" dialog.
  29. You should now see the driver installation wizard update the driver. Wait for the update to finish, as indicated by the message "Windows has successfully updated your drivers" in the dialog.
  30. Click the "Close" button in the "Update Drivers Device - USB-SERIAL CH340 (COMn)" dialog.
    The dialog will close.
  31. Click the "Roll Back Driver" button in the "USB-SERIAL CH340 (COMn) Properties" dialog.
    The "Driver Package rollback" dialog will open.
  32. Click the radio button next to "My apps don't work with this driver" in the "Driver Package rollback" dialog .
  33. Click the "Yes" button.
    The "Driver Package rollback" dialog will close.
  34. Click the "Close" button in the "USB-SERIAL CH340 (COMn) Properties" dialog.

Now start Arduino IDE again and repeat whatever you were doing before when you encountered that error before. Hopefully this time everything will work as expected.

ptillisch
Many Thanks! That was a bit involved but not difficult and it fixed the issue with baud rates. I am now able to upload using "Default" baud rate and uploads are running at 115200!

You are welcome. I'm glad it is working now.

Regards, Per

Is it a defect in the image or is the ATmega crystal marked as if it were 15MHz instead of 16?

Sharp eye and good find. Urboot and CH340G must be doing the job of compensating for the incorrect baud rate. I’m amazed it’s working at all.

Sharp eye and good find. Urboot and CH340G must be doing the job of compensating for the incorrect baud rate

Wow, That's sloppy! I can't believe they are selling them like this.

I’m amazed it’s working at all.

The AVR itself can work well with 115200 baud at 15 MHz, see tables below. But the beauty is Urboot's auto baud detection logic. It will always try to use the best UBRR value to get as little error as possible, regardless of the. In fact, MiniCore loads the same (UART0/UART1) pre-compiled bootloader hex file for the 328PB regardless of which oscillator option you're using. The only reason why the oscillator option is there is to set the correct fuse bits and get the timing (delay(), millis(), micros(), etc) right. But Urboot "doesn't care" about the actual clock speed because of the auto baud rate detection it utilizes every time you upload something.

Just an update, with better picture it's apparent that the crystal is 16 MHz.

Thanks for all the help getting these 328PB UNO clones working.

The picture in post #3 shows the crystal is labeled 15000 with the text oriented so that the bottom of the numbers faces toward the MCU. This better picture shows 16000 with the text oriented so that the top of the numbers faces toward the MCU. So that is a different board.

I bought 4 of these and I can assure you that all four have 16 MHz crystals. One crystal is rotated 180° from the other 3 but the orientation is not important.
And, I just noticed this sticker on the bottom of one of the boards.


Funny thing is, apparently when I bought these 3 years ago, I figured out that I needed to load the "OLD" CH340 drivers :frowning:
Thanks again for all the help and comments. Hopefully it saves someone a lot of frustration and time in the future.