PTC Heater Control

Hello,
I have been trying to control my ptc heater (12vdc 10a) for the past few months and i have come across one issue or the other and now another one has come up. i want to interface the heater with my esp32 and control it (preferably with pwm) but nothing seems to be working.
i have tried a 12v 10a relay, didn't work. i tried an irf3205 mosfet that worked but the mosfet started overheating, i also tried a 15a 400w mosfet trigger switch drive module also over heated. tried driving the mosfet with the module, both overheated. would have also tried an irlz44n but i can't find it anywhere close and would have to order it from abroad and i am strapped on time.
now someone suggested a bts7960 motor driver since it is adept at controlling high voltage and amperage devices and i got that but that is not working either. the out positive and negative pins are reading 0v and I'm honestly at my wits end/

Thank you

HI, @kadakisama
Welcome to the forum.

Can you please post your schematic and code that you have tried.

Thank... Tom.... :smiley: :+1: :coffee: :australia:

Thank you Tom

// Define pin connections
#define RPWM   25    // Choose any PWM-capable pin
#define LPWM   26
#define R_EN   33
#define L_EN   32

void setup() {
  // Set control pins as outputs
  pinMode(RPWM, OUTPUT);
  pinMode(LPWM, OUTPUT);
  pinMode(R_EN, OUTPUT);
  pinMode(L_EN, OUTPUT);

  // Enable forward direction
  digitalWrite(R_EN, HIGH);   // Enable forward
  digitalWrite(L_EN, LOW);    // Disable reverse

  // Start with 50% power (PWM)
  ledcAttach(RPWM, 1000, 8);     // Attach RPWM to PWM channel 0
  //ledcSetup(0, 1000, 8);      // Channel 0, 1kHz frequency, 8-bit resolution
  ledcWrite(0, 128);          // 128 out of 255 = ~50% duty cycle

  digitalWrite(LPWM, LOW);    // LPWM LOW (no reverse signal)
}

void loop() {
  // Nothing needed here unless you want dynamic control
}

this is the most recent for the bts7960.

Using a motor driver for a heater seems a little weird and over-complicated.

Why not start with the simplest option, the relay. Let's see the schematic and code for that. And a link to the relay module used. It may be active-low, which may have confused you, and may not be able to directly interface with a 3.3V controller.

Alright Paul
this is the schematic i used. i used only one channel

#define RELAY_PIN  5  // Change to the GPIO pin you're using

void setup() {
  pinMode(RELAY_PIN, OUTPUT);
  digitalWrite(RELAY_PIN, LOW); // Start with relay OFF
}

void loop() {
  // Turn relay ON (heater ON)
  digitalWrite(RELAY_PIN, HIGH);
  delay(5000); // Heater ON for 5 seconds

  // Turn relay OFF (heater OFF)
  digitalWrite(RELAY_PIN, LOW);
  delay(5000); // Heater OFF for 5 seconds
}

and that was the code i used (got it from chatgpt by the way)

Schematic looks ok (except that there is no Arduino in it).

Code looks ok, even chatGPT can't screw up something that simple.

So...

time to elaborate. What did you try? What happened? What did you expect/want to happen? Always describe these things and never say "didn't work" because no-one can help you on that basis.

well the heater didn't come on neither did the led. the power supply (12v 30a) that i was using was giving the required 12v but nothing happened.

Suggestion, use pin 13 for a test like that - the on board LED should show you the output state at the same time as your LED on the relay, so if it doesn't you know directly you've miswired something.

Which Arduino do you have - an Uno?

forgot to specify. im using an esp32

Try connecting the "K1" pin directly to the 3.3V pin of the ESP32 board. If that doesn't work, try the 5V pin.

No, you mentioned it in post #1.

But there are many ESP32 boards available, please give more detail.

okay.
NODEMCU ESP32S
this is the exact one i got: ESP32 Development Board - HUB360

Ok, thanks.


Did it come with header pins soldered? If not, did you solder them, or just push them in (hint: that doesn't work).

If you want to try the BTS7690 again, do this:

Connect Vcc to 3.3V NOT 5V.
Run this code.

// Define pin connections
#define RPWM   25    // Choose any PWM-capable pin
#define LPWM   26
#define R_EN   33
#define L_EN   32

void setup() {
  // Set control pins as outputs
  pinMode(RPWM, OUTPUT);
  pinMode(LPWM, OUTPUT);
  pinMode(R_EN, OUTPUT);
  pinMode(L_EN, OUTPUT);
  digitalWrite(L_EN, LOW);    // Disable reverse
  digitalWrite(LPWM, LOW);

  // Enable forward direction
  digitalWrite(R_EN, HIGH);   // Enable forward
  analogWrite (RPWM, 200);
}

void loop() {
  
}

Hi, @kadakisama

Can you post some images of your project?
So we can see your component layout.

Tom.... :smiley: :+1: :coffee: :australia:

Perhaps you wired the transistors incorrectly.

The BC547 is a very low power transistor (collector current 100 mA maximum) and is not intended for applications like relay control.

Post a link to the relay module data sheet.

it came with everything soldered on


I don't know if you'll be able to see it clearly.

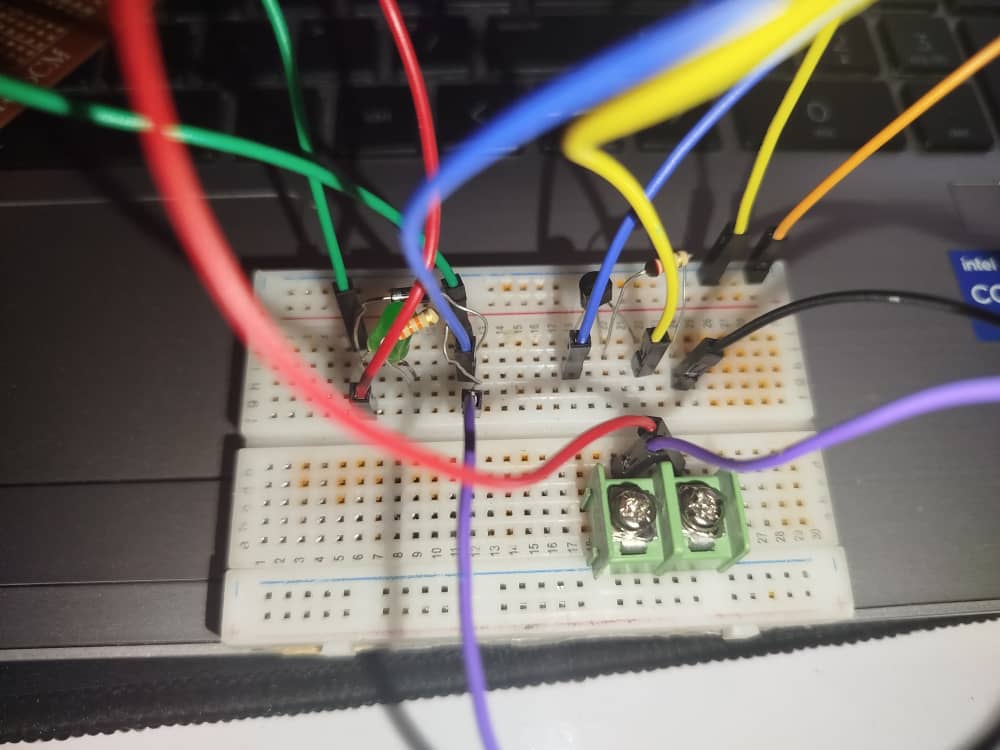
I did this, using an arduino UNO and pin 13 like camsysca suggested. the onboard LED came on but as i was trying to check what else was working. the jumper wire coming from the 12v+ side caught fire.

by the way i found 12v 20a relays and used those instead (in an attempt to account for the cold power)
this is the datasheet (https://www.sigmaelectronica.net/manuals/SRA-12VDC-CL.pdf)

https://belchip.by/sitedocs/trv3.pdf.
This is the datasheet of the relay used

As you can see from that data sheet, the 12V relay has a coil resistance of either 90 or 75 Ohms. The current draw will overheat and/or burn out a BC547 transistor.

It the LED doesn't light, the BC547 is either burned out or miswired.

Pinout from the Fairchild BC547 data sheet: