i tried sg90s and mg90s, both are having ~800ms response time, which is very veery high for my project, i want at least 200ms, but i tried to testing the servos on multiple arduino boards, and esp32 board.
this is is my code to test the servo (arduino code for the arduino board!)
#include <Servo.h>
Servo myservo;
void setup() {
  myservo.attach(9);
  Serial.begin(2000000);
  myservo.write(0);
}
void loop() {
   if (Serial.available() > 3) {
    Serial.println("Received");
    myservo.write(Serial.readString().toInt()); // i also tried write milliseconds too
  }
}
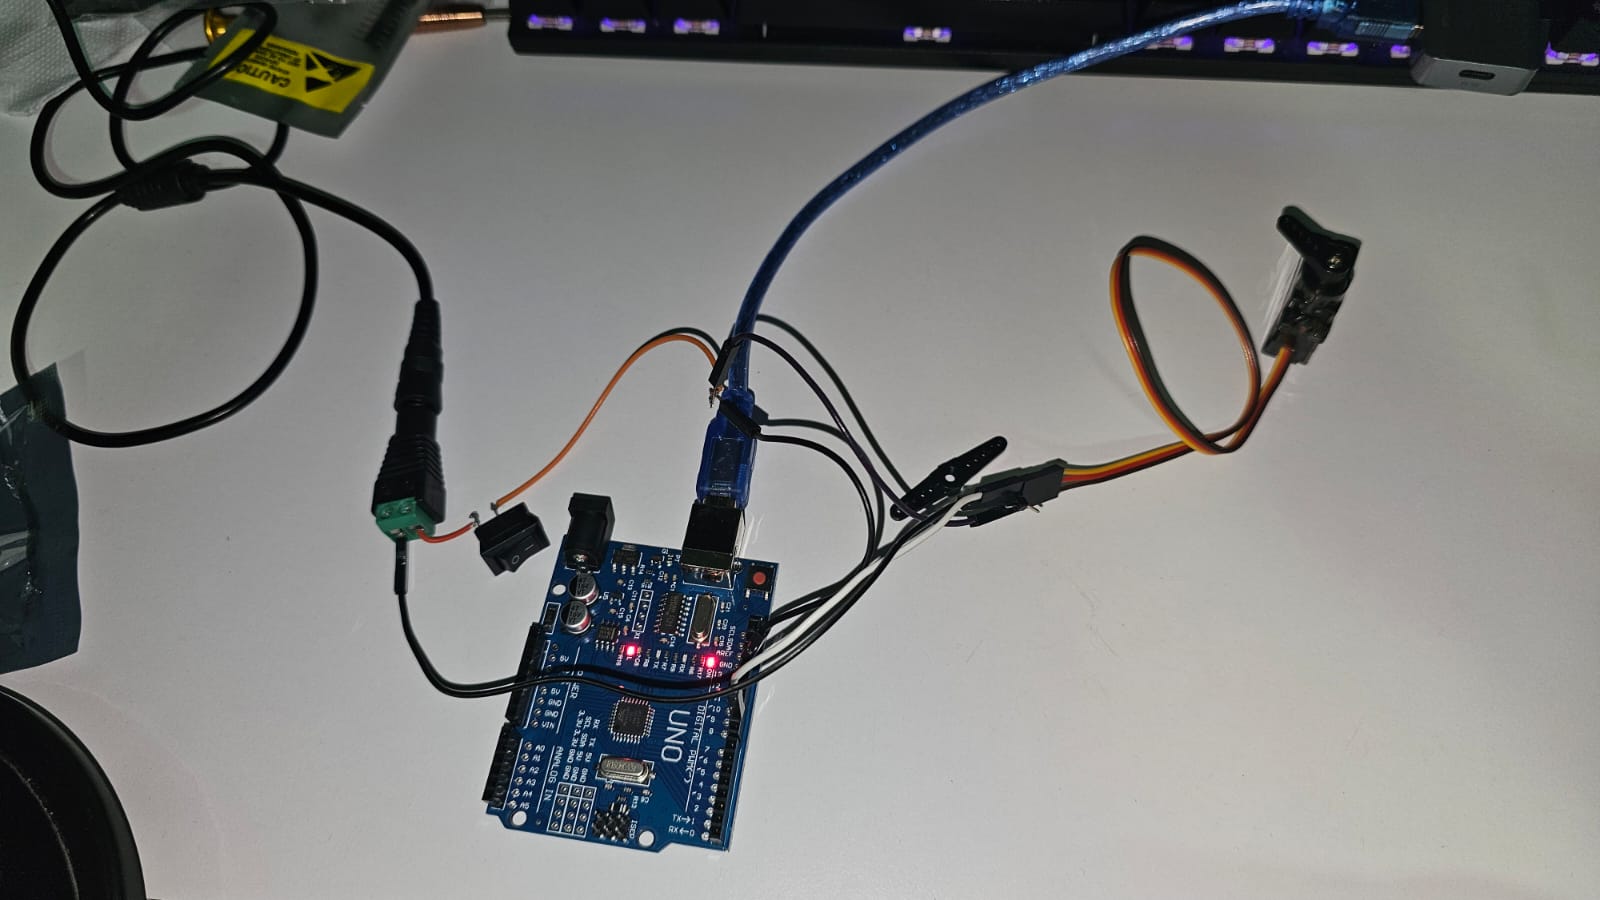
this is my wiring (i tried 5v supply to the servo, and 6v too, same response time, but more rpm)
and this is a youtube video (https://youtube.com/shorts/0b05jf-qMYk), showing the response time, after i've clicked enter to send serial integer to write the postion to the servo.h library.
update: the problem is indeed from the serial, i faced this problem in my project and the serial is not involved, the above code is only for testing, which is in this case, the delay from the serial.
Serial.readString() returns a value when the first non numeric character is read or when its standard timeout of 1000 milliseconds without receiving a character occurs
It is not the servo that is slow in responding, rather it is the Serial input
You can change the timeout period of Serial using the Serial.setTimeout() function
Set serial monitor line ending to "Newline", enter a servo position in Serial monitor and try:
if (Serial.available() > 0)
    {
     int pos =  Serial.parseInt();
      // skip 1 second delay if Serial Monitor set to Newline
      if(Serial.read() == '\n'){};
      servo.write(pos);
      Serial.println(pos);
    }
UPDATE: the problem is not from the serial, i faced this problem in my project and the serial is not involved, the code i provided is only for testing.
The typical rotation speed of those servos is around 0.1 seconds per 60° (100ms) or 300ms for 180° unloaded, what kind of load are your servos swinging?
@mohmedxm - Provide a minimum sketch that shows the error.
For example... this is the fully explicated "Blink without delay()" sketch...
/*
  Blink without Delay

  Turns on and off a light emitting diode (LED) connected to a digital pin,
  without using the delay() function. This means that other code can run at the
  same time without being interrupted by the LED code.

  The circuit:
  - Use the onboard LED.
  - Note: Most Arduinos have an on-board LED you can control. On the UNO, MEGA
    and ZERO it is attached to digital pin 13, on MKR1000 on pin 6. LED_BUILTIN
    is set to the correct LED pin independent of which board is used.
    If you want to know what pin the on-board LED is connected to on your
    Arduino model, check the Technical Specs of your board at:
    https://www.arduino.cc/en/Main/Products

  created 2005
  by David A. Mellis
  modified 8 Feb 2010
  by Paul Stoffregen
  modified 11 Nov 2013
  by Scott Fitzgerald
  modified 9 Jan 2017
  by Arturo Guadalupi

  This example code is in the public domain.

  https://www.arduino.cc/en/Tutorial/BuiltInExamples/BlinkWithoutDelay
*/

// constants won't change. Used here to set a pin number:
const int ledPin = LED_BUILTIN;  // the number of the LED pin

// Variables will change:
int ledState = LOW;  // ledState used to set the LED

// Generally, you should use "unsigned long" for variables that hold time
// The value will quickly become too large for an int to store
unsigned long previousMillis = 0;  // will store last time LED was updated

// constants won't change:
const long interval = 1000;  // interval at which to blink (milliseconds)

void setup() {
  // set the digital pin as output:
  pinMode(ledPin, OUTPUT);
}

void loop() {
  // here is where you'd put code that needs to be running all the time.

  // check to see if it's time to blink the LED; that is, if the difference
  // between the current time and last time you blinked the LED is bigger than
  // the interval at which you want to blink the LED.
  if (millis()- previousMillis >= interval) {
    // save the last time you blinked the LED
    previousMillis = millis();

    // if the LED is off turn it on and vice-versa:
    if (ledState == LOW) {
      ledState = HIGH;
    } else {
      ledState = LOW;
    }

    // set the LED with the ledState of the variable:
    digitalWrite(ledPin, ledState);
  }
}
And this is minimum useful sketch of "blink without delay"...
const int ledPin = LED_BUILTIN;  // the number of the LED pin
int ledState = LOW;  // ledState used to set the LED
unsigned long previousMillis = 0;  // will store last time LED was updated
const long interval = 1000;  // interval at which to blink (milliseconds)

void setup() {
  pinMode(ledPin, OUTPUT);
}

void loop() {
  if (millis() - previousMillis >= interval) {
    previousMillis = millis();
    if (ledState == LOW)
      ledState = HIGH;
    else
      ledState = LOW;
    digitalWrite(ledPin, ledState);
  }
}
yes, the problem in the code above was from the serial reading, but i'm not done yet.
i tested the servo with analogread, and it was ~30ms delay, which is what i want, but that test was done on the arduino board, idk about the esp32, if the problem the library i used there, because my original code is reading data from mpu9250 and 6 buttons , i tested the delay in microseconds before reaching servo.write code, it was 2000microsecond!, but the servo still take delay about 500ms to 700ms to start rotating, i'm about to explode, i just don't know the problem, i will send the code later.
In my project, I didn't use any type of reading serial data, this is why i didn't know that the error in the test code i provided was from serial.read, because i know there was a slow response problem in my project that doesn't have reading serial.