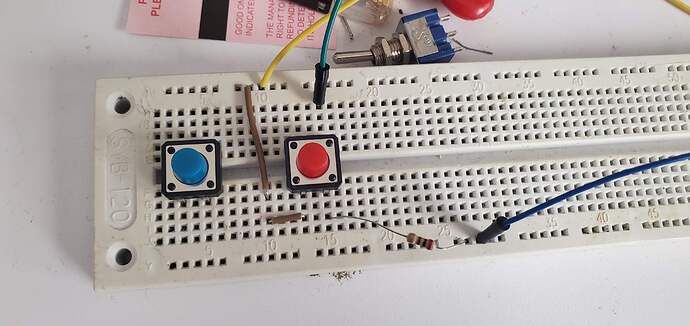
Hello, I am in the middle of trying to make a smart coffee maker for a school project. The only aspect of this that has been difficult is getting this display to work. It is a transparent OLED manufactured by Sparkfun. I will attach pictures showing why that is necessary for the project, plus it looks so cool!!! Only issue, it is such a pain to program. Right now, I am trying to get a button to update the screen with new text. Seems pretty easy, right?
Well, whenever I use pinMode(buttonUp, INPUT), which is in setup, the loop function does not run at all, nothing displays on the screen after the circleTest(). If I comment out the pinMode, the display goes on to show the text I programmed. Here is my code:
#include "HyperDisplay_UG2856KLBAG01.h"   // Your library can be installed here: http://librarymanager/All#SparkFun_Transparent_Graphical_OLED
#include <hyperdisplay.h>                 // The rest of the Layer Cake:         http://librarymanager/All#SparkFun_HyperDisplay_SSD1309
#include <HyperDisplay_SSD1309.h>         //                                     http://librarymanager/All#SparkFun_HyperDisplay
//////////////////////////
//      User Setup      //
//////////////////////////
#define SERIAL_PORT Serial
#define WIRE_PORT Wire      // Used if USE_SPI == 0
#define SPI_PORT SPI        // Used if USE_SPI == 1

#define RES_PIN 2           // Optional
#define CS_PIN 4            // Used only if USE_SPI == 1
#define DC_PIN 5            // Used only if USE_SPI == 1

#define USE_SPI 1           // Choose your interface. 0 = I2C, 1 = SPI
boolean hasRun = false;
const int buttonUp = 8;
int buttonState = 0;

// END USER SETUP


// Object Declaration. A class exists for each interface option
#if USE_SPI
  UG2856KLBAG01_SPI myTOLED;  // Declare a SPI-based Transparent OLED object called myTOLED
#else
  UG2856KLBAG01_I2C myTOLED;  // Declare a I2C-based Transparent OLED object called myTOLED
#endif /* USE_SPI */


void setup() {

  Serial.begin(9600);

  Serial.println(F("Example1_DisplayTest: Transparent Graphical OLED"));

#if USE_SPI
  SPI_PORT.begin();
  myTOLED.begin(CS_PIN, DC_PIN, SPI_PORT);                  // Begin for SPI requires that you provide the CS and DC pin numbers
#else
  WIRE_PORT.begin();
  myTOLED.begin(WIRE_PORT, false, SSD1309_ARD_UNUSED_PIN);  // Begin for I2C has default values for every argument
  Wire.setClock(400000);
#endif /* USSE_SPI */

// Don't show the logo on boards with small memory
#if !defined(__AVR_ATmega328P__) && !defined(__AVR_ATmega168__)
  showLogo( );      // The showLogo function is a hacky way to get a large bitmap into program space without using <avr/pgspace.h>
#endif
circleTest();
  pinMode(buttonUp, INPUT);
}

void loop() {
int num = 205;
buttonState = digitalRead(buttonUp);

if (hasRun == false) {
  start();
  myTOLED.write('2');
  myTOLED.write('0');
  myTOLED.write('5');
  }

  if (buttonState == HIGH) {
    myTOLED.clearDisplay();
  myTOLED.resetTextCursor();
  start_two();
  myTOLED.write('2');
  myTOLED.write('0');
  myTOLED.write('6');
  }

}

void start( void ) {
  myTOLED.write(' ');
  myTOLED.write(' ');
  myTOLED.write(' ');
  myTOLED.write(' ');
  myTOLED.write(' ');
  myTOLED.write(' ');
  myTOLED.write(' ');
  myTOLED.write(' ');
  myTOLED.write(' ');
  myTOLED.write(' ');
  myTOLED.write(' ');
  myTOLED.write(' ');
  myTOLED.write(' ');
  myTOLED.write(' ');
  myTOLED.write(' ');
  myTOLED.write(' ');
  myTOLED.write(' ');
  myTOLED.write(' ');
  myTOLED.write(' ');
  myTOLED.write(' ');
  myTOLED.write(' ');
  myTOLED.write('T');
  myTOLED.write('e');
  myTOLED.write('m');
  myTOLED.write('p');
  myTOLED.write('e');
  myTOLED.write('r');
  myTOLED.write('a');
  myTOLED.write('t');
  myTOLED.write('u');
  myTOLED.write('r');
  myTOLED.write('e');
  myTOLED.write(' ');
  myTOLED.write('C');
  myTOLED.write('o');
  myTOLED.write('n');
  myTOLED.write('t');
  myTOLED.write('r');
  myTOLED.write('o');
  myTOLED.write('l');
  myTOLED.write(':');
  myTOLED.write(' ');
  myTOLED.write('S');
  myTOLED.write('e');
  myTOLED.write('t');
  myTOLED.write(' ');
  myTOLED.write('T');
  myTOLED.write('o');
  myTOLED.write(':');

  hasRun = true;
}
void start_two( void ) {
  myTOLED.write(' ');
  myTOLED.write(' ');
  myTOLED.write(' ');
  myTOLED.write(' ');
  myTOLED.write(' ');
  myTOLED.write(' ');
  myTOLED.write(' ');
  myTOLED.write(' ');
  myTOLED.write(' ');
  myTOLED.write(' ');
  myTOLED.write(' ');
  myTOLED.write(' ');
  myTOLED.write(' ');
  myTOLED.write(' ');
  myTOLED.write(' ');
  myTOLED.write(' ');
  myTOLED.write(' ');
  myTOLED.write(' ');
  myTOLED.write(' ');
  myTOLED.write(' ');
  myTOLED.write(' ');
  myTOLED.write('T');
  myTOLED.write('e');
  myTOLED.write('m');
  myTOLED.write('p');
  myTOLED.write('e');
  myTOLED.write('r');
  myTOLED.write('a');
  myTOLED.write('t');
  myTOLED.write('u');
  myTOLED.write('r');
  myTOLED.write('e');
  myTOLED.write(' ');
  myTOLED.write('C');
  myTOLED.write('o');
  myTOLED.write('n');
  myTOLED.write('t');
  myTOLED.write('r');
  myTOLED.write('o');
  myTOLED.write('l');
  myTOLED.write(':');
  myTOLED.write(' ');
  myTOLED.write('S');
  myTOLED.write('e');
  myTOLED.write('t');
  myTOLED.write(' ');
  myTOLED.write('T');
  myTOLED.write('o');
  myTOLED.write(':');

}

void circleTest( void )
{
  //myTOLED.clearDisplay();

  for(uint8_t indi = 0; indi < (myTOLED.xExt/2 - 1); indi++)
  {
    myTOLED.circleSet((myTOLED.xExt/2 - 1),(myTOLED.yExt/2 - 1), indi, false);
    delay(10);
  }
  myTOLED.circleSet((myTOLED.xExt/2 - 1),(myTOLED.yExt/2 - 1), myTOLED.xExt/2, true);
  myTOLED.clearDisplay();
}
I know this is very poorly written, I just need it to work right now, I can clean it up later. If anyone has any suggestions for how to get this button to work, it would be greatly appreciated!!!
Also for anyone asking why I have 2 identical "Start" functions, if I run the original one more than 1 time, it won't execute. Still trying to figure that out too.
My main goal is to have two buttons to change the temperature readout on the display, and ultimately regulate the coffee maker to that temperature. Thank you for your help!!!


