I have these 2 strain gauges as you can see in the image (code 632-180) and i want to connect it to the arduino so i can read the deformation.
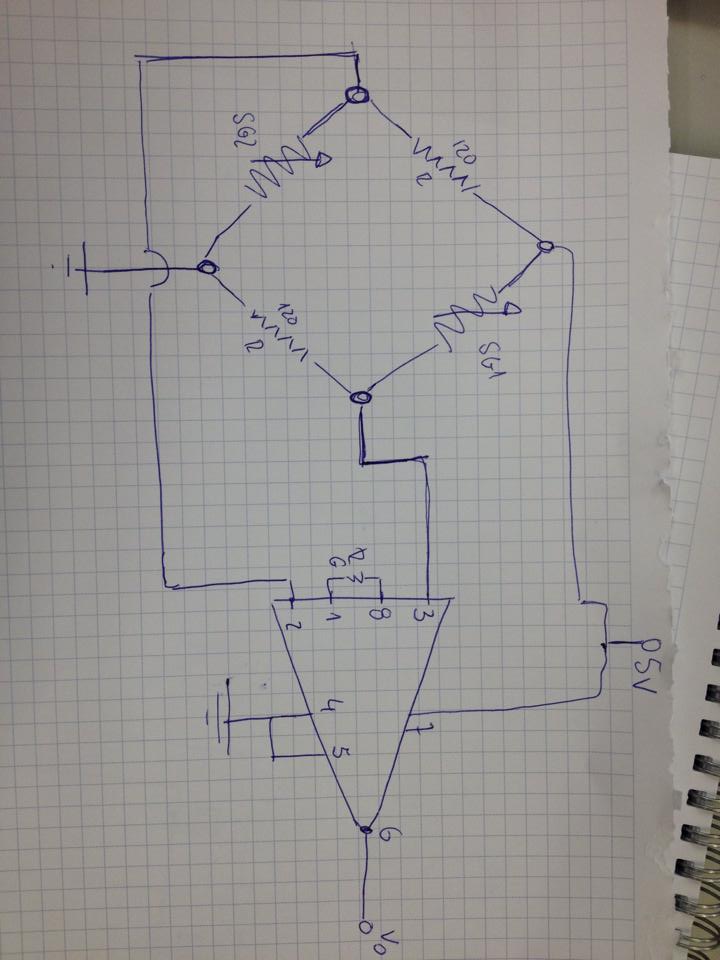
they should be in wheatstone half bridge.
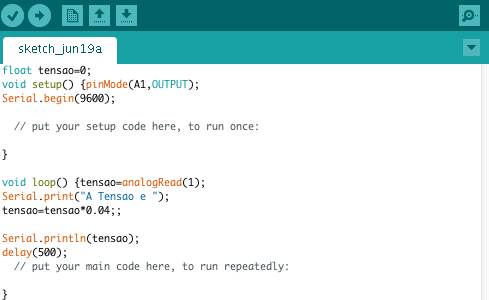
I read that i would have to connect it to an operational amplifier so i can be able to read the data, so i have already an INA122P from texas and a LM234 DRG3 is coming.
Hope someone can help me with the connections from the strain gauge to the amplifier and then to the arduino.
You do not need the REF200. Strain gauges can be connected directly to 5V supply as shown in your circuit diagram (subject to checking that is within their specifications).
Why 2 strain gauges in 1 bridge? When mounted in the same orientation, the signals will extinct each other. At least connect them into opposite (diagonal) sides of the bridge.
netrocos:
They are in opposite direction as you can see in the first post. Isn't this the correct half bridge installation?
I can't work out what your photo is showing. Please explain what there is in that photo.
I would expect strain gauges to be mounted on opposite sides of a bending beam so one is being stretched and the other is being compressed. The conductors in each strain gauge need to be parallel to the stretching or compression. It doesn't matter which end the terminals appear.
As I understand your drawing, both gauges are in the right half of the bridge. Unless you know exactly what you're doing, replace the second gauge by a resistor.
Explain what the two sensors should measure, and how exactly you want to mount them.
Tension does not mean pressure. A strain gauge wants to be pulled, not pushed. Piezos instead like pressure.
Also the gain of your amplifier may be too low. A strain gauge provides a very small signal, and small signals tend to get lost on breadboards. Try e.g. an LDR or pot instead of the strain gauge, to find out whether your amplifier works at all.
If nothing helps, get a ready-made amplifier module and try again.
I would be shocked if you get a reply from someone who hasn't posted in 3 years.
Additionally, the HX711 has become a lot more mainstream since then, with more support and online tutorials. That's the best way to go for an Arduino strain gauge at the moment.
