Touch Screen Password Input

Hi all,
first of all im sorry for little bit english..
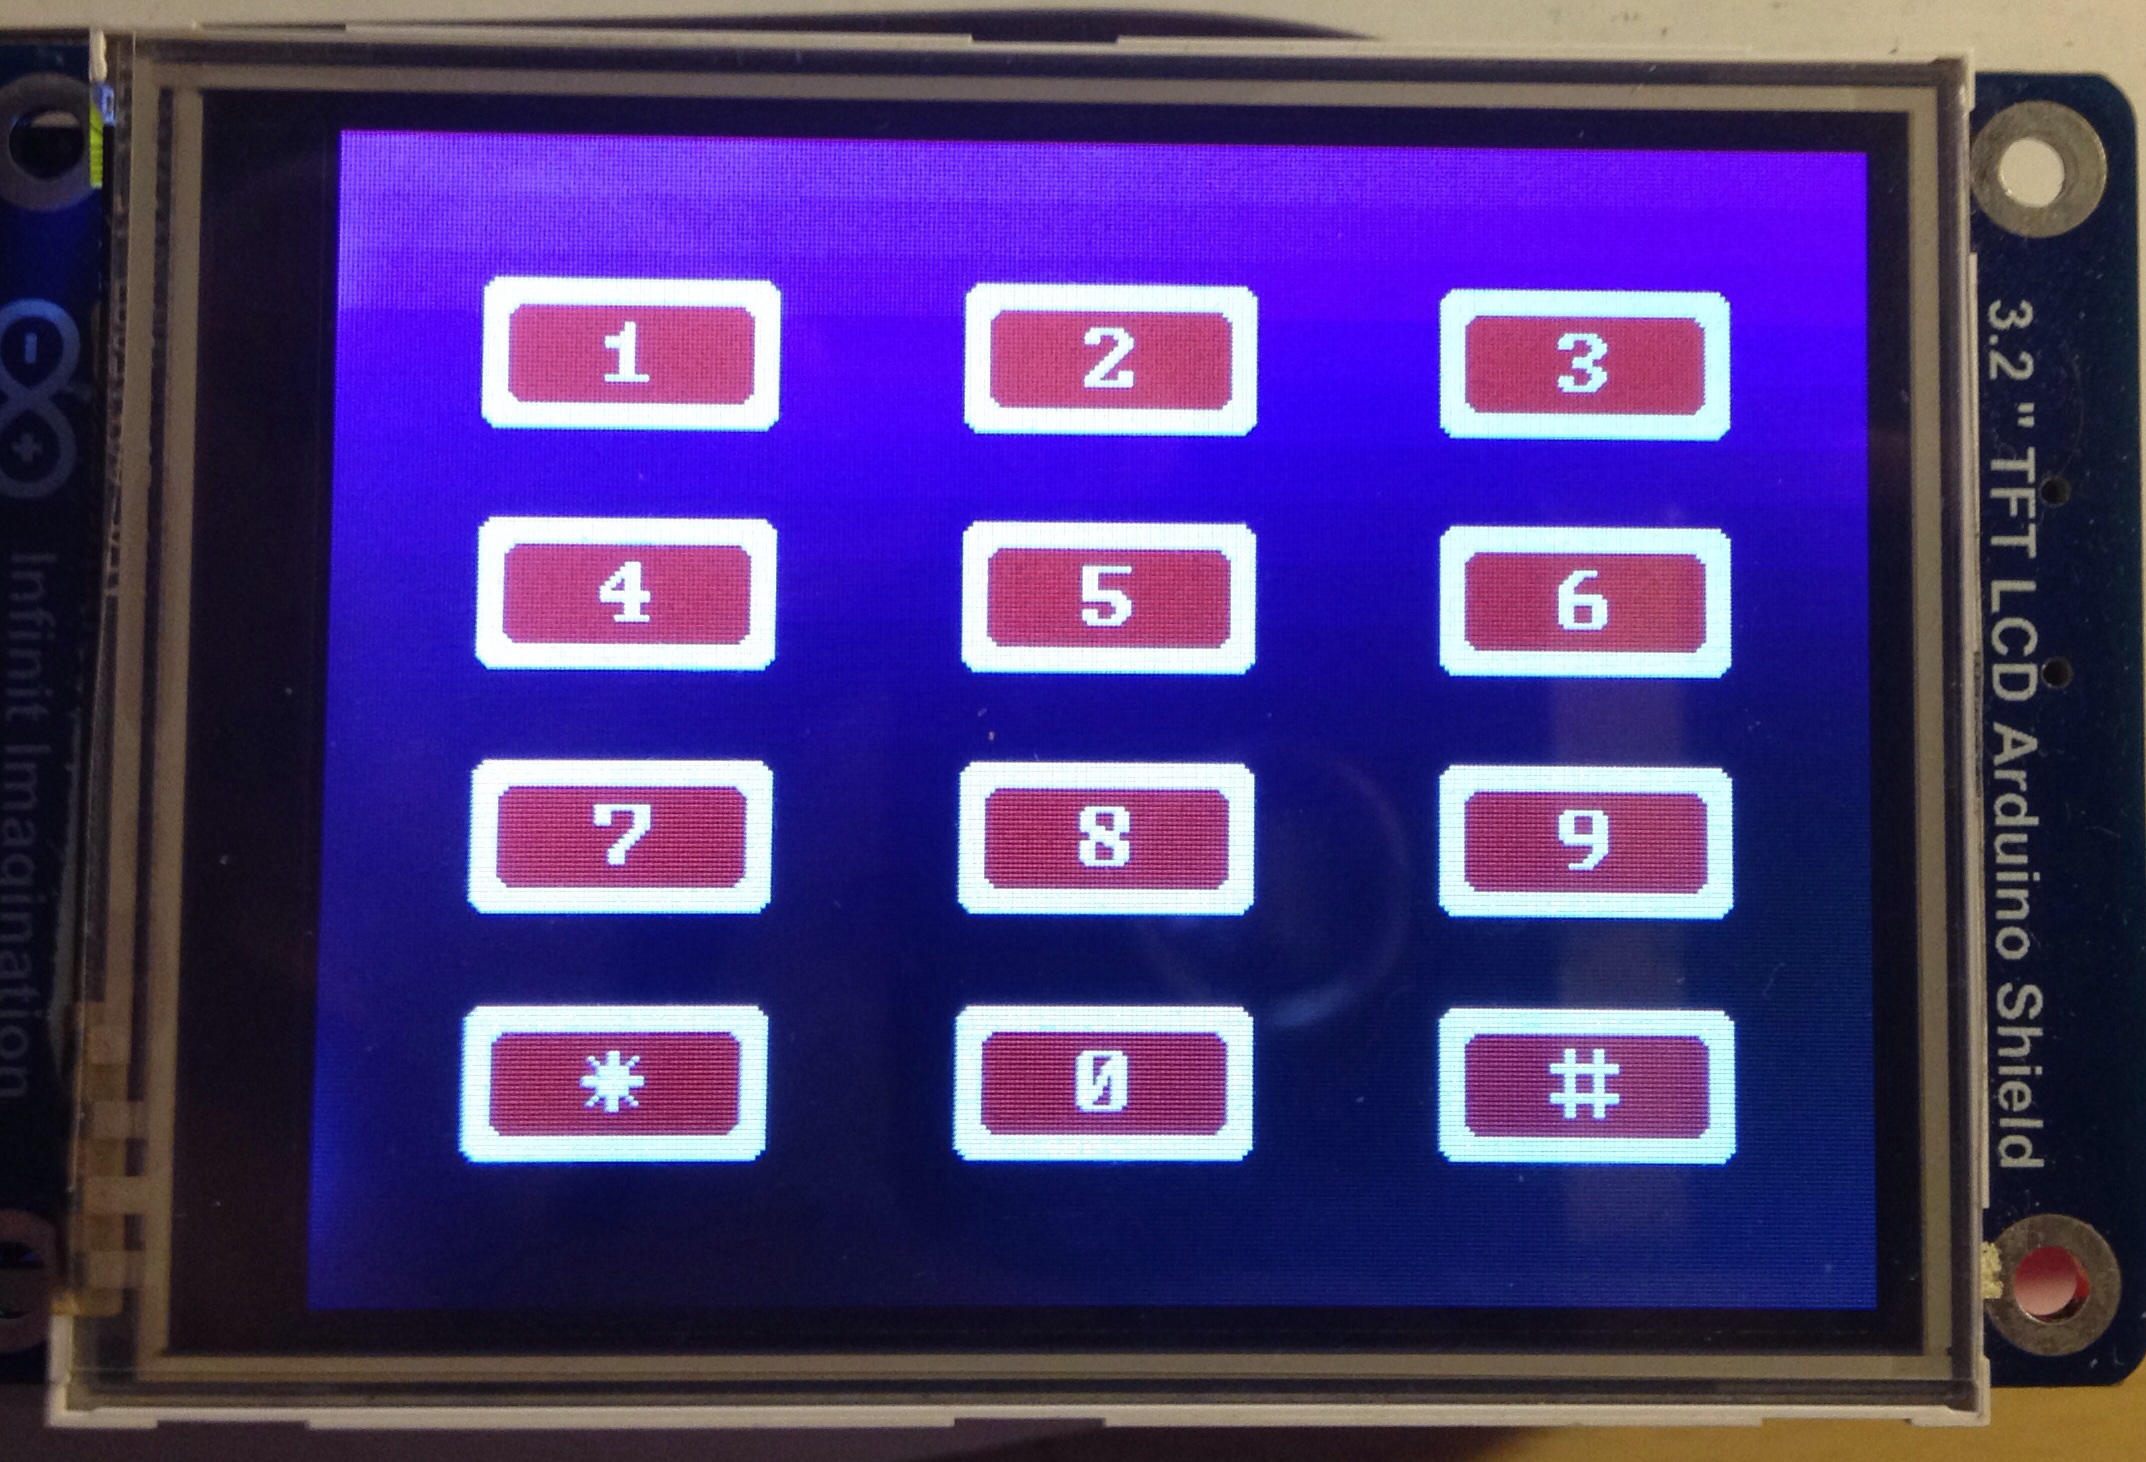
(I have 7" LCD /w touch screen + Mega 2560 + TFT Shield /w SD.)

Im use this code for create password screen;

// UTFT_Buttons_Demo_320x240 (C)2013 Henning Karlsen
// web: http://www.henningkarlsen.com/electronics
//
// A small demo to demonstrate the use of some of the
// functions of the UTFT_Buttons add-on library.
//
// This demo was made for modules with a screen resolution 
// of 320x240 pixels, but should work on larger screens as
// well.
//
// This program requires both the UTFT and UTouch libraries
// in addition to the UTFT_Buttons add-on library.
//
#if defined(__AVR__)
	#define imagedatatype  unsigned int
#elif defined(__PIC32MX__)
	#define imagedatatype  unsigned short
#elif defined(__arm__)
	#define imagedatatype  unsigned short
#endif

#include <UTFT.h>
#include <UTouch.h>
#include <UTFT_Buttons.h>

// Declare which fonts we will be using
extern uint8_t SmallFont[];
extern uint8_t BigFont[];
extern uint8_t Dingbats1_XL[];
extern uint8_t SevenSegNumFont[];


// Set up UTFT...
// Set the pins to the correct ones for your development board
// -----------------------------------------------------------
// Standard Arduino 2009/Uno/Leonardo shield   : <display model>,19,18,17,16
// Standard Arduino Mega/Due shield            : <display model>,38,39,40,41
// CTE TFT LCD/SD Shield for Arduino Due       : <display model>,25,26,27,28
// Standard chipKit Uno32/uC32                 : <display model>,34,35,36,37
// Standard chipKit Max32                      : <display model>,82,83,84,85
// AquaLEDSource All in One Super Screw Shield : <display model>,82,83,84,85
//
// Remember to change the model parameter to suit your display module!
UTFT          myGLCD(CTE70,38,39,40,41);

// Set up UTouch...
// Set the pins to the correct ones for your development board
// -----------------------------------------------------------
// Standard Arduino 2009/Uno/Leonardo shield   : 15,10,14,9,8
// Standard Arduino Mega/Due shield            : 6,5,4,3,2
// CTE TFT LCD/SD Shield for Arduino Due       : 6,5,4,3,2
// Standard chipKit Uno32/uC32                 : 20,21,22,23,24
// Standard chipKit Max32                      : 62,63,64,65,66
// AquaLEDSource All in One Super Screw Shield : 62,63,64,65,66
UTouch        myTouch(6,5,4,3,2);

// Finally we set up UTFT_Buttons :)
UTFT_Buttons  myButtons(&myGLCD, &myTouch);

void setup()
{
  myGLCD.InitLCD();
  myGLCD.clrScr();
  myGLCD.setFont(BigFont);

  myTouch.InitTouch();
  myTouch.setPrecision(PREC_MEDIUM);
  
  myButtons.setTextFont(BigFont);
  myButtons.setSymbolFont(SevenSegNumFont);
  
}

void loop()
{
  
  int but1, but2, but3, but4, but5, but6, but7, but8, but9, but10, but11, but12, but13, butX, butY, pressed_button;
  boolean default_colors = true;
  
  but1 = myButtons.addButton( 10,  20, 130,  105, "1", BUTTON_SYMBOL);
  but2 = myButtons.addButton( 10,  135, 130,  105, "4", BUTTON_SYMBOL);
  but3 = myButtons.addButton( 10, 250, 130,  105, "7", BUTTON_SYMBOL);
  but4 = myButtons.addButton( 10, 365, 130,  105, "*" );
  but5 = myButtons.addButton( 150, 20, 130,  105, "2", BUTTON_SYMBOL);
  but6 = myButtons.addButton( 150, 135, 130,  105, "5", BUTTON_SYMBOL);
  but7 = myButtons.addButton( 150, 250, 130,  105, "8", BUTTON_SYMBOL);
  but8 = myButtons.addButton( 150, 365, 130,  105, "0", BUTTON_SYMBOL);
  but9 = myButtons.addButton( 290, 20, 130,  105, "3", BUTTON_SYMBOL);
  but10 = myButtons.addButton( 290, 135, 130,  105, "6", BUTTON_SYMBOL);
  but11 = myButtons.addButton( 290, 250, 130,  105, "9", BUTTON_SYMBOL);
  but12 = myButtons.addButton( 290, 365, 130,  105, "#" );
  but13 = myButtons.addButton( 450, 20, 300,  105, "" );
  
  
  //butX = myButtons.addButton(279, 199,  40,  40, "2", BUTTON_SYMBOL);
  //butY = myButtons.addButton(279, 299, 100,  40, "1", BUTTON_SYMBOL | BUTTON_SYMBOL_REP_3X);
  myButtons.drawButtons();

  //myGLCD.print("You pressed:", 160, 205);
  myGLCD.setColor(VGA_BLACK);
  myGLCD.setBackColor(VGA_WHITE);
  //myGLCD.print("None    ", 160, 220);

  while(1) 
  {
    if (myTouch.dataAvailable() == true)
    {
      pressed_button = myButtons.checkButtons();

     
      if (pressed_button==but1)
        myGLCD.print("*",  550, 72);
      if (pressed_button==but2)
        myGLCD.print("*", 160, 220);
      if (pressed_button==but3)
        myGLCD.print("*", 160, 220);
      if (pressed_button==but4)
        myGLCD.print("*", 160, 220);
      //if (pressed_button==-1)
        //myGLCD.print("None    ", 160, 220);
    }
  }
}

But, use this keypad how do I coding an advanced password entry.
I want to this input features;
Max 6 digit password and user-replaceable.
1 Master Password,
Set Password + Clear Button
3 false input lock system.

Thank you very much if you could help in this regard.

I think that if you learn the basics first then much will become clear.

Do the Control Structures examples. They teach how to step through data.

Instead of but1, but2, but3, etc, you should be using an array, but[ 15 ] and start count from 0, not 1.

Instead of ints for the buttons, use byte if 0 to 255 values will do or short if -128 to 127 will do. With a MEGA this is not so critical but it is good practice to not waste limited RAM.

I am sorry I don't have time to explain using C strings (string.h library) instead of wasteful C++ String objects used in the examples but maybe this time it won't bite you. Still if you have time, learn to use C strings for these small memory controllers.

Examples of SD code can be found in the examples that come with your Arduino IDE. The IDE examples will match your IDE version. They are found through the FILE menu on upper-left.

You have many steps to get where you want from where you are.

Thank you for advice. I am interested in the hobby with arduino. Another question I want to ask. The buttons on the touch screen how can I use as a "Analog Keypad". Because I'm using the following code will be easier to practice a password application.

// Project 27 Keypad door lock

#include <Keypad.h>
#include <EEPROM.h>

char* secretCode = "1234";
int position = 0;

const byte rows = 4; 
const byte cols = 3; 
char keys[rows][cols] = {
  {'1','2','3'},
  {'4','5','6'},
  {'7','8','9'},
  {'*','0','#'}
};
byte rowPins[rows] = {7, 2, 3, 5}; 
byte colPins[cols] = {6, 8, 4}; 
Keypad keypad = Keypad(makeKeymap(keys), rowPins, colPins, rows, cols);

int redPin = 13;
int greenPin = 12;
int solenoidPin = 10;

void setup()                    
{
  pinMode(redPin, OUTPUT);
  pinMode(greenPin, OUTPUT);
  pinMode(solenoidPin, OUTPUT);
  loadCode();
  flash();
  lock();
  Serial.begin(9600);
  while(!Serial);
  Serial.print("Code is: "); Serial.println(secretCode);
  Serial.println("Change code: cNNNN");
  Serial.println("Unloack: u");
  Serial.println("Lock: l");
}

void loop()                    
{
  if (Serial.available())
  {
    char c = Serial.read();
    if (c == 'u')
    {
      unlock();
    }
    if (c == 'l')
    {
      lock();
    }
    if (c == 'c')
    {
      getNewCode();
    }
  }
  char key = keypad.getKey();
  if (key == '#')
  {
    lock();
  }
  if (key == secretCode[position])
  {
    position ++;
  }
  else if (key != 0)
  {
    lock();
  }
  if (position == 4)
  {
    unlock();
  }
  delay(100);
}

void lock()
{
  position = 0;
  digitalWrite(redPin, HIGH);
  digitalWrite(greenPin, LOW);  
  digitalWrite(solenoidPin, LOW);
  Serial.println("LOCKED");
}

void unlock()
{
  digitalWrite(redPin, LOW);
  digitalWrite(greenPin, HIGH);  
  digitalWrite(solenoidPin, HIGH);
  Serial.println("UN-LOCKED");
  delay(5000);
  lock();
}


void getNewCode()
{
  for (int i = 0; i < 4; i++ )
  {
    char ch = Serial.read();
    secretCode[i] = ch;
  }
  saveCode();
  flash();flash();
  Serial.print("Code changed to: "); Serial.println(secretCode);
}

void loadCode()
{
  if (EEPROM.read(0) == 1)
  {
    secretCode[0] = EEPROM.read(1);
    secretCode[1] = EEPROM.read(2);
    secretCode[2] = EEPROM.read(3);
    secretCode[3] = EEPROM.read(4);
  }
}

void saveCode()
{
  EEPROM.write(1, secretCode[0]);
  EEPROM.write(2, secretCode[1]);
  EEPROM.write(3, secretCode[2]);
  EEPROM.write(4, secretCode[3]);
  EEPROM.write(0, 1);  
}

void flash()
{
    digitalWrite(redPin, HIGH);
    digitalWrite(greenPin, HIGH);    
    delay(500);
    digitalWrite(redPin, LOW);
    digitalWrite(greenPin, LOW);    
}

Thank you for help.

Analog Keypad? On a touchscreen? I think this is a misuse of the word analog. It makes no sense to me.

Before you allow unlock, lock or change password you should first require correct password. Set a variable to 0 to flag password not entered and 1 to flag that correct password was entered. Always check that as part of allowing the lock, unlock or password change.

Separate the code that senses events from the code that causes actions. Action code should trigger on values in variables that the event code sets. The value holds the meaning abstracted by the event code. Separating these code sections lets you use complex events to derive meaning without having to fit/nest the action code into the event code. It will make debugging and maintenance including changes much simpler. Code process will be not-tangled (also called spaghetti) see, think and act.

Password should be a sequence of key entries followed by a symbol, * or # to indicate finished entry.

If you keep track of keypresses taken in while watching for an End of Entry symbol then you can check the entry against the correct password.

If they enter other than 4 digits, don't bother to compare. It's easy to count how many digits are entered as they come in. But always clear the last entry before starting a new one.

These are the libraries for AVR C++ that Arduino IDE uses.
http://www.nongnu.org/avr-libc/user-manual/modules.html

Find string.h and in there are the C string commands.

int strcmp ( const char * s1,
const char * s2
)

Compare two strings.

The strcmp() function compares the two strings s1 and s2.

Returns:
The strcmp() function returns an integer less than, equal to, or greater than zero if s1 is found, respectively, to be less than, to match, or be greater than s2. A consequence of the ordering used by strcmp() is that if s1 is an initial substring of s2, then s1 is considered to be "less than" s2.

I could say don't use strings at all but this way you can reuse much of the code to deal with other entry methods.

I see you still use int variables where byte would do. For example there are less than 255 pins. Byte will do.

I see you use delay(). That may cause a missed quick button touch and is not necessary with better code.
The BlinkWithoutDelay example can show how to make more responsive code but here is a link to a full, better, simple explanation of how to make real time code work:

How to do multiple things at once ... like cook bacon and eggs

Being that your using Utouch and UTFT libraries, You can use my password sketch.
I have his older library, so you will need to change some things, but this is how I did mine.

#include <Wire.h>
#include <ITDB02_Touch.h>
#include <ITDB02_Graph16.h>

// Declare which fonts we will be using
extern uint8_t SmallFont[];
extern uint8_t BigFont[];
//myGLCD(RS,WR,CS,RST,ALE,mode);
ITDB02 myGLCD(A1,A2,A0,A3,A5,ITDB32S);   //
ITDB02_Touch  myTouch(13,10,11,12,A4);

char * text[4][3] = { 
  {
    "1","2","3"}
  ,
  {
    "4","5","6"}
  ,
  {
    "7","8","9"}
  ,
  {
    "*","0","#"}
};
char Pass[5];
char master[5] = "1111";
int Pcount=0;
int XC,YC;
int PassCounter=0;
byte orient = LANDSCAPE;

void setup()
{
  myGLCD.InitLCD(LANDSCAPE);
  myGLCD.setFont(SmallFont);
  myTouch.InitTouch(LANDSCAPE);
  myTouch.setPrecision(PREC_EXTREME);

  for(int line = 0; line <= 239; line++)  // custom background
  {
    myGLCD.setColor(0, 0, line);//text color White  
    myGLCD.drawLine(0, line, 319, line);
  }

  PassWord_makeButton();
  PassWord_buttonText();
  RUN();
}

void loop()
{
}

void RUN() 
{
  while(1) // Not using the Loop() function,
  {
    myTouch.read();
    int tx = myTouch.TP_X;
    int ty = myTouch.TP_Y;
    XC= constrain (map(tx, 205, 3900,0,239),0,239); // my touch screen X/Y coords
    YC= constrain (map(ty, 300, 3850,0,319),0,319);
    GetNum(XC,YC);
  }
}

void PassWord_makeButton()
{
  for(int y = 0; y < 300;y+=100){
    for(int x = 0; x < 200; x+=50){
      drawButton(20+x,90+y,50+x,30+y);
    }
  }
  return;
}

void drawButton(int x1, int y1,int x2, int y2)
{
  myGLCD.setColor(170,170,170);
  myGLCD.fillRoundRect(y1-3, x1+3, y2-3, x2+3); //Rect Shading  

  myGLCD.setColor(255, 255, 255);
  myGLCD.fillRoundRect(y1, x1, y2, x2); //Rect

  myGLCD.setColor(200,0,0);
  myGLCD.fillRoundRect(y1-5, x1+5, y2+5, x2-5); //inner rect
  return;
}

void PassWord_buttonText()
{ 
  myGLCD.setFont(BigFont);
  myGLCD.setBackColor(200, 0, 0);
  myGLCD.setColor(255,255,255);
  for(int tr = 0; tr < 300; tr+=100){
    for(int tc = 0; tc < 200; tc+=50){
      char *myText = text[tc/50][tr/100];
      myGLCD.print(myText,52+tr,27+tc,0);
    }
  } 
}

void GetNum(int tx,int ty) {
  char * lastText;
  for(int tr = 0; tr < 300; tr+=100){
    for(int tc = 0; tc < 200; tc+=50){
      char *myText = text[tc/50][tr/100];
      if(TouchButton((90+tr),(20+tc),(30+tr),(50+tc),XC,YC)){
        //if(tx>= (20+tc)&& ty <= (90+tr)&& tx <= (50+tc)&& ty >= (30+tr)){
        myGLCD.print(myText,0,1,0);
        check(*myText); 
      }
    }
  }
}


void check(char pass) {
  myGLCD.setFont(BigFont);
  Pass[Pcount] = pass;
  myGLCD.printNumI(Pcount,200,0);
  //myGLCD.print(Pass,150,220,0);
  if(Pcount == 3){
    myGLCD.print(Pass,0 + 15*Pcount,220,0);
    if(!strcmp(Pass, master)){
      myGLCD.print("GOOD",130,0,0);
      delay(1000);
      myGLCD.print("    ",130,0,0);
    }
    else{
      myGLCD.print("FAIL",130,0,0);
      delay(1000);
      myGLCD.print("    ",130,0,0);
    } 
  }

  delay(500);
  Pcount++;
  if(Pcount > 3) {
    Pcount = 0; 
    PassCounter = 0;
  }
}

boolean TouchButton(int x1, int y1, int x2, int y2, int xc, int yc){
  int tmp;
  if (orient==LANDSCAPE)
  {
    xc = xc ^ yc;
    yc = xc ^ yc;
    xc = xc ^ yc;
  }

  if (x1>x2)
  {
    tmp=x1;
    x1=x2;
    x2=tmp;
  }
  if (y1>y2)
  {
    tmp=y1;
    y1=y2;
    y2=tmp;
  }

  if(xc >= x1 && xc<= x2 && yc >= y1 && yc <= y2) return true;
  return false;
}

I dont know how your screen is sized or oriented, but if you get weird looking boxes, try changes these.
Inside makeButton, drawButton(30 + x, 30 + y,90 + x, 60 + y)
Inside GetNum(), TouchButton((30+tr),(20+tc),(90+tr),(50+tc),XC,YC)

Is there something wrong with loop()?

No, there is nothing wrong with the loop(), it's just if you have a big sketch, then most likely your going to be using the loop() for something(s) else. By taking out of the loop and using a while statement, you can lessen the load and basically turn off the functions for the password screen. Once you put in a password and it's good, don't you want to do something else afterwards? If there is a lot inside the loop, it will take longer to cycle through it.

Attached, is what it should look like.

  1. start up
  2. if password is good, it also shows the count but not what you enter.
  3. if password is bad.

The compiler either inlines functions or puts minimum, a return address on the stack which eats cycles.

If you run a state machine, your task being in loop() would not be a problem.
I like to blink led 13 as a program running status indicator even when I'm testing something.

I just don't get the part about loop() running other code. What you show never leaves setup().

Well, if you do something like this,

void RUN() {
while(PasswordGood == false) {
myTouch.read();
tx = myTouch.TP_X;
ty = myTouch.TP_Y;
XC= constrain (map(tx, 205, 3900,0,239),0,239);
YC= constrain (map(ty, 300, 3850,0,319),0,319);
GetNum(XC,YC);
}
}

Then when the code goes to check the password, you need a way to get out of the while loop, if the password is good.
If the password is bad, then you will remain inside the while loop until the password is good, or if it reaches a number of tries.

if(!strcmp(Pass, master))
{
myGLCD.print("GOOD",130,0,0);
PasswordGood = true;
delay(1000);
myGLCD.print(" ",130,0,0);
}
else{
myGLCD.print("FAIL",130,0,0);
delay(1000);
myGLCD.print(" ",130,0,0);
}

Now once the password is good, you then can have this in your loop, or a startUp function, that you must pass through to get to the rest of the code.

Mine is like so:

void setup() 
{
// initialize any pins, or lcd modes
.
.
.
startup();
}

void startup()
{ 
  PassWord_makeButton();
  PassWord_buttonText();
  RUN();                                        // This will only return if the password is good.

  // Password was good, proceed to rest of code.
  myGLCD.setFont(SmallFont); 
  controller();
}

void controller()
{
  .
  .
  .
}

Are you familiar with the term "blocking code"?

Thank you very much for the help. I want to do very complicated for me but I want exactly this way;

This code for graphic input and buttons;

// UTFT_Buttons_Demo_320x240 (C)2013 Henning Karlsen
// web: http://www.henningkarlsen.com/electronics
//
// A small demo to demonstrate the use of some of the
// functions of the UTFT_Buttons add-on library.
//
// This demo was made for modules with a screen resolution 
// of 320x240 pixels, but should work on larger screens as
// well.
//
// This program requires both the UTFT and UTouch libraries
// in addition to the UTFT_Buttons add-on library.
//
#if defined(__AVR__)
	#define imagedatatype  unsigned int
#elif defined(__PIC32MX__)
	#define imagedatatype  unsigned short
#elif defined(__arm__)
	#define imagedatatype  unsigned short
#endif

#include <UTFT.h>
#include <UTouch.h>
#include <UTFT_Buttons.h>

// Declare which fonts we will be using
extern uint8_t SmallFont[];
extern uint8_t BigFont[];
extern uint8_t Dingbats1_XL[];
extern uint8_t SevenSegNumFont[];


// Set up UTFT...
// Set the pins to the correct ones for your development board
// -----------------------------------------------------------
// Standard Arduino 2009/Uno/Leonardo shield   : <display model>,19,18,17,16
// Standard Arduino Mega/Due shield            : <display model>,38,39,40,41
// CTE TFT LCD/SD Shield for Arduino Due       : <display model>,25,26,27,28
// Standard chipKit Uno32/uC32                 : <display model>,34,35,36,37
// Standard chipKit Max32                      : <display model>,82,83,84,85
// AquaLEDSource All in One Super Screw Shield : <display model>,82,83,84,85
//
// Remember to change the model parameter to suit your display module!
UTFT          myGLCD(CTE70,38,39,40,41);

// Set up UTouch...
// Set the pins to the correct ones for your development board
// -----------------------------------------------------------
// Standard Arduino 2009/Uno/Leonardo shield   : 15,10,14,9,8
// Standard Arduino Mega/Due shield            : 6,5,4,3,2
// CTE TFT LCD/SD Shield for Arduino Due       : 6,5,4,3,2
// Standard chipKit Uno32/uC32                 : 20,21,22,23,24
// Standard chipKit Max32                      : 62,63,64,65,66
// AquaLEDSource All in One Super Screw Shield : 62,63,64,65,66
UTouch        myTouch(6,5,4,3,2);

// Finally we set up UTFT_Buttons :)
UTFT_Buttons  myButtons(&myGLCD, &myTouch);

void setup()
{
  myGLCD.InitLCD();
  myGLCD.clrScr();
  myGLCD.setFont(BigFont);

  myTouch.InitTouch();
  myTouch.setPrecision(PREC_MEDIUM);
  
  myButtons.setTextFont(BigFont);
  myButtons.setSymbolFont(SevenSegNumFont);
  
}

void loop()
{
  
  int but1, but2, but3, but4, but5, but6, but7, but8, but9, but10, but11, but12, but13, butX, butY, pressed_button;
  boolean default_colors = true;
  
  but1 = myButtons.addButton( 10,  20, 130,  105, "1", BUTTON_SYMBOL);
  but2 = myButtons.addButton( 10,  135, 130,  105, "4", BUTTON_SYMBOL);
  but3 = myButtons.addButton( 10, 250, 130,  105, "7", BUTTON_SYMBOL);
  but4 = myButtons.addButton( 10, 365, 130,  105, "*" );
  but5 = myButtons.addButton( 150, 20, 130,  105, "2", BUTTON_SYMBOL);
  but6 = myButtons.addButton( 150, 135, 130,  105, "5", BUTTON_SYMBOL);
  but7 = myButtons.addButton( 150, 250, 130,  105, "8", BUTTON_SYMBOL);
  but8 = myButtons.addButton( 150, 365, 130,  105, "0", BUTTON_SYMBOL);
  but9 = myButtons.addButton( 290, 20, 130,  105, "3", BUTTON_SYMBOL);
  but10 = myButtons.addButton( 290, 135, 130,  105, "6", BUTTON_SYMBOL);
  but11 = myButtons.addButton( 290, 250, 130,  105, "9", BUTTON_SYMBOL);
  but12 = myButtons.addButton( 290, 365, 130,  105, "#" );
  but13 = myButtons.addButton( 450, 20, 300,  105, "" );
  
  
  //butX = myButtons.addButton(279, 199,  40,  40, "2", BUTTON_SYMBOL);
  //butY = myButtons.addButton(279, 299, 100,  40, "1", BUTTON_SYMBOL | BUTTON_SYMBOL_REP_3X);
  myButtons.drawButtons();

  //myGLCD.print("You pressed:", 160, 205);
  myGLCD.setColor(VGA_BLACK);
  myGLCD.setBackColor(VGA_WHITE);
  //myGLCD.print("None    ", 160, 220);

  while(1) 
  {
    if (myTouch.dataAvailable() == true)
    {
      pressed_button = myButtons.checkButtons();

     
      if (pressed_button==but1)
        myGLCD.print("*",  550, 72);
      if (pressed_button==but2)
        myGLCD.print("*", 160, 220);
      if (pressed_button==but3)
        myGLCD.print("*", 160, 220);
      if (pressed_button==but4)
        myGLCD.print("*", 160, 220);
      //if (pressed_button==-1)
        //myGLCD.print("None    ", 160, 220);
    }
  }
}

password application except the "matrix keypad" in this way.

// Project 27 Keypad door lock

#include <Keypad.h>
#include <EEPROM.h>

char* secretCode = "1234";
int position = 0;

const byte rows = 4; 
const byte cols = 3; 
char keys[rows][cols] = {
  {'1','2','3'},
  {'4','5','6'},
  {'7','8','9'},
  {'*','0','#'}
};
byte rowPins[rows] = {7, 2, 3, 5}; 
byte colPins[cols] = {6, 8, 4}; 
Keypad keypad = Keypad(makeKeymap(keys), rowPins, colPins, rows, cols);

int redPin = 13;
int greenPin = 12;
int solenoidPin = 10;

void setup()                    
{
  pinMode(redPin, OUTPUT);
  pinMode(greenPin, OUTPUT);
  pinMode(solenoidPin, OUTPUT);
  loadCode();
  flash();
  lock();
  Serial.begin(9600);
  while(!Serial);
  Serial.print("Code is: "); Serial.println(secretCode);
  Serial.println("Change code: cNNNN");
  Serial.println("Unloack: u");
  Serial.println("Lock: l");
}

void loop()                    
{
  if (Serial.available())
  {
    char c = Serial.read();
    if (c == 'u')
    {
      unlock();
    }
    if (c == 'l')
    {
      lock();
    }
    if (c == 'c')
    {
      getNewCode();
    }
  }
  char key = keypad.getKey();
  if (key == '#')
  {
    lock();
  }
  if (key == secretCode[position])
  {
    position ++;
  }
  else if (key != 0)
  {
    lock();
  }
  if (position == 4)
  {
    unlock();
  }
  delay(100);
}

void lock()
{
  position = 0;
  digitalWrite(redPin, HIGH);
  digitalWrite(greenPin, LOW);  
  digitalWrite(solenoidPin, LOW);
  Serial.println("LOCKED");
}

void unlock()
{
  digitalWrite(redPin, LOW);
  digitalWrite(greenPin, HIGH);  
  digitalWrite(solenoidPin, HIGH);
  Serial.println("UN-LOCKED");
  delay(5000);
  lock();
}


void getNewCode()
{
  for (int i = 0; i < 4; i++ )
  {
    char ch = Serial.read();
    secretCode[i] = ch;
  }
  saveCode();
  flash();flash();
  Serial.print("Code changed to: "); Serial.println(secretCode);
}

void loadCode()
{
  if (EEPROM.read(0) == 1)
  {
    secretCode[0] = EEPROM.read(1);
    secretCode[1] = EEPROM.read(2);
    secretCode[2] = EEPROM.read(3);
    secretCode[3] = EEPROM.read(4);
  }
}

void saveCode()
{
  EEPROM.write(1, secretCode[0]);
  EEPROM.write(2, secretCode[1]);
  EEPROM.write(3, secretCode[2]);
  EEPROM.write(4, secretCode[3]);
  EEPROM.write(0, 1);  
}

void flash()
{
    digitalWrite(redPin, HIGH);
    digitalWrite(greenPin, HIGH);    
    delay(500);
    digitalWrite(redPin, LOW);
    digitalWrite(greenPin, LOW);    
}

I am sure you are very experienced in these matters. I'd say maybe ridiculous but this is very important for me.

Thank you very much for your support.

Yes I am familiar with the term "blocking code". I wrote my code like this without the use of the loop() is because my full code which is about 5000 lines, spread out over 9 tabs, is using the loop() to get accelerometer data. I could have locked and unlocked certain parts within the loop() but it would be massive. Anything other than the accel data that needs to be looped, I took out of the loop() and put into while loops. This way the accel data would not occur when not needed, thus I don't add any unwanted processing and slow down my code.

Just saying that that BWD site does not mention the concept.

As you note, it is vital to not have one piece of code hold up any time critical task. That's why don't block and use minimal interrupt code, like log micros() and set a flag and write the handler inside an if(flag) as the first code block in loop() so it has the highest priority.

I usually have a separate block for every must-do critical timed function, like the blink part of BWD.

And then I run the switch-case state machine.

And last I check serial.available() to deal with user I/O when I include user I/O at all. The poor human won't know if it has been ignored for 100 ms let alone 1 or 2 so Serial User I/O is the lowest priority.

If I need to pack away complexity into a package with integrated controls, I write a Class and use object code. It is then contained and clean, easier to read and harder to spaghetti.

You can write code in functions outside of loop() that you specify to be inline and wherever that function is called the inline code will be compiled there, not a function call requiring a return. It will make the hex file bigger but it runs faster.

If you think that function calls have overhead, what about interrupts? More than cli() and save sreg before your IRQ starts isn't there? You have to restore sreg and sei() at the IRQ end and all to save 5+ bytes asap.

I used a timing loop with a sonar module. I was getting almost down to 1 usec loop time, totally blocking for whole milliseconds at a time when I took a read. But I only took 20 reads a second. That left time for other things.

Is the accelerometer SPI? If you could read the sensor once per millisecond, would that be enough? SPI can move about 1000 bytes per millisecond in burst mode. A single read to the accelerometer might return 32 bytes or less?

No the accel is being read through the analog pins.

#include <Wire.h>
#include <ITDB02_Touch.h>
#include <ITDB02_Graph16.h>

// Declare which fonts we will be using
extern uint8_t SmallFont[];
extern uint8_t BigFont[];
//myGLCD(RS,WR,CS,RST,ALE,mode);
ITDB02 myGLCD(A1,A2,A0,A3,A5,ITDB32S); //
ITDB02_Touch myTouch(13,10,11,12,A4);

char * text[4][3] = {
{
"1","2","3"}
,
{
"4","5","6"}
,
{
"7","8","9"}
,
{
"*","0","#"}
};
char Pass[5];
char master[5] = "1111";
int Pcount=0;
int XC,YC;
int PassCounter=0;
byte orient = LANDSCAPE;

void setup()
{
myGLCD.InitLCD(LANDSCAPE);
myGLCD.setFont(SmallFont);
myTouch.InitTouch(LANDSCAPE);
myTouch.setPrecision(PREC_EXTREME);

for(int line = 0; line <= 239; line++) // custom background
{
myGLCD.setColor(0, 0, line);//text color White
myGLCD.drawLine(0, line, 319, line);
}

PassWord_makeButton();
PassWord_buttonText();
RUN();
}

void loop()
{
}

void RUN()
{
while(1) // Not using the Loop() function,
{
myTouch.read();
int tx = myTouch.TP_X;
int ty = myTouch.TP_Y;
XC= constrain (map(tx, 205, 3900,0,239),0,239); // my touch screen X/Y coords
YC= constrain (map(ty, 300, 3850,0,319),0,319);
GetNum(XC,YC);
}
}

void PassWord_makeButton()
{
for(int y = 0; y < 300;y+=100){
for(int x = 0; x < 200; x+=50){
drawButton(20+x,90+y,50+x,30+y);
}
}
return;
}

void drawButton(int x1, int y1,int x2, int y2)
{
myGLCD.setColor(170,170,170);
myGLCD.fillRoundRect(y1-3, x1+3, y2-3, x2+3); //Rect Shading

myGLCD.setColor(255, 255, 255);
myGLCD.fillRoundRect(y1, x1, y2, x2); //Rect

myGLCD.setColor(200,0,0);
myGLCD.fillRoundRect(y1-5, x1+5, y2+5, x2-5); //inner rect
return;
}

void PassWord_buttonText()
{
myGLCD.setFont(BigFont);
myGLCD.setBackColor(200, 0, 0);
myGLCD.setColor(255,255,255);
for(int tr = 0; tr < 300; tr+=100){
for(int tc = 0; tc < 200; tc+=50){
char *myText = text[tc/50][tr/100];
myGLCD.print(myText,52+tr,27+tc,0);
}
}
}

void GetNum(int tx,int ty) {
char * lastText;
for(int tr = 0; tr < 300; tr+=100){
for(int tc = 0; tc < 200; tc+=50){
char *myText = text[tc/50][tr/100];
if(TouchButton((90+tr),(20+tc),(30+tr),(50+tc),XC,YC)){
//if(tx>= (20+tc)&& ty <= (90+tr)&& tx <= (50+tc)&& ty >= (30+tr)){
myGLCD.print(myText,0,1,0);
check(*myText);
}
}
}
}

void check(char pass) {
myGLCD.setFont(BigFont);
Pass[Pcount] = pass;
myGLCD.printNumI(Pcount,200,0);
//myGLCD.print(Pass,150,220,0);
if(Pcount == 3){
myGLCD.print(Pass,0 + 15*Pcount,220,0);
if(!strcmp(Pass, master)){
myGLCD.print("GOOD",130,0,0);
delay(1000);
myGLCD.print(" ",130,0,0);
}
else{
myGLCD.print("FAIL",130,0,0);
delay(1000);
myGLCD.print(" ",130,0,0);
}
}

delay(500);
Pcount++;
if(Pcount > 3) {
Pcount = 0;
PassCounter = 0;
}
}

boolean TouchButton(int x1, int y1, int x2, int y2, int xc, int yc){
int tmp;
if (orient==LANDSCAPE)
{
xc = xc ^ yc;
yc = xc ^ yc;
xc = xc ^ yc;
}

if (x1>x2)
{
tmp=x1;
x1=x2;
x2=tmp;
}
if (y1>y2)
{
tmp=y1;
y1=y2;
y2=tmp;
}

if(xc >= x1 && xc<= x2 && yc >= y1 && yc <= y2) return true;
return false;
}