Troubleshooting Touchscreen UTFT/MCUFRIEND

I'm quite new to the topic of micro controllers and the Arduino and have done some simple circuits on a breadboard and a "build it straight from a guide" music-box (the tonuino) until now.

I now wanted to delve deeper into the subject and got myself a TFT touch display for my Mega 2560, a Nema 17 Stepper+Shield and some extra parts to build a motor control system for my camera slider (based on ->this guide).

The described project uses a 3.2" Display from Sainsmart that seems to be out of stock everywhere. So I had to to replace the screen with another one. My Progress so far:


The Search for the right screen


I started by buying a 3.2" screen and was at that moment already overwhelmed by how I should connect it to the Arduino. So i researched and found the advice to simply attach a TFT shield to the Mega that would save myself from all the cable clutter. The shield fitted perfect to the Mega, but the screen didn't fit to the shield.

At this point I asked for help on the Arduino Discord server and got the information that there are SPI Displays (which I had bought) and parallel displays (suitable for my shield) and that my combination won't fit together. So I've returned the SPI Display and bought a -> parallel screen with an included shield


Getting an Image


Initially the new screen didn't show anything either with sketches I found online. But then I found a posting here that made it clear that the answer where in the libraries I've used - UTFT and UTOUCH don't seem to work with my display (but they should according to the amazon page). I don't know exactly why - is it the ILI9486 IC or the size of 3.5" compared to the 3.2" in the example? Nevertheless, I switched to Adafruit GFX and MCU Friend and got it to show an image.


Getting Touchy


The next step was to get the touch function to work. I'Ve tried various approaches without any luck until I found a calibration sketch in the examples of the MCUFRIEND_kbv library. I've included parts of that sketch into my demo project and got the touch functionality to run for the whole screen as one big responsive zone.


Here start the problems


After defining the whole screen as touch zone I tried to narrow the zone down with another code snippet I found.

bool touchedWithin(TSPoint touch, unsigned x, unsigned y, unsigned w, unsigned h)
{
  return (touch.x > x) && (touch.x < (w)) && (touch.y > y) && (touch.y < (h));
}

  if(touchedWithin(p, 0, 0, 250, 250))
    {Serial.println("Touch!");}

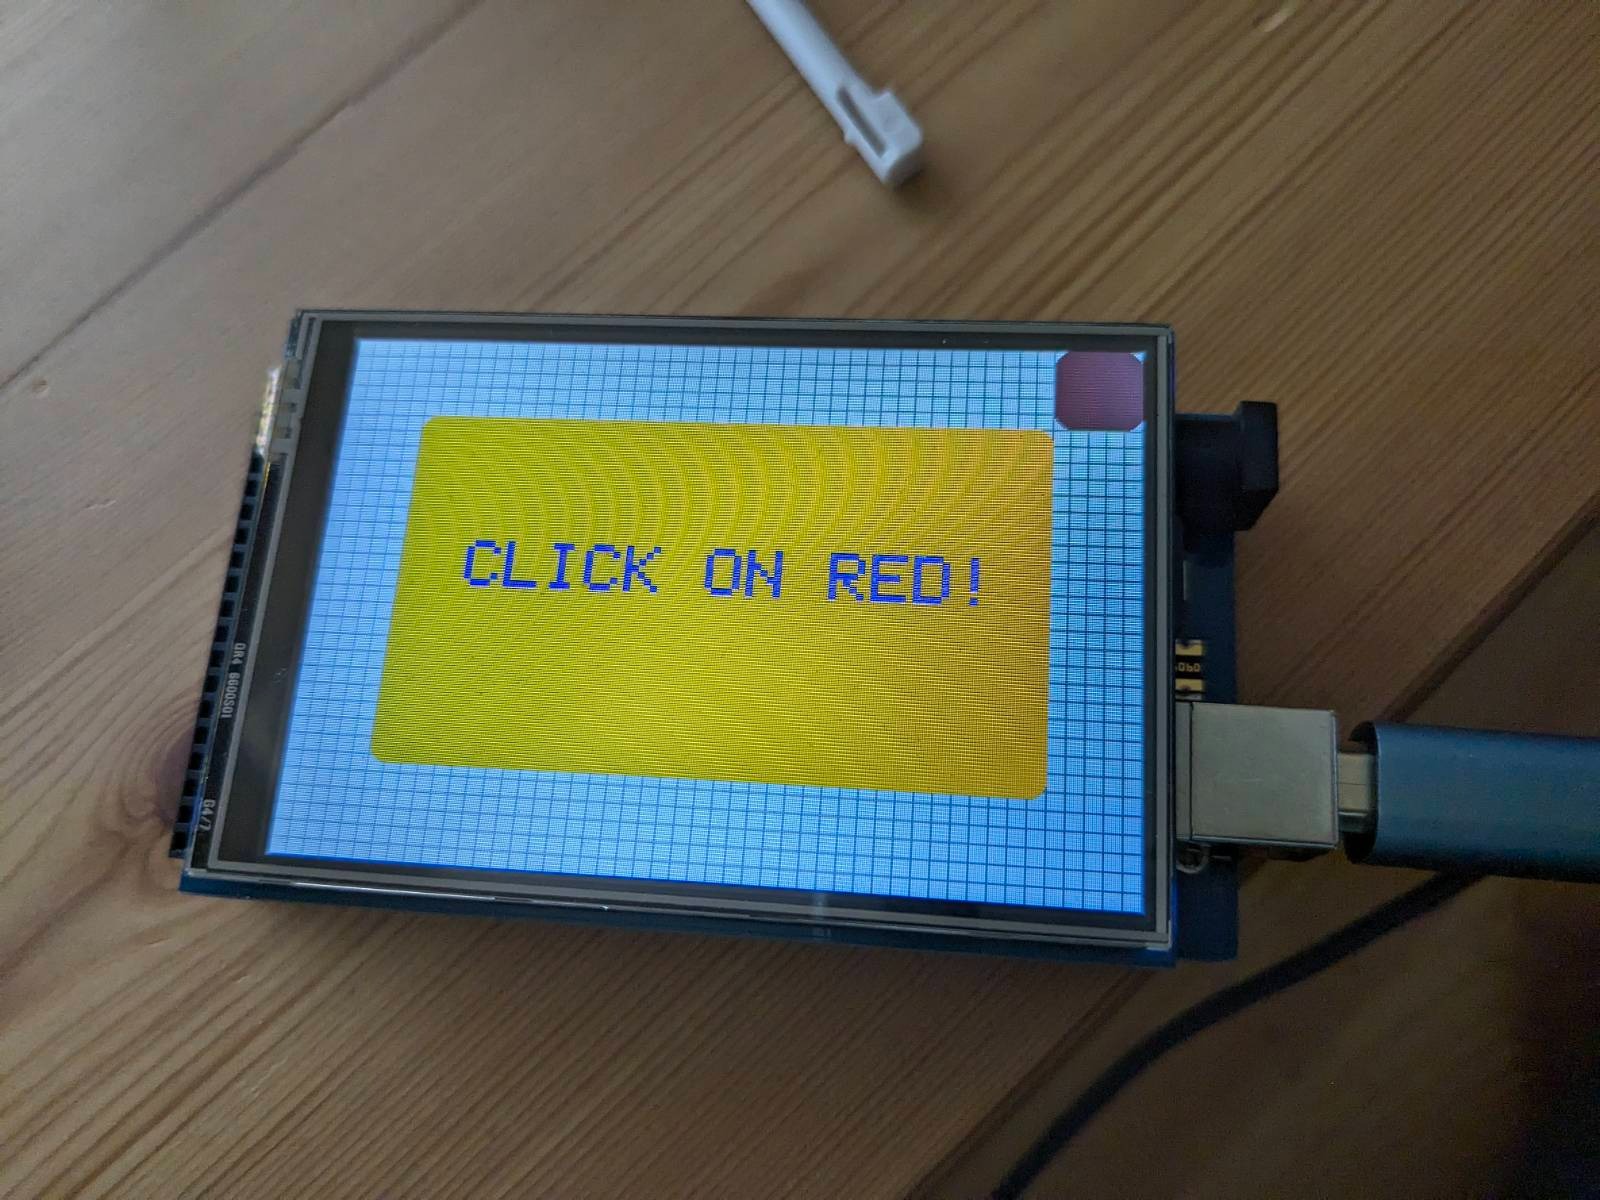
This works on an area in the upper right corner of the screen (more or less the red area). But I have no idea how the width and height of this area correlates with the size of the screen. Any value under roughly 200 in both w and h attributes doesn't produce any touchable area. Values around 250 create an area at the size of the red area. But if i make the button bigger, It goes haywire. I've tried to double and triple it in size from 50/50 to 100/100 and 150/150 with the correlating dimensions of the touchedWithin call to 250/250, 500/500 and 750/750. With those larger values the responding zone covers the whole screen again. My goal would be to create clickable buttons that are limited to the area their drawn counterparts show. Also, the "working" touch event with 0,0,250,250 creates a lot of responses in the monitor, not just a single "I've been clicked". As I want to control a motor shield later on, that shouldn't be a dozen or more responses... What am I missing, what am I doing wrong?

grafik

I'm using an original Arduino Mega 2560 R3 with a 3.5" TFT Display 480x320. The product page on Amazon even says the display is compatible with UTFT / UTFT_Buttons / Utouch Library, but all I get is a blank white screen when using those libraries. It seems I'm not the only ohne with this problem: shields - 3.5" TFT LCD Display is not working with Arduino Mega 2560 R3 - Arduino Stack Exchange
But the modified UTFT library didn't work either. I'd prefer UTFT over MCUFRIEND because the guide I'm following uses those libraries too.

Here's my current sketch with MCUFRIEND/Adafruit GFX:

// Start of "Borrowed" Setup from Adafruit TouchScreen Calibration Sketch

// TouchScreen_Calibr_native for MCUFRIEND UNO Display Shields
// adapted by David Prentice
// for Adafruit's <TouchScreen.h> Resistive Touch Screen Library
// from Henning Karlsen's original UTouch_Calibration program.
// Many Thanks.

#include <Adafruit_GFX.h>
#include <MCUFRIEND_kbv.h>
MCUFRIEND_kbv tft;

#define PORTRAIT  1
#define LANDSCAPE 0
#define USE_XPT2046   0
#define USE_LOCAL_KBV 1
#define PRESSURE_THRESHOLD 10

#define TOUCH_ORIENTATION  PORTRAIT

#if defined(USB_PID) && USB_PID == 0x804E // Arduino M0 Native
#define Serial SerialUSB
#endif

// MCUFRIEND UNO shield shares pins with the TFT.
#if defined(ESP32)
int XP = 27, YP = 4, XM = 15, YM = 14;  //most common configuration
#else
//int XP = 6, YP = A1, XM = A2, YM = 7;  //most common configuration
int XP = 7, YP = A2, XM = A1, YM = 6;  //next common configuration
//int XP=PB7,XM=PA6,YP=PA7,YM=PB6; //BLUEPILL must have Analog for YP, XM
#endif
#if USE_LOCAL_KBV
#include "TouchScreen_kbv.h"         //my hacked version
#define TouchScreen TouchScreen_kbv
#define TSPoint     TSPoint_kbv
#else
#include <TouchScreen.h>         //Adafruit Library
#endif
TouchScreen ts(XP, YP, XM, YM, 300);   //re-initialised after diagnose
TSPoint tp;    

void readResistiveTouch(void)
{
    tp = ts.getPoint();
    pinMode(YP, OUTPUT);      //restore shared pins
    pinMode(XM, OUTPUT);
    //digitalWrite(YP, HIGH);  //because TFT control pins
    //digitalWrite(XM, HIGH);
    //    Serial.println("tp.x=" + String(tp.x) + ", tp.y=" + String(tp.y) + ", tp.z =" + String(tp.z));
}

uint16_t readID(void) {
    uint16_t ID = tft.readID();
    if (ID == 0xD3D3) ID = 0x9486;
    return ID;
}
#define TFT_BEGIN()  tft.begin(ID)

bool ISPRESSED(void)
{
    // .kbv this was too sensitive !!
    // now touch has to be stable for 50ms
    int count = 0;
    bool state, oldstate;
    while (count < 10) {
        readResistiveTouch();
        state = tp.z > 200;     //ADJUST THIS VALUE TO SUIT YOUR SCREEN e.g. 20 ... 250
        if (state == oldstate) count++;
        else count = 0;
        oldstate = state;
        delay(5);
    }
    return oldstate;
}

// End of TS Calibration

#define BLACK 0x0000
#define NAVY 0x000F
#define DARKGREEN 0x03E0
#define DARKCYAN 0x03EF
#define MAROON 0x7800
#define PURPLE 0x780F
#define OLIVE 0x7BE0
#define LIGHTGREY 0xC618
#define DARKGREY 0x7BEF
#define BLUE 0x001F
#define GREEN 0x07E0
#define CYAN 0x07FF
#define RED 0xF800
#define MAGENTA 0xF81F
#define YELLOW 0xFFE0
#define WHITE 0xFFFF
#define ORANGE 0xFD20
#define GREENYELLOW 0xAFE5
#define PINK 0xF81F

bool touchedWithin(TSPoint touch, unsigned x, unsigned y, unsigned w, unsigned h);

void setup() {
//Initializing TFT display:
tft.begin(tft.readID());

Serial.begin(9600);
Serial.print("TFT LCD Screen ID: ");
Serial.println(tft.readID()); 

//The resolution of the TFT screen can be determined using the following code.
Serial.print("TFT LCD Screen Width: ");
Serial.println(tft.width()); 
Serial.print("TFT LCD Screen Height: ");
Serial.println(tft.height());

// Fill TFT Screen with a color: 
tft.fillScreen(LIGHTGREY);
delay(500);

//vertial grid
for(int drawHelper = 0;drawHelper<480;drawHelper+=10){
tft.drawLine(0, drawHelper, 320, drawHelper, DARKGREY);
}

//horizontal grid
for(int drawHelper = 0;drawHelper<320;drawHelper+=10){
tft.drawLine(drawHelper, 0, drawHelper, 480, DARKGREY);
}

delay(1000);

tft.drawRoundRect(50, 50, 215, 380, 10, BLACK);
delay(200);
tft.fillRoundRect(50, 50, 215, 380, 10, ORANGE);

tft.drawRoundRect(0, 0, 50, 50, 10, BLACK);
delay(200);
tft.fillRoundRect(0, 0, 50, 50, 10, MAROON);

delay(2000);

tft.setRotation(3);
tft.setCursor(90, 130);
tft.setTextColor(BLUE);
tft.setTextSize(4);
tft.setTextWrap(true);

tft.print("CLICK ON RED!");
tft.setRotation(0); // Reset Rotation
}

void loop() {
 TSPoint p = ts.getPoint();

    // NOTE: The touchscreen controller does NOT use the
    // screen coordinates! It uses its own coordinate system

  if(touchedWithin(p, 0, 0, 240, 240))
    {Serial.println("Touch!");}

}

bool touchedWithin(TSPoint touch, unsigned x, unsigned y, unsigned w, unsigned h)
{
  return (touch.x > x) && (touch.x < (w)) && (touch.y > y) && (touch.y < (h));
}

And this is the output of LCD_ID_readreg:

reg(0x00BF) 00 00 00 00 00 00	ILI9481, HX8357-B
reg(0x00C0) 00 0E 0E 0E 0E 0E 0E 0E 0E	Panel Control
reg(0x00C8) 00 00 00 00 00 00 00 00 00 00 00 00 00	GAMMA
reg(0x00CC) 00 04	Panel Control
reg(0x00D0) 00 00 00	Power Control
reg(0x00D2) 00 00 00 00 00	NVM Read
reg(0x00D3) 00 00 94 86	ILI9341, ILI9488
reg(0x00D4) 00 00 00 00	Novatek ID
reg(0x00DA) 00 54	RDID1
reg(0x00DB) 00 80	RDID2
reg(0x00DC) 00 66	RDID3
reg(0x00E0) 00 06 04 1E 06 1F 00 37 5F 6F 0B 17 04 39 36 0E	GAMMA-P
reg(0x00E1) 00 0A 01 35 03 1E 09 4E 79 3E 07 16 0B 04 0E 0E	GAMMA-N
reg(0x00EF) 00 80 00 10 60 40	ILI9327
reg(0x00F2) 00 18 A3 12 02 B2 12 FF 10 00 00 00	Adjust Control 2
reg(0x00F6) 00 54 80 66	Interface Control

Rather than just shotgunning numbers, try using the calibration routine to determine specific locations then write routines that box each of those areas and include code for the desired response when that area is touched.
I've had good luck with MCUFRIEND.kbv. None with Adafruit.

I got this output from the TouchScreen_Calibr_native sketch from MCUFRIEND.kbv. In fact, that sketch is where I "borrowed" my touch setup from.

But frankly speaking, I've got no idea what to do with this information - how does that help me with determining some sort of grid I can work with?

Does that mean the Portrait coordinate system looks something like this?

927/0 ------------------191/0
|///////////////////////////|
|///////////////////////////|
0/198---- -------------------191/198

Do you see any chance that I get UTFT running with that display?

cx=551 cy=214 cz=622  X, Y, Pressure
cx=217 cy=950 cz=261  X, Y, Pressure
cx=216 cy=580 cz=442  X, Y, Pressure
cx=211 cy=216 cz=602  X, Y, Pressure

*** COPY-PASTE from Serial Terminal:
const int XP=6,XM=A2,YP=A1,YM=7; //320x480 ID=0x9486
const int TS_LEFT=927,TS_RT=191,TS_TOP=966,TS_BOT=198;

PORTRAIT  CALIBRATION     320 x 480
x = map(p.x, LEFT=927, RT=191, 0, 320)
y = map(p.y, TOP=966, BOT=198, 0, 480)

LANDSCAPE CALIBRATION     480 x 320
x = map(p.y, LEFT=966, RT=198, 0, 480)
y = map(p.x, TOP=191, BOT=927, 0, 320)

EDIT: I found this thread, where the OP used the calibration Data in the initialization of his screen and also uses Pressure readings. So maybe parts of his code will solve my problems. I'll try to implement those parts and reply after testing. Thanks so far.

Basically, the concept is to use the calibration sketch to find the coordinates of the areas you want to use for buttons, not just the layout of the whole screen.

And, although he does not show the code, it is obviously possible to do what you are looking for:

HTH

Thanks a lot! I'll dig in and have a look at it. I'll report back after a lot of reading and testing :wink:

Good News everyone (Futurama Pun intended :wink:)!

I researched again (OK, I asked a friend...) and found great page with a really good video:

With the examples from LCD Wiki, the Video and some tinkering I got the phone example to run propperly, build my UI with Adafruit_GFX and am currently in the process of reading the x&y values of all buttons. I think I might need some help in the last few steps to cobble everything together, but I'm close to a working system!

grafik


grafik

I'll post the code when the larger project is ready.

So, I've learned a lot and cooked up a (more or less) working demo sketch. Everything works fine so far, the buttons react to my touch, the status bar is working fine. And most of the time the system distinguishes between the buttons and the "not a button" area. But I get some responses from button 2 (never from button 1) on the right side of button 1. Any idea, what's causing this?

It seems that it's just like this on the far right edge, maybe the calibration data is not right?
The values range from the top left corner from roughly 470/0 to 0/0 quite after the upper right edge of the yellow button. then the values Jump to eg. 230/230

Lower left edge is roughly 450/300 to 0/300 until the edge of the red button.Then the values jump up again and button 2 says it's touched.

I just checked with the phonecall example again and that behaves just fine in every direction and without "ghost responses" inbetween the buttons. So It shouldn't be hardware related.

Maybe my screen orientation is off? I had some troubles with width and height in landscape.

/* Basic TFT TouchScreen Measurement and Test Tool
Written for and tested with Arduino Mega 2560 Rev3 and ILI9486 TFT 3.5" Screen Shield

Detials on the used screen: http://www.lcdwiki.com/3.5inch_Arduino_Display-UNO
Includes CodeSnippets from: https://dronebotworkshop.com/touchscreen-arduino/

2024 (C) Gregor Urabl
https://gregorurabl.at

Standard TFT tft Pin Mappings:

*pin usage as follow:
*                  tft_CS  tft_CD  tft_WR  tft_RD  tft_RST  SD_SS  SD_DI  SD_DO  SD_SCK 
*     Arduino Uno    A3      A2      A1      A0      A4      10     11     12      13   
                         
*Arduino Mega2560    A3      A2      A1      A0      A4      10     11     12      13                           

*                  tft_D0  tft_D1  tft_D2  tft_D3  tft_D4  tft_D5  tft_D6  tft_D7  
*     Arduino Uno    8       9       2       3       4       5       6       7
*Arduino Mega2560    8       9       2       3       4       5       6       7 

*Remember to set the pins to suit your display module!
*/

/////////////////////////////////////////////
// BASIC SETUP
/////////////////////////////////////////////

// Library Includes
#include <Adafruit_GFX.h> // Core graphics library
#include <Adafruit_TFTLCD.h> // tft Library
#include <TouchScreen.h> // Touchscreen Library
#include <MCUFRIEND_kbv.h> // Touchscreen Hardware-specific library

// Colors
#define BLACK 0x0000
#define BLUE 0x001F
#define GREEN 0x07E0
#define CYAN 0x07FF
#define RED 0xF800
#define MAGENTA 0xF81F
#define MAROON 0x7800
#define YELLOW 0xFFE0
#define WHITE 0xFFFF
#define DARKGREY 0x7BEF
#define LIGHTGREY 0xC618

/////////////////////////////////////////////
// DEFINE THE SCREEN AND SET IT UP
/////////////////////////////////////////////

// Pin Definitions
#define LCD_CS A3 // Chip Select goes to Analog 3
#define LCD_CD A2 // Command/Data goes to Analog 2
#define LCD_WR A1 // LCD Write goes to Analog 1
#define LCD_RD A0 // LCD Read gies to Analog 0

#define LCD_RESET A4 // Can alternately just connect to Arduino's reset pin

/* define pins for resistive touchscreen - these are used in most examples:
#define YP A2  // must be an analog pin, use "An" notation!
#define XM A3  // must be an analog pin, use "An" notation!
#define YM 8   // can be a digital pin
#define XP 9   // can be a digital pin
 
They didn'T work for me this way. Refer to the MCUFRIEND Calibration Sketch for details:
TouchScreen_Calibr_native.ino in libraries\MCUFRIEND_kbv\examples\TouchScreen_Calibr_native

This was my reading:

cx=558 cy=215 cz=609  X, Y, Pressure
cx=223 cy=951 cz=269  X, Y, Pressure
cx=217 cy=585 cz=435  X, Y, Pressure
cx=212 cy=217 cz=606  X, Y, Pressure

*** COPY-PASTE from Serial Terminal:
const int XP=6,XM=A2,YP=A1,YM=7; //320x480 ID=0x9486
const int TS_LEFT=932,TS_RT=193,TS_TOP=968,TS_BOT=198;

PORTRAIT  CALIBRATION     320 x 480
x = map(p.x, LEFT=932, RT=193, 0, 320)
y = map(p.y, TOP=968, BOT=198, 0, 480)

LANDSCAPE CALIBRATION     480 x 320
x = map(p.y, LEFT=968, RT=198, 0, 480)
y = map(p.x, TOP=193, BOT=932, 0, 320)

*/
#define YP A1 // must be an analog pin, use "an" notation!
#define XM A2 // must be an analog pin, use "an" notation!
#define YM 7 // can be a digital pin
#define XP 6 // can be a digital pin

// Define touchscreen parameters
// Use test sketch to refine if necessary
#define TS_MINX 970
#define TS_MAXX 190
 
#define TS_MINY 190
#define TS_MAXY 930
 
#define STATUS_X 10
#define STATUS_Y 65

// define touchscreen pressure points
#define MINPRESSURE 10
#define MAXPRESSURE 1000

// Define button array object
Adafruit_GFX_Button buttons[2];

// Define object for TFT (LCD)display
MCUFRIEND_kbv tft;

// Define object for touchscreen
// Last parameter is X-Y resistance, measure or use 300 if unsure
TouchScreen ts = TouchScreen(XP, YP, XM, YM, 300);

void setup() {

Serial.begin(9600); // Start Up the Serial Monitor
  Serial.println(("TFT LCD test")); //Say Hello in Serial Monitor
  
  tft.reset(); // Reset the Screen
 
  uint16_t identifier = tft.readID(); // Identify the Screen - in my case it is 0x9486
  if (identifier == 0x9325) {
    Serial.println(F("Found ILI9325 LCD driver"));
  } else if (identifier == 0x9328) {
    Serial.println(F("Found ILI9328 LCD driver"));
  } else if (identifier == 0x4535) {
    Serial.println(F("Found LGDP4535 LCD driver"));
  } else if (identifier == 0x7575) {
    Serial.println(F("Found HX8347G LCD driver"));
  } else if (identifier == 0x9341) {
    Serial.println(F("*Found ILI9341 LCD driver"));
  } else if (identifier == 0x7783) {
    Serial.println(F("Found ST7781 LCD driver"));
  } else if (identifier == 0x8230) {
    Serial.println(F("Found UC8230 LCD driver"));
  }
  else if (identifier == 0x8357) {
    Serial.println(F("Found HX8357D LCD driver"));
  } else if (identifier == 0x0101)
  {
    identifier = 0x9341;
    Serial.println(F("Found 0x9341 LCD driver"));
  } else if (identifier == 0x9481)
  {
    Serial.println(F("Found 0x9481 LCD driver"));
  }
  else if (identifier == 0x9486)
  {
    Serial.println(F("Found 0x9486 LCD driver"));
  }
  else {
    Serial.print(F("Unknown LCD driver chip: "));
    Serial.println(identifier, HEX);
    identifier = 0x9486;
  }
 
  // Setup the Display
  tft.begin(identifier);

// read in the screen size - As we rotate the display to landscape mode after this step, the "width" would be the shorter side (from USB Port to Power Port), so I'll flip them here.
  uint16_t screenHeight = tft.width(); 
  uint16_t screenWidth = tft.height();

  tft.setRotation(1); // The rotation parameter can be 0, 1, 2 or 3. For displays that are part of an Arduino shield, rotation value 0 sets the display to a portrait (tall) mode, with the USB jack at the top right. Rotation value 2 is also a portrait mode, with the USB jack at the bottom left. Rotation 1 is landscape (wide) mode, with the USB jack at the bottom right, while rotation 3 is also landscape, but with the USB jack at the top left.

// Output screen size to Serial Monitor
  Serial.print("TFT size is ");Serial.print(screenWidth);Serial.print("x");Serial.print(screenHeight);

/////////////////////////////////////////////
// FILL THE SCREEN WITH BLACK AND DRAW UI
/////////////////////////////////////////////

  tft.fillScreen(BLACK);

  // Draw a vertial grid
for(int drawHelper = 0;drawHelper<screenWidth; drawHelper+=10){
tft.drawLine(drawHelper, 0, drawHelper, screenHeight, DARKGREY);
}

//horizontal grid
for(int drawHelper = 0;drawHelper<screenHeight;drawHelper+=10){
tft.drawLine(0, drawHelper, screenWidth, drawHelper, WHITE);
}

delay(1000);

// Define Values for Buttons and draw them
      buttons[0].initButton(&tft, 240,75, 380, 100, WHITE, YELLOW, BLUE, "BUTTON 1", 4); 
      buttons[0].drawButton();
      buttons[1].initButton(&tft, 240,200, 380, 100, WHITE, MAROON, WHITE, "BUTTON 2", 4); 
      buttons[1].drawButton();
  
// Draw a Status Bar
tft.fillRect(0, screenHeight-50, screenWidth, 50, LIGHTGREY);
}

void loop() {

//touchscreen
  digitalWrite(13, HIGH); // We start by triggering the touchscreen, which is done by toggling pin 13 on the Arduino high. If something is touching the screen we read it and assign it to a TSPoint object named “p”.
  TSPoint p = ts.getPoint();
  digitalWrite(13, LOW);

  pinMode(XM, OUTPUT); // We then need to reset the pin modes for two of the touchscreen pins back to outputs. This is done as these pins get shared with other LCD display functions and get set as inputs temporarily.
  pinMode(YP, OUTPUT);
  if (p.z > MINPRESSURE && p.z < MAXPRESSURE)
  { // Now we check to see if the pressure on the screen was within the minimum and maximum pressure thresholds we defined earlier.  If it makes the grade then we determine where exactly the screen was pressed.
  
  p.x = p.x + p.y;
    p.y = p.x - p.y;
    p.x = p.x - p.y;
    p.x = map(p.x, TS_MINX, TS_MAXX, tft.width(), 0);
    p.y = tft.height() - (map(p.y, TS_MINY, TS_MAXY, tft.height(), 0));
    statusbar("SCREEN",p.x,p.y);
  }
   // Go thru all the buttons, checking if they were pressed
  for (uint8_t b = 0; b < 2; b++) 
    {
        if (buttons[b].contains( p.x, p.y ) )   // (-1, -1) will always fail
        {
            buttons[b].press( true );
            statusbar("SCREEN",p.x,p.y);
        
        if ( buttons[b].justPressed() ) 
          {
              //Tell if Button has been pressed
            if (b == 0) 
            {
              statusbar("BUTTON 1",p.x,p.y);
            }
            if (b == 1) 
            {
              statusbar("BUTTON 2",p.x,p.y);
            }
        }
        } else {
            buttons[b].press( false );
               }
        
      
    }
  
}


void statusbar(String buttonname, uint16_t x, uint16_t y){
tft.fillRect(0, tft.height()-50, tft.width(), 50, LIGHTGREY);
tft.setCursor(50,tft.height()-35);
tft.setTextSize(2);
tft.setTextColor(BLACK);
tft.print(buttonname);tft.print(" touched at X=");tft.print(x);tft.print("/Y=");tft.print(y);tft.print("\r\n");
Serial.print(buttonname);Serial.print(" touched at X=");Serial.print(x);Serial.print(" Y=");Serial.print(y);Serial.print("\r\n");
}